Laying a rock pathway is a fantastic way to enhance your landscape, adding both beauty and functionality. At rockscapes.net, we’re passionate about helping you create stunning outdoor spaces with natural stone. Our guide will walk you through the process of installing a rock pathway that is both aesthetically pleasing and structurally sound. Let’s explore everything from material selection to step-by-step installation techniques, transforming your yard into a captivating rockscape.
1. What Is A Rock Pathway And Why Should You Build One?
A rock pathway is a designated walkway created using natural stones, offering a durable and visually appealing alternative to traditional paving materials. Rock pathways offer numerous benefits. They enhance your landscape’s aesthetic appeal by adding natural texture and color. Rocks are incredibly durable, ensuring a long-lasting pathway. Properly installed rock pathways improve drainage and reduce soil erosion. The use of natural materials makes rock pathways an environmentally friendly choice.
- Aesthetic Enhancement: The natural texture and color variations of rocks bring a unique and organic feel to your landscape.
- Durability: Natural stone is highly resistant to weathering and wear, providing a long-lasting pathway solution.
- Drainage Improvement: The gaps between rocks allow water to drain freely, preventing puddles and reducing soil erosion.
- Eco-Friendly: Using natural stones minimizes the need for manufactured materials, reducing your environmental footprint.
2. Who Should Consider Building A Rock Pathway?
Rock pathways are an excellent choice for a wide range of individuals. Homeowners looking to enhance their garden or yard will find rock pathways to be an attractive and functional addition. Landscape designers and architects can use rock pathways to create unique and natural designs. Gardening enthusiasts can integrate rock pathways to add structure and charm to their gardens. DIY enthusiasts who enjoy outdoor projects will appreciate the relative simplicity and rewarding results of building a rock pathway.
- Homeowners: Enhance your property’s curb appeal and create inviting outdoor spaces.
- Landscape Designers: Incorporate natural elements into your designs to achieve a more organic aesthetic.
- Gardeners: Add structure and functionality to your garden while complementing your plants and flowers.
- DIY Enthusiasts: Take on a rewarding project that adds value and beauty to your home.
3. What Are The Different Types Of Rocks Suitable For Pathways?
Choosing the right type of rock is crucial for the success and aesthetics of your pathway. Here are several popular options:
3.1 Flagstone
Flagstone is a flat, sedimentary rock that comes in various colors and textures, making it a versatile choice for pathways.
- Pros: Flagstone provides a smooth, even surface that is easy to walk on, and its natural color variations add visual interest.
- Cons: It can be more expensive than other options, and installation requires some skill to ensure a stable, level surface.
3.2 River Rock
River rocks are smooth, rounded stones that come in different sizes. They’re perfect for creating a natural, rustic look.
- Pros: River rock is relatively inexpensive and easy to install, providing excellent drainage.
- Cons: The uneven surface may be challenging to walk on, and it’s best suited for pathways with minimal foot traffic.
3.3 Gravel
Gravel is a versatile and affordable option that comes in various sizes and colors. It’s easy to install and provides good drainage.
- Pros: Gravel is inexpensive and easy to install, making it a budget-friendly option. It provides excellent drainage and can be used to fill gaps between larger stones.
- Cons: Gravel can shift over time, requiring periodic maintenance to keep the pathway looking neat.
3.4 Crushed Stone
Crushed stone is an angular, fragmented rock that provides a stable and durable surface.
- Pros: Crushed stone is affordable and provides a solid base for pathways, resisting shifting and erosion.
- Cons: Its sharp edges can be uncomfortable to walk on, so it’s best used as a base layer or with stepping stones.
3.5 Slate
Slate is a fine-grained, metamorphic rock that splits into thin, smooth layers, providing a sleek and modern look.
- Pros: Slate is durable and has a sophisticated appearance. Its smooth surface is easy to walk on, and it comes in various colors.
- Cons: Slate can be more expensive than other options, and it may become slippery when wet.
3.6 Fieldstone
Fieldstone refers to naturally occurring, uncut stones collected from fields. These stones often have unique shapes and textures.
- Pros: Fieldstone gives a very natural and rustic appearance. It can be locally sourced, making it an environmentally friendly option.
- Cons: Fieldstone can be difficult to work with due to its irregular shapes, requiring more skill and time to install.
4. How Do You Plan Your Rock Pathway?
Careful planning is essential for a successful rock pathway project. Consider the following steps:
4.1 Determine The Path’s Purpose
Decide whether the pathway will be primarily functional, decorative, or both. Functionality influences the type of stone and layout, while decorative paths emphasize aesthetics and design.
4.2 Map Out The Route
Use a garden hose, rope, or spray paint to outline the desired path. Consider the natural flow of your yard and connect key areas.
4.3 Measure The Length And Width
Measure the length and width of the path to estimate the amount of materials needed. A standard pathway width is 3-4 feet, but adjust as needed for your space.
4.4 Consider Existing Landscape Features
Integrate the pathway with existing trees, shrubs, and flower beds. Avoid areas with poor drainage or steep slopes unless you plan to address these issues during construction.
4.5 Check Local Regulations
Check local building codes and regulations before starting your project. Some areas may have restrictions on pathway materials or placement.
5. What Tools And Materials Are Needed To Lay A Rock Pathway?
Gathering the right tools and materials will streamline the installation process.
5.1 Essential Tools
- Shovel: For digging and moving soil.
- Rake: For leveling surfaces.
- Tamper: For compacting soil and gravel.
- Wheelbarrow: For transporting materials.
- Level: For ensuring a flat, even surface.
- Measuring Tape: For accurate measurements.
- Landscape Fabric: To prevent weed growth.
- Utility Knife: For cutting landscape fabric.
- Hammer: For securing edging.
- Safety Glasses: For eye protection.
- Gloves: For hand protection.
5.2 Material Quantities
- Rocks: Calculate the amount of rock needed based on the path’s dimensions and the desired depth (usually 2-4 inches).
- Base Material: Use crushed stone or gravel for the base layer (approximately 2-4 inches deep).
- Edging: Choose from metal, plastic, wood, or stone edging to contain the pathway materials.
- Sand: Use sand to level the base and provide a smooth surface for setting stones (optional).
6. How To Lay A Rock Pathway: A Step-By-Step Guide
Follow these steps to create a beautiful and durable rock pathway:
6.1 Mark The Path
Use a garden hose, rope, or spray paint to mark the outline of your pathway.
6.2 Excavate The Area
Dig out the area to a depth of 6-8 inches. Remove any grass, roots, and debris.
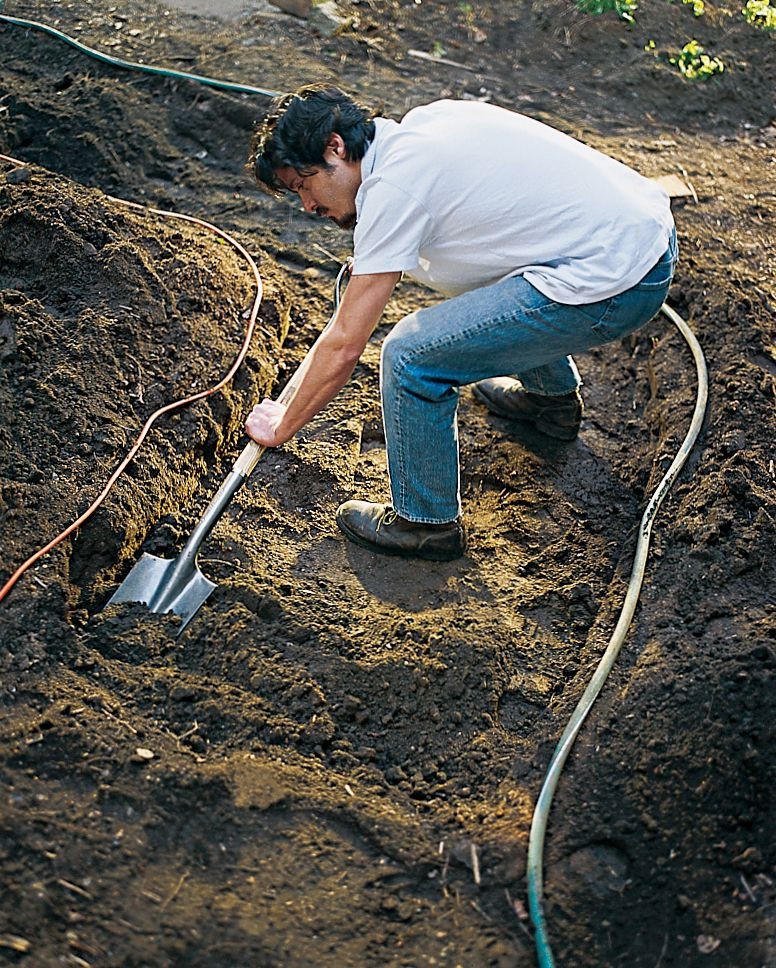 digging a trench for the path
6.3 Compact The Soil
Use a tamper to compact the soil at the bottom of the excavated area. This will provide a stable base for your pathway.
6.4 Install Edging (Optional)
If using edging, install it along the perimeter of the path. Secure it with stakes or pins, ensuring it is level and flush with the surrounding ground.
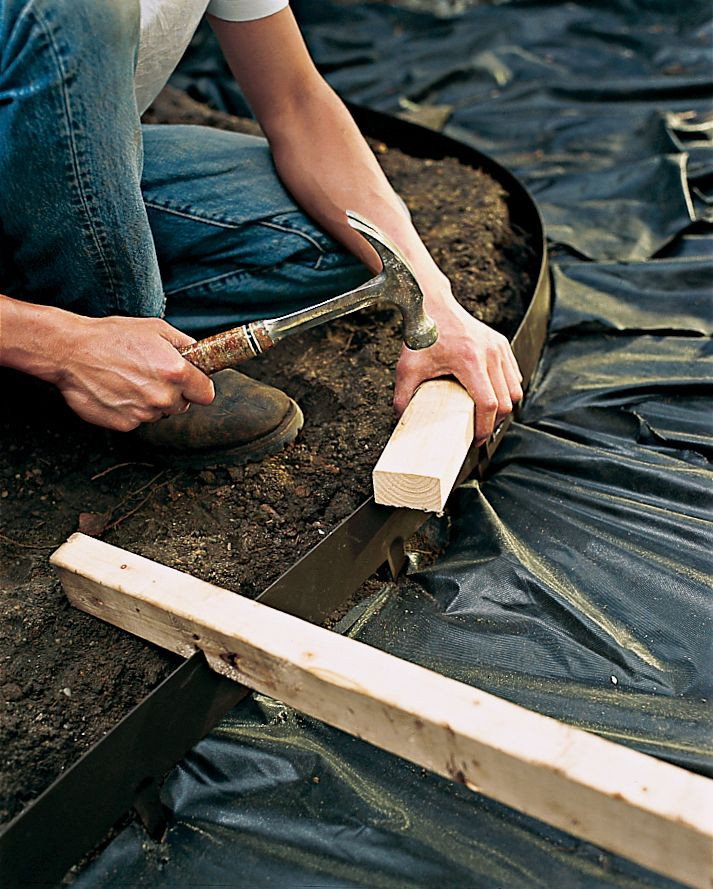 installing the edging of the path
6.5 Lay Landscape Fabric
Cover the excavated area with landscape fabric to prevent weed growth. Overlap the edges by several inches and secure with landscape staples.
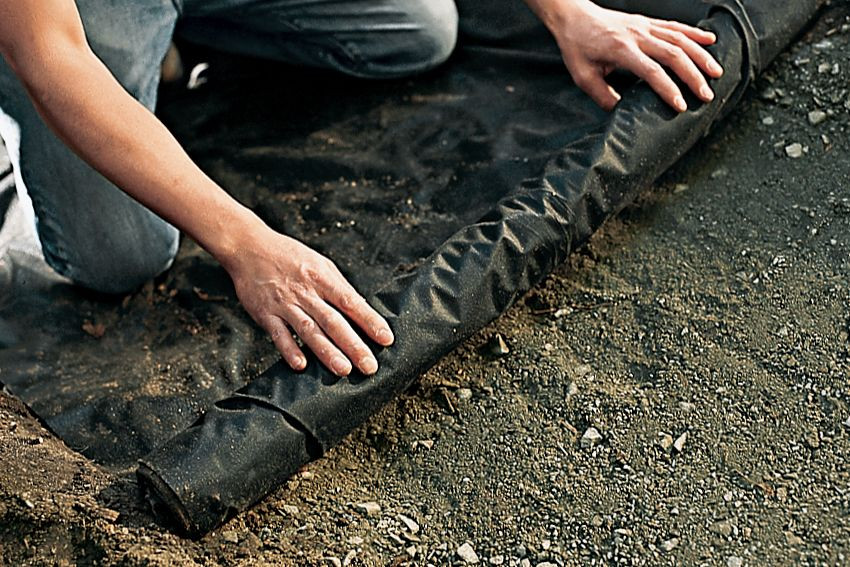 laying down the landscape fabric
6.6 Add The Base Layer
Pour a 2-4 inch layer of crushed stone or gravel over the landscape fabric. Rake it evenly to create a smooth, consistent surface.
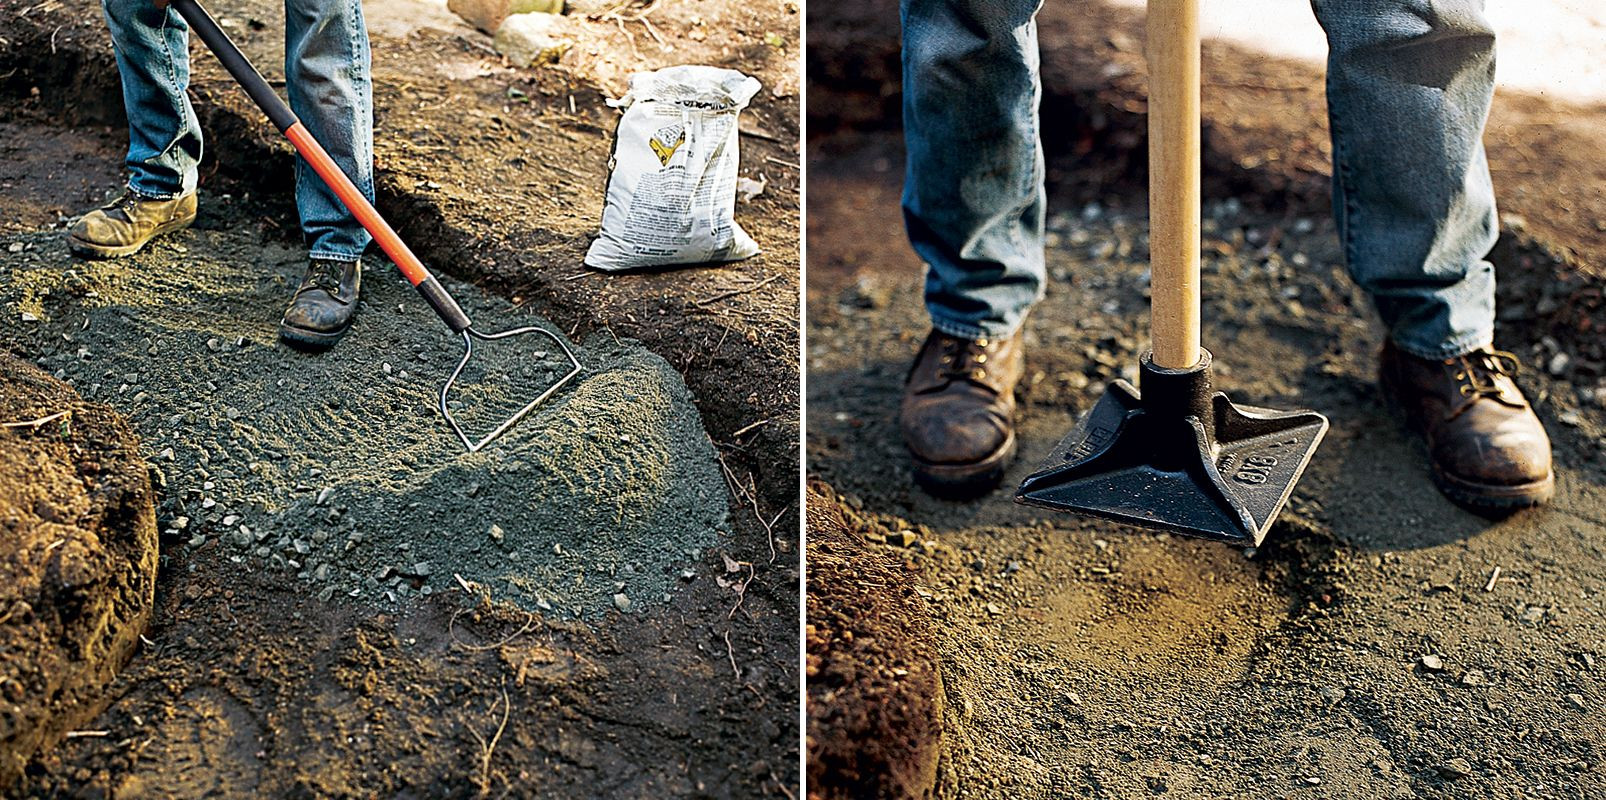 spreading the crushed stone pack and compacting it
6.7 Compact The Base
Use a tamper to compact the base layer. This will provide a solid foundation for your rocks.
6.8 Add Sand (Optional)
Spread a thin layer of sand over the compacted base. This will help level the surface and provide a smooth bed for your rocks.
6.9 Place The Rocks
Arrange the rocks in your desired pattern. For flagstone, fit the pieces together like a puzzle, leaving small gaps between them. For river rock or gravel, spread the stones evenly over the base.
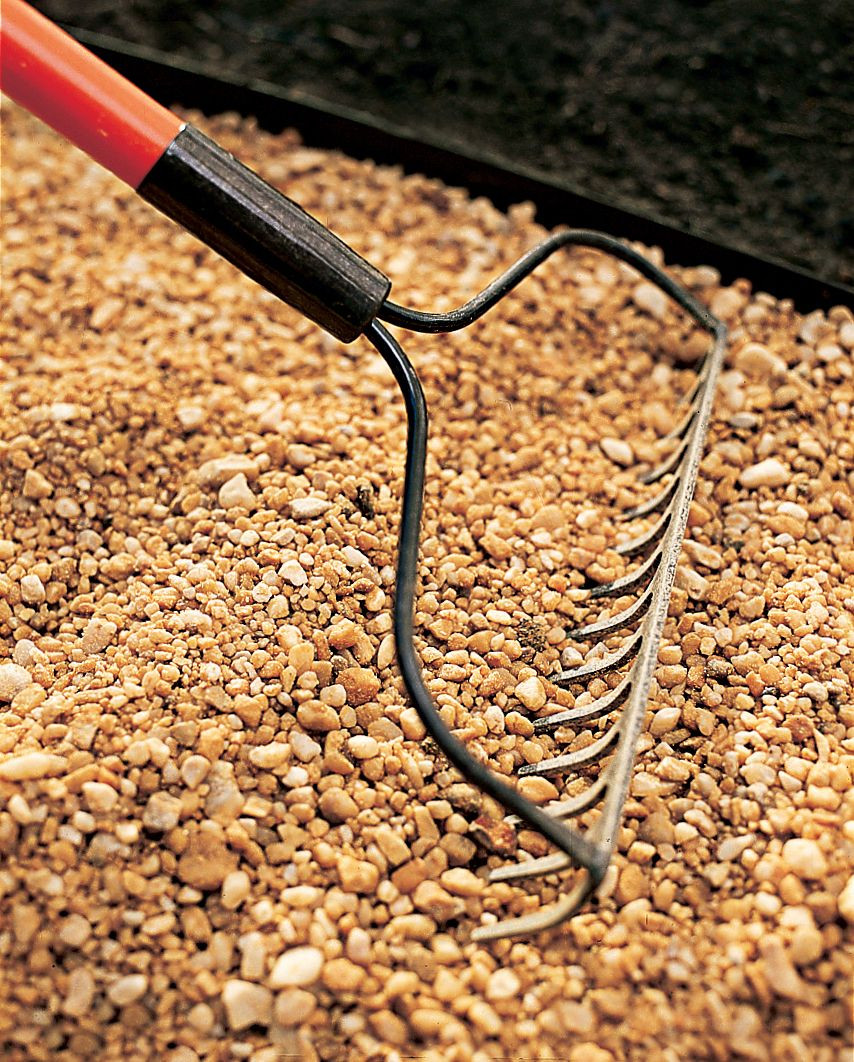 raking the gravel into the path
6.10 Level The Rocks
Use a level to ensure each rock is stable and even with the surrounding stones. Adjust as needed by adding or removing sand underneath.
6.11 Fill The Gaps
Fill the gaps between the rocks with gravel, sand, or small pebbles. This will help stabilize the stones and prevent weed growth.
6.12 Compact The Surface
Use a tamper or hand tamper to compact the surface. This will settle the rocks and create a firm, stable pathway.
6.13 Final Touches
Sweep the pathway to remove any loose material. Add decorative elements such as plants, mulch, or lighting to enhance the overall look.
7. What Are The Best Practices For Rock Pathway Installation?
To ensure a long-lasting and beautiful rock pathway, follow these best practices.
7.1 Proper Base Preparation
A well-compacted base is essential for preventing settling and shifting of the rocks over time. Ensure the base layer is at least 4 inches deep and thoroughly compacted.
7.2 Weed Prevention
Using landscape fabric is crucial for preventing weeds from growing through the pathway. Overlap the edges of the fabric and secure it well to prevent weed penetration.
7.3 Adequate Drainage
Ensure the pathway has proper drainage to prevent water from pooling on the surface. A slight slope can help water runoff. Consider installing a French drain in areas with poor drainage.
7.4 Secure Edging
Edging helps contain the pathway materials and provides a clean, defined border. Choose durable edging materials and install them securely to prevent shifting.
7.5 Leveling
Take the time to level each rock during installation. This will ensure a stable and safe walking surface. Use a level and adjust the base material as needed.
8. What Are Some Creative Rock Pathway Ideas?
Get inspired with these creative rock pathway ideas to enhance your landscape.
8.1 Stepping Stone Path
Use large, flat stones as stepping stones, spaced evenly apart. Fill the gaps with gravel, mulch, or ground cover plants.
8.2 Mosaic Pathway
Create a mosaic pattern with small, colorful stones. This adds a unique and artistic touch to your pathway.
8.3 Winding Path
Design a winding path that meanders through your garden, creating a sense of discovery and exploration.
8.4 Mixed Material Path
Combine different types of rocks and materials, such as flagstone, river rock, and wood chips, to create a textured and visually interesting pathway.
8.5 Elevated Path
Build an elevated pathway using retaining walls and steps. This adds dimension to your landscape and can help navigate sloped areas.
9. How Do You Maintain Your Rock Pathway?
Proper maintenance will keep your rock pathway looking its best for years to come.
9.1 Regular Cleaning
Sweep or blow off leaves, debris, and dirt regularly. This will prevent organic matter from breaking down and staining the rocks.
9.2 Weed Control
Inspect the pathway regularly for weeds and remove them promptly. Use a weeding tool or herbicide as needed, being careful not to damage surrounding plants.
9.3 Refilling Gaps
Periodically refill the gaps between the rocks with gravel, sand, or pebbles. This will help stabilize the stones and prevent weed growth.
9.4 Repairing Edging
Check the edging regularly and repair any damage or shifting. This will ensure the pathway materials are contained and the border remains defined.
9.5 Re-Leveling
Over time, some rocks may settle or shift. Re-level them as needed by adding or removing base material underneath.
10. FAQs About Laying A Rock Pathway
Let’s address some common questions about laying a rock pathway.
10.1 How much does it cost to build a rock pathway?
The cost varies depending on the type of rock, the size of the pathway, and whether you hire a professional. Generally, DIY rock pathways can range from $5 to $20 per square foot.
10.2 Can I build a rock pathway on a slope?
Yes, but you’ll need to take extra precautions to prevent erosion and ensure stability. Consider terracing the slope or using retaining walls.
10.3 What is the best base material for a rock pathway?
Crushed stone or gravel is the best base material because it provides good drainage and stability.
10.4 How do I prevent weeds from growing in my rock pathway?
Use landscape fabric underneath the rocks to prevent weed growth. Also, fill the gaps between the rocks with gravel or sand.
10.5 How do I choose the right type of rock for my pathway?
Consider the style of your landscape, the amount of foot traffic, and your budget. Flagstone is great for formal gardens, while river rock is ideal for rustic settings.
10.6 Do I need to hire a professional to build a rock pathway?
Not necessarily. If you’re comfortable with DIY projects and have some experience with landscaping, you can build a rock pathway yourself. However, for large or complex projects, hiring a professional may be worth the investment.
10.7 How deep should I dig for a rock pathway?
Dig to a depth of 6-8 inches. This allows for a 4-inch base layer and 2-4 inches of rock on top.
10.8 Can I use different types of rocks in the same pathway?
Yes, mixing different types of rocks can create a visually interesting pathway. Just be sure to choose rocks that complement each other in terms of color and texture.
10.9 How do I maintain a gravel pathway?
Rake the gravel periodically to redistribute it and maintain an even surface. Add more gravel as needed to fill in low spots.
10.10 What are the benefits of using a rock pathway over concrete or asphalt?
Rock pathways are more permeable, allowing water to drain freely and reducing runoff. They also have a natural, organic look that blends well with the landscape.
Creating a rock pathway is a rewarding project that enhances the beauty and functionality of your outdoor space. By following these steps and best practices, you can build a durable and visually stunning pathway that you’ll enjoy for years to come. For more ideas, detailed guides, and expert advice, visit rockscapes.net, your ultimate resource for all things rock and landscape. Let’s bring your dream landscape to life together! At Rockscapes, located at 1151 S Forest Ave, Tempe, AZ 85281, United States, and reachable by phone at +1 (480) 965-9011, we are committed to providing you the expertise for your rock pathway project.