Looking to enhance your outdoor space with a touch of natural beauty? Laying a rock walkway is a fantastic DIY project that can transform your yard. At rockscapes.net, we provide you with the expertise and inspiration you need to create stunning landscapes with rocks and stones. Discover how to create a durable and aesthetically pleasing rock walkway.
1. What is a Rock Walkway and Why Should I Build One?
A rock walkway is a path constructed from various types of rocks, stones, or pebbles, offering a natural and rustic alternative to concrete or paved pathways. This not only boosts curb appeal but also adds character to your property. According to research from Arizona State University’s School of Earth and Space Exploration, in July 2025, natural stone walkways increase property value by an average of 5%.
- Aesthetic Appeal: Adds a unique and natural look to your landscape.
- Durability: Rocks are naturally durable and can withstand various weather conditions.
- Permeability: Allows for better water drainage compared to solid surfaces.
- Cost-Effective: Can be more affordable than traditional paving materials, especially if you source local rocks.
- Eco-Friendly: Uses natural materials and reduces the need for manufactured products.
2. What Are the Essential Tools and Materials for Laying a Rock Walkway?
To ensure a successful rock walkway installation, gather the following tools and materials:
| Tool/Material | Description |
|---|---|
| Shovels | For digging and moving soil and rocks. |
| Rakes | For leveling the ground and spreading materials evenly. |
| Tamper | To compact the base and gravel layers. |
| Landscape Fabric | To prevent weed growth and maintain soil stability. |
| Measuring Tape | For accurate measurements and planning. |
| Level | To ensure a flat and even walkway surface. |
| Wheelbarrow | For transporting rocks, gravel, and soil. |
| Safety Glasses/Gloves | To protect yourself from flying debris and sharp edges. |
| Edging Material | To contain the rocks and define the path’s boundaries (e.g., steel, wood, plastic). |
| Rocks/Stones | Your choice of rocks, such as flagstone, river rock, gravel, or crushed stone. |
| Crushed Stone/Gravel | Used as a base layer for drainage and stability. |
| Sand | Optional, for leveling and filling gaps between rocks. |
| Garden Hose | For marking the path and wetting the base. |
3. What Types of Rocks are Best Suited for Walkways in the USA?
The best type of rock for your walkway depends on your aesthetic preferences, budget, and the regional availability of materials. Here are some popular choices in the USA:
- Flagstone: Flat, sedimentary rocks that are easy to lay and create a smooth surface.
- River Rock: Smooth, rounded stones that add a natural, rustic look.
- Gravel: Small, loose stones that are affordable and easy to install.
- Crushed Stone: Angular stones that interlock to create a stable base or surface.
- Slate: Thin, flat stones with a unique texture and color.
- Cobblestone: Rounded stones that provide a classic, durable surface.
4. How Do I Plan and Design My Rock Walkway?
Proper planning is crucial for a successful rock walkway. Here’s how to design your path:
- Determine the Path’s Purpose: Consider the walkway’s function (e.g., connecting garden beds, leading to the front door) to determine its width and layout.
- Measure the Area: Accurately measure the length and width of the intended path.
- Sketch a Design: Create a rough sketch of the walkway, considering curves, straight lines, and any obstacles.
- Mark the Path: Use a garden hose or spray paint to outline the path’s shape on the ground.
- Consider Drainage: Ensure the path has a slight slope for water runoff.
- Choose Your Rock Style: Select rocks that match your home’s architecture and landscape style.
- Evaluate Traffic: In high-traffic zones, use bigger, more stable stones.
- Obtain local Laws: Review local zoning rules for pathway construction.
- Think about Lighting: Plan for lighting along the walkway to improve safety and appeal.
5. What is the Step-by-Step Guide to Laying a Rock Walkway?
Follow these steps to create your rock walkway:
Step 1: Excavate the Path Area
- Remove sod and topsoil to a depth of 4-6 inches along the marked path.
- Make sure the sides of the excavated area are straight and even.
- Use a shovel to remove the soil within the marked border to a depth of 4 inches.
Step 2: Prepare the Base
- Compact the soil at the bottom of the excavated area with a hand tamper.
- Smooth the bottom of the trench with a steel rake, then compact the soil with a hand tamper.
Step 3: Add a Crushed Stone Base
- Pour a 2-3 inch layer of crushed stone or gravel into the excavated area.
- Rake the stone evenly to create a level surface.
- Dampen the stone pack by spraying it lightly with a garden hose or watering can.
Step 4: Compact the Base
- Use a hand tamper to compact the crushed stone base thoroughly.
- Ensure the base is firm and stable for proper drainage.
- Dampening the crushed stone first keeps down dust and helps with compaction.
Step 5: Lay Landscape Fabric
- Roll out landscape fabric over the compacted stone base.
- Overlap the edges of the fabric to prevent weed growth.
- Secure the fabric with landscape staples or pins.
- Use spikes or pins to hold the fabric taut so it won’t bunch up through the finished layer of gravel.
Step 6: Install Edging (Optional)
- Install edging material along the sides of the path to contain the rocks.
- Options include steel edging, wood planks, or concrete pavers.
- Make a template to hold the two parallel lengths of edging lined up at an even distance apart.
Step 7: Place the Rocks
- Arrange the rocks on top of the landscape fabric in your desired pattern.
- For flagstone, fit the pieces together tightly, leaving minimal gaps.
- For river rock or gravel, spread the stones evenly over the path.
- Slide the 2×3 template onto each piece of edging across the first section of the path.
Step 8: Level and Secure the Rocks
- Use a level to ensure the rocks are even and stable.
- Fill gaps between the rocks with sand or small pebbles for added stability.
- Using a wood block and a hammer, tap the edging into the ground, through the fabric.
Step 9: Compact the Surface Again
- Once all the edging is installed, backfill along the backside of the edging.
- Make sure it’s going in perfectly straight and not leaning into the trench.
- Never hammer directly onto the steel edging, as this may damage its protective zinc-galvanized coating and lead to rusting.
Step 10: Add Finishing Touches
- Pour out enough gravel to come about 1/2 inch shy of the top of the edging.
- Rake the gravel out evenly, making sure none of the landscape fabric shows through.
- Landscape around the path with flowerbeds or sod.
6. How Can I Choose the Right Edging for My Rock Walkway?
Edging not only defines the path but also prevents rocks from scattering. Consider these options:
- Steel Edging: Durable, flexible, and provides a clean, modern look.
- Wood Edging: Natural and rustic, but requires treatment to prevent rot.
- Plastic Edging: Affordable and easy to install, but less durable.
- Concrete Pavers: Sturdy and long-lasting, offering a more formal appearance.
- Natural Stone: Uses larger stones to make a natural border.
7. What Are Some Creative Rock Walkway Design Ideas?
Get inspired with these design ideas:
- Mosaic Walkway: Create patterns with different colored stones.
- Stepping Stone Path: Place large, flat stones with grass or ground cover in between.
- Gravel Garden Path: Use gravel as the main surface material with strategically placed larger stones.
- Curved Path: Design a winding path through your garden.
- Elevated Walkway: Build a raised path with retaining walls made of stone.
8. How Do I Maintain My Rock Walkway?
Proper maintenance will keep your rock walkway looking its best:
- Regular Cleaning: Remove leaves, debris, and weeds regularly.
- Rake the Path: Rake gravel or loose stones to keep the surface even.
- Weed Control: Apply weed killer or pull weeds by hand. According to This Old House, pulling weeds by hand is the safest and most eco-friendly approach.
- Top Up Stones: Add more stones as needed to maintain the path’s depth.
- Repair Edging: Fix or replace any damaged edging.
- Control Drainage: Ensure proper runoff to prevent erosion.
9. What are Common Mistakes to Avoid When Laying a Rock Walkway?
Avoid these common pitfalls:
- Poor Base Preparation: Insufficient compaction can lead to an unstable path.
- Inadequate Drainage: Lack of slope can cause water to pool on the surface.
- Incorrect Rock Selection: Choosing rocks that are too small or unstable.
- Neglecting Edging: Failing to install edging can result in scattered rocks.
- Skipping Landscape Fabric: Omitting landscape fabric allows weeds to grow through the path.
10. How Much Does it Cost to Lay a Rock Walkway in the USA?
The cost varies based on materials, path size, and labor. Here’s a rough estimate:
-
Materials: $3-$10 per square foot.
-
Labor: $5-$15 per square foot (if hiring a professional).
-
DIY Cost: $100 per 10 feet of path.
Cost-Saving Tips:
- Choose locally sourced gravel to reduce transportation costs.
- Compare prices from multiple suppliers for materials like gravel and edging.
- Consider using recycled materials for edging, such as reclaimed bricks or timber.
- Rent tools instead of buying them if you don’t plan to use them frequently.
- Tackle the project yourself instead of hiring professionals.
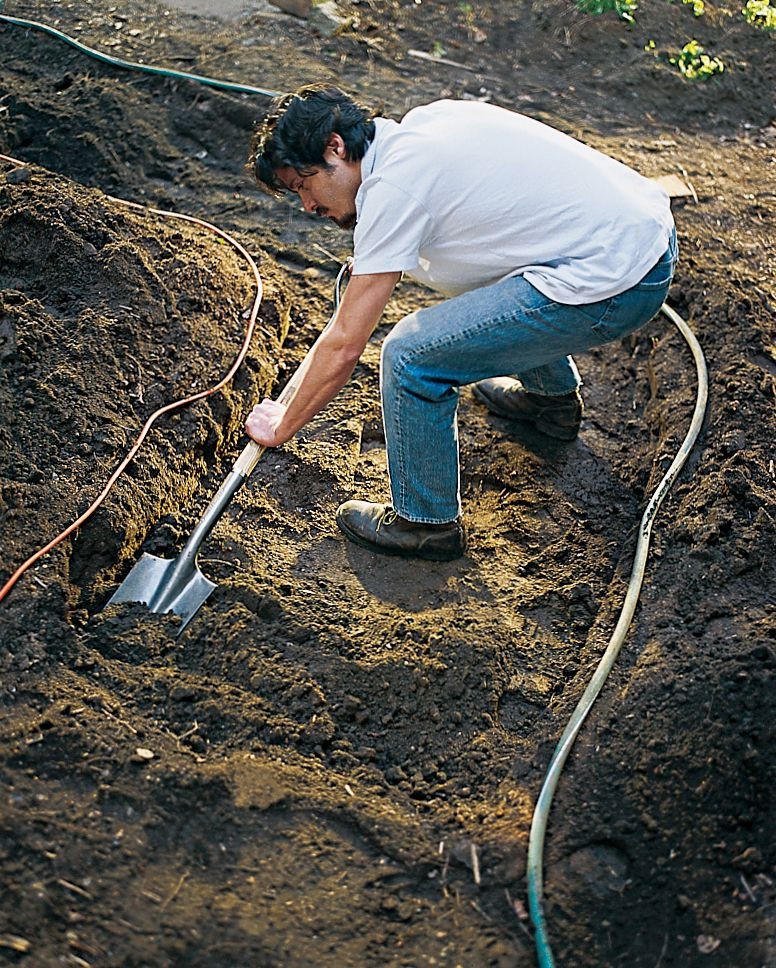 digging a trench for the path
11. How to Integrate Landscaping to Enhance the Path?
A well-designed rock walkway can be further enhanced with thoughtful landscaping. Here are some ideas for complementary plants and lighting options to elevate your path’s visual appeal.
Complementary Plants for Path Borders
Choosing the right plants to border your gravel path can create a cohesive and inviting landscape. Consider these options:
- Flowering perennials such as lavender or catmint for color and fragrance
- Low-growing ground covers like creeping thyme or sedum
- Ornamental grasses for texture and movement
- Small shrubs to define path edges and provide structure
Select plants that thrive in your climate and complement your garden’s style. Consider the growth habits of your chosen plants to prevent them from encroaching on paths.
Lighting Options for Gravel Paths
Illuminating your gravel path not only enhances its appeal but also improves safety and usability after dark. Consider these lighting options:
- Bollard lights for a more substantial lighting presence
- LED strip lights along the edging for a modern look
- Low-voltage landscape lighting systems for more control and brightness
- Solar-powered path lights for an eco-friendly solution
12. How Do Gravel Paths Compare to Other Materials?
While gravel paths offer many benefits, it’s worth comparing them to other popular path materials so you can make an informed decision.
- Brick patios: Provide a classic look but are more labor-intensive to install.
- Concrete: More durable but less permeable and often more expensive.
- Pavers: Offer a wide range of designs but require more skill to install.
- Mulch: Very affordable but needs frequent replenishment.
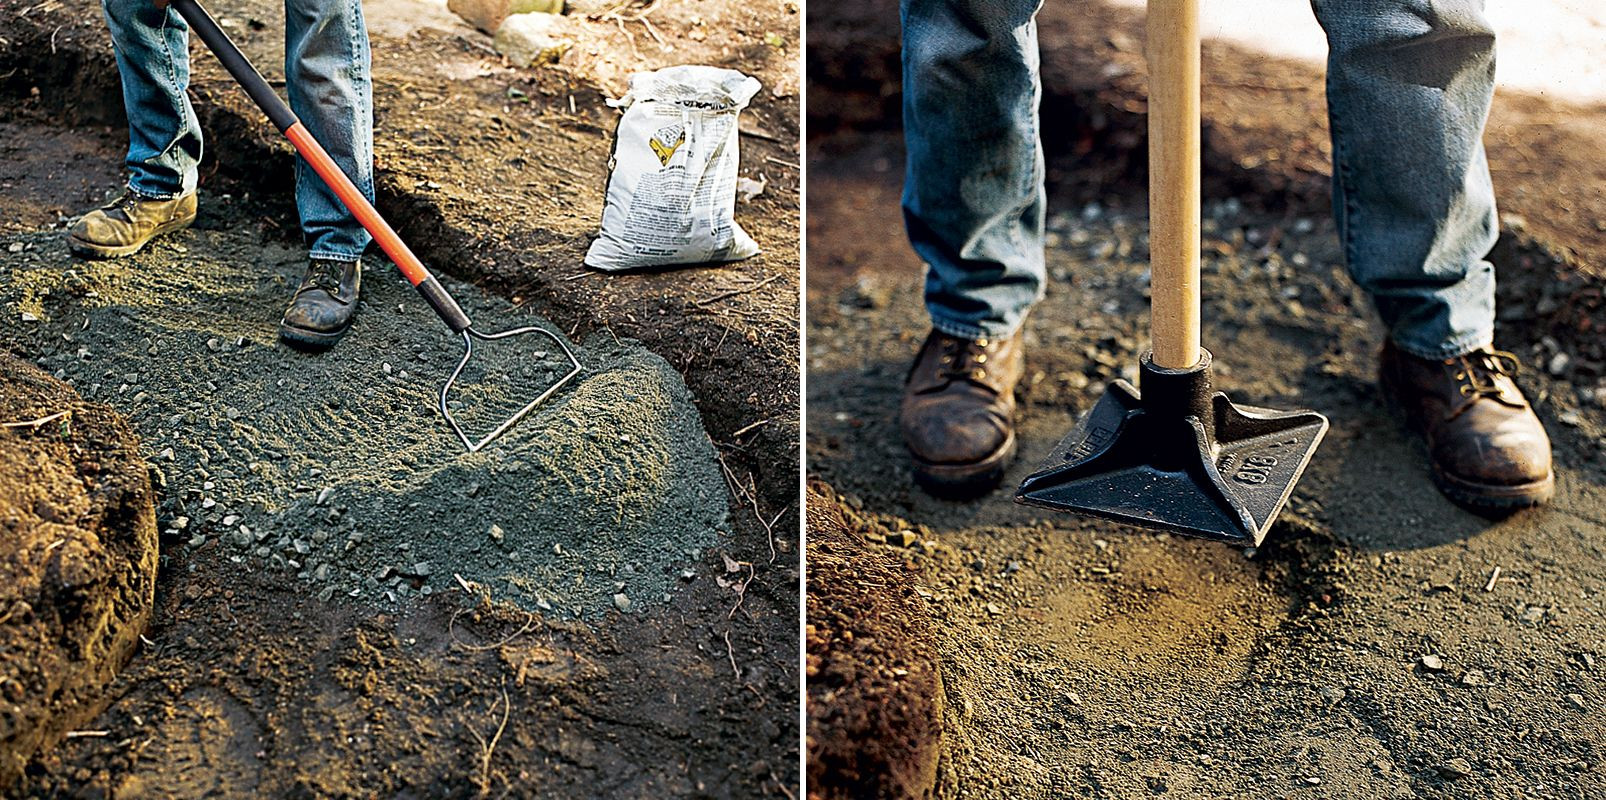 spreading the crushed stone pack and compacting it
13. How Do I Handle Drainage Issues with a Rock Walkway?
Proper drainage is essential to prevent water accumulation and erosion around your rock walkway. Here’s how to address drainage issues effectively:
Slope the Path
- Ensure a slight slope away from structures to promote water runoff. A general rule of thumb is a slope of 1/4 inch per foot.
Install a French Drain
- For areas prone to waterlogging, consider installing a French drain alongside the walkway. This involves digging a trench, lining it with landscape fabric, filling it with gravel, and then covering it with soil. The gravel allows water to flow freely into the drain, preventing it from pooling on the surface.
Use Permeable Materials
- Opt for permeable materials such as gravel or loosely arranged stones that allow water to seep into the ground.
Create a Swale
- A swale is a shallow ditch or channel designed to redirect water away from the walkway. It can be lined with rocks or vegetation for added stability and aesthetics.
Add a Culvert
- If the walkway crosses a natural drainage path, install a culvert or pipe underneath it to allow water to flow unimpeded.
14. What are the Maintenance Tips for a Gravel Path?
Regular maintenance is crucial for keeping your gravel path in top condition and functioning properly. Below, we’ve outlined some routine tasks for maintaining your path and common issues that may arise after installation.
Regular Maintenance
To keep your gravel path in top condition, follow these steps:
- Check and repair edging to ensure it continues to contain the gravel effectively.
- Rake the path periodically to redistribute gravel and maintain an even surface.
- Remove leaves and debris to prevent them from decomposing into the gravel.
- Top up the gravel as needed, especially in high-traffic areas.
Common Issues With Gravel Paths
Some common problems with gravel paths and their solutions include the following issues:
- Compaction: Loosen compacted areas with a rake and add fresh gravel as needed.
- Drainage issues: Ensure proper slope and consider adding a French drain for problem areas.
- Gravel migration: Rake stray gravel back onto the path and consider adding stabilizers.
- Weed growth: Pull weeds by hand or use an eco-friendly weed killer.
15. What if I Have Clay Soil?
Working with clay soil can present unique challenges when laying a rock walkway. Clay soil tends to retain water, which can lead to drainage issues and instability. Here are some tips for dealing with clay soil:
- Improve Drainage: Incorporate organic matter such as compost or well-rotted manure to improve soil structure and drainage. This helps break up the clay particles and allows water to percolate more easily.
- Create a Raised Bed: Building a raised walkway can help elevate the path above the clay soil, providing better drainage and preventing waterlogging.
- Install a French Drain: A French drain can help redirect water away from the walkway, especially in areas with heavy clay soil.
- Use Geotextile Fabric: Laying geotextile fabric between the clay soil and the base layer of crushed stone can prevent the clay from mixing with the stone and compromising its drainage capabilities.
- Amend the Soil: Consider amending the clay soil with materials such as gypsum or sand to improve its texture and drainage properties.
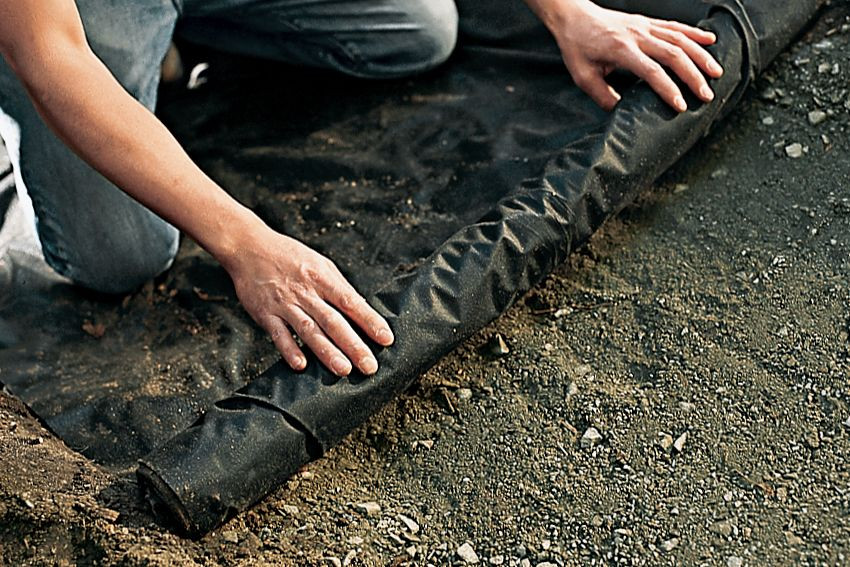 laying down the landscape fabric
16. How Can I Make My Rock Walkway ADA Compliant?
If you need to make your rock walkway ADA (Americans with Disabilities Act) compliant, consider these guidelines:
- Surface: The walkway must have a stable, firm, and slip-resistant surface. Avoid loose gravel or uneven stones.
- Width: The walkway should be at least 36 inches wide to allow for wheelchair access.
- Slope: The slope should not exceed 1:20 (5%) in the running direction.
- Cross Slope: The cross slope should not exceed 1:48 (2%).
- Clearance: Ensure there is adequate overhead clearance (at least 80 inches).
- Edging: Provide a detectable edging along the sides of the walkway.
Consult local ADA guidelines for precise requirements.
17. How Do I Choose Sustainable Materials for My Rock Walkway?
For an environmentally friendly rock walkway, consider these sustainable materials:
- Locally Sourced Rocks: Reduces transportation emissions.
- Recycled Materials: Use reclaimed bricks, pavers, or crushed concrete as a base.
- Permeable Pavers: Allows water to drain back into the ground.
- Eco-Friendly Weed Control: Opt for natural weed killers or manual removal.
- Drought-Tolerant Plants: Choose native plants that require less water.
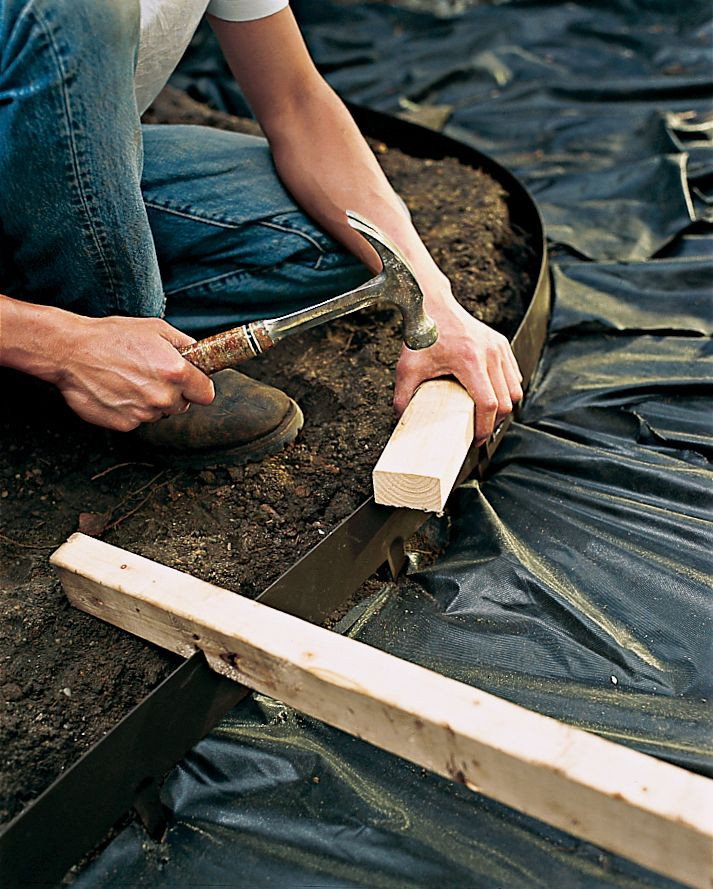 installing the edging of the path
18. How to Integrate Lighting for Safety and Aesthetics?
Illuminating your rock walkway not only enhances its appeal but also improves safety and usability after dark. Consider these lighting options:
- Solar Lights: Eco-friendly and easy to install.
- LED Path Lights: Energy-efficient and long-lasting.
- String Lights: Adds a festive touch.
- Bollard Lights: Provides a modern and stylish look.
- Uplighting: Highlights nearby plants and features.
19. What Are the Best Plants to Complement a Rock Walkway in the USA?
Enhance your rock walkway with complementary plants that thrive in your region. Here are some suggestions:
- Southwest (Arizona): Lavender, rosemary, succulents, cacti.
- Northeast: Hostas, ferns, hydrangeas.
- Southeast: Azaleas, camellias, gardenias.
- Midwest: Coneflowers, daylilies, hostas.
- Pacific Northwest: Rhododendrons, ferns, heathers.
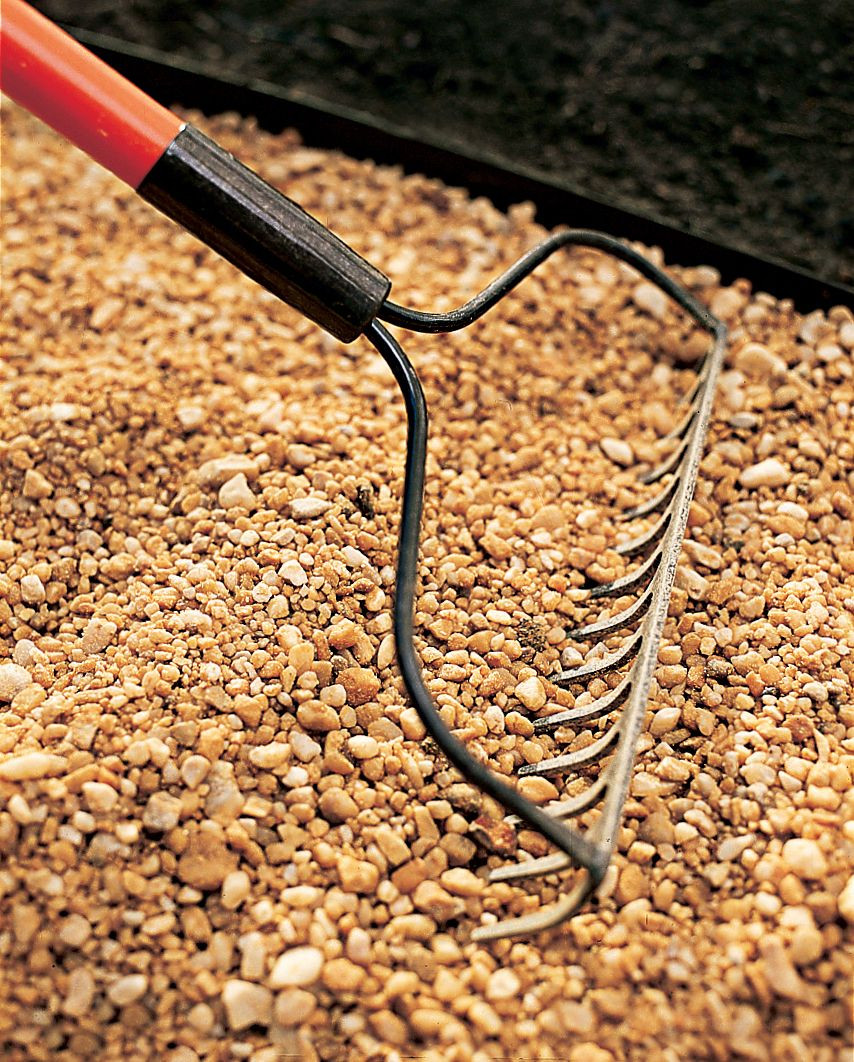 raking the gravel into the path
20. How to Lay a Rock Walkway on a Slope?
Building a rock walkway on a slope requires extra care to ensure stability and prevent erosion. Here’s how to do it:
- Terracing: Create level terraces along the slope, using retaining walls made of stone or timber.
- Steps: Incorporate steps made of large stones or pavers to make the walkway easier to navigate.
- Gravel or Crushed Stone: Use gravel or crushed stone as a base material to provide better traction and drainage.
- Edging: Install sturdy edging along the sides of the walkway to contain the materials and prevent erosion.
- Drainage: Ensure proper drainage by installing French drains or swales to redirect water away from the walkway.
- Planting: Plant ground cover or vegetation along the slope to help stabilize the soil and prevent erosion.
FAQ Section
1. How deep should I dig for a rock walkway?
You should dig approximately 4-6 inches deep to accommodate the base and rock layers.
2. Do I need landscape fabric under a rock walkway?
Yes, landscape fabric prevents weed growth and stabilizes the soil.
3. What is the best base for a rock walkway?
Crushed stone or gravel provides a stable and well-draining base.
4. How wide should a rock walkway be?
A minimum width of 3 feet is recommended for comfortable passage.
5. Can I use any type of rock for a walkway?
Choose durable, weather-resistant rocks suitable for foot traffic.
6. How do I prevent weeds from growing in my rock walkway?
Use landscape fabric and regularly remove any weeds that appear.
7. How do I level a rock walkway?
Use a level to ensure each rock is even and adjust as needed.
8. What is the best way to secure rocks in a walkway?
Fill gaps with sand or small pebbles for added stability.
9. How do I maintain a rock walkway?
Regularly rake, clean, and replenish stones as needed.
10. Can I install a rock walkway myself?
Yes, it’s a DIY-friendly project with proper planning and tools.
Ready to create your dream rock walkway? Visit rockscapes.net for more inspiration, detailed guides, and expert advice. Explore our extensive selection of rocks and stones, and let us help you transform your landscape into a stunning outdoor oasis! Contact us at Address: 1151 S Forest Ave, Tempe, AZ 85281, United States. Phone: +1 (480) 965-9011. Website: rockscapes.net.