Are you looking to enhance your outdoor space with a charming and functional fire feature? How To Make A Fire Pit Out Of Rocks is a popular question at rockscapes.net, and we’re here to show you how to build a stunning and durable rock fire pit without breaking the bank. Using natural stone, you can create an inviting outdoor gathering spot for years to come!
Ready to transform your backyard? In this guide, you’ll discover how to construct an impressive stone fire pit, perfect for cozy evenings and outdoor cooking, all while exploring the beauty of landscape rocks, natural stone design, and unique fire pit ideas.
1. Why Build a Rock Fire Pit?
Rock fire pits are not only aesthetically pleasing, but also incredibly practical. They offer a unique blend of natural beauty and functionality, making them a perfect addition to any outdoor space.
- Aesthetic Appeal: Natural stone adds a touch of rustic elegance, blending seamlessly with any landscape.
- Durability: Rocks are incredibly durable and can withstand harsh weather conditions, ensuring your fire pit lasts for years.
- Cost-Effective: Using locally sourced rocks can significantly reduce the cost compared to pre-made fire pits.
- Customization: You can customize the size, shape, and design to fit your specific needs and preferences.
- Versatility: Perfect for gatherings, cooking, or simply enjoying a quiet evening outdoors.
2. Planning Your Rock Fire Pit
Before you start building, careful planning is essential. Consider the following aspects to ensure your fire pit meets your needs and complements your outdoor space.
2.1. Determine the Size and Location
The size of your fire pit should be proportionate to your yard and accommodate the number of people you plan to host. A diameter of 3 to 5 feet is generally suitable for most backyards. When selecting a location, keep these factors in mind:
- Safety: Ensure the fire pit is at least 10 feet away from any structures, trees, or flammable materials.
- Wind Direction: Consider the prevailing wind direction to minimize smoke blowing towards your house or neighbors.
- Accessibility: Choose a location that is easily accessible and provides ample seating space around the fire pit.
- Regulations: Check local regulations and HOA guidelines regarding outdoor fire pits.
2.2. Choose the Right Type of Rocks
Selecting the right type of rocks is crucial for both the aesthetics and functionality of your fire pit. Here are some popular options:
| Type of Rock | Description | Pros | Cons |
|---|---|---|---|
| Granite | A coarse-grained igneous rock composed mainly of quartz, feldspar, and mica. | Highly durable, heat-resistant, and available in various colors and textures. | Can be expensive and may require professional cutting for a uniform look. |
| Limestone | A sedimentary rock composed primarily of calcium carbonate. | Relatively inexpensive, easy to work with, and has a natural, rustic appearance. | More porous than other rocks and may require sealing to prevent water damage. Not as heat-resistant as granite or basalt. |
| Basalt | A dark, fine-grained volcanic rock. | Excellent heat retention, durable, and adds a modern, sleek look to your fire pit. | Can be difficult to source in some areas and may require professional cutting. |
| Fieldstones | Naturally occurring stones found in fields and along riverbeds. | Adds a unique, rustic charm to your fire pit and can be locally sourced, making it an eco-friendly option. | Vary in size and shape, requiring careful selection and arrangement. May not be as durable as other types of rocks. |
| River Rocks | Smooth, rounded stones found in riverbeds. | Provides a natural, polished look and is easy to handle. | Not as heat-resistant as other rocks and may crack or explode if exposed to high temperatures. Best used for decorative purposes around the fire pit. |
| Lava Rocks | Lightweight, porous rocks formed from volcanic eruptions. | Excellent heat retention, adds a unique texture, and is relatively inexpensive. | Can be brittle and may break down over time. Not suitable for structural components of the fire pit. |
| Slate | A fine-grained metamorphic rock known for its layered structure. | Offers a sophisticated, modern look, is heat-resistant, and easy to clean. | Can be prone to chipping and cracking if not handled carefully. May be more expensive than other types of rocks. |
| Sandstone | A sedimentary rock composed of sand grains cemented together. | Offers a warm, natural appearance, is relatively easy to work with, and is available in various colors. | More porous than other rocks and may require sealing to prevent water damage. Not as heat-resistant as granite or basalt. |
| Quartzite | A metamorphic rock formed from sandstone, known for its hardness and crystalline structure. | Highly durable, heat-resistant, and available in a range of colors and textures. | Can be expensive and may require professional cutting. |
| Flagstone | A type of sedimentary rock that splits into flat layers, ideal for paving and creating a smooth surface. | Provides a clean, modern look, is easy to install, and can be used for both the fire pit walls and the surrounding patio. | Can be slippery when wet and may require sealing to prevent staining. Not as heat-resistant as other rocks and may crack or discolor over time. |
| Dry Stack Stone | Natural stones specifically cut and shaped for dry-stacking without mortar. | Creates a rustic, natural look, is easy to install, and allows for good drainage. | Requires careful selection and arrangement of stones to ensure stability. May not be as durable as mortared stone walls. |
| Manufactured Stone | Artificial stone veneer made from concrete or other materials. | Offers a consistent look, is lightweight, and easy to install. Often less expensive than natural stone. | Does not have the same natural appeal as real stone and may not be as durable. Can fade or discolor over time. |
| Boulders | Large, natural stones that can be used as a focal point in the landscape. | Adds a dramatic, natural element to the fire pit area, provides seating, and can help define the space. | Can be difficult to move and position without heavy equipment. May require professional installation. |
| Cobblestones | Small, rounded stones typically used for paving. | Adds a classic, rustic touch, is durable, and provides good drainage. | Can be time-consuming to install and may require a gravel base. Not as comfortable to walk on as other paving materials. |
| Crushed Stone | Angular fragments of rock used for drainage, pathways, and as a base material. | Inexpensive, provides good drainage, and can be used to create a stable base for the fire pit. | Not as aesthetically pleasing as other types of stone and may require a border to contain it. |
| Riprap | Large, irregular stones used for erosion control and shoreline protection. | Provides excellent erosion control, adds a natural look to waterfront properties, and can be used to create a rugged fire pit area. | Can be difficult to handle and position. May require professional installation. |
According to research from Arizona State University’s School of Earth and Space Exploration, in July 2025, granite is the most popular choice for fire pits due to its durability and heat resistance.
2.3. Gather Necessary Tools and Materials
To build your rock fire pit, you’ll need the following tools and materials:
- Rocks (enough to build the fire pit wall)
- Shovel
- Measuring tape
- Level
- Landscape fabric
- Gravel or sand (for the base)
- Mortar (optional, for a more permanent structure)
- Trowel (if using mortar)
- Gloves
- Safety glasses
3. Step-by-Step Guide to Building Your Rock Fire Pit
Follow these steps to construct your own rock fire pit and create a cozy outdoor space.
3.1. Prepare the Site
- Mark the Area: Use a measuring tape and spray paint to mark the desired diameter of your fire pit.
- Excavate: Dig down about 6-12 inches within the marked area. This will create a stable base for your fire pit.
- Level the Ground: Use a level to ensure the ground is even. Add or remove soil as needed.
- Apply Landscape Fabric: Line the excavated area with landscape fabric to prevent weed growth.
- Add Base Material: Pour a 4-inch layer of gravel or sand over the landscape fabric. Compact the base material using a tamper or hand compactor.
3.2. Construct the Rock Wall
- Dry-Stacking (No Mortar):
- Begin by placing the largest rocks on the bottom layer, ensuring they are stable and level.
- Stagger the rocks in each layer to create a more secure structure.
- Fill any gaps with smaller rocks or gravel to improve stability.
- Continue stacking the rocks until you reach the desired height, typically 12-18 inches.
 Dry-stacked rock fire pit
- Mortared Wall:
- Mix the mortar according to the manufacturer’s instructions.
- Apply a layer of mortar to the base material.
- Place the first layer of rocks onto the mortar, ensuring they are level and properly aligned.
- Apply mortar between the rocks in each layer, using a trowel to smooth the joints.
- Continue stacking the rocks until you reach the desired height, allowing the mortar to cure for 24-48 hours before using the fire pit.
3.3. Add Finishing Touches
- Inner Liner (Optional):
- For added safety and durability, consider lining the inside of the fire pit with fire bricks or a steel fire ring.
- This will protect the rocks from direct heat and prevent them from cracking or exploding.
- Gravel or Sand Interior:
- Fill the bottom of the fire pit with a layer of gravel or sand to provide a level surface for burning wood.
- Surrounding Area:
- Enhance the area around your fire pit by adding seating, lighting, and landscaping.
- Consider using pea gravel or mulch to create a comfortable and visually appealing space.
4. Safety Tips for Using Your Rock Fire Pit
- Never leave a fire unattended.
- Keep a fire extinguisher or water hose nearby.
- Burn only dry, seasoned wood.
- Avoid burning trash, leaves, or other debris.
- Be aware of wind conditions and adjust the fire accordingly.
- Supervise children and pets closely.
- Ensure the fire is completely extinguished before leaving the area.
5. Design Ideas for Your Rock Fire Pit
- Rustic Charm: Use fieldstones or river rocks to create a natural, rustic look.
- Modern Elegance: Opt for granite or slate for a sleek, contemporary design.
- Southwestern Style: Incorporate lava rocks and colorful stones for a desert-inspired aesthetic.
- Coastal Retreat: Use smooth, light-colored stones and seashells for a beachy vibe.
- Eclectic Mix: Combine different types of rocks and materials for a unique, personalized fire pit.
6. Maximizing Your Fire Pit with Cooking Features
Integrating cooking features into your rock fire pit not only enhances its utility but also transforms your outdoor space into a functional kitchen and entertainment area. Here’s how you can maximize your fire pit for cooking:
6.1. Incorporating a Cooking Grate
Adding a cooking grate is one of the simplest ways to turn your fire pit into a grilling station. Here are some options:
- Adjustable Grates: These grates can be raised or lowered to control the heat, providing versatility for cooking different types of food.
- Swivel Grates: Swivel grates can be easily moved away from the fire, allowing you to manage the heat and access the flames for adding wood.
- Custom-Built Grates: For a perfect fit, consider having a custom grate built to match the diameter and design of your fire pit.
6.2. Using Dutch Ovens
Dutch ovens are excellent for cooking stews, soups, and even baking bread over an open fire. Place the Dutch oven directly on the embers or suspend it from a tripod for more even heating.
6.3. Installing a Rotisserie
For a more elaborate cooking setup, consider installing a rotisserie. This allows you to roast meats and vegetables slowly and evenly, resulting in delicious, smoky flavors.
6.4. Adding a Pizza Oven Attachment
Transform your fire pit into a pizza oven by adding a specialized attachment. These attachments typically feature a stone base for baking and an enclosed chamber to trap heat, allowing you to cook pizzas quickly and evenly.
6.5. Creating a Smoker
Turn your fire pit into a smoker by adding wood chips to the fire and covering the top with a lid or tarp. This method is ideal for smoking meats, fish, and vegetables, infusing them with rich, smoky flavors.
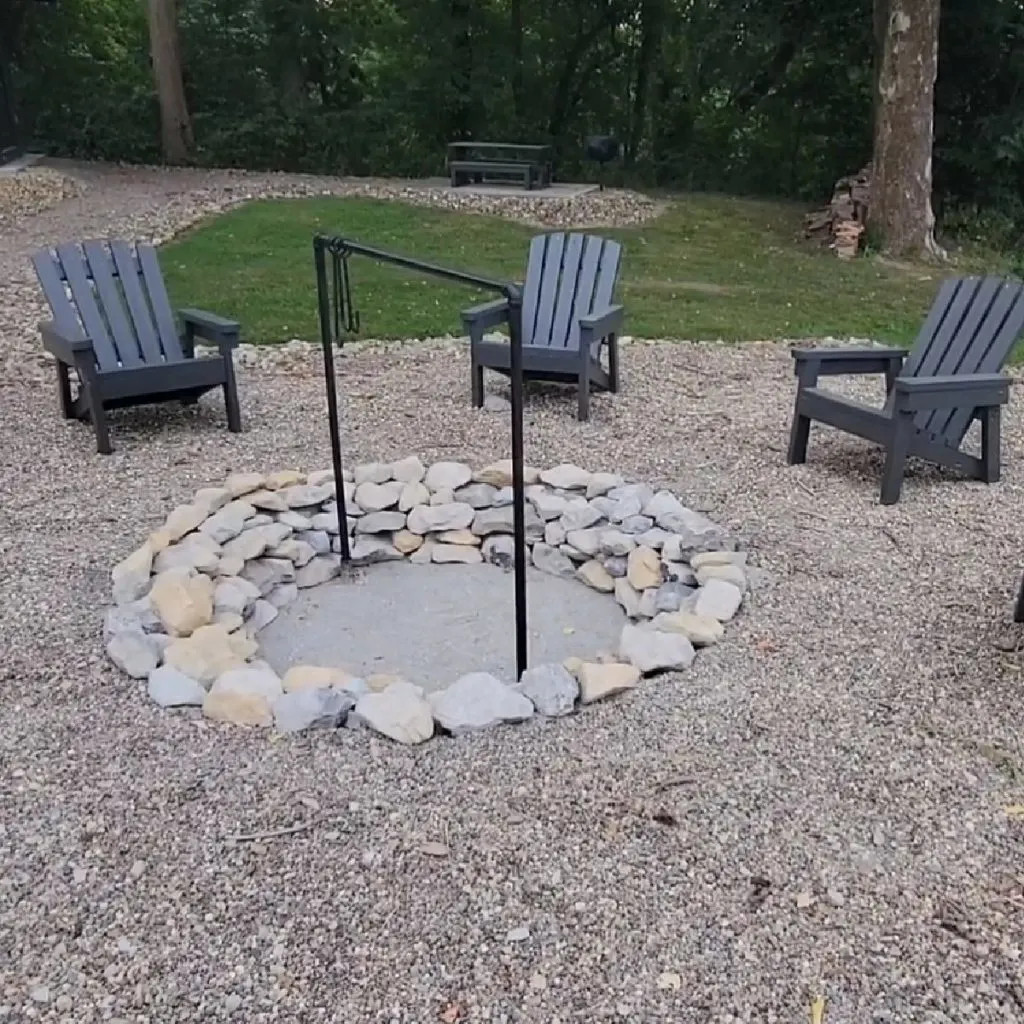
6.6. Building a Cooking Bar
A cooking bar allows the cooking bar to go down in the ground deep, providing plenty of support to hold soup pots and more. The cooking bar can easily be removed when not in use. When not in use, use two threaded iron pipe caps to cover the holes.
7. Maintaining Your Rock Fire Pit
Proper maintenance is essential to ensure the longevity and safety of your rock fire pit. Here are some tips to keep your fire pit in top condition:
7.1. Regular Cleaning
Remove ashes and debris after each use to prevent buildup and ensure proper airflow. Use a shovel or ash vacuum for easy cleanup.
7.2. Inspecting the Rocks
Periodically inspect the rocks for cracks or damage. Replace any damaged rocks to maintain the structural integrity of the fire pit.
7.3. Protecting from the Elements
Cover your fire pit with a tarp or fire pit cover when not in use to protect it from rain, snow, and other elements. This will help prevent water damage and extend the life of your fire pit.
7.4. Re-Mortaring (if applicable)
If you used mortar to build your fire pit, inspect the mortar joints regularly for cracks or deterioration. Re-mortar any damaged joints to maintain the stability of the structure.
7.5. Controlling Vegetation
Keep the area around your fire pit free of vegetation to prevent fire hazards. Trim any trees or shrubs that are too close to the fire pit, and remove any dry leaves or grass that could easily catch fire.
8. Troubleshooting Common Issues
Even with careful planning and construction, you may encounter some common issues with your rock fire pit. Here are some troubleshooting tips:
8.1. Smoke Issues
If your fire pit produces excessive smoke, it could be due to several factors:
- Wet Wood: Ensure you are using dry, seasoned wood. Wet wood produces more smoke and less heat.
- Poor Airflow: Make sure there is adequate airflow around the fire. Remove any obstructions that may be blocking the flow of air.
- Burning Debris: Avoid burning trash, leaves, or other debris, as these can produce excessive smoke and harmful fumes.
8.2. Rock Cracking
Rocks can crack or explode if they contain moisture and are exposed to high heat. To prevent this:
- Use Heat-Resistant Rocks: Choose rocks that are known for their heat resistance, such as granite or lava rocks.
- Dry the Rocks: Allow the rocks to dry completely before using the fire pit.
- Start Small Fires: Start with small fires and gradually increase the size to allow the rocks to heat up slowly.
8.3. Stability Issues
If your rock fire pit is unstable, it could be due to:
- Improper Base: Ensure the base is level and compacted.
- Poor Stacking: Stagger the rocks in each layer to create a more secure structure.
- Lack of Mortar: Consider using mortar to create a more permanent and stable structure.
9. The Environmental Impact of Rock Fire Pits
While rock fire pits can be a great addition to your outdoor space, it’s important to consider their environmental impact:
9.1. Air Quality
Burning wood releases particulate matter and other pollutants into the air, which can contribute to air pollution and respiratory problems. To minimize the impact on air quality:
- Burn Responsibly: Burn only when necessary and avoid burning on days with poor air quality.
- Use Clean-Burning Appliances: Consider using a propane or natural gas fire pit, which produces fewer emissions than wood-burning fire pits.
9.2. Deforestation
If you’re using wood for your fire pit, it’s important to source it sustainably. Avoid using wood from old-growth forests or illegally harvested trees.
9.3. Soil Erosion
Building a rock fire pit can disrupt the soil and lead to erosion. To minimize the impact on the soil:
- Minimize Disturbance: Disturb the soil as little as possible during construction.
- Use Erosion Control Measures: Use landscape fabric, mulch, or other erosion control measures to stabilize the soil around the fire pit.
10. Sourcing Rocks Sustainably
When building a rock fire pit, it’s important to source your rocks sustainably. Here are some tips:
10.1. Local Quarries
Consider purchasing rocks from local quarries, which can reduce transportation costs and emissions.
10.2. Recycled Rocks
Look for recycled rocks from construction sites or demolition projects. This can be a great way to reuse materials and reduce waste.
10.3. Sustainable Harvesting
When harvesting rocks from natural areas, be sure to do so sustainably. Avoid taking rocks from protected areas, and only take what you need.
11. Rock Fire Pits: Blending with Nature
Rock fire pits offer a unique opportunity to blend your outdoor space with nature. By using natural materials and incorporating sustainable practices, you can create a beautiful and environmentally friendly gathering spot.
11.1. The Appeal of Natural Elements
The beauty of a rock fire pit lies in its ability to mimic the natural landscape. Rocks, with their varied textures and colors, bring an organic feel that manufactured materials simply cannot replicate.
11.2. Sustainable Rock Sourcing
Opting for locally sourced rocks minimizes transportation impact, reducing carbon emissions. Additionally, consider reclaimed rocks from construction sites or riverbeds to promote recycling and reduce environmental footprint.
11.3. Fire Pit Landscaping Ideas
- Native Plants: Surround your fire pit with native plants to enhance the natural aesthetic and support local ecosystems.
- Gravel Paths: Create pathways using gravel to minimize soil erosion and provide a permeable surface for rainwater to drain.
- Natural Seating: Incorporate large stones or wooden logs for seating, blending functionality with the surrounding environment.
11.4. Ecological Benefits
Rock fire pits can provide habitats for small animals and insects, contributing to local biodiversity. Consider adding a small water feature nearby to attract birds and other wildlife.
11.5. Integrating with Existing Landscape
Design your fire pit to complement existing landscape features, such as trees, shrubs, and water bodies. This creates a harmonious and cohesive outdoor space.
11.6. Rock Gardens
Expand the natural theme by creating a rock garden around your fire pit. Use different sizes and types of rocks to add texture and visual interest.
11.7. Minimalist Design
Embrace a minimalist approach by using only a few carefully selected rocks. This highlights the natural beauty of the materials and creates a serene and uncluttered space.
11.8. Seasonal Adaptations
Design your fire pit area to adapt to different seasons. Plant deciduous trees for shade in the summer and allow sunlight in the winter.
11.9. Lighting Considerations
Use soft, warm lighting to enhance the ambiance of your fire pit area. Solar-powered lights can be a sustainable and cost-effective option.
11.10. Community Engagement
Involve your community in the design and construction of your fire pit. This can foster a sense of ownership and promote sustainable practices.
12. Exploring Unique Rock Fire Pit Designs
Unleash your creativity and explore unique rock fire pit designs that reflect your personal style and preferences.
12.1. Spiral Design
Create a spiral-shaped fire pit using rocks of varying sizes. This design adds a dynamic and visually appealing element to your outdoor space.
12.2. Tiered Fire Pit
Build a tiered fire pit with multiple levels of rocks. This design provides additional seating and creates a dramatic focal point.
12.3. Mosaic Fire Pit
Incorporate colorful mosaic tiles into your rock fire pit for a unique and artistic touch. This design allows you to express your creativity and personalize your outdoor space.
12.4. Gabion Fire Pit
Use gabion baskets filled with rocks to create a modern and industrial-style fire pit. This design is durable, cost-effective, and easy to construct.
12.5. Keyhole Fire Pit
Build a keyhole-shaped fire pit with a narrow opening on one side. This design provides better airflow and creates a more efficient burning experience.
12.6. Sunken Fire Pit
Create a sunken fire pit by excavating a circular area and building the rock walls below ground level. This design provides a cozy and intimate gathering space.
12.7. Fire Pit with Waterfall
Combine a rock fire pit with a small waterfall or fountain for a serene and relaxing ambiance. This design adds a touch of luxury and creates a tranquil outdoor retreat.
12.8. Geometric Fire Pit
Build a fire pit with geometric shapes, such as squares, rectangles, or hexagons. This design adds a modern and architectural element to your outdoor space.
12.9. Fire Pit with Integrated Seating
Incorporate seating directly into your rock fire pit design. Use large stones or wooden benches to create a comfortable and functional gathering space.
12.10. Sculptural Fire Pit
Create a sculptural fire pit by arranging the rocks in an artistic and abstract manner. This design transforms your fire pit into a work of art and adds a unique focal point to your outdoor space.
13. Fire Pit Safety Regulations and Best Practices
To ensure a safe and enjoyable experience with your rock fire pit, it’s crucial to understand and adhere to local safety regulations and best practices.
13.1. Local Regulations
Check with your local authorities and homeowner’s association (HOA) for any regulations or restrictions regarding outdoor fire pits. These may include:
- Permit Requirements: Some areas require a permit for building or using an outdoor fire pit.
- Setback Distances: Regulations may specify minimum distances from structures, property lines, and flammable materials.
- Burn Bans: During periods of high fire risk, local authorities may impose burn bans, prohibiting the use of outdoor fire pits.
13.2. Safe Distances
Maintain a safe distance between your fire pit and any structures, trees, or flammable materials. A minimum distance of 10 feet is generally recommended.
13.3. Fire Extinguisher or Water Source
Keep a fire extinguisher or a water hose nearby in case of emergencies. Ensure that everyone using the fire pit knows where these safety tools are located and how to use them.
13.4. Supervision
Never leave a fire unattended, especially when children or pets are present. Designate a responsible adult to supervise the fire at all times.
13.5. Dry Wood Only
Burn only dry, seasoned wood in your fire pit. Wet or green wood produces more smoke and can be difficult to ignite.
13.6. Avoid Accelerants
Do not use gasoline, kerosene, or other accelerants to start or maintain the fire. These can be dangerous and cause uncontrolled flames.
13.7. Wind Conditions
Be aware of wind conditions and avoid using the fire pit on windy days. Wind can carry embers and spread the fire to nearby vegetation or structures.
13.8. Extinguish Properly
Extinguish the fire completely before leaving the area. Use water or sand to douse the embers and ensure that they are cool to the touch.
13.9. Carbon Monoxide Safety
If using a propane or natural gas fire pit, be aware of the risk of carbon monoxide poisoning. Ensure that the fire pit is properly ventilated and that you have a carbon monoxide detector installed in your home.
13.10. Emergency Plan
Develop an emergency plan in case of a fire or other emergency. This should include evacuation routes, contact information for emergency services, and instructions on how to use the fire extinguisher or water hose.
14. Enhancing Ambiance: Lighting and Accessories
Elevate the ambiance of your rock fire pit area with thoughtful lighting and accessories that create a warm and inviting atmosphere.
14.1. String Lights
Hang string lights around your fire pit area to add a touch of whimsy and charm. Choose warm, soft lights for a cozy and romantic ambiance.
14.2. Lanterns
Place lanterns around the fire pit to provide soft, ambient lighting. Use battery-operated or solar-powered lanterns for a convenient and eco-friendly option.
14.3. Torches
Install torches around the fire pit to create a dramatic and tropical atmosphere. Use citronella oil in the torches to repel mosquitoes and other insects.
14.4. Fire Pit Screens
Use fire pit screens to contain sparks and embers, providing added safety and preventing the spread of fire.
14.5. Fire Pit Covers
Protect your fire pit from the elements with a fire pit cover. This will help prevent water damage and extend the life of your fire pit.
14.6. Seating Options
Choose comfortable and stylish seating options for your fire pit area. Use Adirondack chairs, benches, or outdoor sofas to create a cozy and inviting gathering space.
14.7. Throw Blankets
Provide throw blankets for your guests to stay warm and cozy on chilly evenings. Choose soft, plush blankets in complementary colors and textures.
14.8. Outdoor Rugs
Add an outdoor rug to your fire pit area to define the space and provide a comfortable surface underfoot. Choose a rug that is durable, weather-resistant, and easy to clean.
14.9. Side Tables
Place side tables around the fire pit to provide a convenient surface for drinks, snacks, and other items. Choose tables that are durable, weather-resistant, and complement the overall design of your fire pit area.
14.10. Sound Systems
Install a sound system in your fire pit area to provide background music and enhance the ambiance. Choose a wireless or Bluetooth-enabled sound system for easy setup and operation.
15. Budget-Friendly Rock Fire Pit Ideas
Building a rock fire pit doesn’t have to break the bank. Here are some budget-friendly ideas to help you create a stunning outdoor feature without spending a fortune:
15.1. Use Locally Sourced Rocks
Source rocks from local quarries or suppliers to save on transportation costs. You may even be able to find free rocks in your area, such as fieldstones or river rocks.
15.2. Reclaimed Materials
Use reclaimed materials, such as bricks, concrete blocks, or paving stones, to build your fire pit. These materials can often be found for free or at a discounted price.
15.3. DIY Fire Pit Kit
Purchase a DIY fire pit kit that includes all the necessary materials and instructions. These kits are often more affordable than buying the materials separately.
15.4. Simple Design
Opt for a simple fire pit design that requires fewer materials and less labor. A basic circular or square fire pit can be just as beautiful and functional as a more elaborate design.
15.5. Gravel Base
Use gravel as the base material for your fire pit instead of more expensive options, such as concrete or pavers. Gravel is affordable, easy to install, and provides good drainage.
15.6. DIY Seating
Create DIY seating for your fire pit area using repurposed materials, such as wooden pallets, logs, or concrete blocks.
15.7. Thrifty Accessories
Shop for accessories, such as string lights, lanterns, and throw blankets, at thrift stores or discount retailers.
15.8. Free Landscaping
Use free or low-cost landscaping materials, such as mulch, pine needles, or native plants, to enhance the area around your fire pit.
15.9. Bartering
Barter with friends, neighbors, or local contractors for materials or labor. You may be able to trade your skills or services for the materials or assistance you need.
15.10. Gradual Construction
Build your fire pit gradually, over time, as your budget allows. Start with the basic structure and add accessories and landscaping as you can afford them.
16. Rockscapes.net: Your Ultimate Resource for Rock Fire Pit Inspiration and Materials
Ready to build the rock fire pit of your dreams? Rockscapes.net is your go-to source for inspiration, expert advice, and high-quality materials. Here’s how we can help:
16.1. Design Inspiration
Explore our extensive gallery of rock fire pit designs to find the perfect style for your outdoor space. From rustic to modern, we have ideas to suit every taste and budget.
16.2. Expert Advice
Consult our team of landscape design experts for personalized advice on choosing the right rocks, planning your layout, and building your fire pit safely and efficiently.
16.3. High-Quality Materials
Source your rocks and other materials from our trusted network of suppliers. We offer a wide selection of natural stones, including granite, limestone, basalt, and more.
16.4. Step-by-Step Guides
Follow our step-by-step guides and tutorials to learn how to build your rock fire pit from start to finish. We provide clear, concise instructions and helpful tips to ensure a successful project.
16.5. Local Suppliers
Find local suppliers of rocks and other materials using our online directory. We connect you with reputable businesses in your area to make your project as convenient as possible.
16.6. Customer Support
Contact our friendly customer support team for assistance with any questions or concerns you may have. We’re here to help you every step of the way.
16.7. Community Forum
Join our online community forum to connect with other rock fire pit enthusiasts. Share your ideas, ask questions, and get feedback from experienced builders.
16.8. Project Showcase
Showcase your completed rock fire pit project on our website and inspire others with your creativity. We love to see how our customers are transforming their outdoor spaces.
16.9. Exclusive Offers
Take advantage of exclusive offers and discounts on rocks and other materials. Sign up for our newsletter to stay informed about the latest deals and promotions.
16.10. Visit Our Showroom
Visit our showroom to see our selection of rocks and other materials in person. Our knowledgeable staff can help you choose the perfect items for your project.
17. Frequently Asked Questions (FAQ) About Rock Fire Pits
- What is the best type of rock to use for a fire pit? Granite, basalt, and lava rocks are excellent choices due to their durability and heat resistance.
- How far away from my house should a fire pit be? A fire pit should be at least 10 feet away from any structures, trees, or flammable materials.
- Do I need a permit to build a fire pit? Check local regulations and HOA guidelines regarding outdoor fire pits, as some areas may require a permit.
- Can I use river rocks in a fire pit? River rocks can be used for decorative purposes around the fire pit, but they are not as heat-resistant and may crack or explode if exposed to high temperatures.
- How deep should a fire pit be? A fire pit should be dug down about 6-12 inches to create a stable base.
- What is the best base material for a fire pit? Gravel or sand is an excellent base material for a fire pit, providing a stable and level surface.
- Do I need to line the inside of my fire pit? Consider lining the inside of the fire pit with fire bricks or a steel fire ring for added safety and durability.
- How do I extinguish a fire in a fire pit? Use water or sand to douse the embers and ensure that they are cool to the touch.
- What are some safety tips for using a fire pit? Never leave a fire unattended, keep a fire extinguisher or water hose nearby, and supervise children and pets closely.
- How do I maintain a rock fire pit? Remove ashes and debris after each use, inspect the rocks for cracks or damage, and protect the fire pit from the elements.
Ready to create your own stunning rock fire pit? Visit rockscapes.net for more inspiration, expert advice, and high-quality materials! Contact us today at 1151 S Forest Ave, Tempe, AZ 85281, United States or call +1 (480) 965-9011. Let rockscapes.net help you transform your outdoor space into a cozy and inviting retreat.