Are you looking for a fun and creative way to decorate your garden or create unique gifts? Making a ladybug rock is a delightful and simple project that brings a touch of charm to any space. At rockscapes.net, we provide you with all the inspiration and guidance you need to transform ordinary stones into beautiful works of art. Follow our easy tutorial to create your own adorable ladybug rocks and discover the joy of rock painting!
This project not only enhances your artistic skills but also adds a personalized touch to your outdoor decor. Explore rockscapes.net for more creative rock painting ideas, stone art projects, and garden decoration inspiration.
1. Why Make a Ladybug Rock?
Making a ladybug rock is a fun and rewarding craft project. Ladybug rocks are a delightful addition to any garden, adding a splash of color and whimsy. They also make fantastic gifts that are personalized and heartfelt.
- Adds Charm to Gardens: Ladybug rocks bring a playful and cheerful element to your outdoor space.
- Easy and Fun Craft: Perfect for all ages, this project requires minimal supplies and is easy to execute.
- Personalized Gifts: A handmade ladybug rock is a thoughtful and unique gift for friends and family.
2. Who Would Enjoy This Project?
This project is perfect for anyone who enjoys crafting, gardening, or creating personalized gifts. From kids to adults, the simplicity and charm of making ladybug rocks appeal to a wide audience.
- Families: A great activity for spending quality time together.
- Gardeners: Adds a personal touch to their garden decor.
- Crafters: A fun and simple project to express creativity.
3. Where Can You Display Ladybug Rocks?
Ladybug rocks are versatile and can be displayed in various locations, both indoors and outdoors. Their vibrant colors and charming designs make them a delightful addition to any space.
- Gardens: Place them among plants and flowers for a whimsical touch.
- Patios: Use them as decorative accents on tables or shelves.
- Indoor Decor: Display them in pots, terrariums, or on windowsills.
4. When Is the Best Time to Make Ladybug Rocks?
Any time is a good time to make ladybug rocks, but they are particularly popular during spring and summer when gardens are in full bloom. This craft is also perfect for holiday decorations and themed parties.
- Spring: Celebrates new growth and the return of ladybugs.
- Summer: A fun outdoor activity to enjoy during warmer months.
- Holidays: Use them as festive decorations for Easter or Halloween.
5. What Supplies Do You Need to Make a Ladybug Rock?
Gathering the right supplies is essential for a successful ladybug rock painting project. Here’s a comprehensive list to get you started:
- Smooth Rocks: Choose rocks with a smooth surface for easy painting.
- Acrylic Paints: Red, black, white, and any other colors you desire.
- Paintbrushes: A variety of sizes for base coats and detailed work.
- Clear Sealer: To protect your painted rock from the elements.
- Palette or Plate: For holding and mixing paints.
- Water Container: For cleaning brushes.
- Paper Towels: For blotting excess paint.
- Pencils: For sketching designs (optional).
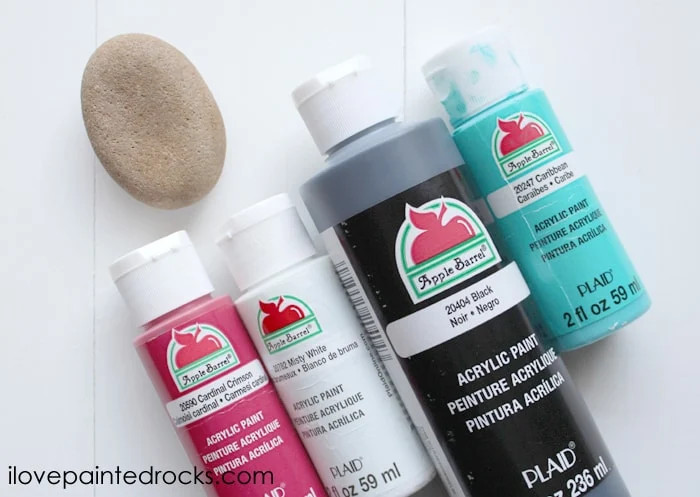 Supplies for painting a ladybug rock, including acrylic paints, paintbrushes, and smooth rocks
6. How to Choose the Right Rock?
Selecting the perfect rock is crucial for a successful painting project. Look for rocks that are smooth, flat, and free from cracks or rough edges.
- Smooth Surface: Ensures the paint adheres well and creates a clean finish.
- Flat Shape: Provides a stable base for painting and displaying.
- Appropriate Size: Choose a size that is easy to handle and paint.
7. Step-by-Step Guide to Making a Ladybug Rock
Follow these simple steps to create your own adorable ladybug rock:
7.1. Clean the Rock
Wash the rock with soap and water to remove any dirt or debris. Allow it to dry completely before painting.
7.2. Apply Base Coat
Paint the entire rock with a red base coat. Use a large brush for even coverage. Let it dry completely.
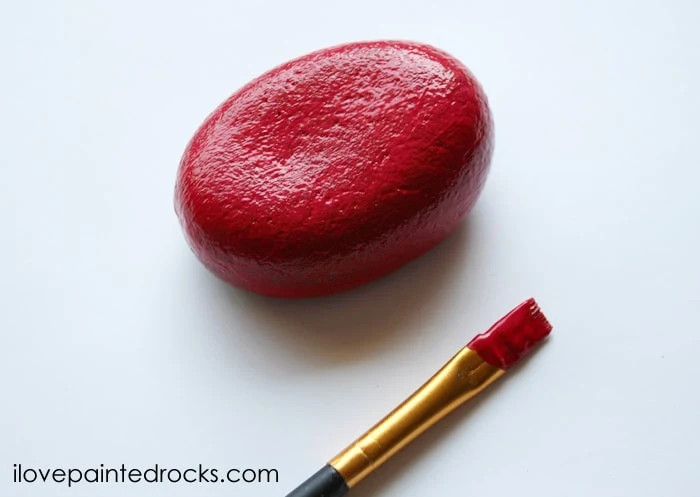 Easy ladybug rock painting idea
7.3. Paint the Head
Use a round brush to paint a black, heart-shaped face on the front of the rock. Let it dry.
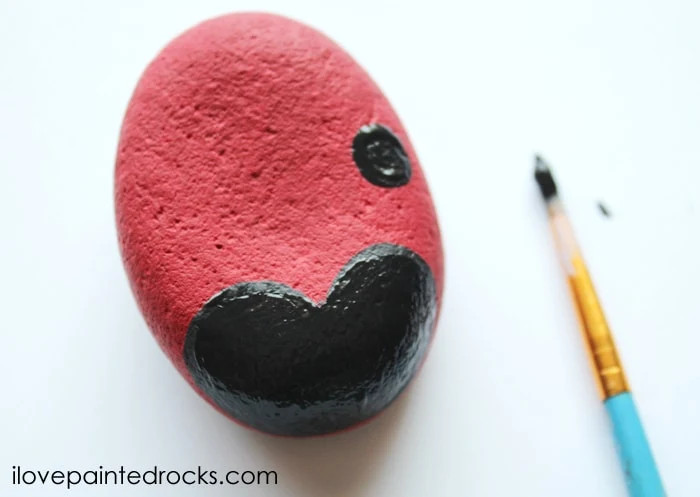 Ladybug painted rock ideas
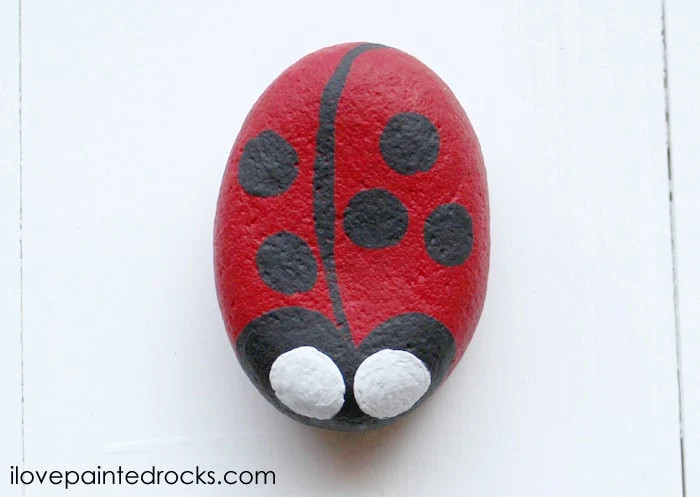
7.4. Add Spots
Use a smaller round brush or a dotting tool to add black spots on the ladybug’s back. Vary the size and placement for a more natural look.
7.5. Create Wing Separation
Paint a curved black line down the back to give the ladybug a cartoony appearance. Let the paint dry completely.
 How to paint a ladybug rock
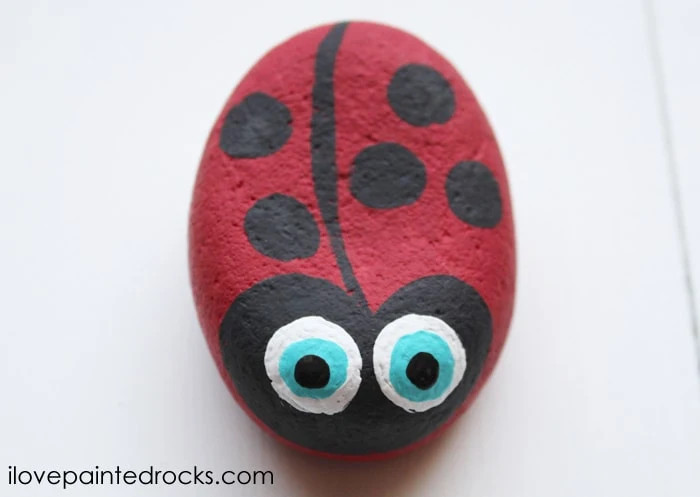
7.6. Paint the Eyes
Use a round brush to paint two large, white eyes on the black face. Let the white paint dry completely.
 How to paint a ladybug on a rock
7.7. Add Irises
Paint big blue irises in the center of the white eyes, leaving some white showing around the edge. Let the blue paint dry completely.
 How to make a ladybug painted rock for kindness rocks project
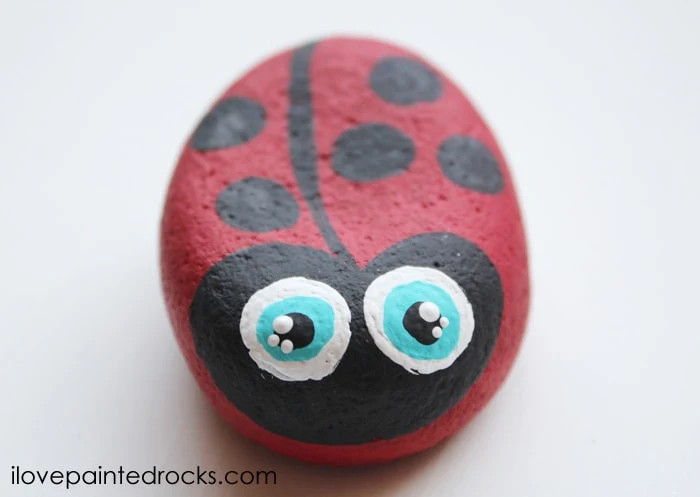
7.8. Create Pupils
Use the end of a pencil eraser or a small round brush to paint black pupils in the center of the blue irises. Let the black paint dry completely.
 How to make a ladybug painted rock
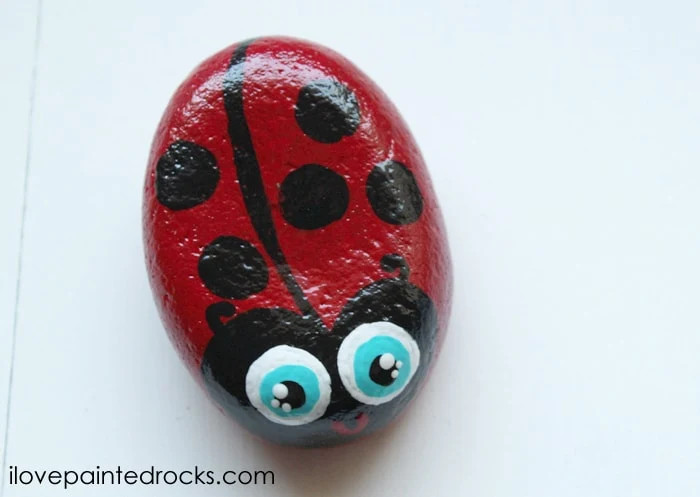
7.9. Add Highlights
Add three small white dots on the edge of the pupils to give the eyes a kawaii look. Mirror the placement for the other eye.
 Best ladybug rock painting ideas
7.10. Paint the Mouth
Use a small detail brush or a dotting tool to draw a cute little red mouth below the eyes.
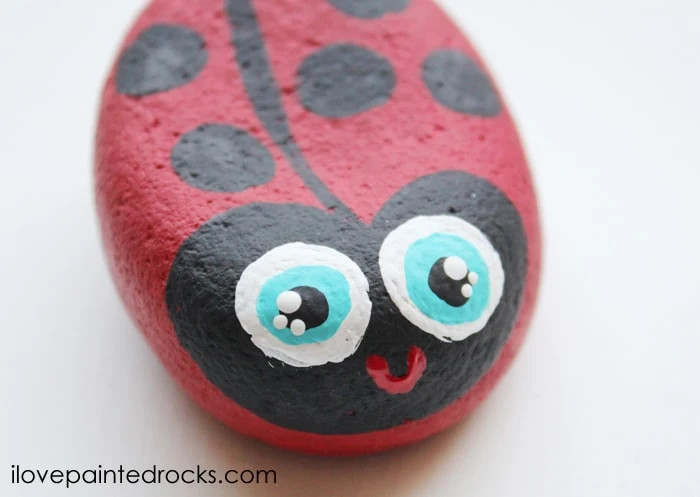 How to give eyes kawaii details – painting a ladybug rock
7.11. Add Antennae
Use a small detail brush or embossing stylus to draw tiny little antenna curls right above the eyes.
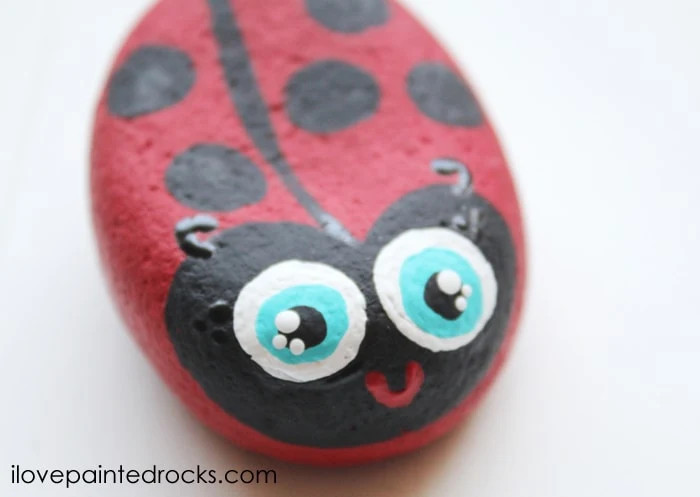 How to paint a ladybug rock. this is a super easy rock painting tutorial that is easy enough for kids
7.12. Seal the Rock
Finish off your adorable ladybug rock with a clear spray sealer to protect the paint from the elements and give it a glossy finish.
 Glossy ladybug painted rock
8. Tips for Painting Ladybug Rocks
Here are some helpful tips to ensure your ladybug rocks turn out beautifully:
- Use High-Quality Paints: Acrylic paints are durable and provide vibrant colors.
- Apply Thin Coats: Multiple thin coats prevent the paint from clumping and ensure a smooth finish.
- Let Each Layer Dry: Allow each layer of paint to dry completely before adding the next one.
- Use the Right Brushes: Different brush sizes are essential for base coats and detailed work.
- Seal Your Work: A clear sealer protects the paint and gives your ladybug rock a professional look.
9. Creative Variations for Ladybug Rocks
Get creative with your ladybug rocks by trying these fun variations:
- Rainbow Ladybugs: Paint ladybugs in every color of the rainbow.
- Polka Dot Ladybugs: Add colorful polka dots instead of traditional black spots.
- Glow-in-the-Dark Ladybugs: Use glow-in-the-dark paint for a magical nighttime display.
- Personalized Ladybugs: Add names or initials to make them extra special.
- Themed Ladybugs: Create ladybugs inspired by holidays, seasons, or favorite characters.
10. Common Mistakes to Avoid When Painting Rocks
Avoid these common mistakes to ensure your ladybug rocks look their best:
- Using Dirty Rocks: Always clean rocks before painting to ensure proper paint adhesion.
- Applying Thick Coats of Paint: Thick coats can lead to clumping and uneven finishes.
- Not Letting Paint Dry: Applying new layers before the previous ones are dry can cause smudging.
- Skipping the Sealer: Sealing your painted rocks protects them from the elements and extends their lifespan.
11. How to Protect Your Painted Rocks from the Elements?
Protecting your painted rocks from the elements is essential for maintaining their beauty and longevity. Here are some tips to keep them looking their best:
- Use a Clear Sealer: Apply several coats of a clear, weather-resistant sealer to protect the paint from fading and chipping.
- Avoid Direct Sunlight: Prolonged exposure to direct sunlight can cause the colors to fade over time.
- Bring Indoors During Extreme Weather: Protect your painted rocks from harsh weather conditions like heavy rain, snow, and freezing temperatures by bringing them indoors.
- Clean Regularly: Gently clean your painted rocks with a soft cloth and mild soap to remove any dirt or debris.
- Reapply Sealer: Reapply the clear sealer every year or two to maintain their protection.
According to research from Arizona State University’s School of Earth and Space Exploration, in July 2025, sealing painted rocks with a UV-resistant coating increases their lifespan by up to 50% when exposed to direct sunlight.
12. How to Involve Kids in This Project?
Involving kids in making ladybug rocks is a fantastic way to foster their creativity and spend quality time together. Here are some tips to make it a fun and educational experience:
- Prepare the Rocks: Wash and prime the rocks ahead of time to make them ready for painting.
- Set Up a Safe Workspace: Cover the table with newspaper or a plastic tablecloth to protect it from paint spills.
- Use Non-Toxic Paints: Opt for non-toxic, washable acrylic paints that are safe for children.
- Provide Simple Instructions: Break down the steps into easy-to-follow instructions that kids can understand.
- Encourage Creativity: Let kids choose their own colors and designs for their ladybug rocks.
- Supervise Closely: Supervise kids while they are painting, especially when using small tools or sealers.
- Make it Fun: Turn it into a game by challenging kids to create the most unique or colorful ladybug rock.
- Display Their Creations: Showcase their finished ladybug rocks in the garden or around the house to boost their confidence and pride.
13. The Benefits of Rock Painting for Mental Health
Rock painting is not only a fun and creative activity, but it also offers numerous benefits for mental health. Here are some ways rock painting can improve your well-being:
- Reduces Stress: Engaging in a creative activity like rock painting can help reduce stress and anxiety by providing a distraction from daily worries.
- Enhances Mindfulness: Rock painting encourages you to focus on the present moment, promoting mindfulness and a sense of calm.
- Boosts Creativity: Expressing yourself through art can stimulate your imagination and boost your creative thinking.
- Improves Fine Motor Skills: The detailed work involved in rock painting can help improve fine motor skills and hand-eye coordination.
- Promotes Relaxation: The repetitive motions of painting can have a calming effect, promoting relaxation and a sense of well-being.
- Increases Self-Esteem: Completing a rock painting project and sharing it with others can boost your self-esteem and sense of accomplishment.
- Provides a Sense of Community: Joining rock painting groups or sharing your creations online can connect you with like-minded individuals and provide a sense of community.
- Offers a Screen-Free Activity: Rock painting is a great alternative to screen-based activities, allowing you to disconnect from technology and engage in a more mindful and creative pursuit.
14. How to Find Inspiration for Your Rock Painting Projects?
Finding inspiration for your rock painting projects can spark creativity and lead to unique and beautiful designs. Here are some tips on where to find inspiration:
- Nature: Look to nature for inspiration in the form of flowers, animals, landscapes, and natural patterns.
- Online Platforms: Explore websites like Pinterest, Instagram, and rockscapes.net for endless rock painting ideas and tutorials.
- Art and Design: Draw inspiration from various art styles, design trends, and color palettes.
- Books and Magazines: Browse through art books, craft magazines, and gardening publications for creative ideas.
- Everyday Objects: Find inspiration in everyday objects like fabrics, patterns, and textures.
- Local Environment: Take a walk in your neighborhood or local park and observe the colors, shapes, and textures of the natural environment.
- Community Groups: Join local rock painting groups or online communities to share ideas and gain inspiration from other artists.
- Personal Interests: Incorporate your personal interests and hobbies into your rock painting designs.
15. How to Share Your Ladybug Rocks with Others?
Sharing your ladybug rocks with others is a wonderful way to spread joy and connect with your community. Here are some ideas on how to share your creations:
- Hide Them in Public Places: Leave your ladybug rocks in parks, gardens, or other public places for others to find and enjoy.
- Gift Them to Friends and Family: Give your ladybug rocks as thoughtful and personalized gifts to friends and family members.
- Join Rock Painting Groups: Participate in local rock painting groups and share your creations with fellow artists.
- Share on Social Media: Post photos of your ladybug rocks on social media platforms like Instagram, Facebook, and Pinterest using relevant hashtags.
- Donate to Local Charities: Donate your ladybug rocks to local charities or organizations to brighten someone’s day.
- Create a Rock Garden: Start a rock garden in your front yard and invite neighbors to add their own painted rocks.
- Host a Rock Painting Party: Invite friends and family over for a rock painting party and encourage them to create their own ladybug rocks.
- Participate in Community Events: Participate in local community events and set up a booth to showcase and sell your ladybug rocks.
16. How Does Rockscapes.Net Help You With Rock Painting?
Rockscapes.net provides a wealth of resources and inspiration to help you with your rock painting projects. Here’s how we can assist you:
- Extensive Idea Gallery: Browse our extensive gallery of rock painting ideas for inspiration and creative designs.
- Step-by-Step Tutorials: Follow our step-by-step tutorials for detailed instructions on how to create various rock painting projects.
- Expert Tips and Techniques: Learn expert tips and techniques from experienced rock painters to improve your skills.
- Supply Recommendations: Get recommendations for the best rock painting supplies, including paints, brushes, and sealers.
- Community Forum: Join our community forum to connect with other rock painters, share your creations, and ask questions.
- Latest Trends: Stay up-to-date with the latest trends in rock painting and discover new and innovative designs.
- Local Resources: Find local resources such as rock suppliers, art stores, and rock painting groups in your area.
- Personalized Support: Receive personalized support and guidance from our team of rock painting experts.
17. What Are the Different Types of Rocks Suitable for Painting?
Choosing the right type of rock is essential for a successful rock painting project. Here are some of the best types of rocks for painting:
- Smooth River Rocks: These rocks have a smooth surface and rounded edges, making them ideal for painting detailed designs.
- Flat Rocks: Flat rocks provide a stable base for painting and are easy to display.
- Pebbles: Small, smooth pebbles are perfect for creating miniature rock paintings.
- Sea Glass: Although not technically a rock, sea glass offers a unique and translucent surface for painting.
- Slate: Slate rocks have a flat, smooth surface and a distinctive texture that adds character to your paintings.
- Sandstone: Sandstone rocks have a porous surface that absorbs paint well, creating a rustic look.
- Granite: Granite rocks are durable and have a smooth surface that is suitable for painting.
- Limestone: Limestone rocks have a soft texture and a light color that provides a good base for painting.
When selecting rocks for painting, consider the size, shape, texture, and color to ensure they meet your project requirements.
18. What Are the Latest Trends in Rock Painting?
Stay up-to-date with the latest trends in rock painting to create unique and eye-catching designs. Here are some of the hottest trends in the rock painting world:
- Mandala Rocks: Painting intricate mandala patterns on rocks is a popular trend that combines art and mindfulness.
- Kindness Rocks: Creating rocks with positive messages and leaving them in public places to spread kindness and joy.
- Character Rocks: Painting rocks to resemble popular characters from movies, TV shows, and video games.
- Nature-Inspired Rocks: Painting rocks with designs inspired by nature, such as flowers, animals, and landscapes.
- Abstract Rocks: Creating abstract designs using bold colors, geometric shapes, and unconventional techniques.
- Glow-in-the-Dark Rocks: Using glow-in-the-dark paint to create rocks that light up in the dark, adding a magical touch to your garden or outdoor space.
- 3D Rocks: Adding dimension to your rock paintings by incorporating textured materials, embellishments, and raised designs.
- Interactive Rocks: Creating rocks with QR codes that link to websites, videos, or social media profiles, adding a modern twist to rock painting.
19. FAQ About Making Ladybug Rocks
Here are some frequently asked questions about making ladybug rocks:
19.1. What type of paint is best for painting rocks?
Acrylic paints are generally the best choice for painting rocks due to their durability, vibrant colors, and water resistance.
19.2. Do I need to seal my painted rocks?
Yes, sealing your painted rocks with a clear, weather-resistant sealer is essential for protecting the paint and extending their lifespan.
19.3. How do I clean my painted rocks?
Gently clean your painted rocks with a soft cloth and mild soap to remove any dirt or debris.
19.4. Can I use markers instead of paint?
Yes, you can use paint markers for detailed work on your ladybug rocks.
19.5. How do I make my painted rocks glow in the dark?
Use glow-in-the-dark paint or add glow-in-the-dark accents to your designs.
19.6. What size rocks are best for painting ladybugs?
Choose rocks that are smooth, flat, and easy to handle. Sizes between 2-4 inches are ideal.
19.7. How do I prevent the paint from chipping off my rocks?
Prepare the rocks properly by cleaning them thoroughly, applying thin coats of paint, and sealing them with a weather-resistant sealer.
19.8. Can I sell my painted ladybug rocks?
Yes, you can sell your painted ladybug rocks at craft fairs, markets, or online platforms like Etsy.
19.9. How do I join a rock painting group?
Search for local rock painting groups on social media platforms or community bulletin boards.
19.10. Where can I find inspiration for my rock painting projects?
Explore websites like Pinterest, Instagram, and rockscapes.net for endless rock painting ideas and tutorials.
20. Transform Your Garden with Rockscapes.net
Ready to add a touch of whimsy to your garden? Visit rockscapes.net today for more inspiration, tips, and resources to create beautiful ladybug rocks and other stunning rock art. Explore our website and discover how easy and fun it is to transform ordinary stones into extraordinary works of art.
For personalized assistance and expert advice, contact us at:
- Address: 1151 S Forest Ave, Tempe, AZ 85281, United States
- Phone: +1 (480) 965-9011
- Website: rockscapes.net
Let rockscapes.net be your guide to creating a garden that is as unique and beautiful as you are!