Making a ring out of a rock is an awesome DIY project to connect with nature and express your unique style, and rockscapes.net is here to guide you through the process with expert tips and inspiration. With the right tools and techniques, you can transform ordinary stones into wearable art, creating beautiful stone jewelry and unique rock crafts that reflect your personal style. Get ready to unleash your creativity and explore the world of rock ring making with rockscapes.net!
1. Why Make a Ring Out of a Rock?
Making a ring out of a rock lets you create a unique, personalized piece of jewelry that connects you to nature. Crafting your own rock ring lets you express your creativity, resulting in a one-of-a-kind accessory that reflects your individual style.
What are the benefits of creating your own rock ring?
Creating your own rock ring provides a distinctive and personalized accessory, a connection to nature, a creative outlet, and a cost-effective jewelry option. Each benefit enhances the appeal of this DIY project.
- Unique and Personalized Accessory: Crafting a rock ring allows you to design a piece that truly reflects your personal style and taste. You select the rock, shape, and finish, ensuring that no one else will have the exact same ring.
- Connection to Nature: Using natural materials like rocks connects you to the earth, providing a tangible reminder of the outdoors. This connection can be especially meaningful for those who appreciate nature and want to incorporate it into their everyday lives.
- Creative Outlet: The process of making a rock ring is a fantastic creative outlet. It allows you to experiment with different techniques, tools, and designs, fostering your artistic skills and providing a sense of accomplishment.
- Cost-Effective: Compared to purchasing jewelry from a store, making your own rock ring can be very cost-effective. You can source rocks for free from your surroundings or purchase them in bulk at a low cost, saving money while creating something beautiful.
What kind of person enjoys making rock rings?
People who enjoy making rock rings often share a love for nature, crafting, and unique jewelry. They appreciate the process of transforming raw materials into something beautiful and wearable.
- Nature Enthusiasts: Those who love spending time outdoors and appreciate natural materials find rock ring making particularly appealing. It allows them to bring a piece of nature into their daily lives.
- DIY Enthusiasts: Individuals who enjoy do-it-yourself projects and crafting find rock ring making a satisfying and engaging activity. It offers a chance to learn new skills and create something unique with their own hands.
- Jewelry Lovers: People who appreciate unique and handcrafted jewelry are drawn to rock ring making. It provides an opportunity to create custom pieces that stand out from mass-produced items.
- Budget-Conscious Creatives: Those looking for affordable ways to express their creativity find rock ring making an attractive option. It allows them to create beautiful jewelry without breaking the bank.
2. What Tools And Materials Do You Need to Make a Rock Ring?
To make a ring out of a rock, you’ll need safety glasses, a rock saw or rotary tool, grinding and polishing tools, epoxy or strong adhesive, and a ring blank. Each tool plays a vital role in shaping and securing the rock into a wearable ring.
What are the essential tools for rock ring making?
The essential tools include safety glasses, a rock saw or rotary tool, grinding and polishing tools, epoxy or strong adhesive, and a ring blank. These tools ensure safety and precision in crafting a rock ring.
- Safety Glasses: Protecting your eyes from flying debris is crucial. Safety glasses are a must when cutting, grinding, and polishing rocks.
- Rock Saw or Rotary Tool: A rock saw is ideal for cutting larger rocks, while a rotary tool with diamond cutting wheels is perfect for smaller, more detailed work.
- Grinding and Polishing Tools: These tools help shape and smooth the rock. You can use various grits of sandpaper, polishing pads, and a polishing compound.
- Epoxy or Strong Adhesive: A strong adhesive is necessary to securely attach the rock to the ring blank. Epoxy is a popular choice due to its durability.
- Ring Blank: The ring blank is the base onto which you’ll attach the rock. These come in various materials and sizes to suit your design.
What type of rock is best for making rings?
The best types of rocks for making rings are those that are hard enough to withstand wear but soft enough to be shaped and polished, such as agate, jasper, and turquoise. Durability and aesthetic appeal are key factors.
- Agate: Known for its vibrant colors and banding patterns, agate is a popular choice for rings. It is hard enough to resist scratches and polishes well.
- Jasper: Jasper is another durable stone that comes in a wide variety of colors and patterns. It is easy to work with and polishes to a high shine.
- Turquoise: With its distinctive blue-green color, turquoise is a beautiful option for rings. It is relatively soft, so it requires careful handling during the crafting process.
- Other suitable rocks: Other options include obsidian, quartz, and various types of hard sedimentary rocks. The key is to choose a rock that is both visually appealing and durable enough for everyday wear.
3. How Do You Select The Right Rock for Your Ring?
Selecting the right rock for your ring involves considering hardness, color, pattern, and size. A good rock should be durable, visually appealing, and appropriately sized for a ring.
What factors should you consider when choosing a rock?
Consider hardness, color, pattern, size, and personal preference when choosing a rock. These factors ensure the final ring is both beautiful and durable.
- Hardness: Choose a rock that is hard enough to withstand daily wear. Rocks with a Mohs hardness of 6 or higher are generally suitable for rings.
- Color and Pattern: Select a rock with colors and patterns that appeal to your personal style. Consider how the colors will complement your wardrobe and other jewelry.
- Size: The size of the rock should be appropriate for a ring. Smaller rocks are easier to work with and more comfortable to wear.
- Shape: Look for rocks that are relatively flat or can be easily shaped into a suitable form. Avoid rocks with too many cracks or imperfections.
- Personal Preference: Ultimately, the best rock is one that you find beautiful and meaningful. Choose a rock that resonates with you and inspires your creativity.
Where can you find rocks for ring making?
Rocks for ring making can be found in nature, craft stores, gem and mineral shows, and online retailers. Each source offers different options and price points.
- Nature: Beaches, riverbeds, and hiking trails are great places to find rocks. Look for interesting stones that catch your eye.
- Craft Stores: Many craft stores sell small rocks and gemstones suitable for jewelry making. These are often pre-polished and ready to use.
- Gem and Mineral Shows: These events are a treasure trove of rocks, minerals, and gemstones. You can find unique and high-quality materials at competitive prices.
- Online Retailers: Websites like Etsy, Amazon, and specialty gem retailers offer a wide variety of rocks for ring making. This is a convenient option for those who cannot easily access other sources.
- Rockhounding Clubs: Joining a local rockhounding club can provide access to group collecting trips and valuable knowledge about where to find specific types of rocks.
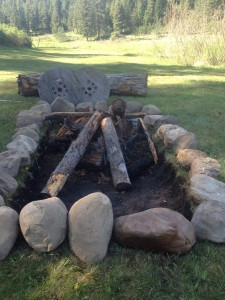
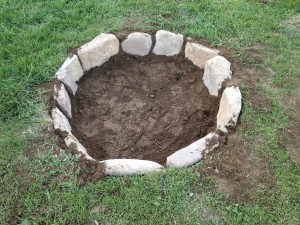 Rocks for ring making found in nature
4. Step-By-Step Guide: How to Make a Ring Out of a Rock
Making a ring out of a rock involves cutting, shaping, polishing, and attaching the rock to a ring blank. Following these steps carefully will result in a beautiful, handmade rock ring.
How do you cut and shape the rock?
Cutting and shaping the rock requires a rock saw or rotary tool with diamond cutting wheels, along with safety precautions. Proper cutting and shaping are crucial for creating a comfortable and attractive ring.
- Mark the Rock: Use a marker to draw the desired shape on the rock. Consider the size and shape of the ring blank when marking.
- Cut the Rock: Use a rock saw or rotary tool with a diamond cutting wheel to carefully cut along the marked lines. Keep the rock cool by using water as a lubricant.
- Grind the Edges: Use a grinding wheel or sandpaper to smooth the edges of the cut rock. Start with a coarse grit and gradually move to finer grits.
- Shape the Rock: Continue grinding and sanding the rock until it reaches the desired shape. Regularly check the fit against the ring blank to ensure a proper match.
What is the best way to polish the rock?
Polishing the rock involves using progressively finer grits of sandpaper, followed by a polishing compound and a soft cloth. Proper polishing enhances the rock’s natural beauty and shine.
- Sand the Rock: Begin with a medium-grit sandpaper (around 400 grit) to remove any remaining scratches from the grinding process.
- Use Finer Grits: Gradually move to finer grits of sandpaper (600, 800, 1000 grit) to further smooth the surface.
- Polish with Compound: Apply a polishing compound to a soft cloth or polishing pad. Use this to polish the rock until it achieves a high shine.
- Final Buff: Buff the rock with a clean, soft cloth to remove any residue from the polishing compound.
How do you attach the rock to the ring blank?
Attaching the rock to the ring blank requires a strong adhesive like epoxy. Proper adhesion ensures the rock stays securely attached to the ring.
- Clean Surfaces: Ensure both the rock and the ring blank are clean and dry. Use rubbing alcohol to remove any oils or dirt.
- Apply Adhesive: Apply a generous amount of epoxy or strong adhesive to the ring blank where the rock will be placed.
- Position the Rock: Carefully position the rock onto the adhesive, pressing down firmly.
- Secure and Cure: Use clamps or tape to hold the rock in place while the adhesive cures. Follow the manufacturer’s instructions for curing time, typically 24-48 hours.
- Remove Excess Adhesive: Once the adhesive is fully cured, remove any excess adhesive with a sharp blade or sandpaper.
5. Safety Tips For Working With Rocks
Working with rocks requires several safety precautions, including wearing safety glasses and using proper ventilation. Prioritizing safety ensures a safe and enjoyable crafting experience.
Why is safety important when working with rocks?
Safety is crucial to prevent injuries from flying debris, sharp tools, and dust inhalation. Taking proper precautions ensures a safe and enjoyable crafting experience.
- Eye Protection: Flying rock fragments can cause serious eye injuries. Always wear safety glasses when cutting, grinding, or polishing rocks.
- Respiratory Protection: Grinding and cutting rocks can create dust that can be harmful if inhaled. Use a dust mask or respirator to protect your lungs.
- Proper Ventilation: Work in a well-ventilated area to minimize exposure to dust and fumes from adhesives or polishing compounds.
- Tool Safety: Follow the manufacturer’s instructions when using power tools like rock saws and rotary tools. Use the appropriate safety guards and attachments.
- Hand Protection: Wear gloves to protect your hands from sharp edges and abrasive materials.
What safety gear should you always wear?
Always wear safety glasses, a dust mask or respirator, gloves, and appropriate clothing when working with rocks. This gear provides essential protection against potential hazards.
- Safety Glasses: Essential for protecting your eyes from flying debris.
- Dust Mask or Respirator: Prevents inhalation of harmful dust particles.
- Gloves: Protect hands from sharp edges and abrasive materials.
- Appropriate Clothing: Wear long sleeves and pants to protect your skin from cuts and abrasions.
- Ear Protection: If using noisy power tools, wear earplugs or earmuffs to protect your hearing.
6. Rock Ring Design Ideas
Rock ring designs can range from simple and minimalist to intricate and ornate. Exploring different design ideas can inspire your creativity and help you create unique pieces.
What are some popular rock ring styles?
Popular rock ring styles include minimalist designs, bezel settings, cluster rings, and nature-inspired designs. Each style offers a unique aesthetic appeal.
- Minimalist Designs: These rings feature a simple, polished rock attached to a plain band. The focus is on the natural beauty of the stone.
- Bezel Settings: A bezel setting involves wrapping a metal rim around the rock to hold it in place. This style is secure and adds a touch of elegance.
- Cluster Rings: Cluster rings feature multiple small rocks arranged together on the band. This style creates a bold and eye-catching look.
- Nature-Inspired Designs: These rings incorporate natural elements like leaves, vines, or flowers around the rock. This style celebrates the beauty of the natural world.
- Boho Style: Rings with a raw stone without any buffing. Usually bigger and not symmetrical.
How can you personalize your rock ring design?
Personalizing your rock ring design involves choosing unique stones, incorporating custom engravings, and selecting distinctive ring blank materials. These touches make your ring truly one-of-a-kind.
- Choose Unique Stones: Select rocks with unusual colors, patterns, or shapes that reflect your personal style.
- Incorporate Custom Engravings: Add engravings to the ring blank or the rock itself. This could be initials, dates, or meaningful symbols.
- Select Distinctive Ring Blank Materials: Experiment with different materials for the ring blank, such as sterling silver, copper, or wood.
- Add Metal Accents: Incorporate metal accents like wire wrapping or small metal beads to enhance the design.
- Combine with Other Materials: Mix rocks with other natural materials like wood or leather to create a unique and textured look.
7. Caring For Your Rock Ring
Caring for your rock ring involves regular cleaning and proper storage to maintain its beauty and durability. Proper care ensures your ring lasts for years to come.
How do you clean a rock ring?
Cleaning a rock ring involves using mild soap, warm water, and a soft brush. Gentle cleaning helps maintain the stone’s shine and prevent damage.
- Prepare Cleaning Solution: Mix a small amount of mild soap with warm water.
- Gently Scrub: Use a soft brush to gently scrub the rock and the ring blank.
- Rinse Thoroughly: Rinse the ring thoroughly with clean water to remove all traces of soap.
- Dry Completely: Dry the ring completely with a soft cloth.
- Polish if Needed: If the rock appears dull, use a polishing cloth to restore its shine.
How should you store your rock ring to prevent damage?
Store your rock ring in a soft pouch or jewelry box to protect it from scratches and impacts. Proper storage prevents damage and maintains the ring’s appearance.
- Use a Soft Pouch: Store the ring in a soft pouch made of microfiber or velvet to prevent scratches.
- Store Separately: Keep the ring separate from other jewelry to avoid scratches and tangling.
- Avoid Extreme Temperatures: Protect the ring from extreme temperatures and direct sunlight, which can damage the stone or the adhesive.
- Remove Before Activities: Remove the ring before engaging in activities that could damage it, such as gardening, cleaning, or exercising.
- Regular Inspections: Periodically inspect the ring for any signs of damage, such as loose stones or cracks in the adhesive.
8. Troubleshooting Common Issues
Common issues when making rock rings include rocks breaking, adhesive failing, and polishing problems. Knowing how to troubleshoot these issues can save time and frustration.
What do you do if the rock breaks while cutting or shaping?
If the rock breaks, assess the damage and consider using adhesive to repair it or selecting a new rock. Careful handling and proper techniques can minimize breakage.
- Assess the Damage: Determine the extent of the damage. If the break is clean and the pieces fit together well, you may be able to repair it.
- Use Strong Adhesive: Apply a strong adhesive like epoxy to the broken edges and carefully reassemble the rock.
- Secure and Cure: Use clamps or tape to hold the pieces in place while the adhesive cures.
- Grind and Polish: Once the adhesive is fully cured, grind and polish the repaired area to smooth out any imperfections.
- Start Over: If the damage is too severe, it may be best to select a new rock and start the process again.
Why might the adhesive fail, and how can you prevent it?
Adhesive failure can occur due to improper cleaning, insufficient adhesive, or using the wrong type of adhesive. Proper preparation and the right materials can prevent this issue.
- Ensure Clean Surfaces: Always clean both the rock and the ring blank thoroughly with rubbing alcohol to remove any oils or dirt.
- Use Sufficient Adhesive: Apply a generous amount of adhesive to ensure a strong bond.
- Choose the Right Adhesive: Select a strong adhesive like epoxy that is specifically designed for bonding non-porous materials.
- Follow Instructions: Follow the manufacturer’s instructions for mixing and curing the adhesive.
- Secure During Curing: Use clamps or tape to hold the rock in place while the adhesive cures.
What causes polishing problems, and how can you fix them?
Polishing problems can result from using the wrong polishing compound, skipping grits of sandpaper, or applying too much pressure. Correcting these issues can achieve a smooth, shiny finish.
- Use the Right Compound: Ensure you are using a polishing compound that is appropriate for the type of rock you are working with.
- Don’t Skip Grits: Follow a progressive sanding process, moving from coarser to finer grits of sandpaper. Skipping grits can leave scratches that are difficult to remove.
- Apply Moderate Pressure: Use moderate pressure when sanding and polishing. Applying too much pressure can damage the rock or create uneven surfaces.
- Clean Regularly: Clean the rock and polishing pad regularly to remove any debris that could cause scratches.
- Check Your Work: Periodically check your work under good lighting to identify any imperfections and address them before moving on to the next step.
9. Where To Find Inspiration For Your Rock Ring?
Finding inspiration for your rock ring can come from nature, online galleries, and jewelry design books. Inspiration helps fuel creativity and leads to unique designs.
How can nature inspire your designs?
Nature offers endless inspiration through its colors, patterns, and textures. Observing natural elements can spark unique and beautiful ring designs.
- Colors: Draw inspiration from the colors of rocks, minerals, plants, and landscapes. Use these colors in your rock selection and design.
- Patterns: Study the patterns found in nature, such as the banding in agate or the veins in marble. Incorporate these patterns into your ring design.
- Textures: Explore the textures of different rocks, woods, and other natural materials. Use these textures to add depth and interest to your ring.
- Shapes: Look for inspiration in the shapes of leaves, flowers, and other natural forms. Incorporate these shapes into your ring design.
- Settings: Imagine the settings where you find your rocks – a beach, a forest, a mountain. Let these landscapes influence the overall aesthetic of your ring.
What are some good online resources for rock ring design ideas?
Online resources like Pinterest, Instagram, and Etsy offer a wealth of rock ring design ideas. These platforms showcase a variety of styles and techniques.
- Pinterest: Pinterest is a great source for visual inspiration. Search for “rock rings,” “stone jewelry,” or “DIY rings” to find a wide range of ideas.
- Instagram: Follow jewelry designers and rock enthusiasts on Instagram to see their latest creations. Use hashtags like #rockring, #stonejewelry, and #DIYjewelry to discover new designs.
- Etsy: Etsy is a marketplace for handmade and vintage items. Browse Etsy for rock rings to see what other artisans are creating and get ideas for your own designs.
- Online Jewelry Forums: Participate in online jewelry forums to connect with other makers and share ideas. These forums often have galleries of member projects that can provide inspiration.
- Rock and Gem Websites: Explore websites dedicated to rocks and gems for information on different types of stones and how they can be used in jewelry making.
10. How to Sell Your Rock Rings?
Selling your rock rings involves setting up an online store, participating in craft fairs, and marketing through social media. Effective sales strategies can turn your hobby into a business.
What are the best platforms for selling handmade jewelry online?
The best platforms for selling handmade jewelry online include Etsy, Shopify, and Amazon Handmade. Each offers different features and benefits.
- Etsy: Etsy is a popular marketplace for handmade and vintage items. It has a large customer base and is easy to set up and use.
- Shopify: Shopify allows you to create your own online store with full control over branding and design. It offers a range of features for managing inventory, processing payments, and marketing your products.
- Amazon Handmade: Amazon Handmade is a section of Amazon dedicated to handmade items. It offers access to Amazon’s massive customer base but has stricter requirements for sellers.
- Big Cartel: Big Cartel is a platform designed specifically for artists and makers. It is easy to use and offers affordable pricing plans.
- eBay: eBay is a large online marketplace where you can sell a wide variety of items, including handmade jewelry. It offers a large audience but can be competitive.
How can you market your rock rings effectively?
Marketing your rock rings involves using social media, participating in craft fairs, and collaborating with influencers. Effective marketing strategies can increase visibility and sales.
- Social Media: Use platforms like Instagram, Facebook, and Pinterest to showcase your rock rings. Post high-quality photos and videos, engage with your followers, and run targeted ads.
- Craft Fairs: Participate in local craft fairs and markets to sell your rings in person. This allows you to connect with customers, get feedback, and build relationships.
- Collaborate with Influencers: Partner with influencers in the jewelry or DIY space to promote your rings. This can help you reach a wider audience and build credibility.
- Email Marketing: Build an email list and send out regular newsletters to promote new designs, special offers, and upcoming events.
- Website or Blog: Create a website or blog to showcase your rock rings and share your story. This can help you build your brand and attract customers.
Making a ring out of a rock is a rewarding DIY project that allows you to create unique, personalized jewelry. By following the steps outlined in this guide and prioritizing safety, you can transform ordinary stones into beautiful wearable art. Whether you’re looking to express your creativity, connect with nature, or start a small business, rock ring making offers endless possibilities.
Ready to start your rock ring making adventure? Explore rockscapes.net for more inspiration, detailed guides, and expert advice on all things rocks and landscaping! Discover the perfect stones and tools to bring your unique designs to life. Visit rockscapes.net today and unleash your creativity!
Address: 1151 S Forest Ave, Tempe, AZ 85281, United States
Phone: +1 (480) 965-9011
Website: rockscapes.net
 Rock ring design ideas from online galleries
FAQ: Making a Ring Out of a Rock
1. What are the best rocks to use for making rings?
Agate, jasper, and turquoise are excellent choices because they balance hardness and workability.
2. Do I need special tools to cut rocks?
Yes, you’ll need a rock saw or rotary tool with diamond cutting wheels for precise cutting.
3. How do I polish a rock to make it shine?
Use progressively finer grits of sandpaper followed by a polishing compound and a soft cloth.
4. What kind of adhesive should I use to attach the rock to the ring blank?
Epoxy or a strong adhesive designed for non-porous materials works best.
5. How can I protect my eyes when working with rocks?
Always wear safety glasses to guard against flying debris.
6. Is it safe to breathe in the dust from grinding rocks?
No, use a dust mask or respirator to avoid inhaling harmful particles.
7. How do I clean my rock ring?
Use mild soap, warm water, and a soft brush, then dry it thoroughly.
8. How should I store my rock ring to keep it safe?
Store it in a soft pouch or jewelry box to prevent scratches and impacts.
9. What can I do if my rock breaks while I’m working on it?
Assess the damage; if minor, use adhesive to repair it, or start with a new rock.
10. Where can I find inspiration for my rock ring designs?
Look to nature, online galleries, and jewelry design books for creative ideas.