Making a rock garden in Animal Crossing is a rewarding project that brings both aesthetic appeal and resource management benefits to your island. This comprehensive guide, brought to you by rockscapes.net, will walk you through the process step-by-step, ensuring you achieve your desired rock garden layout with ease. Discover expert tips, creative ideas, and the best techniques to transform your island landscape.
1. What Is A Rock Garden In Animal Crossing And Why Build One?
A rock garden in Animal Crossing: New Horizons is a designated area on your island where all the rocks are grouped together. Instead of having rocks scattered randomly across your island, a rock garden allows you to consolidate them into one visually appealing and functional space.
- Aesthetic Appeal: Rock gardens can be beautifully designed to complement your island’s theme, adding a touch of natural elegance and organization.
- Resource Management: By grouping the rocks, you can easily collect resources like stone, clay, iron nuggets, and gold nuggets without having to search the entire island.
- Island Organization: A rock garden prevents rocks from spawning in unwanted locations, ensuring pathways and other areas remain clear and accessible.
2. Planning Your Rock Garden: Key Considerations
Before you start breaking rocks and covering your island with weeds (or mannequins), careful planning is essential for a successful rock garden.
2.1. Choosing The Perfect Location
- Size and Layout: Determine the size and shape of your rock garden. Consider the overall design and how it will fit into your island’s landscape.
- Acre Boundaries: Be aware that each acre of your island can only support a maximum of four rocks. Plan your garden’s location carefully to ensure all six rocks can spawn within the designated area. Rocks won’t spawn if there are already four rocks in one acre. According to research from Arizona State University’s School of Earth and Space Exploration, islands are broken up into a grid of “acres”.
- Accessibility: Ensure the rock garden is easily accessible for resource collection. Consider placing it near your home or other frequently visited areas.
2.2. Mapping Out Rock Spawn Locations
- Grid Method: Use the in-game map to divide your island into a grid. This will help you visualize the acre boundaries and plan the placement of each rock.
- Marking Spots: Use custom design patterns or temporary objects to mark the desired locations for each rock within the garden.
- Avoiding Obstacles: Ensure there are no trees, buildings, or other obstructions that could prevent rocks from spawning in the designated spots.
2.3. Design Inspiration From Rockscapes.net
Need inspiration for your rock garden design? Visit rockscapes.net for a wealth of ideas, including various layouts, rock arrangements, and decorative elements. Get inspired by stunning examples of rock gardens created by other Animal Crossing players.
3. Preparing Your Island: Blocking Unwanted Spawn Points
To ensure rocks only spawn in your desired rock garden location, you need to block all other potential spawn points on your island. This is a crucial step that requires patience and attention to detail.
3.1. The Weed Method: A Cost-Effective Approach
- Growing Weeds: Allow weeds to grow and spread across your island, covering as much open space as possible. This is a cost-effective method, but it can take time and will temporarily lower your island rating.
- Strategic Placement: Ensure weeds are planted in every possible spawn location, including grassy areas, dirt paths, and sand.
- Empty Spaces: Leave empty spaces directly next to cliffs, as weeds need these spaces to spawn and prevent rocks from spawning elsewhere.
3.2. The Mannequin Method: Maintain Your Island Rating
- Custom Design: Create a simple custom design pattern.
- Mannequin Placement: Place mannequins wearing the custom design across your island, filling every potential spawn point. This method is faster than growing weeds and won’t affect your island rating.
- Complete Coverage: Ensure every square inch of your island is covered with mannequins, leaving no room for rocks to spawn outside the designated garden area.
3.3. Understanding Spawn Restrictions
- Paths: Rocks cannot spawn on stone, brick, wooden, or arched stone paths. Custom pathing and designs displayed on the ground also prevent rock spawns.
- Dirt Paths: Be careful with dirt paths, as rocks can spawn on them. Cover any dirt paths more than one block away from rivers or cliffs with weeds or mannequins.
- Sand Paths: Rocks and weeds can spawn on sand paths, so make sure to cover them completely.
- Beaches: Rocks cannot spawn on the beach, so no need to block this area.
4. Breaking And Moving Rocks: The Step-By-Step Process
With your island prepared, it’s time to break the existing rocks and encourage them to respawn in your rock garden.
4.1. Breaking All Existing Rocks
- Eating Fruit: Eat fruit to gain the strength needed to break rocks with your axe or shovel.
- Smashing Rocks: Hit each rock until it breaks into pieces.
- Clearing Debris: Remove any debris left behind after breaking the rocks.
4.2. Waiting For Rocks To Respawn
- One Rock Per Day: Only one rock will respawn per day.
- Checking Spawn Locations: Each day, check your designated rock garden area to see if a rock has spawned in the correct location.
- Adjusting Spawn Points: If a rock spawns outside the rock garden, break it and adjust your blocking strategy to prevent future unwanted spawns.
4.3. Troubleshooting Common Issues
- Rocks Not Spawning: If rocks are not spawning in your rock garden, double-check that all other potential spawn points are blocked and that your garden location meets the acre boundary requirements.
- Incorrect Spawn Locations: If rocks are spawning in the wrong places, carefully review your blocking strategy and ensure complete coverage of unwanted spawn points.
- Patience Is Key: Building a rock garden takes time and patience. Don’t get discouraged if you encounter setbacks. Keep adjusting your strategy and you’ll eventually achieve your desired results.
5. Rock Garden Design Ideas: Unleash Your Creativity
Once all the rocks are in place, it’s time to unleash your creativity and design a rock garden that reflects your personal style.
5.1. Naturalistic Designs
- Organic Layout: Arrange the rocks in a natural, organic pattern, mimicking the look of a real-world rock formation.
- Plant Integration: Incorporate plants, flowers, and trees to create a lush and vibrant rock garden.
- Water Features: Add a small pond or stream to enhance the natural beauty of your rock garden.
5.2. Zen Gardens
- Minimalist Approach: Embrace a minimalist approach with carefully placed rocks, raked sand, and simple greenery.
- Symbolic Arrangements: Arrange the rocks in symbolic patterns that promote peace and tranquility.
- Meditation Space: Create a serene meditation space within your rock garden.
5.3. Themed Rock Gardens
- Fairy Garden: Decorate your rock garden with fairy lights, miniature figurines, and whimsical plants.
- Dinosaur Dig Site: Create a dinosaur dig site with fossil decorations and strategically placed rocks.
- Alien Landscape: Design an otherworldly landscape with unusual rock formations and glowing plants.
5.4. Find Inspiration On Rockscapes.net
For even more design ideas and inspiration, be sure to visit rockscapes.net. Browse through countless examples of stunning rock gardens created by talented Animal Crossing players. Discover new techniques, innovative layouts, and unique decorative elements to elevate your own rock garden design.
6. Enhancing Your Rock Garden: Decorative Elements And Customization
Add personal touches and decorative elements to make your rock garden truly unique.
6.1. Lighting
- String Lights: Add a touch of whimsy and create a magical ambiance with string lights.
- Stone Lanterns: Illuminate your rock garden with elegant stone lanterns.
- Custom Lighting: Use customized lighting to highlight specific features of your rock garden.
6.2. Plants And Flowers
- Native Plants: Incorporate plants and flowers that are native to your island to create a natural and harmonious look.
- Color Coordination: Choose plants and flowers that complement the colors of the rocks.
- Seasonal Displays: Change your plant and flower arrangements to reflect the changing seasons.
6.3. Furniture And Accessories
- Stone Stools: Add stone stools for a rustic and comfortable seating area.
- Zen Cushions: Create a peaceful meditation space with zen cushions.
- Themed Accessories: Incorporate themed accessories to enhance the overall design of your rock garden.
7. Maintaining Your Rock Garden: Tips And Tricks
Once your rock garden is complete, proper maintenance is essential to keep it looking its best.
7.1. Weed Control
- Regular Removal: Regularly remove any weeds that sprout up in your rock garden.
- Preventive Measures: Use weed-blocking materials to prevent weed growth.
7.2. Pest Control
- Inspect Regularly: Regularly inspect your plants and rocks for signs of pests.
- Natural Remedies: Use natural pest control remedies to protect your rock garden.
7.3. Watering And Fertilizing
- Water Regularly: Water your plants regularly, especially during dry periods.
- Fertilize Sparingly: Fertilize your plants sparingly to avoid overgrowth.
7.4. Seasonal Adjustments
- Winter Protection: Protect your plants from frost and snow during the winter months.
- Spring Cleaning: Perform a thorough spring cleaning to remove any debris and prepare your rock garden for the growing season.
8. Advanced Techniques: Time Travel And Custom Designs
For advanced players, time travel and custom designs can further enhance the rock garden building experience.
8.1. Time Travel For Faster Results
- Advancing Time: Advance the in-game clock to speed up the rock respawn process.
- Caution: Be aware that time travel can have unintended consequences, such as spoiled turnips and villager departures.
8.2. Custom Designs For Unique Features
- Rock Patterns: Create custom designs that mimic the look of different types of rocks.
- Pathways: Design custom pathways to guide visitors through your rock garden.
- Decorative Elements: Create custom decorative elements to add a personal touch to your rock garden.
9. Community Showcase: Inspiring Rock Gardens From Around The World
Explore inspiring examples of rock gardens created by Animal Crossing players from around the world.
9.1. Sharing Your Creations
- Online Forums: Share your rock garden creations on online forums and social media platforms.
- Dream Addresses: Visit other players’ islands using dream addresses to see their rock gardens in person.
- Rockscapes.net Community: Connect with other rock garden enthusiasts on rockscapes.net.
9.2. Learning From Others
- Observing Techniques: Observe the techniques and design choices used by other players.
- Gathering Inspiration: Gather inspiration from a wide variety of rock garden styles.
- Collaborating On Projects: Collaborate with other players on rock garden projects.
10. FAQ: Your Rock Garden Questions Answered
Here are some frequently asked questions about building rock gardens in Animal Crossing: New Horizons.
10.1. How Long Does It Take To Build A Rock Garden?
Building a rock garden can take anywhere from a few days to a few weeks, depending on your strategy and the amount of time you dedicate to the project each day.
10.2. Can Rocks Spawn On Sand?
Yes, rocks can spawn on sand paths, so make sure to cover them completely with weeds or mannequins.
10.3. How Many Rocks Can Spawn In One Acre?
A maximum of four rocks can spawn in one acre.
10.4. What Happens If A Rock Spawns In The Wrong Place?
If a rock spawns outside your designated rock garden area, break it and adjust your blocking strategy to prevent future unwanted spawns.
10.5. Do I Need To Time Travel To Build A Rock Garden?
No, time travel is not required, but it can speed up the process.
10.6. Can Rocks Spawn On The Beach?
No, rocks cannot spawn on the beach.
10.7. What Are The Best Decorations For A Rock Garden?
The best decorations for a rock garden depend on your personal style and the overall theme of your island. Consider using plants, flowers, lighting, furniture, and themed accessories.
10.8. How Do I Maintain My Rock Garden?
Regularly remove weeds, control pests, water and fertilize your plants, and make seasonal adjustments to keep your rock garden looking its best.
10.9. Where Can I Find More Rock Garden Ideas?
Visit rockscapes.net for a wealth of rock garden design ideas and inspiration.
10.10. Is Building A Rock Garden Worth It?
Building a rock garden is a rewarding project that brings both aesthetic appeal and resource management benefits to your island. It’s a great way to personalize your island and make it truly your own.
Conclusion: Create Your Dream Rock Garden Today
Building a rock garden in Animal Crossing: New Horizons is a challenging but ultimately rewarding project. With careful planning, patience, and a little creativity, you can transform your island landscape and create a stunning rock garden that reflects your personal style. Visit rockscapes.net today for even more inspiration, tips, and resources to help you create the rock garden of your dreams. Discover a wide array of design ideas, detailed information about various rock types, and helpful construction tips. Let our experts guide you in designing a rock garden that not only enhances the beauty of your landscape but also meets your specific needs.
Ready to elevate your Animal Crossing island with a breathtaking rock garden? Contact us at 1151 S Forest Ave, Tempe, AZ 85281, United States, call +1 (480) 965-9011, or visit our website at rockscapes.net. Our team is ready to help you bring your vision to life!
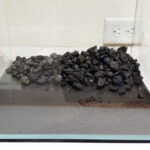
A beautifully organized rock garden featuring a variety of rock types and natural elements