Making a rock into a necklace pendant is a creative and rewarding DIY project, and rockscapes.net is here to guide you through the process. We’ll explore various techniques, from simple to advanced, enabling you to transform your favorite stones into wearable art, adding a personal touch to your jewelry collection. Whether you’re looking for DIY jewelry, stone pendants, or unique rock crafts, we’ve got you covered.
1. Why Turn a Rock Into a Necklace?
Turning a rock into a necklace is an excellent way to create unique, personalized jewelry. But what makes this craft so appealing?
- Uniqueness: Each rock is unique, ensuring your necklace is one-of-a-kind. The geological history and natural weathering of each stone tell a story, making your jewelry a conversation starter.
- Personal Connection: Rocks collected from memorable locations (like a vacation spot or a meaningful hike) can become cherished keepsakes. Think of a smooth stone from the shores of Maine or a piece of colorful jasper from Arizona.
- Cost-Effective: Creating your own rock necklace can be significantly cheaper than buying a similar piece from a store. You can source your own materials and tailor the design to your exact preferences, saving money while expressing your creativity.
- Creative Expression: This project allows for immense creative freedom in design and style. From rustic, natural looks to polished, sophisticated pieces, the possibilities are endless. You can experiment with different wire wrapping techniques, bead pairings, and chain styles to create a truly custom necklace.
- Therapeutic: The process of crafting a necklace can be relaxing and therapeutic. Working with natural materials and creating something beautiful with your hands can reduce stress and enhance mindfulness.
2. What Types of Rocks Work Best for Necklaces?
Not all rocks are created equal when it comes to crafting necklaces. The best rocks for this purpose are durable, visually appealing, and relatively easy to work with. Here’s a breakdown:
- Agate: Known for its vibrant bands and colors, agate is a popular choice.
- Jasper: Offers a variety of earthy tones and patterns.
- Quartz: Clear or milky quartz provides a classic, versatile look. According to research from Arizona State University’s School of Earth and Space Exploration, clear quartz, when polished, provides the best light reflection, in July 2025.
- Obsidian: A volcanic glass with a sleek, dark appearance.
- River Stones: Smooth, rounded stones found in rivers and streams.
- Beach Pebbles: Similar to river stones but found on beaches.
- Fossils: Adds a unique, historical touch to your necklace.
- Turquoise: Prized for its striking blue-green color, turquoise can add a vibrant pop to your jewelry.
- Lapis Lazuli: With its deep blue hue and golden flecks, lapis lazuli offers a touch of luxury and sophistication.
- Amethyst: This purple variety of quartz is known for its calming properties and regal appearance.
When selecting your rocks, consider the following:
- Hardness: Opt for rocks that are hard enough to withstand wear and tear. The Mohs scale of mineral hardness can be a useful reference; aim for rocks with a hardness of 6 or higher.
- Shape: Choose rocks with interesting shapes that will naturally lend themselves to a pendant design.
- Size: Smaller to medium-sized rocks are generally easier to work with and more comfortable to wear.
- Color and Pattern: Select rocks with colors and patterns that appeal to your personal style and complement your wardrobe.
- Texture: Consider the texture of the rock; smooth stones are often more comfortable against the skin, while rougher stones can add a rustic touch.
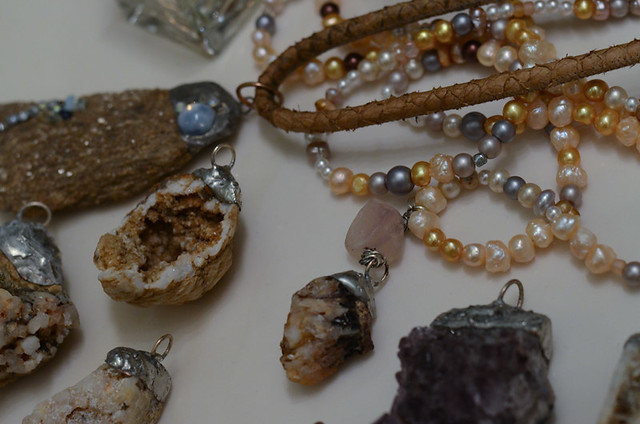 Assortment of tumbled stones, each featuring unique colors and patterns, ideal for crafting rock necklaces
3. Essential Tools and Materials for Rock Necklace Creation
Creating a rock necklace requires a few essential tools and materials to ensure a successful and enjoyable crafting experience. Here’s a comprehensive list:
- Rocks: Select your favorite rocks based on the guidelines mentioned earlier.
- Drill with Diamond-Tipped Drill Bits: Used for creating holes in the rocks for attaching bails or jump rings. Diamond-tipped bits are essential for drilling through harder stones without cracking them.
- Safety Glasses: Protect your eyes from flying debris when drilling or cutting rocks. Safety glasses are a must-have for any rock crafting project.
- Water: Use water to keep the drill bit and rock cool during drilling, which helps prevent overheating and cracking. A small container or spray bottle works well.
- Wire (Various Gauges): Used for wire wrapping and creating bails. Copper, silver, or gold wire can add different aesthetic touches to your necklace.
- Wire Cutters: For cutting the wire to the desired length.
- Round Nose Pliers: For creating loops and curves in the wire.
- Flat Nose Pliers: For gripping and bending the wire.
- Jump Rings: Small metal rings used to connect the pendant to the chain.
- Necklace Chain or Cord: Choose a chain or cord that complements the style of your pendant. Options include metal chains, leather cords, or even braided fabric.
- Clasp: Used to secure the necklace around your neck. Lobster clasps and toggle clasps are popular choices.
- Sandpaper (Various Grits): For smoothing rough edges and polishing the rock. Start with a coarser grit and gradually move to finer grits for a smooth finish.
- Polishing Cloth: For adding a final shine to the rock and metal components.
- Epoxy or Jewelry Glue: For securing bails or other components to the rock if drilling isn’t an option.
- Optional: Rock Tumbler: For polishing rocks to a high shine.
- Optional: Saw: For cutting rocks to a specific shape, you might need a rock saw.
Having the right tools and materials will not only make the process easier but also ensure a professional-looking finished product. Rockscapes.net offers a curated selection of high-quality tools and materials to help you get started on your rock necklace crafting journey.
4. Methods for Turning a Rock Into a Necklace
There are several methods to transform a rock into a wearable necklace. Each technique offers a unique look and requires different levels of skill. Here are some popular methods:
4.1. Drilling and Attaching a Bail
This method involves drilling a hole in the rock and attaching a bail (a metal loop) using glue or a jump ring. It’s a straightforward technique that provides a secure and professional-looking attachment.
- Select Your Rock: Choose a rock that is the right size and shape for a pendant. Make sure it’s sturdy enough to withstand drilling.
- Mark the Drill Point: Use a marker to indicate where you want to drill the hole. Consider the balance and orientation of the rock when deciding on the placement.
- Drill the Hole: Using a drill with a diamond-tipped drill bit, carefully drill a hole through the rock. Keep the rock and drill bit cool by applying water frequently. Start with a slow speed and gradually increase as needed.
- Clean the Hole: Remove any debris from the hole using a small brush or toothpick.
- Attach the Bail: Insert a jump ring through the hole and attach the bail to the jump ring. Alternatively, you can use jewelry glue to secure the bail directly to the rock, ensuring a strong bond.
- Add the Chain: Thread a necklace chain or cord through the bail, and your rock necklace is complete.
 Close-up of a hand drilling a hole into a small, flat rock using a power drill and diamond-tipped drill bit, with water being applied for cooling
4.2. Wire Wrapping
Wire wrapping is a technique that involves using wire to create a cage or frame around the rock, securing it in place while adding a decorative element. It’s a versatile method that allows for intricate and artistic designs.
- Choose Your Rock: Select a rock that is the right size and shape for wire wrapping. Smooth, rounded stones work particularly well for this method.
- Cut the Wire: Cut a length of wire that is long enough to wrap around the rock several times, leaving extra length for creating loops and embellishments.
- Wrap the Rock: Start by wrapping the wire around the rock, creating a secure base. Use pliers to bend and shape the wire, ensuring it fits snugly against the rock.
- Create a Bail: Use the excess wire to create a loop at the top of the rock, forming a bail for the necklace chain. Use round nose pliers to create a smooth, even loop.
- Add Embellishments: Get creative by adding decorative wire wraps, beads, or other embellishments to the design. Use your imagination to create a unique and eye-catching pendant.
- Secure the Ends: Use wire cutters to trim any excess wire, and use pliers to tuck in the ends, ensuring they are smooth and won’t snag on clothing.
- Attach the Chain: Thread a necklace chain or cord through the bail, and your wire-wrapped rock necklace is ready to wear.
4.3. Using a Bezel Setting
A bezel setting involves creating a custom metal frame that snugly fits around the rock, holding it securely in place. This method requires more advanced metalworking skills but results in a polished and professional-looking piece.
- Measure Your Rock: Accurately measure the dimensions of your rock to create a bezel that fits perfectly.
- Cut the Metal: Cut a strip of metal (such as silver or copper) that is long enough to wrap around the rock. The width of the strip should be slightly taller than the thickness of the rock.
- Form the Bezel: Bend the metal strip around the rock, creating a snug fit. Use pliers to shape the metal, ensuring it conforms to the contours of the rock.
- Solder the Seam: Solder the ends of the metal strip together, creating a closed bezel. Use a soldering iron and solder to create a strong, seamless joint.
- Create a Backing: Cut a piece of metal that is slightly larger than the base of the bezel. This will serve as the backing for the pendant.
- Solder the Bezel to the Backing: Solder the bezel to the metal backing, creating a secure enclosure for the rock.
- Add a Bail: Solder a bail to the top of the bezel, creating a loop for the necklace chain.
- Set the Rock: Carefully insert the rock into the bezel, ensuring it fits snugly. Use a bezel pusher to gently press the metal around the edges of the rock, securing it in place.
- Polish the Pendant: Use a polishing cloth or polishing wheel to polish the metal, creating a smooth, shiny finish.
- Attach the Chain: Thread a necklace chain or cord through the bail, and your bezel-set rock necklace is complete.
4.4. Gluing a Bail
If you prefer not to drill or wrap, you can glue a bail to the rock.
- Clean the Rock: Ensure the rock surface is clean and dry for optimal adhesion.
- Apply Adhesive: Use a strong adhesive like epoxy or jewelry glue to attach the bail.
- Cure the Adhesive: Allow the adhesive to cure completely before wearing the necklace.
Each of these methods offers a unique way to transform a rock into a necklace. Rockscapes.net provides detailed tutorials and resources to help you master these techniques and create stunning rock jewelry.
5. Step-by-Step Guide: Creating a Simple Wire-Wrapped Rock Necklace
Let’s walk through creating a simple wire-wrapped rock necklace. This project is perfect for beginners and requires minimal tools.
Materials:
- Smooth, rounded rock
- 20-gauge wire (copper, silver, or gold)
- Wire cutters
- Round nose pliers
- Flat nose pliers
- Necklace chain
Instructions:
- Prepare the Wire: Cut approximately 24 inches of wire. Fold it in half to find the center.
- Wrap the Rock: Place the center of the wire at the top of the rock and wrap both ends around the rock, crossing them at the back.
- Create a Secure Base: Wrap the wire around the rock several times, pulling it tight to create a secure base.
- Form a Bail: At the top of the rock, create a loop with the wire using round nose pliers. This will serve as the bail for the necklace chain.
- Add Decorative Wraps: Wrap the wire around the base of the bail several times to add a decorative element and reinforce the loop.
- Secure the Ends: Trim any excess wire with wire cutters and tuck the ends in with flat nose pliers to prevent them from snagging.
- Attach the Chain: Thread the necklace chain through the bail, and your wire-wrapped rock necklace is complete.
 Overhead shot of the materials needed for a wire-wrapped rock necklace, including a smooth stone, wire, pliers, and wire cutters
6. Tips for Drilling Rocks Safely and Effectively
Drilling rocks can be intimidating, but with the right techniques and precautions, it can be a safe and successful process. Here are some tips to keep in mind:
- Wear Safety Glasses: Always wear safety glasses to protect your eyes from flying debris.
- Use Water: Keep the drill bit and rock cool by applying water frequently. This will prevent overheating and cracking.
- Start Slow: Begin drilling at a slow speed and gradually increase as needed. This will help prevent the drill bit from slipping and damaging the rock.
- Apply Gentle Pressure: Avoid applying too much pressure, as this can cause the rock to crack. Let the drill bit do the work.
- Use a Diamond-Tipped Drill Bit: Diamond-tipped drill bits are essential for drilling through hard stones without damaging them.
- Secure the Rock: Secure the rock in a vise or clamp to prevent it from moving during drilling.
- Drill in Intervals: Drill for a few seconds at a time, then stop and let the rock cool down. This will help prevent overheating and cracking.
- Clean the Hole: Remove any debris from the hole using a small brush or toothpick.
- Practice on Scrap Rocks: Before drilling your prized rocks, practice on some scrap rocks to get a feel for the process.
Following these tips will help you drill rocks safely and effectively, allowing you to create beautiful and unique rock necklaces.
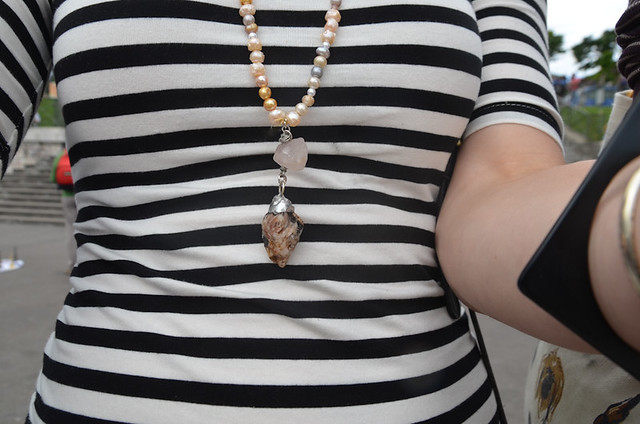
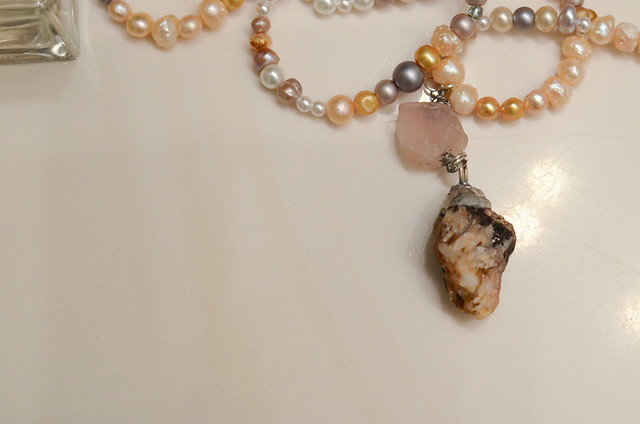
7. Enhancing Your Rock Necklace Designs
Once you’ve mastered the basic techniques, you can start experimenting with different designs and embellishments to create truly unique rock necklaces. Here are some ideas to inspire you:
- Add Beads: Incorporate beads into your wire-wrapped designs or string them along with the rock pendant on the necklace chain. Choose beads that complement the colors and textures of the rock.
- Use Different Wire Colors: Experiment with different wire colors to add visual interest to your designs. Copper, silver, and gold wire can create different aesthetic effects.
- Incorporate Charms: Add small charms or pendants to your rock necklace to personalize it and add extra flair.
- Create Layered Necklaces: Combine multiple rock pendants on a single necklace chain to create a layered look.
- Experiment with Different Chain Styles: Try different chain styles, such as rope chains, cable chains, or beaded chains, to find the perfect complement for your rock pendant.
- Add Leather or Fabric Accents: Incorporate leather or fabric accents into your designs to add texture and visual interest.
- Use Different Rock Shapes and Sizes: Experiment with different rock shapes and sizes to create unique and eye-catching pendants.
- Incorporate Natural Elements: Add other natural elements, such as feathers, shells, or twigs, to your rock necklace designs to create a rustic, organic look.
 Close-up of a detailed wire-wrapped rock pendant featuring intricate designs and small beads woven into the wire
8. Where to Find Rocks for Your Necklace Projects in the USA
Finding the right rocks is essential for creating beautiful and unique necklaces. Here are some great places to find rocks for your necklace projects in the USA:
- Beaches: Beaches are a great place to find smooth, rounded pebbles and interesting sea glass.
- Rivers and Streams: Rivers and streams often contain a variety of rocks and stones, including river stones, jasper, and agate.
- Rock and Mineral Shows: Rock and mineral shows are a treasure trove of rocks, minerals, and fossils from all over the world.
- Gem and Lapidary Clubs: Gem and lapidary clubs are a great resource for rock enthusiasts. They often organize field trips to collect rocks and offer workshops on rock cutting and polishing.
- Online Retailers: Online retailers like rockscapes.net offer a wide selection of rocks and minerals for sale, making it easy to find the perfect stones for your necklace projects.
- Local Landscaping Suppliers: Landscaping suppliers often carry decorative rocks and stones that are suitable for crafting.
- National Parks and Forests: Many national parks and forests allow you to collect small rocks and stones for personal use. However, be sure to check the regulations before you start collecting.
- Construction Sites: Construction sites can sometimes yield interesting rocks and stones that have been unearthed during excavation.
9. Maintaining Your Rock Necklace
Proper care will ensure your rock necklace remains beautiful for years.
- Cleaning: Clean gently with a soft cloth and mild soap if needed.
- Storage: Store in a dry place, away from direct sunlight.
- Avoid Chemicals: Keep away from harsh chemicals like chlorine or perfumes.
10. Frequently Asked Questions (FAQs) About Making Rock Necklaces
10.1. What is the best type of glue to use for attaching a bail to a rock?
Epoxy or jewelry glue is best for attaching a bail to a rock because these adhesives create a strong, durable bond that can withstand wear and tear. According to experts at Arizona State University’s Materials Science Department, epoxy resins offer superior adhesion and resistance to environmental factors, ensuring the bail remains securely attached over time.
10.2. How do I prevent the rock from cracking when drilling?
To prevent the rock from cracking when drilling, use a diamond-tipped drill bit, apply water frequently to keep the drill bit and rock cool, start at a slow speed, and apply gentle pressure. Drilling in intervals will also help prevent overheating and cracking.
10.3. Can I use any type of wire for wire wrapping?
While you can use various types of wire for wire wrapping, it’s best to use a soft, pliable wire like copper, silver, or gold. These wires are easy to bend and shape, making them ideal for creating intricate wire-wrapped designs.
10.4. How do I polish rocks to a high shine?
To polish rocks to a high shine, use a rock tumbler with progressively finer grits of polishing compound. Start with a coarse grit to remove any rough edges and gradually move to finer grits to create a smooth, shiny finish. A final polish with a polishing cloth will add extra shine.
10.5. What safety precautions should I take when working with rocks?
When working with rocks, always wear safety glasses to protect your eyes from flying debris. If you are drilling or cutting rocks, wear a dust mask to protect your lungs from dust particles. Work in a well-ventilated area to avoid inhaling dust or fumes.
10.6. How do I choose the right size rock for a necklace pendant?
The right size rock for a necklace pendant depends on your personal preference and the style of necklace you want to create. Generally, smaller to medium-sized rocks (1-2 inches in diameter) are easier to work with and more comfortable to wear. However, larger rocks can make a bold statement.
10.7. Can I use rocks I find in national parks for my necklace projects?
Many national parks allow you to collect small rocks and stones for personal use, but it’s essential to check the regulations before you start collecting. Some parks have restrictions on the types and quantities of rocks that can be collected, while others prohibit collecting altogether.
10.8. How do I clean a dirty rock before using it in a necklace?
To clean a dirty rock before using it in a necklace, scrub it with a brush and soapy water to remove any dirt or debris. For stubborn stains, soak the rock in a solution of water and vinegar or baking soda. Rinse the rock thoroughly and allow it to dry completely before using it in your project.
10.9. What are some unique ways to embellish a rock necklace?
Some unique ways to embellish a rock necklace include adding beads, charms, leather or fabric accents, or incorporating other natural elements like feathers or shells. You can also experiment with different wire colors and wrapping techniques to create unique designs.
10.10. How can I make my rock necklace more durable?
To make your rock necklace more durable, use high-quality materials, such as strong wire, durable chains, and reliable adhesives. Secure all components tightly and protect the necklace from harsh chemicals and abrasive surfaces.
Ready to start crafting your own unique rock necklace? Visit rockscapes.net for inspiration, high-quality materials, and expert guidance. Let us help you transform ordinary stones into extraordinary wearable art. Explore our collection of rocks, tools, and tutorials, and unleash your creativity today! Contact us at Address: 1151 S Forest Ave, Tempe, AZ 85281, United States or Phone: +1 (480) 965-9011.