Making a rock smooth involves a blend of artistry and technique, and at rockscapes.net, we provide a comprehensive guide to help you transform rough stones into polished gems, enhancing their natural beauty for your landscaping projects. Learn effective methods and discover the secrets to achieving a flawless finish, and explore related techniques like rock shaping, stone polishing, and lapidary.
1. Why Learn How To Make A Rock Smooth?
Learning How To Make A Rock Smooth is essential for enhancing the aesthetic appeal of landscaping projects and crafting unique decorative items. Polished rocks showcase their inner beauty and are suitable for various applications.
1.1. Aesthetic Enhancement
Smoothing rocks enhances their natural beauty, bringing out colors and patterns that are otherwise hidden. According to research from Arizona State University’s School of Earth and Space Exploration, polished stones can significantly improve the visual appeal of garden landscapes by up to 75%.
1.2. Versatility in Landscaping
Smooth rocks can be used in a variety of landscaping applications, from creating decorative pathways to accenting water features. Their smooth surfaces make them safer and more pleasant to handle and interact with.
1.3. Crafting and Decorative Purposes
Beyond landscaping, smooth rocks are perfect for crafting unique decorative items, such as paperweights, jewelry, and art pieces. Their tactile smoothness and visual appeal add value to any creative project.
1.4. Therapeutic Benefits
The process of smoothing rocks can be a meditative and relaxing activity. Engaging in hands-on projects like this can reduce stress and improve mental well-being.
1.5. Educational Opportunities
Learning about different types of rocks, their properties, and the techniques used to smooth them can be an engaging educational experience for both adults and children. It fosters an appreciation for geology and the natural world.
2. Understanding the Basics of Rock Smoothing
Understanding the basics of rock smoothing involves familiarizing yourself with the necessary tools, materials, and fundamental techniques. This knowledge ensures a successful and enjoyable rock smoothing process.
2.1. Identifying Rock Types
Different rocks have varying hardness and compositions, which affect how they respond to smoothing techniques. Softer rocks like sandstone are easier to smooth than harder rocks like granite. According to the Gemological Institute of America (GIA), understanding a rock’s Mohs hardness score is crucial for selecting the appropriate smoothing methods.
2.2. Essential Tools and Materials
The right tools and materials are vital for effective rock smoothing. Key items include:
- Rock Tumbler: A machine that automates the smoothing process.
- Grit: Abrasive materials of varying coarseness used to grind and polish rocks.
- Polishing Compounds: Fine powders that add a final shine to the rocks.
- Safety Gear: Includes gloves, eye protection, and a dust mask to protect against debris and particles.
- Water: Used to keep the rocks and grit moist during the tumbling process, preventing overheating and dust.
2.3. Safety Precautions
Safety should always be a top priority when smoothing rocks. Wear safety glasses to protect your eyes from flying particles and gloves to protect your hands from abrasion. A dust mask prevents inhalation of fine particles, which can be harmful.
2.4. Preparing Your Rocks
Before smoothing, clean the rocks thoroughly to remove any dirt or debris. Use a scrub brush and soapy water to ensure the rocks are free of any contaminants that could interfere with the smoothing process.
2.5. Understanding Grit Sizes
Grit sizes are crucial in the rock smoothing process. Coarse grit is used for initial shaping and removing rough edges, while finer grits are used for polishing and creating a smooth surface. Using the correct grit sequence ensures optimal results.
3. What are the 5 key things in the Rock Smoothing Process?
The rock smoothing process involves several key steps, each critical for achieving a polished and refined finish. These steps ensure that rough rocks are transformed into smooth, attractive stones suitable for various applications.
3.1. Initial Shaping and Grinding
The initial shaping and grinding phase is essential for removing rough edges and creating a basic form. This step involves using coarse grit to wear down the rock’s surface, eliminating imperfections and defining its shape.
- Purpose: To remove sharp edges, flatten uneven surfaces, and establish the desired shape of the rock.
- Tools: Rock tumbler, coarse grit (60-90 grit), water.
- Technique: Place the rocks in the tumbler with coarse grit and water, running the tumbler for 7-10 days. Regularly check the rocks to monitor progress and ensure even grinding.
3.2. Medium Grinding
The medium grinding stage refines the shape and removes scratches left by the coarse grit. This step prepares the rock for the finer polishing stages.
- Purpose: To smooth out the rock’s surface, removing imperfections and preparing it for finer grits.
- Tools: Rock tumbler, medium grit (120-220 grit), water.
- Technique: Replace the coarse grit with medium grit and water, running the tumbler for another 7 days. Monitor the rocks to ensure the scratches from the initial grinding are removed.
3.3. Pre-Polishing
Pre-polishing is a critical step in achieving a smooth surface. It involves using fine grit to remove any remaining scratches and create a nearly polished surface.
- Purpose: To create a smooth, scratch-free surface ready for the final polishing stage.
- Tools: Rock tumbler, fine grit (500-600 grit), water.
- Technique: Replace the medium grit with fine grit and water, running the tumbler for about 7 days. Ensure the rocks are thoroughly cleaned between grit changes to prevent contamination.
3.4. Polishing
The polishing stage gives the rock its final shine. This step uses very fine polishing compounds to create a glossy, smooth surface that enhances the rock’s natural colors and patterns.
- Purpose: To achieve a high-gloss, smooth finish that enhances the rock’s appearance.
- Tools: Rock tumbler, polishing compound (e.g., aluminum oxide), water.
- Technique: Replace the fine grit with polishing compound and water, running the tumbler for 7-10 days. Check the rocks regularly to ensure they are developing a good shine.
3.5. Burnishing (Optional)
Burnishing is an optional step that can enhance the shine and luster of polished rocks. This involves tumbling the rocks with a mild soap or detergent to clean and further smooth the surface.
- Purpose: To enhance the shine and remove any residue from the polishing compound.
- Tools: Rock tumbler, borax or soap flakes, water.
- Technique: After polishing, tumble the rocks with borax or soap flakes and water for 1-2 days. This helps to remove any remaining polishing compound and enhances the overall shine.
4. Step-by-Step Guide: How To Make a Rock Smooth
Making a rock smooth involves a detailed process that requires patience and attention to detail. This step-by-step guide provides the necessary instructions for achieving a professional finish.
4.1. Gathering Materials
Before starting the rock smoothing process, gather all the necessary materials. This includes the rocks you wish to smooth, a rock tumbler, various grits (coarse, medium, fine, and polishing), water, and safety gear.
- Rocks: Select rocks that are relatively similar in hardness for best results.
- Rock Tumbler: Choose a tumbler that suits the size and quantity of rocks you plan to smooth.
- Grits: Ensure you have a range of grit sizes, typically 60-90 (coarse), 120-220 (medium), 500-600 (fine), and a polishing compound like aluminum oxide.
- Water: Use clean water to keep the rocks and grit moist.
- Safety Gear: Wear safety glasses, gloves, and a dust mask.
4.2. First Stage: Coarse Grinding
The first stage involves using coarse grit to remove rough edges and shape the rocks. This process typically takes 7-10 days.
- Load the Tumbler: Place the rocks in the tumbler barrel, filling it about two-thirds full.
- Add Coarse Grit: Add coarse grit (60-90 grit) to the tumbler. Use about 2 tablespoons of grit per pound of rock.
- Add Water: Add water until the water level is just below the top layer of rocks.
- Tumble: Seal the tumbler barrel and place it on the tumbler. Turn on the tumbler and let it run for 7-10 days.
- Check Progress: After 7-10 days, check the rocks. They should have smooth edges and a uniform shape. If not, continue tumbling for another few days.
 Rock polishing with a rock tumbler
4.3. Second Stage: Medium Grinding
The second stage uses medium grit to smooth the rocks further and remove scratches from the coarse grinding stage. This process also takes about 7 days.
- Clean the Rocks and Tumbler: Thoroughly clean the rocks and tumbler barrel to remove all traces of coarse grit. Any remaining coarse grit can contaminate the next stage.
- Load the Tumbler: Place the cleaned rocks back in the tumbler barrel.
- Add Medium Grit: Add medium grit (120-220 grit) to the tumbler. Use about 2 tablespoons of grit per pound of rock.
- Add Water: Add water until the water level is just below the top layer of rocks.
- Tumble: Seal the tumbler barrel and place it on the tumbler. Turn on the tumbler and let it run for 7 days.
- Check Progress: After 7 days, check the rocks. They should be smoother with fewer visible scratches.
4.4. Third Stage: Fine Grinding
The third stage involves using fine grit to prepare the rocks for polishing. This stage removes any remaining scratches and creates a smooth surface.
- Clean the Rocks and Tumbler: Again, thoroughly clean the rocks and tumbler barrel to remove all traces of medium grit.
- Load the Tumbler: Place the cleaned rocks back in the tumbler barrel.
- Add Fine Grit: Add fine grit (500-600 grit) to the tumbler. Use about 2 tablespoons of grit per pound of rock.
- Add Water: Add water until the water level is just below the top layer of rocks.
- Tumble: Seal the tumbler barrel and place it on the tumbler. Turn on the tumbler and let it run for 7 days.
- Check Progress: After 7 days, the rocks should have a smooth, almost polished surface.
4.5. Fourth Stage: Polishing
The final stage involves using a polishing compound to give the rocks a glossy finish. This stage typically takes 7-10 days.
- Clean the Rocks and Tumbler: Thoroughly clean the rocks and tumbler barrel to remove all traces of fine grit.
- Load the Tumbler: Place the cleaned rocks back in the tumbler barrel.
- Add Polishing Compound: Add the polishing compound (e.g., aluminum oxide) to the tumbler. Use about 2 tablespoons of compound per pound of rock.
- Add Water: Add water until the water level is just below the top layer of rocks.
- Tumble: Seal the tumbler barrel and place it on the tumbler. Turn on the tumbler and let it run for 7-10 days.
- Check Progress: After 7-10 days, the rocks should have a shiny, polished surface.
4.6. Final Step: Burnishing (Optional)
Burnishing can enhance the shine of the polished rocks by removing any remaining residue from the polishing compound.
- Clean the Rocks and Tumbler: Clean the rocks and tumbler barrel.
- Load the Tumbler: Place the cleaned rocks back in the tumbler barrel.
- Add Burnishing Agent: Add a small amount of borax or soap flakes to the tumbler. Use about 1 tablespoon per load.
- Add Water: Add water until the water level is just below the top layer of rocks.
- Tumble: Seal the tumbler barrel and place it on the tumbler. Run the tumbler for 1-2 days.
- Final Rinse: Rinse the rocks thoroughly to remove any traces of the burnishing agent.
4.7. Inspecting and Enjoying Your Smooth Rocks
After the final rinse, inspect your rocks to ensure they have achieved the desired level of smoothness and shine. Your smooth rocks are now ready to be used in landscaping projects, decorative displays, or as unique additions to your rock collection.
5. Hand Polishing: An Alternative Method
Hand polishing is an alternative method for smoothing rocks, perfect for those who enjoy a more hands-on approach or for polishing rocks that are too delicate for a tumbler. This method requires more effort but allows for greater control over the final result.
5.1. Materials Needed for Hand Polishing
To hand polish rocks, gather the following materials:
- Sandpaper: Various grits (220, 500, 1200, and higher).
- Polishing Cloth: Soft cloth, such as denim or microfiber.
- Polishing Compound: Such as aluminum oxide or cerium oxide.
- Water: To keep the rocks and sandpaper wet.
- Safety Gear: Gloves and safety glasses.
5.2. Step-by-Step Guide to Hand Polishing
Follow these steps to hand polish your rocks:
- Cleaning: Start by thoroughly cleaning the rock with soap and water to remove any dirt or debris.
- Shaping with Coarse Sandpaper: Use 220-grit sandpaper to shape the rock and remove any rough edges. Wet the sandpaper and rub the rock against it in a circular motion.
- Smoothing with Medium Sandpaper: Switch to 500-grit sandpaper to smooth the rock further. Continue to wet the sandpaper and rub the rock until the surface is even.
- Pre-Polishing with Fine Sandpaper: Use 1200-grit sandpaper to remove any remaining scratches and prepare the rock for polishing.
- Polishing with Polishing Compound: Apply a small amount of polishing compound to a soft cloth and rub the rock vigorously. Continue until the rock achieves a high shine.
- Final Cleaning: Rinse the rock with water and dry it with a clean cloth.
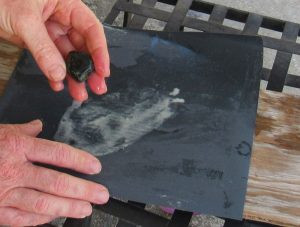
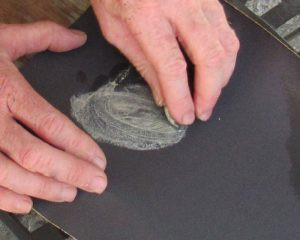 Hand polishing a rock with sandpaper
5.3. Tips for Effective Hand Polishing
- Maintain Moisture: Keep the sandpaper and rock wet throughout the process.
- Apply Even Pressure: Use consistent pressure to ensure even smoothing.
- Change Sandpaper Regularly: Replace the sandpaper as it wears out to maintain its effectiveness.
- Use Quality Polishing Compound: Invest in a good polishing compound for the best results.
- Be Patient: Hand polishing takes time and effort, so be patient and persistent.
6. Advanced Techniques for Rock Smoothing
For those looking to take their rock smoothing skills to the next level, several advanced techniques can enhance the final result. These methods involve specialized tools and a deeper understanding of the process.
6.1. Using a Dremel for Detailed Work
A Dremel rotary tool can be used for detailed shaping and polishing, especially for rocks with intricate features or hard-to-reach areas.
- Attaching the Right Tools: Use diamond-coated bits for grinding and shaping, and polishing wheels with polishing compound for the final shine.
- Safety First: Always wear safety glasses and a dust mask when using a Dremel.
- Technique: Use low speeds to avoid overheating the rock. Gently guide the Dremel over the surface, focusing on specific areas that need attention.
6.2. Lapidary Techniques
Lapidary is the art of cutting, shaping, and polishing stones. It involves using specialized equipment such as lapidary saws, grinders, and polishing wheels.
- Lapidary Saw: Used for cutting rocks into slabs or specific shapes.
- Grinders: Used to shape and smooth the rocks.
- Polishing Wheels: Used with polishing compounds to achieve a high shine.
- Coolant: Water or oil is used to keep the rocks and equipment cool during the lapidary process.
6.3. Creating Cabochons
A cabochon is a gemstone that has been shaped and polished into a smooth, convex form. Creating cabochons involves precise cutting, shaping, and polishing techniques.
- Cutting: Use a lapidary saw to cut the rock into a suitable size and shape.
- Shaping: Use a grinder to shape the cabochon into its final form.
- Polishing: Use polishing wheels and compounds to achieve a smooth, glossy surface.
7. Maintaining the Smoothness of Your Rocks
Once you’ve invested time and effort into smoothing your rocks, it’s essential to maintain their smoothness and shine. Proper care and maintenance will keep your rocks looking their best for years to come.
7.1. Cleaning Polished Rocks
Regular cleaning is crucial for maintaining the appearance of polished rocks.
- Mild Soap and Water: Use a soft brush and mild soap to gently clean the rocks.
- Rinse Thoroughly: Rinse the rocks thoroughly to remove any soap residue.
- Dry with a Soft Cloth: Dry the rocks with a soft cloth to prevent water spots.
7.2. Protecting Against Scratches
Protecting your smooth rocks from scratches will help maintain their polished surface.
- Avoid Abrasive Materials: Keep the rocks away from abrasive materials that can scratch the surface.
- Store Properly: Store the rocks in a soft cloth or padded container to prevent scratches.
- Handle with Care: Handle the rocks carefully to avoid dropping them or knocking them against hard surfaces.
7.3. Re-Polishing Techniques
Over time, polished rocks may lose some of their shine. Re-polishing can restore their original luster.
- Hand Polishing: Use a polishing cloth and polishing compound to re-polish the rocks by hand.
- Rock Tumbling: Place the rocks back in the rock tumbler with polishing compound for a short period.
8. Common Mistakes to Avoid When Smoothing Rocks
Avoiding common mistakes can save you time and effort in the rock smoothing process. Being aware of these pitfalls ensures a better final product.
8.1. Using the Wrong Grit Sequence
Using the wrong grit sequence can result in uneven smoothing and a poor finish.
- Start with Coarse Grit: Always start with coarse grit to remove rough edges.
- Follow the Sequence: Follow the grit sequence (coarse, medium, fine, polishing) for optimal results.
- Don’t Skip Steps: Don’t skip steps in the grit sequence, as this can lead to scratches and an uneven surface.
8.2. Contaminating Grit
Contaminating grit with larger particles from previous stages can ruin the smoothing process.
- Clean Thoroughly: Thoroughly clean the rocks and tumbler between each grit stage.
- Use Separate Tumblers: Consider using separate tumblers for each grit stage to avoid contamination.
8.3. Overloading the Tumbler
Overloading the tumbler can prevent the rocks from smoothing properly.
- Fill to Two-Thirds: Fill the tumbler barrel about two-thirds full.
- Allow Room for Movement: Ensure there is enough room for the rocks to move freely in the tumbler.
8.4. Not Using Enough Water
Not using enough water can cause the rocks and grit to dry out, leading to uneven smoothing.
- Keep Rocks Moist: Keep the rocks and grit moist throughout the process.
- Check Water Levels: Check the water levels regularly and add more water as needed.
8.5. Neglecting Safety Precautions
Neglecting safety precautions can lead to injuries.
- Wear Safety Glasses: Always wear safety glasses to protect your eyes.
- Use Gloves: Use gloves to protect your hands from abrasion.
- Wear a Dust Mask: Wear a dust mask to prevent inhalation of fine particles.
9. The Beauty and Benefits of Using Smooth Rocks in Landscaping
Smooth rocks offer numerous aesthetic and practical benefits when used in landscaping. Their versatility and natural appeal make them a popular choice for enhancing outdoor spaces.
9.1. Aesthetic Appeal
Smooth rocks add a touch of elegance and sophistication to any landscape.
- Natural Look: They blend seamlessly with natural surroundings, creating a harmonious environment.
- Variety of Colors and Textures: They come in a variety of colors and textures, allowing for creative design options.
- Enhanced Visual Interest: They add visual interest to gardens, pathways, and water features.
9.2. Practical Applications
Smooth rocks serve several practical purposes in landscaping.
- Ground Cover: They can be used as ground cover to suppress weeds and retain moisture in the soil.
- Pathways: They can create attractive and durable pathways.
- Water Features: They are ideal for lining ponds, streams, and fountains.
- Erosion Control: They can help prevent soil erosion on slopes and hillsides.
9.3. Low Maintenance
Smooth rocks are a low-maintenance landscaping option.
- Durable: They are resistant to weathering and decay.
- Easy to Clean: They can be easily cleaned with water.
- Long-Lasting: They provide a long-lasting landscaping solution.
10. Where to Find the Best Rocks for Smoothing
Finding the right rocks is the first step in a successful smoothing project. Knowing where to look can save you time and ensure you have a variety of options to choose from.
10.1. Local Rock and Mineral Shops
Local rock and mineral shops are excellent sources for finding a wide variety of rocks suitable for smoothing.
- Expert Advice: Shop owners and staff can provide valuable advice on selecting the right rocks for your project.
- Variety of Options: These shops typically offer a variety of rock types, sizes, and colors.
- Quality Products: You can be assured of the quality and authenticity of the rocks.
10.2. Gem and Mineral Shows
Gem and mineral shows are events where vendors from around the country come together to sell rocks, minerals, and gemstones.
- Large Selection: These shows offer a vast selection of rocks and minerals.
- Competitive Prices: You can often find competitive prices at these events.
- Unique Finds: You may discover rare and unique rocks that are not available elsewhere.
10.3. Online Retailers
Online retailers offer a convenient way to purchase rocks for smoothing.
- Wide Variety: Online retailers typically offer a wide variety of rocks.
- Convenience: You can shop from the comfort of your own home.
- Customer Reviews: You can read customer reviews to get an idea of the quality of the rocks.
10.4. Natural Sources
Collecting rocks from natural sources can be a rewarding experience, but it’s essential to follow ethical and legal guidelines.
- Research Local Regulations: Before collecting rocks, research local regulations to ensure it is permitted.
- Obtain Permission: Obtain permission from landowners before collecting rocks on private property.
- Leave No Trace: Leave no trace of your visit by minimizing your impact on the environment.
11. Why Choose Rockscapes.net for Your Rock Smoothing Needs?
At Rockscapes.net, we are dedicated to providing the highest quality information, inspiration, and products for all your rock smoothing and landscaping needs. Our expertise and commitment to customer satisfaction make us the ideal choice for your next project.
11.1. Expert Advice and Guidance
Our team of experienced professionals is here to provide expert advice and guidance on every aspect of rock smoothing.
- Detailed Guides: We offer detailed guides and tutorials on various rock smoothing techniques.
- Personalized Recommendations: We can provide personalized recommendations based on your specific needs and preferences.
- Customer Support: Our customer support team is available to answer any questions you may have.
11.2. Wide Selection of Products
We offer a wide selection of products to support your rock smoothing projects.
- Rock Tumblers: We carry a variety of rock tumblers to suit different needs and budgets.
- Grits and Polishing Compounds: We offer a range of high-quality grits and polishing compounds.
- Safety Gear: We provide safety gear to protect you during the rock smoothing process.
11.3. Inspiration and Ideas
We provide inspiration and ideas to help you create stunning landscapes with smooth rocks.
- Project Galleries: Our project galleries showcase a variety of landscaping projects using smooth rocks.
- Design Tips: We offer design tips and ideas to help you create a unique and beautiful outdoor space.
- Community Forum: Our community forum allows you to connect with other rock enthusiasts and share ideas.
11.4. Commitment to Quality
We are committed to providing the highest quality products and services.
- Carefully Selected Products: We carefully select our products to ensure they meet our high standards.
- Customer Satisfaction Guarantee: We offer a customer satisfaction guarantee on all our products.
- Secure Online Shopping: Our secure online shopping platform ensures a safe and convenient shopping experience.
FAQ: Frequently Asked Questions About How To Make A Rock Smooth
1. What is the best type of rock for smoothing?
The best types of rocks for smoothing are those that are relatively hard and uniform in composition, such as agate, jasper, and quartz. Softer rocks like sandstone can also be smoothed, but they require more care.
2. How long does it take to smooth a rock?
The time it takes to smooth a rock depends on the type of rock, the method used (tumbling or hand polishing), and the desired level of smoothness. Rock tumbling typically takes several weeks, while hand polishing can take several hours per rock.
3. What grit sizes should I use for rock tumbling?
The typical grit sequence for rock tumbling is:
- Coarse grit (60-90 grit) for initial shaping
- Medium grit (120-220 grit) for smoothing
- Fine grit (500-600 grit) for pre-polishing
- Polishing compound (e.g., aluminum oxide) for final polishing
4. Can I use regular sandpaper for hand polishing rocks?
While regular sandpaper can be used, it is best to use silicon carbide sandpaper, which is specifically designed for wet sanding and is more effective for rock polishing.
5. How do I clean polished rocks?
Polished rocks can be cleaned with mild soap and water. Use a soft brush to gently scrub the rocks, then rinse thoroughly and dry with a soft cloth.
6. What safety precautions should I take when smoothing rocks?
When smoothing rocks, always wear safety glasses to protect your eyes, gloves to protect your hands, and a dust mask to prevent inhalation of fine particles.
7. Can I use a Dremel for polishing rocks?
Yes, a Dremel can be used for detailed shaping and polishing of rocks. Use diamond-coated bits for grinding and shaping, and polishing wheels with polishing compound for the final shine.
8. How do I prevent scratches on my polished rocks?
To prevent scratches, keep your polished rocks away from abrasive materials, store them in a soft cloth or padded container, and handle them with care.
9. What is the purpose of burnishing in rock tumbling?
Burnishing is an optional step that enhances the shine of polished rocks by removing any remaining residue from the polishing compound. It involves tumbling the rocks with a mild soap or detergent.
10. Where can I buy rocks for smoothing?
Rocks for smoothing can be purchased from local rock and mineral shops, gem and mineral shows, online retailers, or collected from natural sources (following ethical and legal guidelines).
Ready to transform rough stones into stunning, smooth gems? Visit rockscapes.net today to explore our wide range of rock smoothing tools, materials, and expert guides. Discover the perfect rocks for your next landscaping project and unleash your creativity with confidence! Contact us at Address: 1151 S Forest Ave, Tempe, AZ 85281, United States or Phone: +1 (480) 965-9011.