How To Make Candy Rocks? Making candy rocks is an enjoyable process that yields delightful treats, and Rockscapes.net is here to guide you through each step. With a few simple ingredients and some patience, you can create colorful and flavorful candy rocks right in your own kitchen. Beyond being a delicious treat, this activity offers an engaging way to explore the science of crystallization, creating large sugar crystals. Learn the rock candy recipe, rock candy ingredients and more information about this fun dessert.
1. What is Rock Candy, Exactly?
Rock candy is essentially crystallized sugar, often enjoyed for its sweet taste and visually appealing colors. This type of candy is composed entirely of large sugar crystals. If you’ve ever prepared simple syrup, you’ll find the process of making rock candy quite similar. Rock candy requires oversaturating a simple syrup solution, allowing it to cool and rest so sugar crystals can form.
Because the solution is supersaturated, it cannot absorb the sugar at cooler temperatures. As the solution cools, it becomes unstable, and the sugar can’t stay in the liquid. The sugar then attaches itself to the skewer.
2. Why Should I Learn How To Make Candy Rocks Myself?
While purchasing rock candy is convenient, crafting it at home can be a rewarding experience. You can find rock candy in most candy stores or online. Rock candy is easy to do and can be given out as gifts or enjoyed yourself. If you need rock candy in bulk for wedding decor, you’ll want to plan VERY well in advance!
According to research from Arizona State University’s School of Earth and Space Exploration, engaging in hands-on science experiments like making rock candy enhances understanding and retention of scientific principles.
2.1. Educational Opportunity
Making your own rock candy also serves as an engaging science experiment. It provides a hands-on opportunity to explore crystallization and the science of saturating solutions, making it a perfect educational activity for children.
2.2. Creative Cocktails
Rock candy can also be used in cocktails, creating sweet and visually appealing drinks. You can also make mocktails for your kids.
2.3. Alternative Candies
In conjunction with making rock candy, you may also want to try making other candies, like homemade fudge and gummy candy. Here’s a great guide to sugar chemistry.
3. How Long Does It Take To Make Candy Rocks?
While the rock candy solution is easy to prepare and doesn’t take long at all, crystal formation requires patience, typically around 6-7 days. However, the process is engaging, allowing you to monitor crystal growth daily.
4. What Equipment Do I Need to Make Candy Rocks?
You may already have everything you need to make your own rock candy. Here’s what you need:
- Granulated Sugar (for 5 sticks of candy, you’ll need 10 cups)
- Water
- Food coloring (if you want to add color to your candy)
- Mason jars or other receptacles to hold sugar solution. I recommend a standard 16 oz. mason jar.
- Skewers or sticks to make rock candy on. I use a simple wooden kabob skewer. But you can actually buy rock candy sticks to use for a more professional look.
- Clothespins or chip clips to balance stick on jar (you can’t let the stick touch the bottom of the jar).
5. Step-by-Step Guide: How to Make Candy Rocks
Here’s how to make rock candy at home! This “recipe” will make 5 sticks of rock candy. Since the candy will all grow in separate jars, you can make a variety of colors with this one recipe. I like to keep at least one jar clear as it’s the easiest to be able to monitor growth!
5.1. Prepare the Skewers
Start by coating your skewers or sticks in granulated sugar to “seed” the rock candy. This gives the crystals something to adhere to as they grow.
I trim my skewers a bit before using them since they’re pretty long and have a pointy sharp end.
Submerge the skewers in water, coat them in sugar, and then set out to dry.
I like to do this a day ahead of time, but as long as you let them dry for an hour, they should be fine.
5.2. Ready the Jars
Ensure your jars are clean and not cold. Attach a clothespin or chip clip to each skewer and balance it over the top of the jar, ensuring the skewer hangs about an inch from the bottom to prevent the candy from sticking.
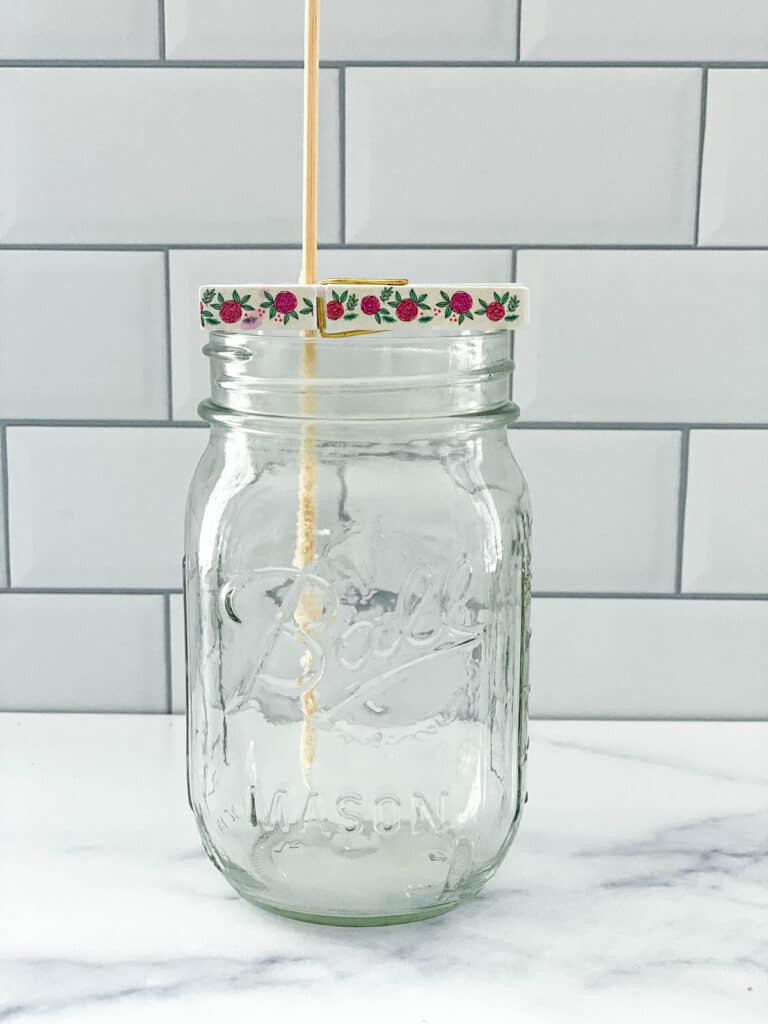 Mason jar set up with skewer, ready for rock candy sugar solution
A prepared mason jar with a skewer held in place by a clothespin, ready to receive the sugar solution for making rock candy.
Set it all up, but then take the skewer out of the jar- you’ll add it back in once your sugar solution is in.
5.3. Create the Sugar Solution
In a large saucepan, combine 4 cups of water and 10 cups of granulated sugar. Heat the mixture, stirring continuously, until the sugar is completely dissolved. This is similar to making simple syrup.
Add 4 cups of water to a large saucepan. Bring to a boil and then start adding sugar in one cup at a time, stirring with a wooden spoon and letting each cup fully dissolve before adding the next.
You’ll notice it becomes harder and harder for the sugar to dissolve as you add more in and the sugar will start to clump before dissolving, like this:
That means your solution is supersaturated and you should have no problem growing crystals. Woo hoo!
Once your final cup of sugar has been dissolved, let mixture simmer for about 5 minutes before removing from heat.
Remove the saucepan from the heat and let the mixture rest for about 15 minutes.
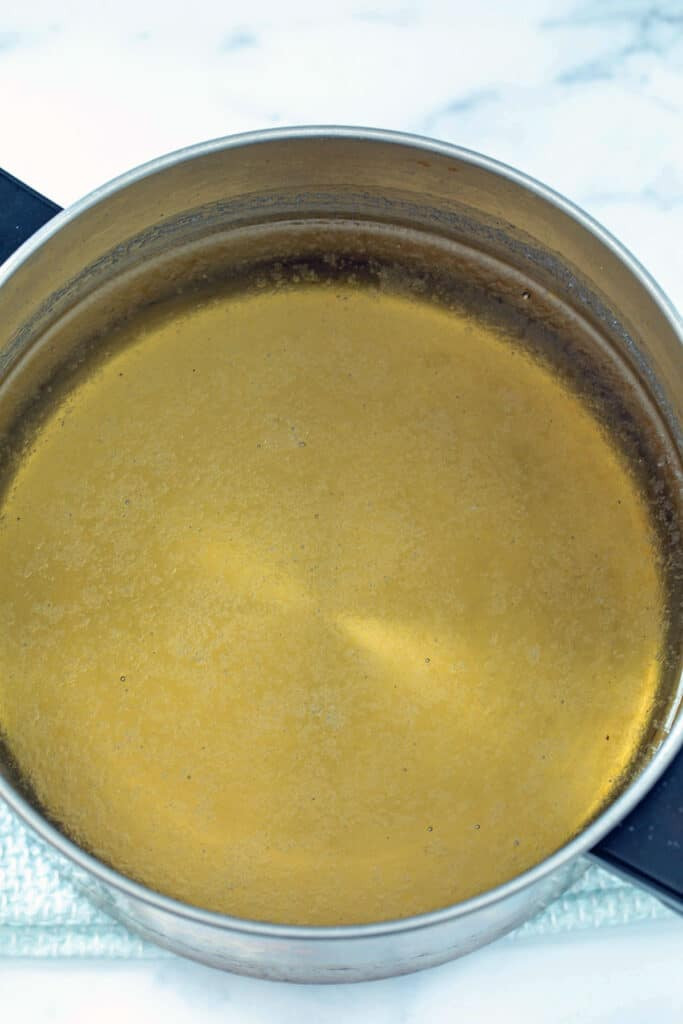 Sugar water solution simmering in saucepan
Simmering sugar water solution in a saucepan, illustrating the key step in creating a supersaturated solution for rock candy.
5.4. Add Color
Divide the mixture between your 5 prepared jars. And stir in your food coloring at this time.
Now, divide the mixture between your 5 prepared jars. And stir in your food coloring at this time.
I highly recommend bringing your jars to where they’ll be resting for the next 6-7 days before you place the skewer in the jar. Be sure to use caution when moving the jars as they will be very, very hot.
5.5. Initiate Crystal Growth
Place prepared skewers into solution. You’ll want to try your best not to move jars around much once skewers are in place.
Once the jars are in their resting spots, place prepared skewers into solution. You’ll want to try your best not to move jars around much once skewers are in place.
5.6. Patience is Key
Wait for your rock candy to grow. You should see crystals starting to grow on your sticks within a day. Here’s how mine looked after 24 hours:
Now comes the tough part… Waiting for your rock candy to grow!
Luckily, things will start happening fairly quickly and you should see crystals starting to grow on your sticks within a day. Here’s how mine looked after 24 hours:
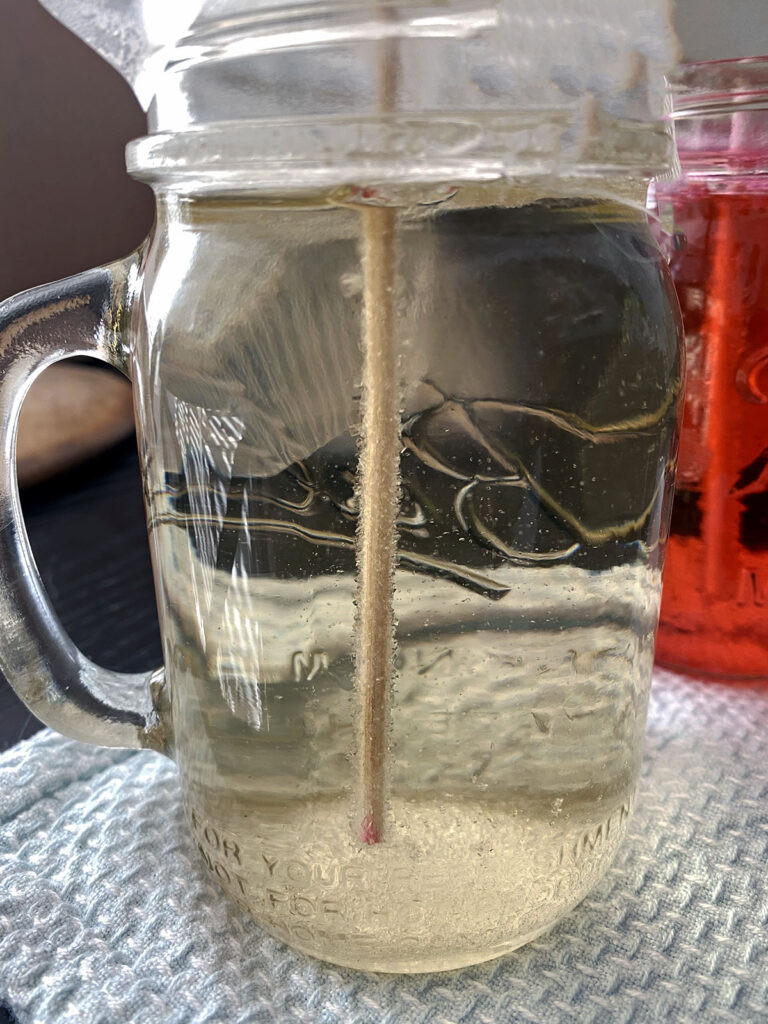 Rock candy crystals forming in jar after 1 day
Rock candy crystals beginning to form on a skewer inside a jar, showcasing the early stages of the crystallization process.
Here they are after 48 hours:
And here they are after 72 hours:
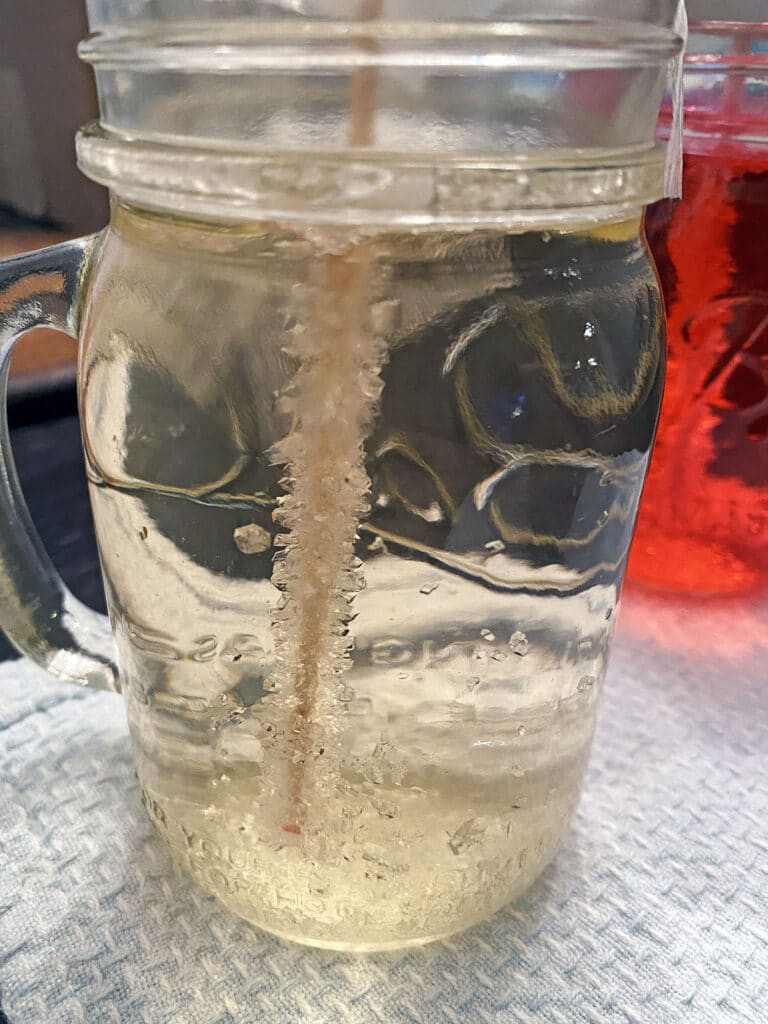 Rock candy crystals forming in jar after 3 days
Rock candy crystals growing larger inside a jar after 3 days, demonstrating the visible progress of crystal formation.
5.7. Harvest and Enjoy
After at least 6 days, gently remove the rock candy sticks from the jars. Let the syrup drizzle from stick. I recommend setting the candy over an empty jar or bowl to let it drip or placing it on a paper towel.
You can remove the skewers from the jars whenever you want, but I recommend giving them at least 6 days to fully form.
When you’re ready to remove rock candy sticks from jars, use your finger to gently crack the hardened sugar on top of the jar and gently wiggle the stick to release. Like this:
Let the syrup drizzle from stick. I recommend setting the candy over an empty jar or bowl to let it drip or placing it on a paper towel.
Then you’re ready to enjoy your incredible homemade rock candy!
How cool is that??
6. Can I Re-Use Sugar Solution?
Yes, you can re-use the sugar solution!
But before you just plop another sugar-coated stick in the solution, I recommend that you pour it back into a saucepan and bring it back to a boil. Add another ¼ cup sugar in it and let it simmer for a few minutes. Then pour it back in the jar.
Once you take the sticks out of your jars, you’ll likely feel wasteful pouring the rest of the sugar solution in the trash. So, can you re-use it? The short answer is yes!
I re-used a couple of my solutions without re-heating and adding more sugar to the solution and here’s how they came out after a week:
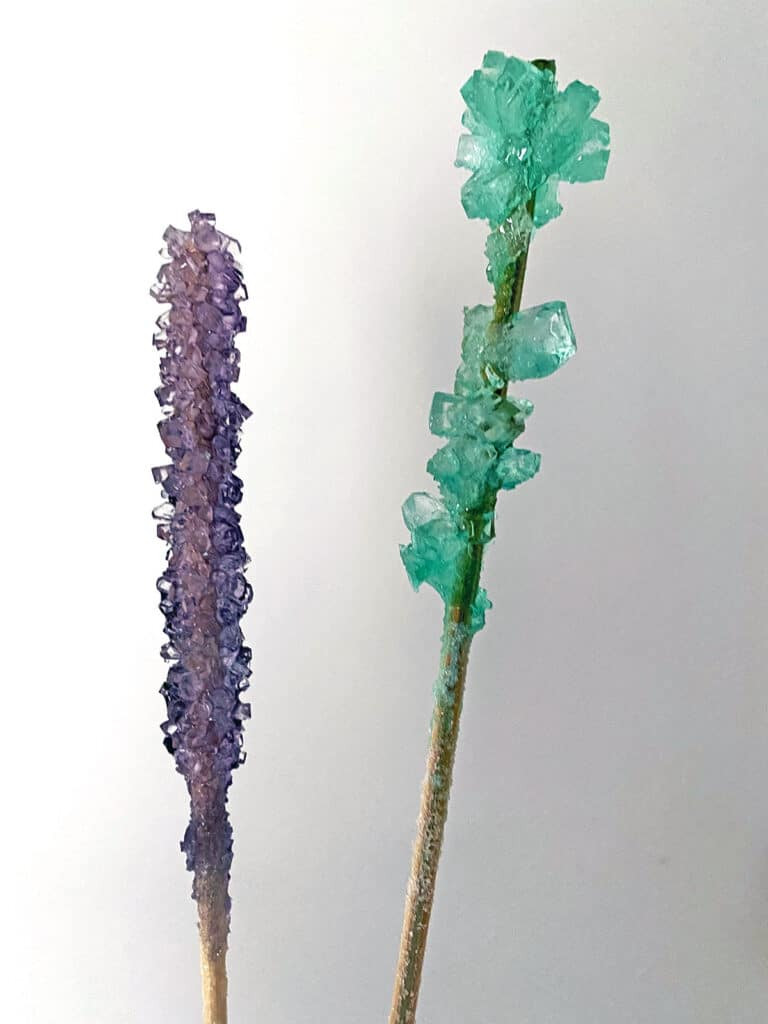 Purple and green rock candy made from reused sugar solution without re-heating and adding more sugar
Rock candy made from reused sugar solution without re-heating and adding more sugar.
Here’s what happened when I did re-heat and add an additional ¼ cup sugar:
That’s some definite proof that you’ll want to re-boil the solution and add more sugar!
7. Why Isn’t My Rock Candy Growing?
If your sticks don’t seem to have crystals growing at all after a few days, it may because your sugar solution wasn’t oversaturated for whatever reason. In that case, you can put the mixture back into the saucepan, bring it to a boil and add in another cup of sugar. Stir to dissolve. Add more sugar in if the first cup dissolved easily.
Making rock candy can be a bit finicky and there are lots of reasons it may not work on your first try. However, if you follow these instructions closely and use the full 10 cups of sugar in 4 cups of water, you should have a supersaturated solution and your chances of it working are high.
You’ll want to use new sugar-coated skewers, too.
I went through this process the first time I made rock candy and had a fail and it definitely seemed to help as crystals started growing after I did it.
Also be sure to double-check that your jars are clean and not cold and that you didn’t move your jars around once you added the stick in.
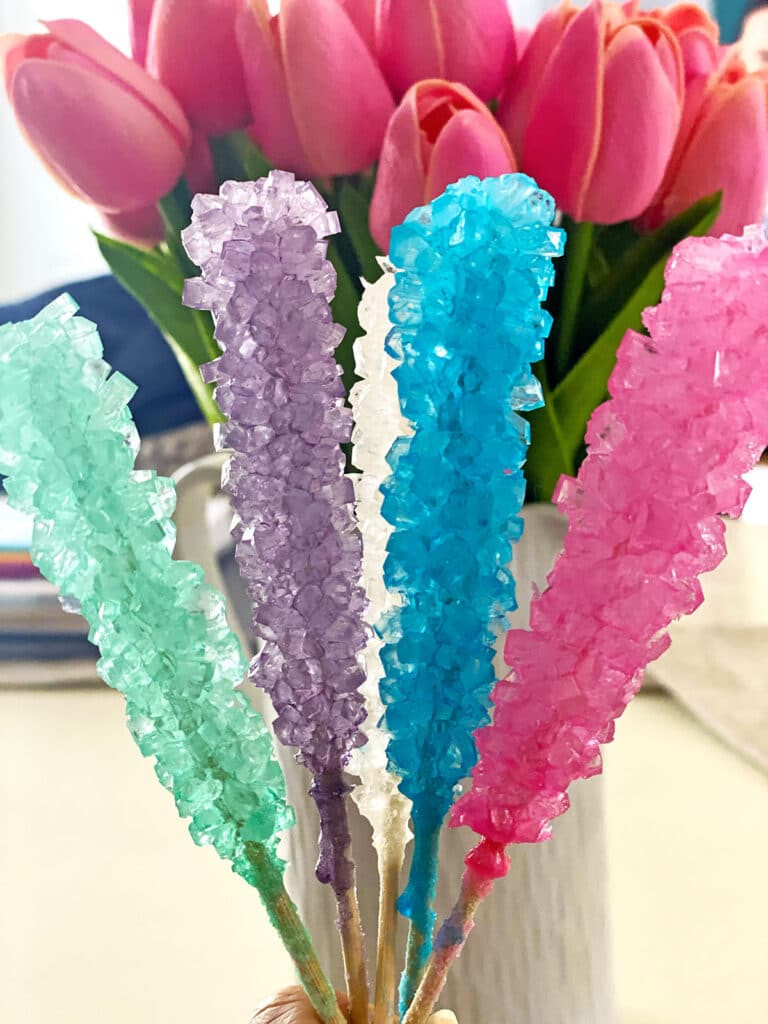 Homemade rock candy on sticks with pink tulips in the background
Homemade rock candy on sticks with pink tulips in the background.
8. How Can I Make Rock Candy Fast?
Unfortunately, there isn’t really a way to make rock candy grow quickly. I have heard that putting the jars in the fridge will speed up the process a bit, but I haven’t tried this myself.
You can take your rock candy out of the jar after just a couple days, but your sticks will probably be a bit sparse.
9. How to Store Candy
Store your rock candy in a cool dry place. If you’re planning on keeping it for a while or giving it as gifts, I recommend wrapping them in cellophane wrappers, like these.
When stored properly, your rock candy should stay good for a year.
10. Helpful Tips & Tricks
Once you have the process down and understand the science behind it, making your own rock candy is super simple! But I do have some tips and tricks that should help you troubleshoot if you’re having problems:
- Make sure your mason jars are completely clean and not cold. I store a lot of my mason jars in my basement (which is chilly), so I always clean them out with hot water before using them.
- Do not skip the step of coating your sticks in sugar. It’s very important that the crystals have something to adhere to as they grow (otherwise they’ll likely just grow to the bottom of the jar).
- I recommend making the color a bit darker than you think you should as it will look lighter once the crystals form.
- You can add flavoring to the rock candy if you want, but similarly to using food coloring, try to use a concentrated flavoring so you don’t have to add too much liquid to get the flavor level you want.
- Once you’ve poured your sugar mixture and placed your sticks in the jars, take care not to move them or jostle the sticks.
As you can see, DIY rock candy is pretty easy to make as long as long as you understand the process. It mostly just requires patience… And a whole lot of sugar!
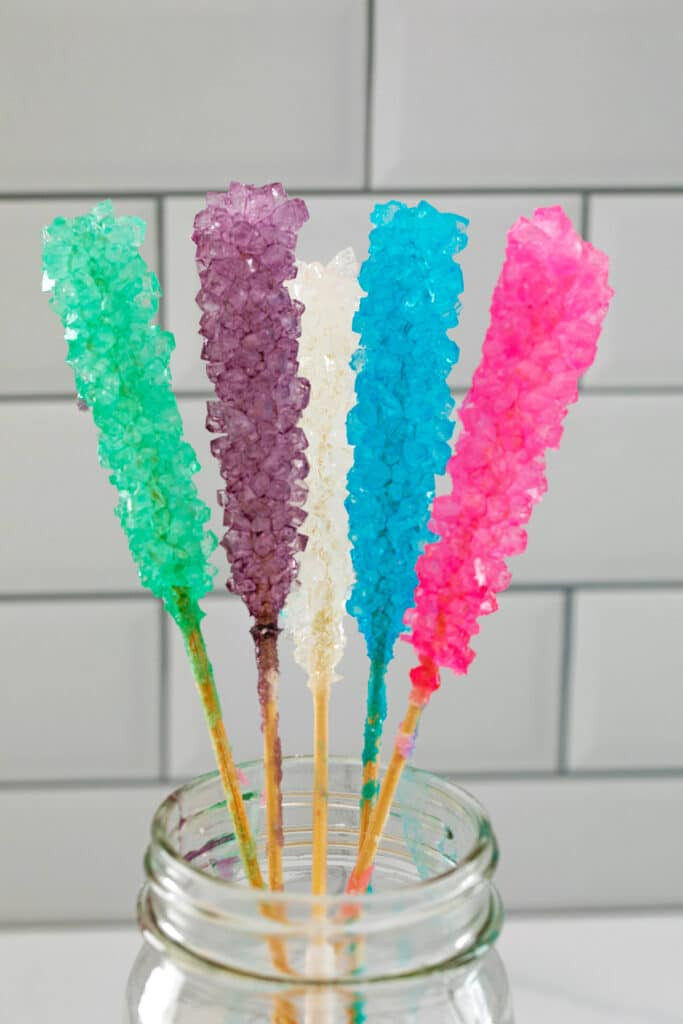 Mason jar filled with 5 different colors of rock candy on sticks
Mason jar filled with 5 different colors of rock candy on sticks.
After making rock candy at home, I have a whole new appreciation for the candy and can certainly understand why a company may charge top dollar for it (though I’m sure the use of machinery makes it much easier!).
Don’t forget to check out my recipe for rock candy cocktails if you’re looking for a fun way to utilize your candy!
Have you ever made your own rock candy at home?
FAQ About How To Make Candy Rocks
1. Can I use different types of sugar for making candy rocks?
While granulated sugar is the most common and recommended type for making candy rocks, experimenting with other sugars like cane sugar or brown sugar can yield interesting results. However, be aware that the color and flavor of the candy rocks will be affected, and the crystallization process might vary.
2. What kind of flavoring extracts can I add to my candy rocks?
You can add various flavoring extracts to customize your candy rocks. Popular choices include vanilla, peppermint, lemon, strawberry, and almond extract. Ensure the extract is concentrated to avoid adding too much liquid, which can interfere with the crystallization process.
3. How do I prevent the sugar from crystallizing too quickly and forming a hard mass?
To prevent premature crystallization, ensure the sugar is fully dissolved in the water before boiling. Stir the mixture constantly while heating, and avoid any undissolved sugar crystals clinging to the sides of the pot. Adding a small amount of corn syrup or lemon juice can also help prevent rapid crystallization.
4. What is the best way to clean the jars after making candy rocks?
Cleaning the jars after making candy rocks can be challenging due to the hardened sugar. Soaking the jars in hot water for several hours or overnight will help dissolve the sugar. You can also add a bit of vinegar to the water to aid in dissolving the sugar.
5. Can I use metal skewers instead of wooden ones?
While wooden skewers are commonly used, metal skewers can also be used. However, ensure they are food-grade stainless steel to avoid any chemical reactions with the sugar solution. Metal skewers may also conduct heat more efficiently, potentially affecting the crystallization process.
6. What is the ideal temperature for storing candy rocks?
Candy rocks should be stored in a cool, dry place to prevent them from melting or becoming sticky. The ideal temperature is between 60°F and 70°F (15°C and 21°C). Avoid storing them in the refrigerator, as the humidity can cause the sugar to dissolve.
7. How can I make layered or swirled candy rocks with different colors?
To create layered or swirled candy rocks, prepare multiple batches of sugar solution with different food colorings. Pour one color into the jar and let it partially crystallize before adding the next color. Use a skewer to gently swirl the colors together for a marbled effect.
8. What are some troubleshooting tips if my candy rocks are too soft or sticky?
If your candy rocks are too soft or sticky, it could be due to insufficient sugar in the solution or high humidity. Try reboiling the sugar solution with additional sugar to increase its concentration. Ensure the candy rocks are stored in an airtight container with a desiccant to absorb moisture.
9. How long can I store homemade candy rocks?
Homemade candy rocks can typically be stored for up to a year if properly stored in a cool, dry place in an airtight container. However, their quality and appearance may degrade over time, so it’s best to consume them within a few months for optimal flavor and texture.
10. Are there any safety precautions I should take when making candy rocks with children?
When making candy rocks with children, adult supervision is essential due to the use of hot sugar solution and boiling water. Ensure children understand the importance of not touching the hot liquid and using caution around the stove. Using oven mitts or gloves can also help prevent burns.
Creating your own candy rocks can be a fun experience. For inspiration and to explore beautiful rock features, visit rockscapes.net. Contact us at 1151 S Forest Ave, Tempe, AZ 85281, United States or call +1 (480) 965-9011.