How To Make Easy Rock Candy? Rock candy, with its sparkling sugar crystals, is a delightful treat that’s surprisingly simple to create at home. At rockscapes.net, we believe in bringing the beauty and wonder of natural formations into your everyday life, and what could be more wondrous than crafting your own crystalline candy? This guide will walk you through the process, providing tips and tricks to ensure your rock candy turns out perfectly every time. You’ll also learn about the science behind crystal formation and explore creative ways to customize your sweet creations, making it a fun and educational activity for all ages. Let’s turn ordinary sugar into extraordinary edible gems with this sweet confection and sugary treats.
1. What is Rock Candy and Why Make It?
Rock candy, also known as sugar candy, is essentially large sugar crystals that form on a stick or string.
1.1. What Exactly is Rock Candy?
Rock candy is pure, crystallized sugar, often enjoyed for its sweet taste and visually appealing appearance. It’s made by dissolving sugar in water to create a supersaturated solution and then allowing the sugar to recrystallize on a stick or string over several days. This process results in large, transparent crystals that are both beautiful and delicious. Its unique crystal structure makes it a fun treat to eat and a popular choice for decorations, especially for parties and special events.
1.2. Why Make Rock Candy at Home?
Making your own rock candy offers several benefits:
- Customization: You have complete control over the color, flavor, and size of the crystals.
- Educational: It’s a fun science experiment to teach kids about saturation, crystallization, and patience.
- Cost-Effective: Making rock candy at home can be cheaper than buying it in stores, especially if you need a large quantity.
- Unique Gifts: Homemade rock candy makes a thoughtful and personalized gift for friends and family.
- Fun Activity: The process of making rock candy can be a fun and rewarding activity for both kids and adults.
1.3. What are the Key Ingredients for Rock Candy?
The primary ingredients are simple:
- Granulated sugar
- Water
- Optional: Food coloring and flavorings
The magic lies in the process of dissolving the sugar and allowing it to slowly recrystallize.
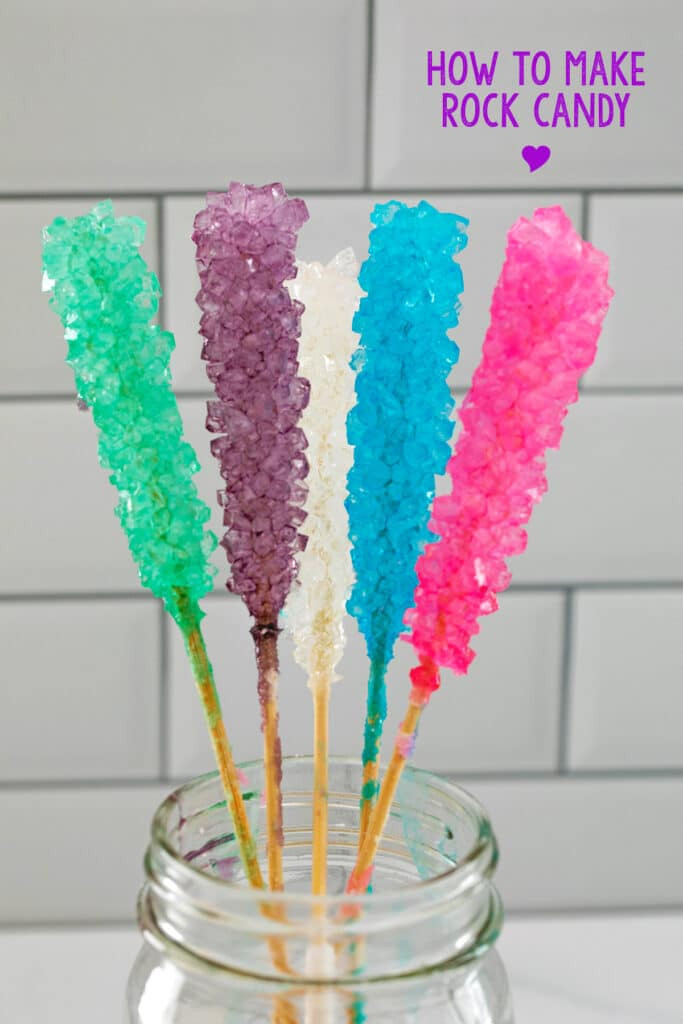 Close-up of 5 different colors rock candy in mason jar with
2. Essential Equipment for Making Rock Candy
To make rock candy successfully, you’ll need a few key pieces of equipment:
2.1. List of Necessary Equipment
- Saucepan: A large, heavy-bottomed saucepan is ideal for heating the sugar and water mixture evenly.
- Glass Jars or Glasses: Clean glass jars or glasses will hold the sugar solution while the crystals form. Mason jars are a popular choice.
- Sticks or Skewers: Wooden skewers, chopsticks, or candy sticks provide a surface for the crystals to grow on.
- Clothespins or Clips: These will hold the sticks in place, suspending them in the sugar solution.
- Thermometer (Optional): A candy thermometer can help you monitor the temperature of the sugar solution, but it’s not essential.
- Wooden Spoon: For stirring the sugar solution.
- Measuring Cups and Spoons: For accurate measurements of ingredients.
2.2. Detailed Explanation of Each Item
- Saucepan: Choose a saucepan that is large enough to hold the sugar solution without overflowing. The heavy bottom will help prevent scorching.
- Glass Jars or Glasses: Make sure the jars are clean and free of any residue. Sterilizing them is a good idea to prevent any unwanted bacteria from affecting the crystal growth.
- Sticks or Skewers: If using wooden skewers, you may want to soak them in water for about 30 minutes before using them to prevent them from burning or splintering in the hot sugar solution.
- Clothespins or Clips: These should be strong enough to hold the sticks securely in place without slipping.
- Thermometer (Optional): A candy thermometer can help you achieve the perfect sugar concentration. The ideal temperature for the sugar solution is around 220-230°F (104-110°C).
- Wooden Spoon: A wooden spoon is ideal for stirring because it doesn’t react with the sugar solution and can withstand high temperatures.
- Measuring Cups and Spoons: Accurate measurements are crucial for achieving the correct sugar-to-water ratio.
3. Step-by-Step Guide to Making Rock Candy
Making rock candy is a simple process, but it requires patience. Here’s a detailed guide:
3.1. Preparing the Sticks
The first step is to prepare the sticks to encourage crystal growth.
- Wet the Sticks: Dip the sticks in water.
- Coat with Sugar: Roll the wet sticks in granulated sugar, ensuring they are fully coated. This provides a base for the crystals to grow on.
- Dry the Sticks: Allow the sugar-coated sticks to dry completely. This may take an hour or two, or you can leave them overnight.
3.2. Making the Sugar Solution
Next, you’ll create the supersaturated sugar solution.
- Combine Water and Sugar: In the saucepan, combine 4 cups of water with 10 cups of granulated sugar. This high ratio of sugar to water is what makes the solution supersaturated.
- Heat the Mixture: Place the saucepan over medium heat and stir constantly until the sugar dissolves completely. Be patient and continue stirring until the solution is clear.
- Boil the Solution: Once the sugar is dissolved, bring the solution to a gentle boil. If you’re using a thermometer, aim for a temperature of 220-230°F (104-110°C).
- Simmer and Cool: Reduce the heat and let the solution simmer for about 5 minutes. Then, remove it from the heat and let it cool for about 15 minutes. This allows the solution to stabilize before adding it to the jars.
3.3. Adding Color and Flavor (Optional)
This is where you can get creative.
- Divide the Solution: Divide the sugar solution evenly among the prepared jars or glasses.
- Add Food Coloring: Add a few drops of food coloring to each jar and stir gently to combine. You can use different colors for each jar to create a rainbow effect.
- Add Flavoring: If desired, add a few drops of flavoring extract to each jar, such as vanilla, peppermint, or lemon. Stir gently to combine.
3.4. Growing the Crystals
Now comes the waiting game.
- Position the Sticks: Carefully place the prepared sticks into the jars, ensuring they are suspended in the sugar solution and not touching the bottom or sides of the jar. Use clothespins or clips to hold the sticks in place.
- Let it Sit: Place the jars in a cool, stable location where they won’t be disturbed. Allow the crystals to grow for 6-7 days. The longer you wait, the larger the crystals will become.
- Observe the Growth: Check on the jars daily to observe the crystal growth. You’ll notice small crystals forming on the sticks within a day or two.
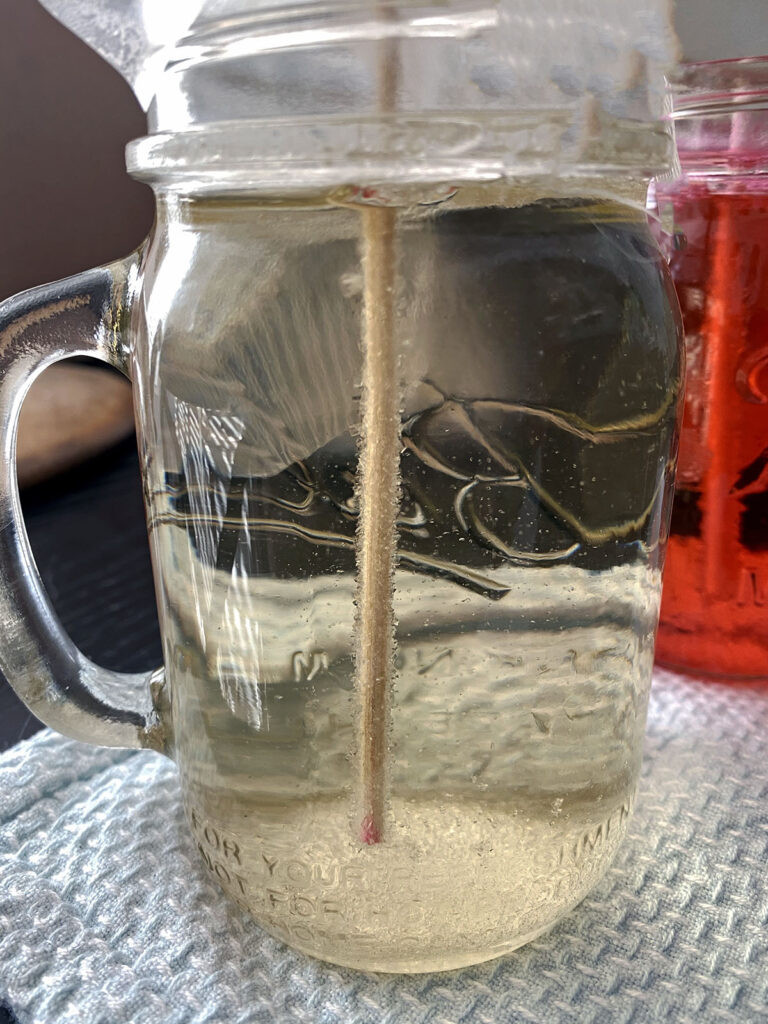 Rock candy crystals forming in jar after 1 day
3.5. Removing and Drying the Rock Candy
After a week, your rock candy should be ready.
- Remove the Sticks: Gently remove the sticks from the jars, being careful not to break the crystals. You may need to use a knife to loosen any crystals that have formed on the sides or bottom of the jar.
- Dry the Candy: Place the sticks on a wire rack or hang them upside down to dry completely. This may take several hours.
- Enjoy: Once the rock candy is dry, it’s ready to enjoy or wrap as gifts.
4. Tips and Tricks for Perfect Rock Candy
Here are some helpful tips to ensure your rock candy turns out perfectly:
4.1. Ensuring Crystal Growth
- Supersaturation is Key: Make sure the sugar solution is truly supersaturated by using the correct sugar-to-water ratio and dissolving the sugar completely.
- Seed the Sticks: Coating the sticks with sugar crystals provides a base for the new crystals to grow on.
- Avoid Disturbing the Jars: Once the sticks are in the solution, avoid moving the jars or bumping the sticks, as this can disrupt the crystal formation.
- Maintain a Stable Temperature: Keep the jars in a location with a consistent temperature, away from drafts or direct sunlight.
4.2. Troubleshooting Common Issues
- No Crystal Growth: If crystals aren’t forming, the sugar solution may not be supersaturated enough. Try boiling the solution again and adding more sugar.
- Small Crystals: If the crystals are too small, try letting them grow for a longer period.
- Cloudy Crystals: Cloudy crystals can be caused by impurities in the sugar or water. Use filtered water and high-quality sugar for best results.
- Crystals Sticking to the Jar: Make sure the sticks are not touching the bottom or sides of the jar. You can also try coating the inside of the jar with a thin layer of vegetable oil before adding the sugar solution.
4.3. Creative Variations
- Layered Colors: Create layered rock candy by adding different colors of sugar solution to the jars at different times.
- Flavored Sugar: Use flavored sugar, such as cinnamon or vanilla sugar, to add extra flavor to the crystals.
- Edible Glitter: Add edible glitter to the sugar solution for a sparkling effect.
- Rock Candy Swizzle Sticks: Use the rock candy sticks to stir cocktails or hot beverages for a sweet and stylish touch.
5. The Science Behind Rock Candy
Understanding the science behind rock candy can help you appreciate the process even more.
5.1. Understanding Supersaturation
Supersaturation is the key to making rock candy. It occurs when a solution contains more dissolved solute (sugar) than it would normally hold at a given temperature. This is achieved by heating the water, which allows more sugar to dissolve. As the solution cools, it becomes unstable, and the excess sugar begins to crystallize out of the solution.
5.2. The Crystallization Process
Crystallization is the process by which atoms or molecules arrange themselves into a highly ordered structure known as a crystal. In the case of rock candy, sugar molecules in the supersaturated solution begin to attach themselves to the sugar crystals on the stick, forming larger and larger crystals over time.
5.3. Factors Affecting Crystal Formation
Several factors can affect the size and shape of the crystals:
- Temperature: A stable, cool temperature promotes slow and steady crystal growth, resulting in larger, more uniform crystals.
- Purity: Impurities in the sugar or water can disrupt the crystal formation, leading to smaller or misshapen crystals.
- Disturbances: Disturbing the solution while the crystals are growing can also disrupt the process, resulting in smaller or uneven crystals.
6. Storing and Using Your Rock Candy
Proper storage is essential to keep your rock candy fresh and prevent it from becoming sticky.
6.1. Best Storage Practices
- Airtight Containers: Store the rock candy in airtight containers to protect it from moisture.
- Cool, Dry Place: Keep the containers in a cool, dry place, away from direct sunlight or heat.
- Individual Wrapping: For extra protection, you can wrap each rock candy stick in cellophane or plastic wrap.
6.2. Creative Uses for Rock Candy
- Edible Decorations: Use rock candy to decorate cakes, cupcakes, and other desserts.
- Party Favors: Package rock candy sticks as party favors for birthdays, weddings, or other special occasions.
- Drink Stirrers: Use rock candy sticks to stir cocktails, mocktails, or hot beverages.
- Gifts: Give rock candy as a homemade gift to friends and family.
6.3. Shelf Life
When stored properly, rock candy can last for several months to a year. However, it’s best to consume it within a few months for optimal flavor and texture.
7. Frequently Asked Questions (FAQs)
Here are some frequently asked questions about making rock candy:
7.1. Common Questions About Rock Candy Making
- Why isn’t my rock candy growing?
- Ensure your sugar solution is supersaturated by using the correct sugar-to-water ratio and dissolving the sugar completely.
- How long does it take for rock candy to grow?
- It typically takes 6-7 days for rock candy crystals to fully form.
- Can I reuse the sugar solution?
- Yes, you can reuse the sugar solution. Reheat it, add a bit more sugar, and let it cool before inserting new sticks.
- What if my crystals are too small?
- Allow the crystals to grow for a longer period, up to 10 days.
- How do I prevent the crystals from sticking to the jar?
- Make sure the sticks are not touching the bottom or sides of the jar. You can also try coating the inside of the jar with a thin layer of vegetable oil.
- Can I add flavoring to my rock candy?
- Yes, you can add a few drops of flavoring extract to the sugar solution after it has cooled slightly.
- What’s the best way to store rock candy?
- Store rock candy in airtight containers in a cool, dry place.
- Can I make rock candy without a thermometer?
- Yes, you can make rock candy without a thermometer. Just ensure the sugar is completely dissolved and the solution comes to a gentle boil.
- Why are my crystals cloudy?
- Cloudy crystals can be caused by impurities in the sugar or water. Use filtered water and high-quality sugar for best results.
- Is rock candy a good science experiment for kids?
- Yes, making rock candy is a great science experiment to teach kids about saturation, crystallization, and patience.
8. Rockscapes.net: Your Source for Natural Beauty and Inspiration
At rockscapes.net, we’re passionate about bringing the beauty of natural elements into your life. Just as rock candy transforms simple sugar into sparkling crystals, we help you transform your living spaces with the timeless elegance of natural stone.
8.1. Discover Rockscapes.net
We offer a wide range of resources and inspiration for incorporating natural stone into your landscape and home:
- Design Ideas: Explore stunning landscape designs featuring natural stone elements.
- Stone Selection Guide: Learn about different types of stone and their unique properties.
- Installation Tips: Get expert advice on installing stone pathways, walls, and features.
- Maintenance Guide: Discover how to care for your stone features to keep them looking beautiful for years to come.
- Expert Advice: Consult with our team of experts to get personalized recommendations for your project.
8.2. How Rockscapes.net Can Help You
Whether you’re looking to create a serene garden retreat or a striking architectural statement, rockscapes.net has the resources and expertise to help you achieve your vision. We can assist you with:
- Choosing the right stone: From granite to limestone, we can help you select the perfect stone for your style and budget.
- Designing your landscape: Our team can create custom landscape designs that incorporate natural stone seamlessly.
- Finding a qualified installer: We can connect you with experienced professionals who can install your stone features with precision and care.
- Sourcing high-quality materials: We partner with trusted suppliers to ensure you get the best quality stone at competitive prices.
9. Conclusion: Sweeten Your Life with Homemade Rock Candy
Making rock candy is a fun, educational, and rewarding activity that can add a touch of sweetness to your life. With a few simple ingredients and a little patience, you can create beautiful, sparkling crystals that are perfect for enjoying, gifting, or decorating. So, gather your supplies, follow our step-by-step guide, and get ready to transform ordinary sugar into extraordinary edible gems!
9.1. Final Thoughts and Encouragement
Remember, the key to success is patience and attention to detail. Don’t be discouraged if your first batch doesn’t turn out perfectly. Experiment with different colors, flavors, and techniques until you find what works best for you. And most importantly, have fun with the process!
9.2. Call to Action: Visit Rockscapes.net Today
Ready to bring the beauty of nature into your home and landscape? Visit rockscapes.net today to explore our wide range of resources and inspiration. Whether you’re looking for design ideas, stone selection guides, or expert advice, we have everything you need to create stunning and sustainable living spaces.
Contact Us:
- Address: 1151 S Forest Ave, Tempe, AZ 85281, United States
- Phone: +1 (480) 965-9011
- Website: rockscapes.net
Discover the endless possibilities of natural stone and transform your vision into reality with rockscapes.net!