Craving a cool treat? How To Make Homemade Ice Cream With Rock Salt is easier than you think! At rockscapes.net, we’re passionate about crafting amazing experiences, and that includes delicious desserts. This guide provides a simple, fun way to create creamy homemade ice cream using just a few ingredients and the magic of rock salt. Get ready to explore a delightful DIY ice cream adventure, perfect for family fun and creating sweet memories with this ice cream recipe and ice cream maker alternative.
1. What is Homemade Ice Cream with Rock Salt?
Homemade ice cream with rock salt is a classic method of making ice cream without an ice cream machine. This method uses a mixture of ice and rock salt to lower the freezing point of the ice, allowing the ice cream mixture to freeze.
Making ice cream at home with rock salt is a simple and enjoyable way to create a delicious frozen treat. The combination of basic ingredients and a bit of hands-on effort results in a creamy, flavorful dessert that’s perfect for hot days or any time you crave something sweet. The process is not only easy but also a fun activity that can involve the whole family, especially children, who will be fascinated by the science behind it. By shaking a bag filled with the ice cream mixture surrounded by ice and rock salt, you can transform simple ingredients into a delightful homemade dessert in just a few minutes. This method is an excellent alternative to using an ice cream machine and offers a satisfying way to enjoy a classic treat made from scratch.
The Science Behind the Freeze
The secret lies in the colligative properties of solutions. Adding rock salt to ice lowers its freezing point, creating a super-cooled environment. This allows the heat from the ice cream mixture to transfer to the ice, causing it to freeze.
The Sweet Reward
The result? A creamy, delicious homemade ice cream, perfect for hot summer days or any time you crave a sweet treat.
2. Why Use Rock Salt for Homemade Ice Cream?
Rock salt is crucial for making homemade ice cream without a machine because it lowers the freezing point of water.
The magic of rock salt in homemade ice cream lies in its ability to lower the freezing point of water. When rock salt (sodium chloride) is added to ice, it disrupts the equilibrium of freezing and melting. Ice naturally exists in a state of equilibrium where it is constantly melting and refreezing. Adding salt interferes with this process because the salt ions get in the way of water molecules trying to re-bond into a solid structure.
To re-establish equilibrium, some of the ice melts, and this melting process requires energy in the form of heat. The heat is drawn from the surrounding environment, including the ice cream mixture. This causes the temperature of the ice bath to drop below the normal freezing point of water (32°F or 0°C). The salt allows the ice to get colder than it normally would.
By surrounding the container holding the ice cream mix with this super-cooled ice bath, heat is drawn out of the ice cream mixture, allowing it to freeze. Without the addition of salt, the ice would only cool the mixture to 32°F (0°C), which is not cold enough to freeze it into ice cream. Rock salt ensures that the temperature drops significantly, typically to around 20°F (-6.7°C) or lower, which is ideal for freezing the mixture quickly and evenly.
The lower temperature is essential for creating the right texture. The quicker the mixture freezes, the smaller the ice crystals that form, resulting in smoother, creamier ice cream. Slow freezing leads to larger ice crystals and a grainier texture, which is less desirable.
Additionally, the amount of salt used affects the temperature of the ice bath. Too little salt, and the temperature won’t drop enough to freeze the mixture properly. Too much salt, and while the temperature might drop lower, it can also slow down the melting process and not be as efficient.
In summary, rock salt enables the creation of a super-cooled environment that’s cold enough to freeze the ice cream mixture effectively. This process ensures the ice cream freezes quickly and evenly, resulting in the creamy, smooth texture that characterizes delicious homemade ice cream.
The Science of Freezing Point Depression
- Lowering the Temperature: Rock salt lowers the freezing point of the ice, allowing it to get colder than 32°F (0°C).
- Creating a Super-Cooled Environment: This super-cooled environment draws heat away from the ice cream mixture, causing it to freeze.
3. What are the Intended Search Purposes for “How to Make Homemade Ice Cream with Rock Salt”?
Understanding the user’s intent behind searching for “how to make homemade ice cream with rock salt” can help create content that truly meets their needs. Here are five key search intents:
- Recipe and Instructions:
- Intent: Users are looking for a detailed, step-by-step guide on how to make ice cream at home using rock salt. They want a reliable recipe that provides clear instructions, ingredient lists, and tips for success.
- Content Needs: The content should include a precise recipe with measurements, easy-to-follow instructions, and visual aids like photos or videos. It should also offer troubleshooting tips for common issues.
- Understanding the Science:
- Intent: Some users are curious about the science behind using rock salt to make ice cream. They want to understand why rock salt is necessary and how it helps in the freezing process.
- Content Needs: Explain the colligative properties of salt, how it lowers the freezing point of water, and why this is essential for making ice cream without a machine. Providing scientific explanations in simple, easy-to-understand terms is crucial.
- Finding Alternatives and Substitutions:
- Intent: Users might be searching for alternatives to rock salt or other ingredients if they don’t have them on hand. They want to know if they can substitute different types of salt or dairy products.
- Content Needs: Offer a list of possible substitutes for rock salt (like kosher salt or table salt) and dairy options (like coconut milk or almond milk). Explain how these substitutions might affect the final product.
- Troubleshooting and Tips:
- Intent: Users who have already tried making ice cream with rock salt but encountered problems are looking for solutions. They need tips to avoid common mistakes and improve their results.
- Content Needs: Address common issues like the ice cream not freezing properly, the texture being too grainy, or the bag leaking. Provide practical tips and solutions based on expert advice and user experiences.
- Fun and Engaging Activity:
- Intent: Many users, especially parents, are looking for a fun and educational activity to do with their kids. They want a simple, engaging project that teaches basic science concepts while producing a tasty treat.
- Content Needs: Frame the ice cream-making process as a fun, kid-friendly activity. Include tips for involving children in the process, safety precautions, and ways to make it an educational experience.
4. What You Need to Make Homemade Ice Cream with Rock Salt
To embark on your homemade ice cream adventure, gather these essential items:
Ingredients: The Foundation of Flavor
- 2 cups heavy cream, half-and-half, or whole milk (or a combination)
- 1/4 cup granulated sugar
- 1 teaspoon vanilla extract (or other flavoring)
Supplies: The Tools for Success
- 2 gallon-sized Ziploc bags (freezer-safe, heavy-duty)
- 6-8 cups of ice
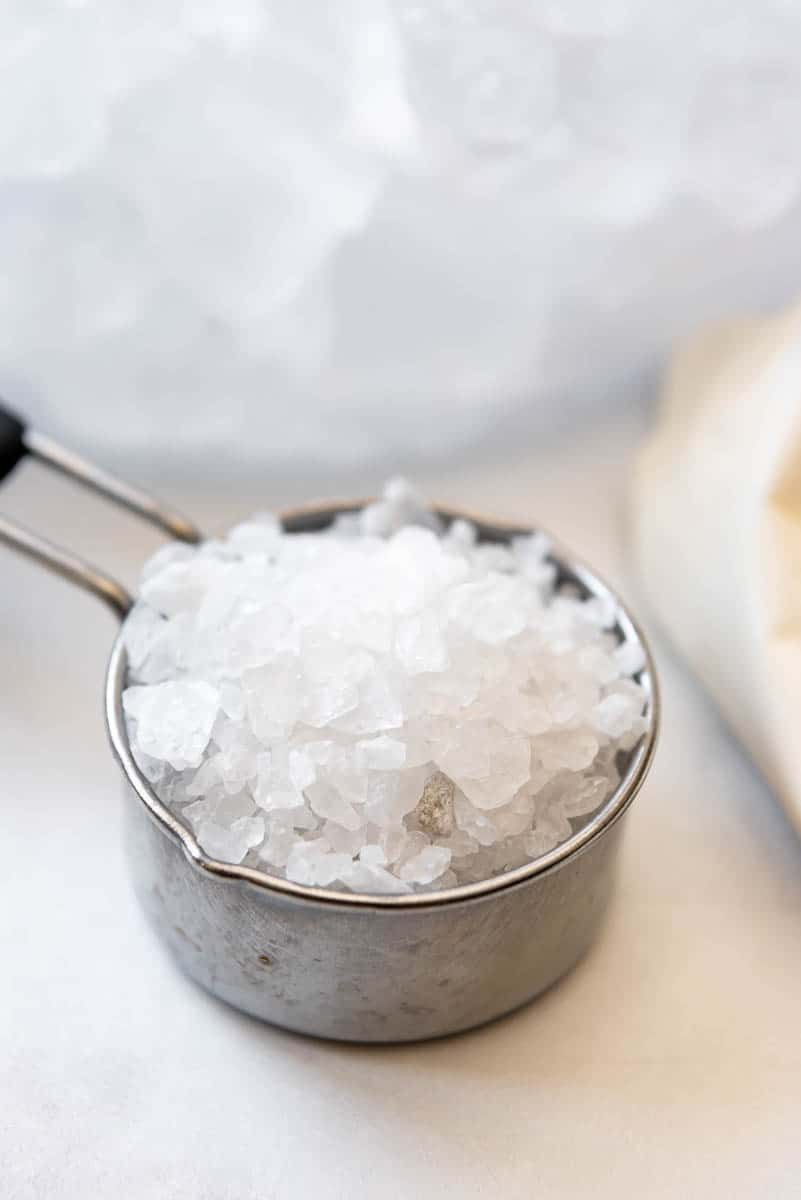
- 1/3 cup rock salt (or coarse kosher salt)
- Kitchen towel or gloves (to protect your hands from the cold)
 Ingredients for Homemade Ice Cream in a Bag
Optional: Adding Your Personal Touch
- Your favorite ice cream toppings (sprinkles, chocolate chips, fruit, etc.)
- Extracts for flavoring (mint, almond, etc.)
5. Step-by-Step Guide: Making Ice Cream in a Bag
Follow these simple steps to create your own delicious homemade ice cream:
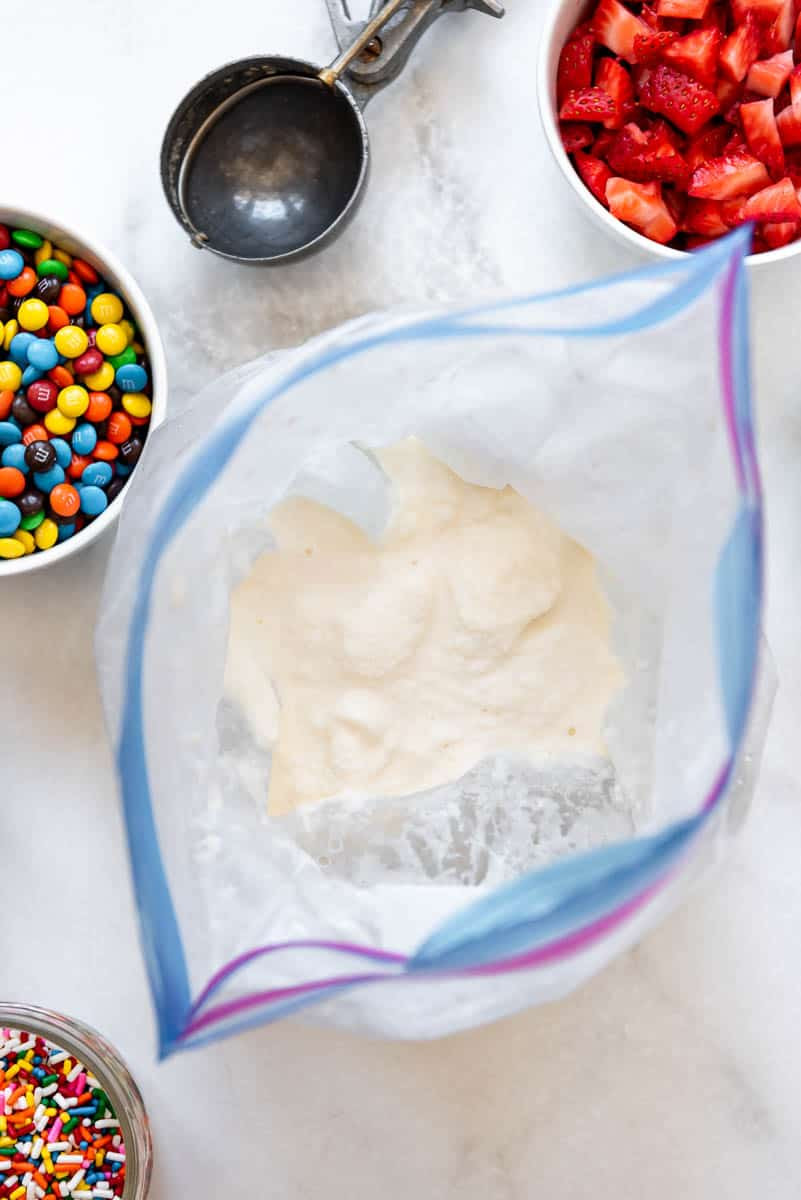
Step 1: Mix the Ingredients
- Pour the cream, sugar, and vanilla extract into one of the Ziploc bags.
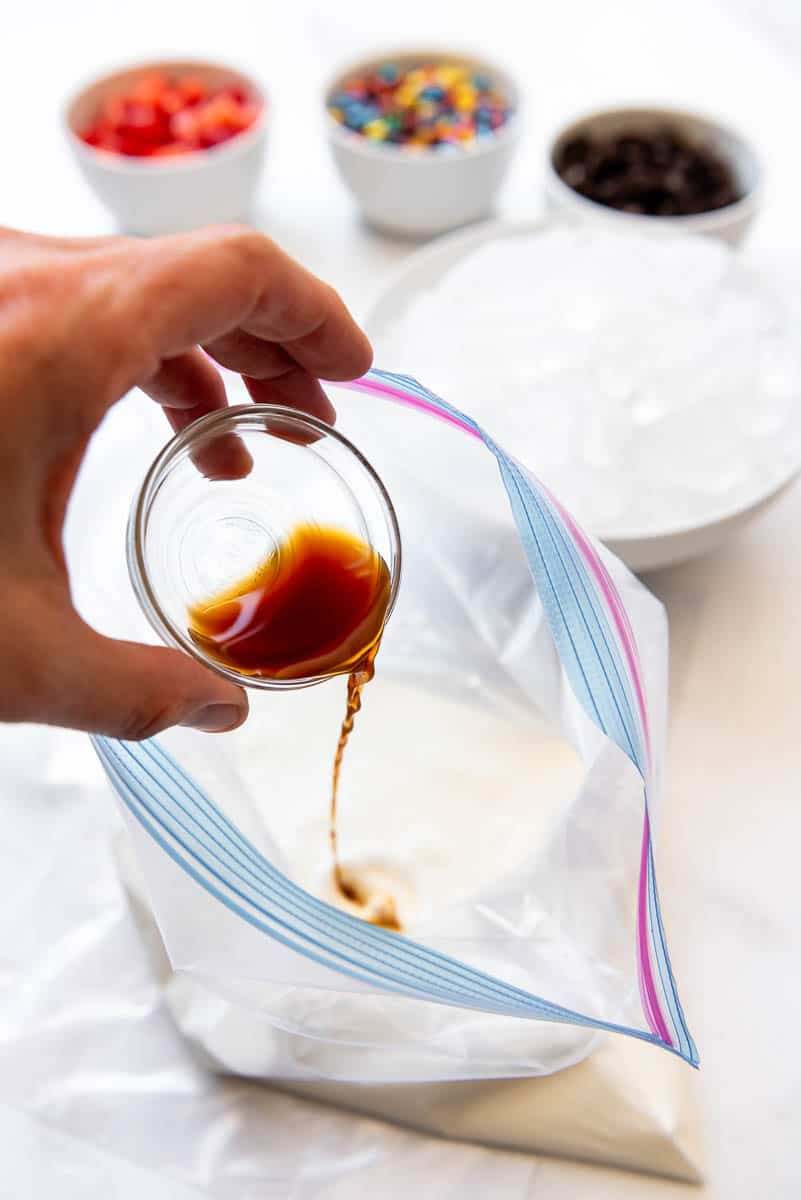 Mixing Ice Cream Ingredients
- Seal the bag tightly, removing as much air as possible. This prevents ice crystals from forming and ensures a smoother texture.
- Squish the mixture around to dissolve the sugar.
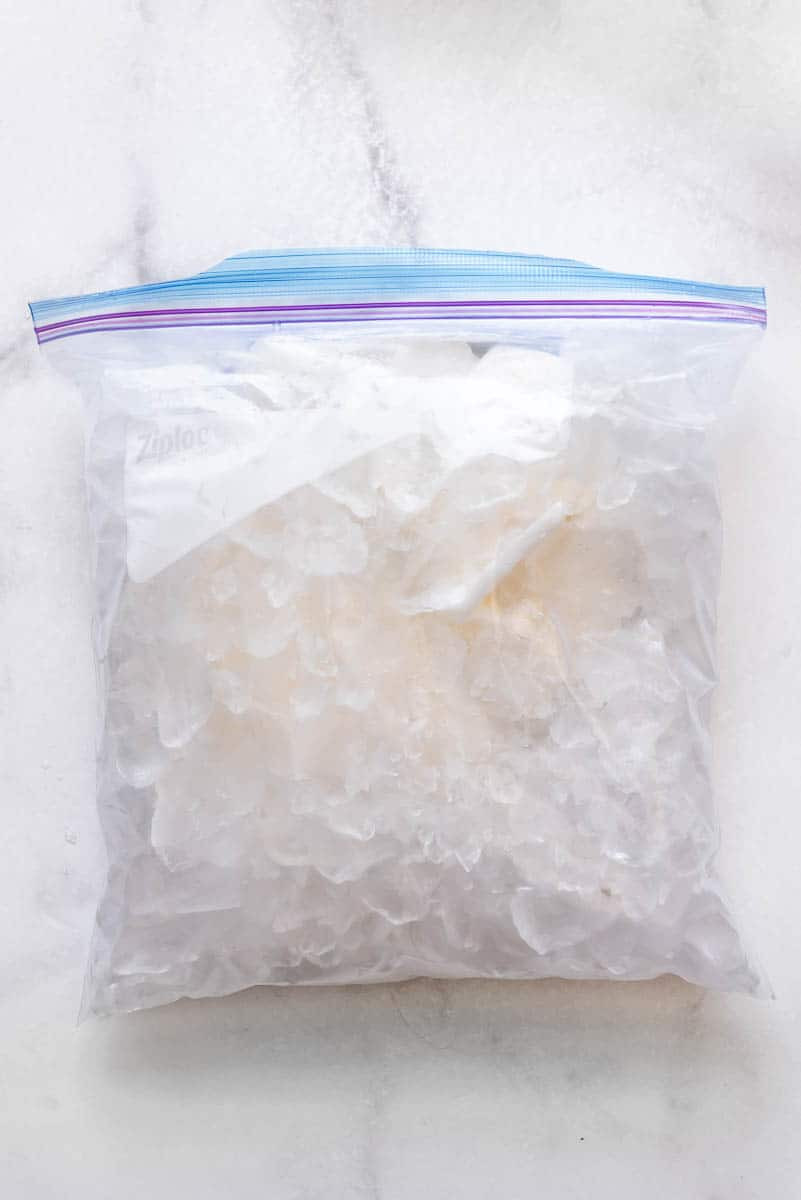
Step 2: Prepare the Ice Bath
- Fill the other Ziploc bag with ice.
- Add the rock salt to the ice.
- Seal the bag tightly, again removing as much air as possible.
 Adding Ice and Rock Salt
Step 3: Shake, Shake, Shake!
- Place the bag with the ice cream mixture inside the bag with the ice and salt.
- Wrap the bag in a kitchen towel or wear gloves to protect your hands from the cold.
- Shake, massage, and squish the bag for 5-15 minutes. The more vigorously you shake, the faster the ice cream will freeze.
 Shaking the Ice Cream Bag
Step 4: Enjoy!
- Carefully open the outer bag, being careful not to get any salt water into the ice cream bag.
- Remove the ice cream bag and open it carefully.
- Add your favorite toppings and enjoy your homemade ice cream immediately!
- If you prefer a harder consistency, place the ice cream in the freezer for a few hours.
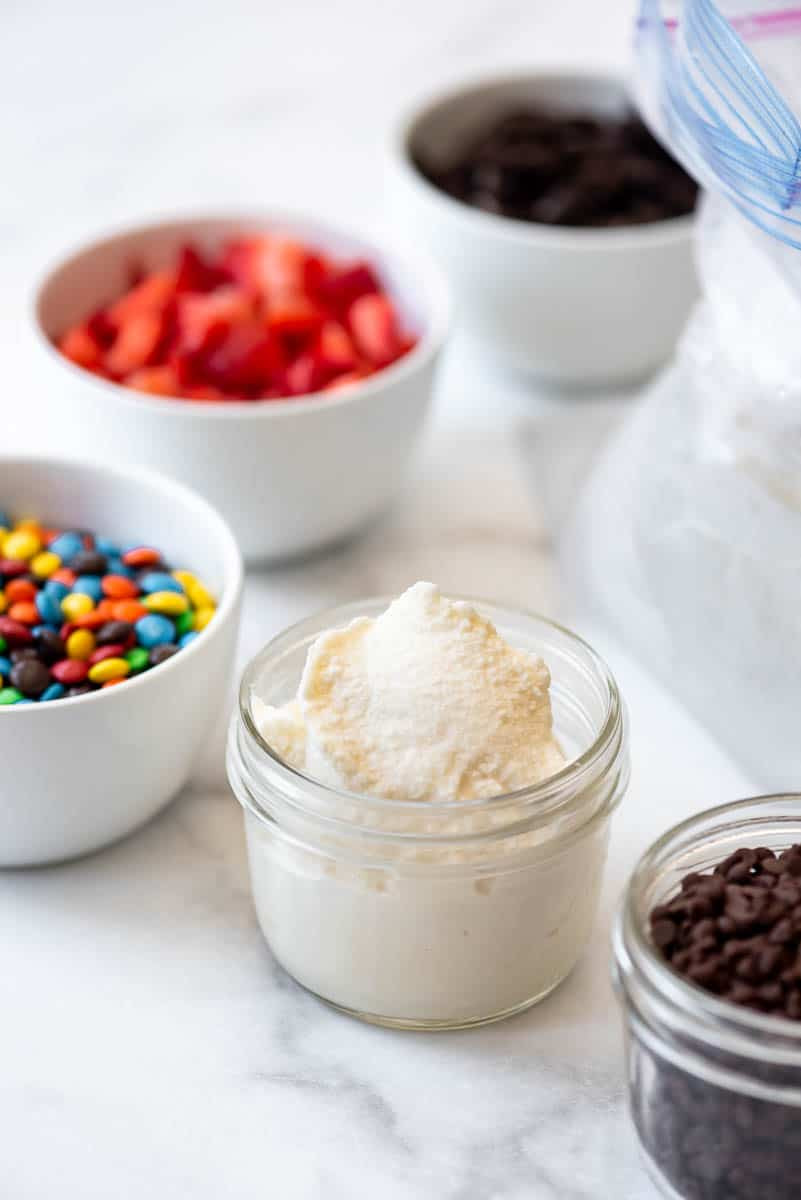
 Enjoying Homemade Ice Cream
Tips for Success
- Use high-quality ingredients for the best flavor.
- Ensure the bags are sealed tightly to prevent leaks.
- Shake vigorously for the best texture.
- Don’t be afraid to experiment with different flavors and toppings.
6. Variations and Flavor Ideas
The possibilities are endless when it comes to flavoring your homemade ice cream. Here are a few ideas to get you started:
Classic Flavors
- Chocolate: Add 2 tablespoons of cocoa powder to the ice cream mixture.
- Mint Chocolate Chip: Add 1/2 teaspoon of mint extract and 1/4 cup of mini chocolate chips.
- Strawberry: Add 1/2 cup of pureed strawberries to the ice cream mixture.
Creative Combinations
- Coffee: Add 1 tablespoon of instant coffee granules to the ice cream mixture.
- Maple Walnut: Add 1/4 cup of maple syrup and 1/4 cup of chopped walnuts.
- Lemon: Add 1 tablespoon of lemon juice and 1 teaspoon of lemon zest.
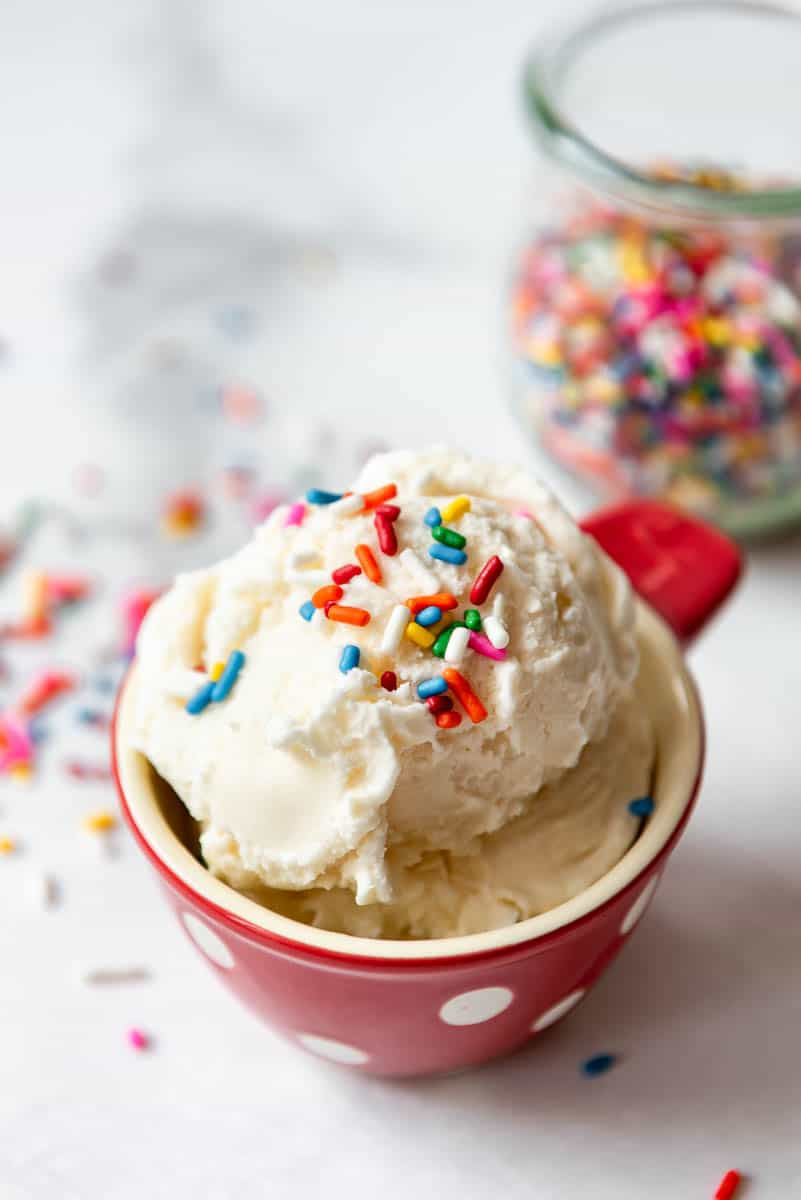 Homemade Vanilla Ice Cream with Sprinkles
Dairy-Free Options
- Coconut Milk Ice Cream: Substitute coconut milk for the heavy cream or milk.
- Almond Milk Ice Cream: Substitute almond milk for the heavy cream or milk.
Adding Mix-ins
- Cookies and Cream: Mix in crushed Oreo cookies at the end.
- Peanut Butter Cup: Mix in chopped peanut butter cups at the end.
- Rocky Road: Mix in marshmallows, chocolate chips, and nuts at the end.
7. Troubleshooting Common Issues
Even with the simplest recipes, things can sometimes go wrong. Here are some common issues and how to fix them:
Ice Cream Isn’t Freezing
- Possible Cause: Not enough salt, ice not cold enough, bag leaking.
- Solution: Add more rock salt, use colder ice, double-bag the ice cream mixture.
Ice Cream is Grainy
- Possible Cause: Not enough shaking, mixture not cold enough.
- Solution: Shake more vigorously, ensure the ice bath is very cold.
Bag is Leaking
- Possible Cause: Cheap bags, overfilled bag.
- Solution: Use heavy-duty freezer bags, don’t overfill the bag.
Ice Cream is Too Sweet
- Possible Cause: Too much sugar.
- Solution: Reduce the amount of sugar in the recipe.
8. The Best Types of Salt to Use
While rock salt is the traditional choice, other types of salt can work in a pinch. Here’s a breakdown:
| Salt Type | Pros | Cons |
|---|---|---|
| Rock Salt | Most effective at lowering the freezing point of water | Can be harder to find |
| Kosher Salt | Coarse, works well, readily available | Not as effective as rock salt |
| Table Salt | Readily available | Can dissolve too quickly, making it less effective |
| Sea Salt | Adds a unique flavor | Can be expensive, may not lower the freezing point as much |
| Epsom Salt | Do not use Epsom salt as it is not for consumption |
9. What Makes This a Great Summer Project?
Making homemade ice cream with rock salt is the perfect summer project for several reasons:
- Fun and Engaging: It’s a hands-on activity that gets everyone involved.
- Educational: It teaches basic science concepts in a fun way.
- Delicious: The end result is a tasty treat that everyone can enjoy.
- Customizable: You can experiment with different flavors and toppings to create your own unique ice cream.
- No Special Equipment Required: You don’t need an ice cream maker or any other special equipment.
 Homemade Ice Cream in a Bag with Toppings
10. Where to Get the Best Landscaping Rocks in the USA?
While you’re enjoying your homemade ice cream, consider enhancing your outdoor space with beautiful landscaping rocks from rockscapes.net. We offer a wide variety of rocks to suit any style and budget.
Rockscapes.net: Your Source for Quality Landscaping Rocks
At rockscapes.net, we’re passionate about helping you create the outdoor oasis of your dreams. We offer a wide selection of high-quality landscaping rocks, including:
- Granite: Durable and versatile, perfect for pathways and retaining walls.
- Slate: Adds a touch of elegance to any landscape.
- River Rock: Smooth and rounded, ideal for creating natural-looking water features.
- Flagstone: Perfect for patios and walkways, offering a natural, rustic look.
- Boulders: Create a dramatic focal point in your garden.
We service customers throughout the USA, especially in areas like Arizona, where landscapes benefit greatly from the right rock features.
Address and Contact Information
For inspiration, information, and quality landscaping rocks, visit us at:
- Address: 1151 S Forest Ave, Tempe, AZ 85281, United States
- Phone: +1 (480) 965-9011
- Website: rockscapes.net
Why Choose Rockscapes.net?
- Wide Selection: We offer a diverse range of rocks to suit any style and budget.
- High Quality: Our rocks are sourced from the best quarries and suppliers.
- Expert Advice: Our knowledgeable team can help you choose the right rocks for your project.
- Competitive Prices: We offer competitive prices without compromising on quality.
- Customer Satisfaction: We are committed to providing exceptional customer service.
Landscaping Ideas with Rocks
- Rock Gardens: Create a beautiful rock garden with a variety of plants and stones.
- Pathways: Use flagstone or gravel to create inviting pathways through your garden.
- Water Features: Add a natural-looking waterfall or pond with river rock.
- Retaining Walls: Use granite or boulders to build sturdy and attractive retaining walls.
- Borders: Define your garden beds with decorative rock borders.
FAQ: Homemade Ice Cream with Rock Salt
Q1: Can I use table salt instead of rock salt?
Yes, you can use table salt, but it’s not ideal. Rock salt works best because its larger granules lower the freezing point more effectively and don’t dissolve as quickly. If you use table salt, you might need more of it and the ice may melt faster.
Q2: Why does the bag get so cold when making ice cream with rock salt?
The bag gets cold because adding rock salt to ice lowers its freezing point. To melt the ice, heat is drawn from the surroundings, including the bag, making it feel very cold.
Q3: How long do I need to shake the bag to make ice cream?
Generally, you need to shake the bag for about 5 to 15 minutes. The exact time depends on how vigorously you shake it and how cold the ice is. Keep shaking until the ice cream mixture thickens to your desired consistency.
Q4: What if my ice cream isn’t freezing even after shaking for 15 minutes?
If your ice cream isn’t freezing, ensure you’re using enough rock salt and that the ice is very cold. You can also try adding more ice and salt to the bag. Make sure the bag is sealed properly and continue shaking.
Q5: Can I use milk instead of cream to make ice cream in a bag?
Yes, you can use milk, but the ice cream will be less creamy. For the best results, use heavy cream or a combination of heavy cream and milk. You can also use alternatives like coconut milk or almond milk for a dairy-free version.
Q6: Is it safe if some of the salt water gets into the ice cream?
It’s best to avoid getting salt water into the ice cream, as it can make it taste salty and ruin the batch. Carefully open the inner bag to prevent any contamination.
Q7: What are some fun flavors I can add to my homemade ice cream?
You can add various flavors to your homemade ice cream, such as vanilla extract, chocolate syrup, mint extract, or pureed fruits like strawberries or bananas. Experiment with different extracts, spices, and mix-ins like chocolate chips, nuts, or cookie pieces.
Q8: How do I make dairy-free ice cream with rock salt?
To make dairy-free ice cream, substitute the heavy cream or milk with coconut milk, almond milk, or soy milk. Follow the same steps as the regular recipe, adjusting sweetness and flavors to your preference.
Q9: How can I make the ice cream harder after it’s made in the bag?
If you prefer a harder consistency, transfer the ice cream to a freezer-safe container and freeze it for a few hours. This will allow it to harden and become scoopable.
Q10: What is the science behind using rock salt to make ice cream?
The science behind using rock salt involves a process called freezing point depression. Adding salt to ice lowers its freezing point, creating a super-cooled environment that draws heat away from the ice cream mixture, causing it to freeze faster and more efficiently than ice alone.
Ready to transform your backyard into a stunning rockscape? Visit rockscapes.net today for inspiration, expert advice, and the best selection of landscaping rocks in the USA!