Homemade rock candy is an enjoyable activity, especially for individuals in the USA who have a passion for both geological formations and distinctive landscape design, and here at rockscapes.net we will guide you through the process. You’ll be amazed at how fun and rewarding it is to create your own crystallized sugar sticks, perfect for adding a touch of sweetness to your garden-inspired treats. Discover the secrets to making this crystallized confection and explore how it connects to the fascinating world of mineral formation, plus find some landscaping tips with rock accents.
Table of Contents
- What is Rock Candy?
- Why Make Homemade Rock Candy?
- What Equipment Do I Need?
- How to Make Rock Candy: A Step-by-Step Guide
- Can I Re-Use the Sugar Solution?
- Why Isn’t My Rock Candy Growing?
- How Can I Make Rock Candy Faster?
- How to Store Homemade Rock Candy
- Tips & Tricks for Perfect Rock Candy
- FAQ About Making Rock Candy
- How Does Rock Candy Relate to Landscaping?
1. What is Rock Candy?
Rock candy, also known as sugar candy, is essentially large sugar crystals that often come in various colors and are sold in candy stores. Rock candy is crystallized sugar formed from a supersaturated solution. If you’ve ever made simple syrup, the process of making rock candy is similar, but with a twist: you oversaturate the syrup solution by adding too much sugar. As the solution cools and rests, sugar crystals begin to form.
Because the solution is supersaturated, it cannot absorb all the sugar at a cooler temperature. As a result, the solution becomes unstable during cooling, and the excess sugar can’t stay dissolved in the liquid. Instead, it attaches itself to a skewer or string, creating the iconic rock candy crystals.
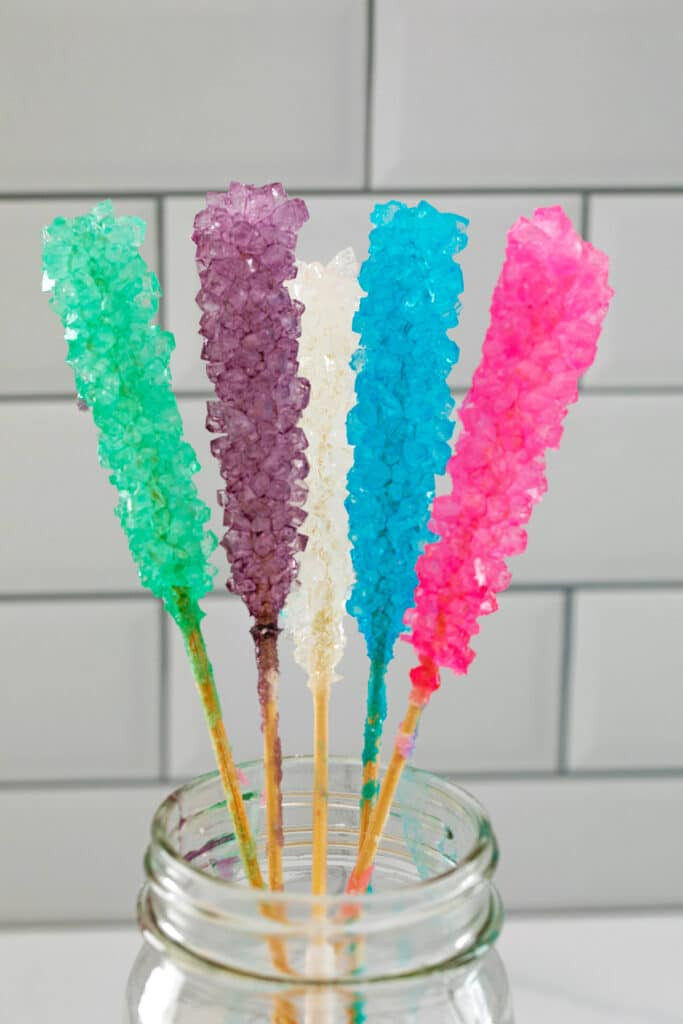
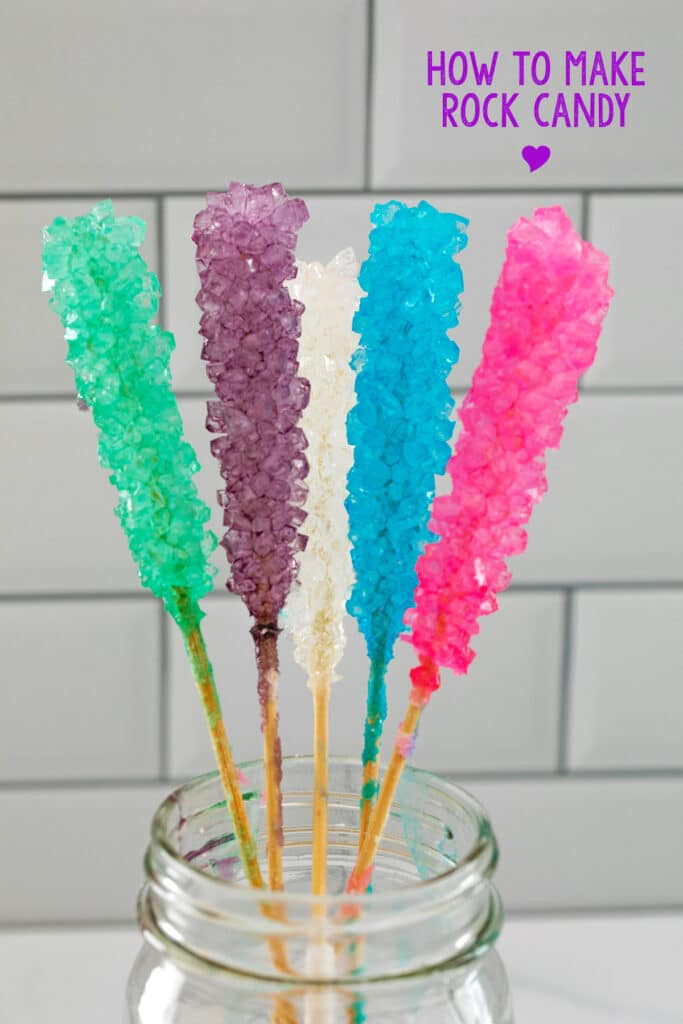 Colorful rock candy in mason jars, showcasing the variety of colors achievable.
2. Why Make Homemade Rock Candy?
Sure, you can easily purchase rock candy in a store or online, but making your own offers unique advantages and enjoyable experiences. Making homemade rock candy is a fun, educational, and creative activity. Here are some compelling reasons to try it yourself:
- Fun and Rewarding: The process of watching sugar crystals grow over several days is fascinating and satisfying. It’s a simple project that yields impressive results, making it perfect for both adults and children.
- Customization: When you make rock candy at home, you have complete control over the colors, flavors, and even the size of the crystals. This allows you to create unique treats tailored to your preferences or to match a specific theme for parties or gifts.
- Educational Science Experiment: Making rock candy is an excellent way to teach kids about crystallization and the science behind solutions and saturation. It’s a hands-on learning experience that makes science fun and engaging. According to research from Arizona State University’s School of Earth and Space Exploration, in July 2025, crystal formation provides Y.
- Unique Gifts and Decorations: Homemade rock candy can be beautifully packaged and given as gifts for holidays, birthdays, or other special occasions. It can also be used as a creative decoration for cakes, cupcakes, and other desserts.
- Creative Cocktails and Mocktails: Rock candy can be used to sweeten and add a visual appeal to cocktails and mocktails. The crystallized sugar dissolves slowly, providing a sustained sweetness and a touch of elegance to your drinks.
- Cost-Effective: Making rock candy at home can be more cost-effective than buying it pre-made, especially if you need a large quantity for events or parties.
In conjunction with making rock candy, you may also want to try making other candies, like homemade fudge and gummy candy. Here’s a great guide to sugar chemistry from Chemical Safety Facts.
3. What Equipment Do I Need?
Making homemade rock candy requires minimal equipment, most of which you likely already have in your kitchen. To make homemade rock candy, you need sugar, water, skewers, jars, and a few other common kitchen tools. Here’s a detailed list of the essentials:
| Item | Description |
|---|---|
| Granulated Sugar | The main ingredient. For 5 sticks of candy, you’ll need about 10 cups. |
| Water | Used to create the sugar solution. |
| Food Coloring | Optional, but adds a fun, colorful element to your candy. |
| Mason Jars | To hold the sugar solution while the crystals grow. Standard 16 oz mason jars are recommended. |
| Skewers or Sticks | Provide a surface for the sugar crystals to grow on. Wooden skewers or specialized rock candy sticks work well. |
| Clothespins or Clips | To balance the sticks over the jars, preventing them from touching the bottom. |
| Saucepan | For heating and dissolving the sugar in water. A large saucepan is ideal to prevent spillage. |
| Wooden Spoon | For stirring the sugar solution. |
| Measuring Cups | To accurately measure the sugar and water. |
| Optional Items | |
| Flavors | Extracts like vanilla, lemon, or peppermint can be added to the sugar solution for flavored rock candy. |
| Cellophane Wrappers | For storing and gifting your homemade rock candy. |
| Ribbon or Twine | To decorate the wrapped rock candy sticks, making them more appealing as gifts. |
Having these tools on hand will ensure a smooth and successful rock candy-making experience.
4. How to Make Rock Candy: A Step-by-Step Guide
Making rock candy at home is a rewarding project that combines science and culinary art. To make rock candy, you’ll need to create a supersaturated sugar solution and provide a surface for crystal growth. Follow these steps for perfect homemade rock candy:
-
Prepare the Skewers:
- Start by coating your skewers or sticks with granulated sugar. This crucial step “seeds” the rock candy, providing initial crystals for the sugar to adhere to as they grow.
- Moisten the skewers with water, then roll them in sugar until they are thoroughly coated.
- Set the sugar-coated skewers aside to dry completely. Ideally, do this a day in advance, but allowing them to dry for at least an hour will suffice.
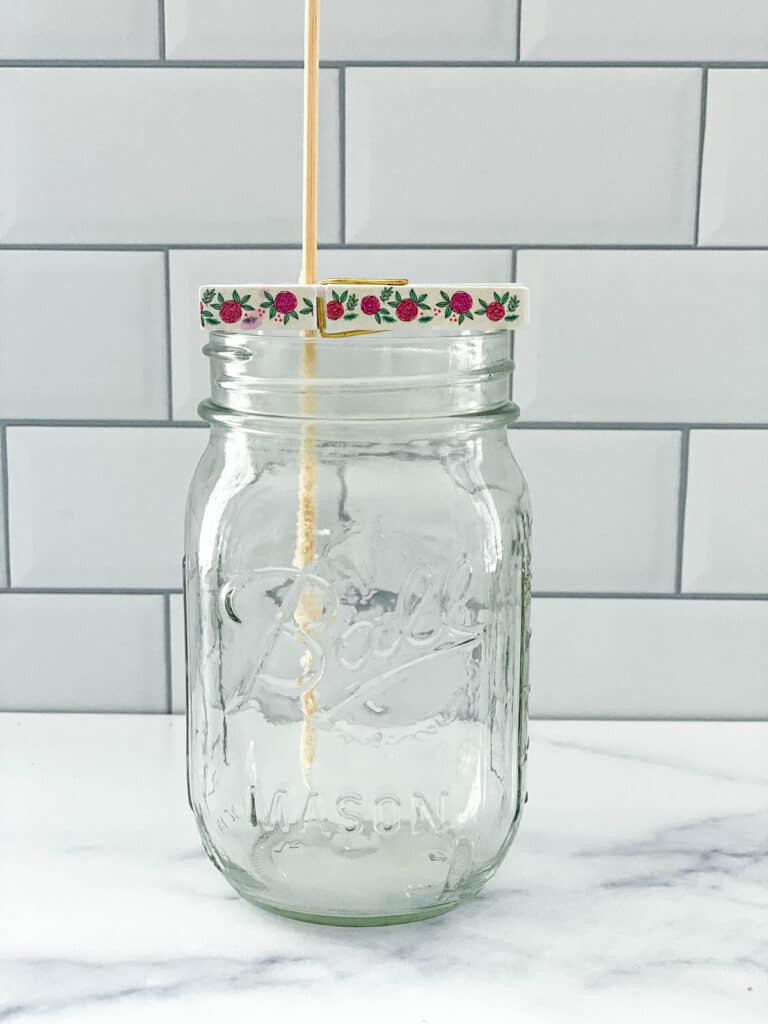 Sugar-coated skewer ready to be placed in a mason jar for rock candy creation.
 -
Set Up the Jars:
- Ensure your mason jars are clean and warm. Rinse them with hot water to remove any residue and prevent the cold glass from shocking the hot sugar solution.
- Attach a clothespin or chip clip to the top of each skewer.
- Balance the skewers over the top of the jars, making sure the skewer hangs about an inch from the bottom. This prevents the crystals from sticking to the bottom of the jar, making removal difficult.
- Set up all the jars with skewers, then remove the skewers temporarily until the sugar solution is ready.
-
Make the Sugar Solution:
- In a large saucepan, combine 4 cups of water and bring it to a boil over medium-high heat.
- Once the water is boiling, begin adding sugar one cup at a time. Stir continuously with a wooden spoon, ensuring each cup of sugar is fully dissolved before adding the next.
- As you add more sugar, you’ll notice it becomes increasingly difficult to dissolve. The sugar may clump before dissolving, which indicates that your solution is becoming supersaturated. This is exactly what you want for successful crystal growth.
- After the final cup of sugar has been dissolved, let the mixture simmer for about 5 minutes. This helps ensure all the sugar is fully dissolved and the solution is properly saturated.
-
Cool and Color the Solution:
- Remove the saucepan from the heat and let the mixture rest for about 15 minutes to cool slightly.
- Divide the hot sugar solution evenly among the prepared jars.
- Add food coloring to each jar at this time, stirring gently to distribute the color evenly. You can create a variety of colors by using different food colorings in each jar.
- Consider adding flavor extracts like vanilla or lemon for a unique twist.
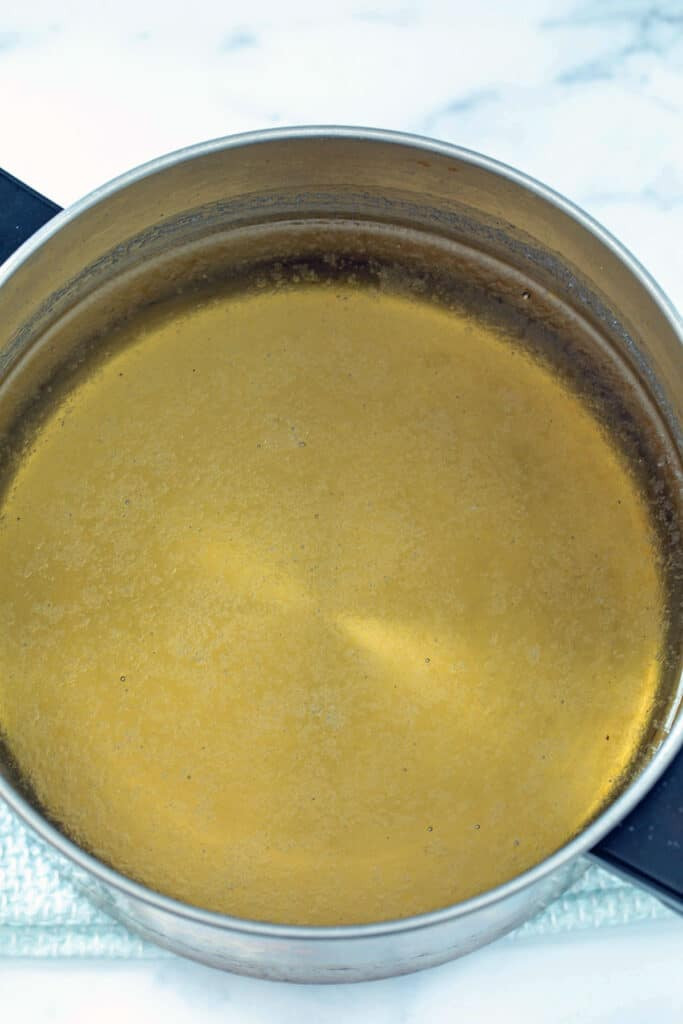 Simmering sugar water solution in a saucepan.
 -
Add the Skewers:
- Carefully place the prepared skewers back into the jars, ensuring they are suspended in the sugar solution without touching the bottom.
- Once the skewers are in place, try not to move the jars around too much. Disturbing the solution can disrupt the crystal formation process.
-
Wait for Crystal Growth:
- Now comes the hardest part: waiting for the rock candy crystals to grow.
- You should start to see crystals forming on the sticks within a day or two. The growth rate depends on the saturation of the solution and the ambient temperature.
- Over the next 6-7 days, check on your jars daily to observe the crystal growth. You’ll notice the crystals becoming larger and more defined as time passes.
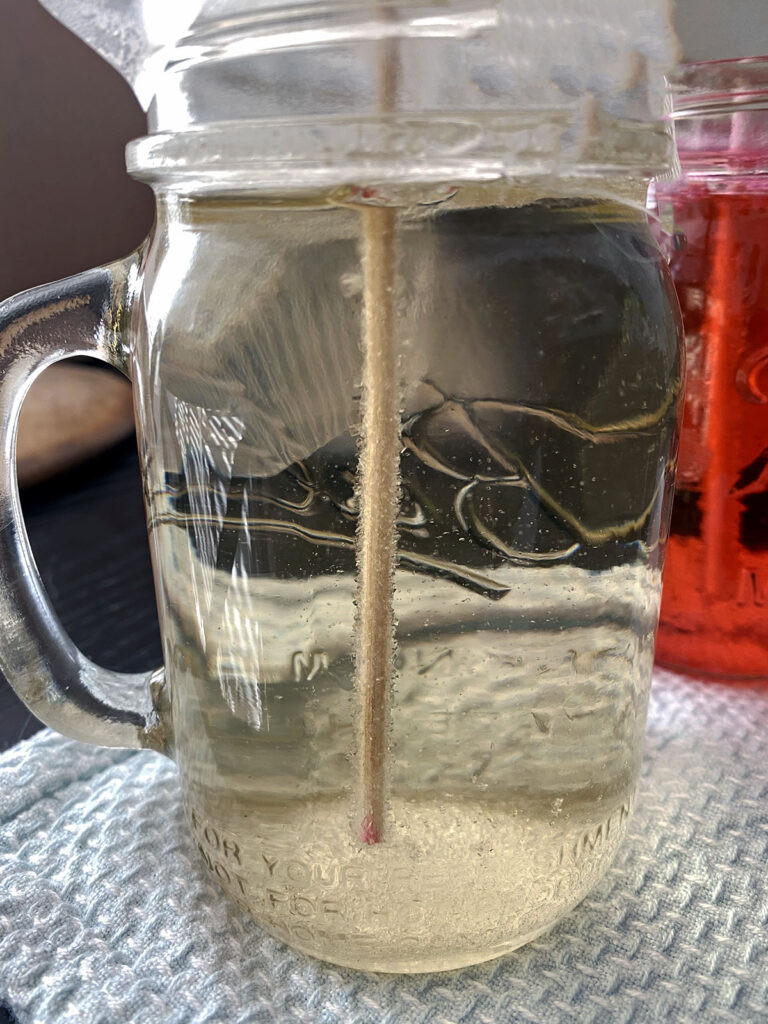 Rock candy crystals forming on a skewer after one day.
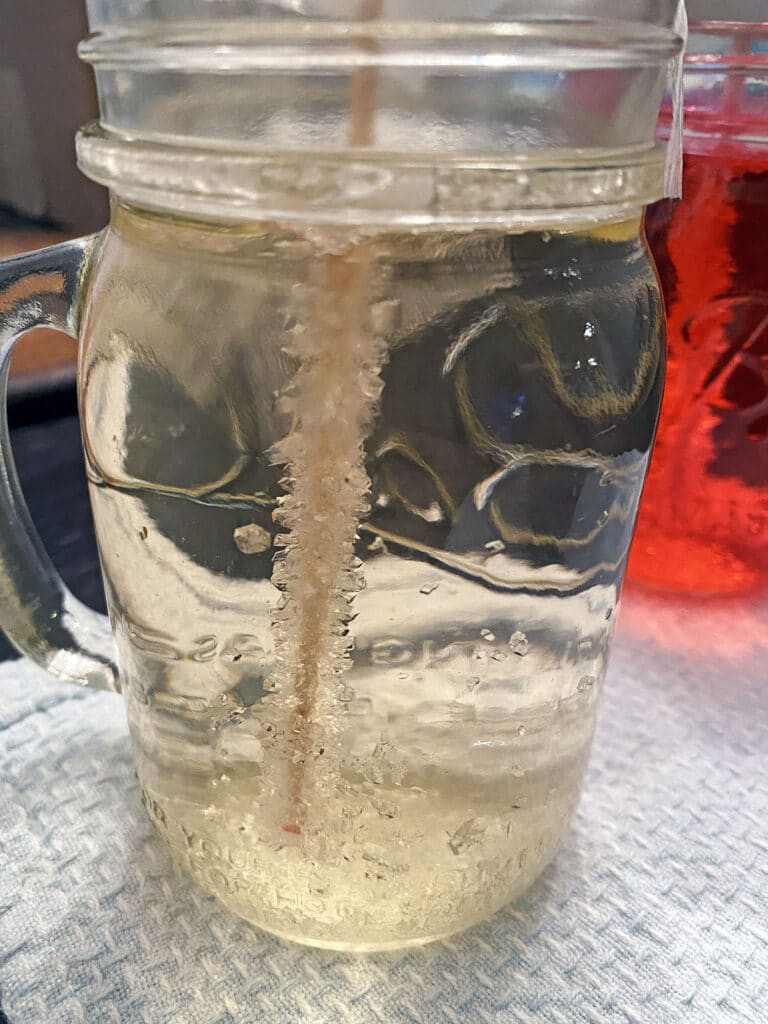 Crystal formation on a rock candy skewer after three days.
 -
Remove the Rock Candy:
- After 6-7 days, or when the crystals have reached your desired size, it’s time to remove the rock candy from the jars.
- Use your finger or a fork to gently crack the hardened sugar layer on top of the jar.
- Carefully wiggle the stick to release it from the jar. If it’s stuck, try running warm water around the outside of the jar to loosen the sugar.
- Once the stick is free, let any excess syrup drizzle off. You can place the candy over an empty jar or bowl to catch the drips or set it on a paper towel.
-
Dry and Enjoy:
- Allow the rock candy to dry completely before enjoying or storing it. This may take a few hours.
- Once dry, your homemade rock candy is ready to be enjoyed!
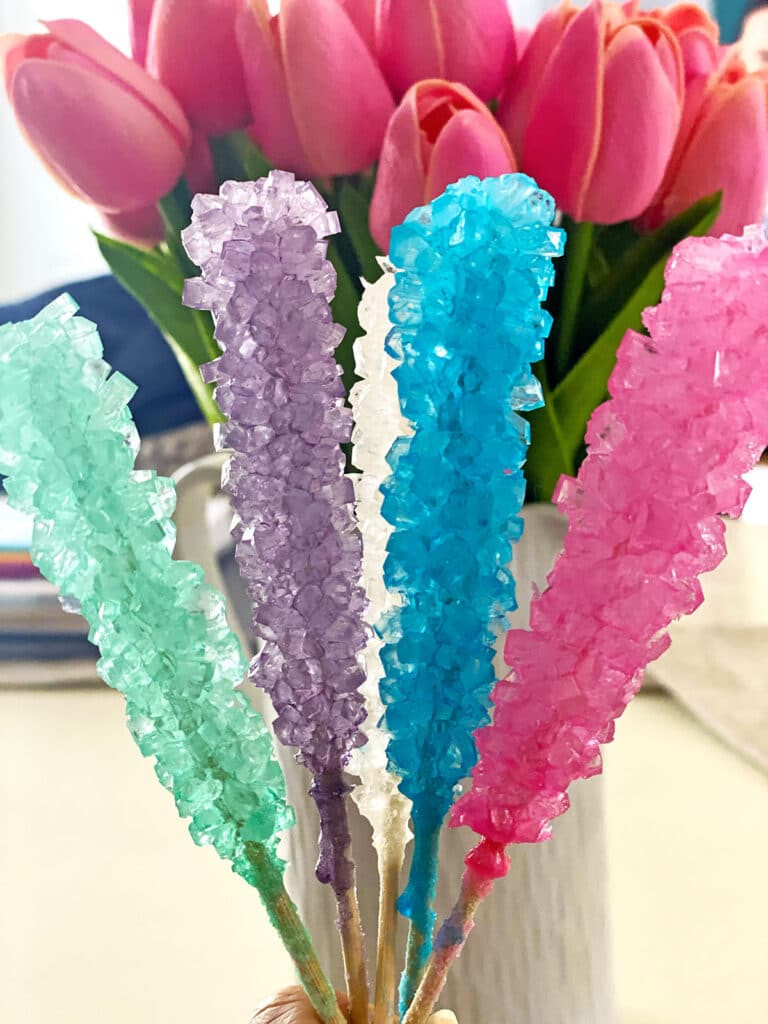 Close-up of homemade rock candy on sticks.
5. Can I Re-Use the Sugar Solution?
Many people wonder if the leftover sugar solution can be reused to make more rock candy. Yes, you can reuse the sugar solution, but with a few important steps. Reusing the solution is a great way to minimize waste and maximize your ingredients. Here’s how to do it successfully:
-
Reheat the Solution:
- After removing the rock candy sticks, pour the remaining sugar solution back into the saucepan.
- Bring the solution to a boil over medium heat. This step is essential to redissolve any sugar crystals that may have formed and to ensure the solution is still saturated enough for new crystal growth.
-
Add More Sugar:
- For the best results, add an additional ¼ cup of sugar to the solution. This will help maintain the supersaturated state necessary for crystal formation.
- Stir the sugar into the boiling solution until it is completely dissolved.
-
Simmer Briefly:
- Let the mixture simmer for a few minutes after adding the sugar. This ensures that the added sugar is fully incorporated and the solution is properly saturated.
-
Cool and Reuse:
- Remove the saucepan from the heat and let the solution cool for about 10 minutes.
- Pour the reheated sugar solution back into a clean mason jar.
- Place a new sugar-coated skewer into the solution and follow the same crystal-growing process as before.
Reheating the solution and adding more sugar significantly improves the outcome of the second batch of rock candy. If you skip this step, the crystals may not grow as large or as well-formed.
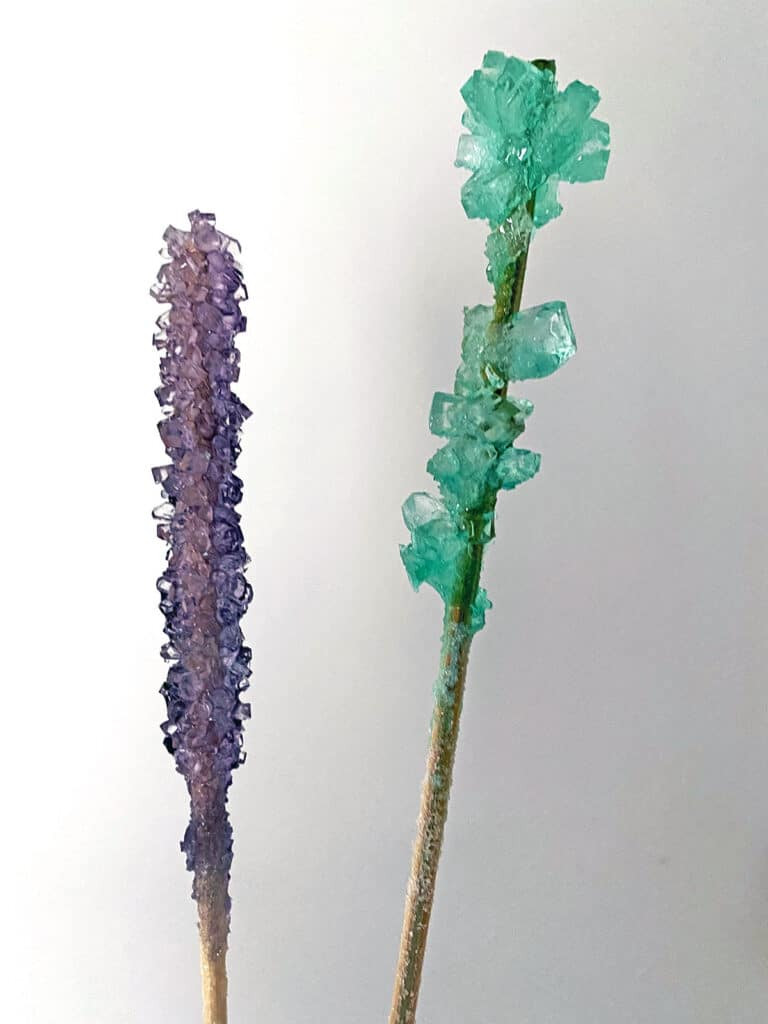 Comparison of rock candy made from reused sugar solution, with and without reheating.
6. Why Isn’t My Rock Candy Growing?
Making rock candy can be a delicate process, and sometimes things don’t go as planned. If your rock candy isn’t growing, it’s likely due to an undersaturated sugar solution or disturbances during the crystal formation process. Here are several reasons why your rock candy might not be growing and how to troubleshoot the issue:
-
Insufficient Sugar Saturation:
- The most common reason for rock candy not growing is that the sugar solution wasn’t supersaturated enough. This means there wasn’t enough sugar dissolved in the water for crystals to form properly.
- Solution: If you suspect this is the issue, pour the mixture back into the saucepan, bring it to a boil, and add another cup of sugar. Stir until the sugar is completely dissolved. If the first cup dissolves easily, add another until it becomes difficult to dissolve.
-
Lack of Seed Crystals:
- The sugar crystals need a base to grow on. If the skewers aren’t properly coated with sugar, the crystals may struggle to form.
- Solution: Ensure the skewers are well-coated with sugar before placing them in the solution. If necessary, use new sugar-coated skewers when reheating the solution.
-
Dirty or Cold Jars:
- Impurities in the jars or cold glass can interfere with crystal formation.
- Solution: Make sure the jars are thoroughly cleaned and rinsed with hot water before use. Warm jars help maintain the solution’s temperature and promote crystal growth.
-
Disturbances During Crystal Formation:
- Moving or jostling the jars while the crystals are forming can disrupt the process and prevent growth.
- Solution: Once the skewers are in place, avoid moving the jars as much as possible. Find a stable location where they can rest undisturbed for the duration of the crystal-growing period.
-
Temperature Fluctuations:
- Significant temperature changes can affect the stability of the sugar solution and hinder crystal growth.
- Solution: Keep the jars in a location with a consistent temperature, away from drafts or direct sunlight.
-
Improper Skewer Placement:
- If the skewer is touching the bottom of the jar, the crystals may attach to the glass instead of the skewer.
- Solution: Make sure the skewer is suspended about an inch from the bottom of the jar, allowing the crystals to grow freely.
By addressing these potential issues, you can increase your chances of successfully growing beautiful rock candy crystals.
7. How Can I Make Rock Candy Faster?
While patience is key to making rock candy, some methods can potentially speed up the crystal growth process. While there’s no guaranteed way to make rock candy grow quickly, some techniques might help accelerate the process slightly. Here are a few tips to consider:
-
Refrigeration:
- Some people suggest that refrigerating the jars can speed up crystal growth. The idea is that the cooler temperature encourages faster crystallization.
- Note: This method is not guaranteed and may affect the quality of the crystals. If you try this, monitor the jars closely and be prepared for potentially different results.
-
Higher Sugar Concentration:
- Ensuring the sugar solution is as saturated as possible can promote faster crystal growth.
- Tip: When making the solution, add sugar until it is almost impossible to dissolve any more. This creates a highly concentrated solution that encourages rapid crystal formation.
-
Optimal Environmental Conditions:
- Maintaining a stable, slightly cooler environment can help speed up the process.
- Tip: Keep the jars in a cool, dark place with consistent temperature and minimal disturbances.
-
Patience is Still Key:
- Even with these methods, rock candy still requires time to grow. Don’t expect to see fully formed crystals overnight.
- Recommendation: Allow at least a few days for the crystals to develop. Removing the rock candy too early may result in smaller, less developed crystals.
Although these tips might help speed up the process, remember that patience is still the most important ingredient. Experiment with these methods to see what works best for you, but be prepared to wait several days for the best results.
8. How to Store Homemade Rock Candy
Proper storage is essential to keep your homemade rock candy fresh and prevent it from becoming sticky or dissolving. To store homemade rock candy, wrap it individually in cellophane and keep it in a cool, dry place. Here are some guidelines for storing your candy effectively:
-
Individual Wrapping:
- The best way to store rock candy is to wrap each stick individually in cellophane wrappers. This protects the candy from moisture and helps maintain its shape and texture.
- Recommendation: Use clear cellophane wrappers to showcase the candy’s beautiful colors. You can find these wrappers at most craft or candy-making supply stores.
-
Cool, Dry Place:
- Store the wrapped rock candy in a cool, dry place away from direct sunlight and humidity. A pantry or cupboard works well.
- Avoid: Do not store rock candy in the refrigerator, as the moisture can cause it to become sticky and dissolve.
-
Airtight Containers:
- For added protection, you can place the wrapped rock candy sticks in an airtight container. This further prevents moisture from affecting the candy.
- Tip: Ensure the container is completely dry before adding the wrapped candy.
-
Shelf Life:
- When stored properly, homemade rock candy can last for up to a year.
- Check: Before consuming, check the candy for any signs of moisture or stickiness. If the candy appears to be melting or has a soft texture, it may no longer be good.
By following these storage tips, you can ensure your homemade rock candy stays fresh, delicious, and visually appealing for an extended period.
9. Tips & Tricks for Perfect Rock Candy
Making perfect rock candy requires attention to detail and a bit of practice. To make the best rock candy, ensure clean jars, seed the sticks well, use concentrated coloring, and avoid disturbances. Here are some helpful tips and tricks to troubleshoot common issues and achieve the best results:
-
Clean and Warm Jars:
- Ensure your mason jars are completely clean and warm before starting. Residue or cold glass can interfere with crystal formation.
- Tip: Wash the jars thoroughly with hot water and soap, then rinse them well. You can also run them through a dishwasher cycle to ensure they are sanitized.
 Selection of mason jars, some empty and others filled with colorful homemade rock candy.
 -
Don’t Skip the Sugar Coating:
- Coating the sticks in sugar is a crucial step that provides the initial crystals for the sugar to adhere to as they grow. Skipping this step can result in crystals growing at the bottom of the jar instead of on the sticks.
- Tip: Moisten the sticks with water and roll them in granulated sugar until they are thoroughly coated. Allow them to dry completely before placing them in the sugar solution.
-
Use Concentrated Food Coloring:
- When adding food coloring, use concentrated options like gel food coloring to achieve vibrant colors without adding too much liquid to the solution.
- Tip: Add the food coloring gradually, stirring until you reach your desired shade. Remember that the color will appear lighter once the crystals form.
-
Add Flavoring Sparingly:
- If you want to add flavoring to your rock candy, use concentrated extracts and add them sparingly. Too much liquid can dilute the sugar solution and affect crystal growth.
- Tip: Vanilla, lemon, peppermint, and other extracts can add a delicious twist to your homemade rock candy.
-
Avoid Disturbing the Jars:
- Once you’ve poured the sugar mixture and placed the sticks in the jars, avoid moving or jostling them. Disturbances can disrupt the crystal formation process.
- Tip: Find a stable location where the jars can rest undisturbed for the duration of the crystal-growing period.
-
Monitor Crystal Growth:
- Keep an eye on the jars and monitor the crystal growth over the course of several days. This allows you to catch any issues early and make adjustments as needed.
- Tip: Take photos of the jars each day to track the progress and compare the crystal growth.
10. FAQ About Making Rock Candy
Here are some frequently asked questions about making rock candy at home:
- How long does it take to make rock candy?
- Rock candy typically takes 6-7 days to fully form crystals. While you’ll start to see crystal growth within a day or two, allowing the full time ensures larger, more developed crystals.
- Can I use different types of sugar?
- Granulated sugar is the best option for making rock candy because it dissolves easily and promotes clear crystal formation. Other types of sugar may not produce the same results.
- What if my rock candy is too sticky?
- If your rock candy is too sticky, it may be due to high humidity or insufficient drying time. Ensure the candy is stored in a cool, dry place and allow it to dry completely before wrapping.
- Can I add glitter to my rock candy?
- Yes, you can add edible glitter to your rock candy for a sparkly effect. Add the glitter to the sugar solution after you’ve added the food coloring.
- Why is my rock candy cloudy?
- Cloudy rock candy can be caused by impurities in the sugar or water. Use high-quality granulated sugar and filtered water to minimize cloudiness.
- Can I make rock candy without skewers?
- While skewers provide the best surface for crystal growth, you can also use cotton string or pipe cleaners. Suspend the string or pipe cleaner in the sugar solution and follow the same crystal-growing process.
- How do I prevent the sugar from hardening on top of the jar?
- There’s no foolproof way to prevent the sugar from hardening on top of the jar, but keeping the jars in a stable environment and avoiding disturbances can help minimize this issue.
- Can I use tap water to make rock candy?
- Filtered water is recommended for making rock candy because it is free of impurities that can affect crystal formation. However, if your tap water is clean and clear, you can use it as well.
- What can I do with leftover sugar solution?
- If you have leftover sugar solution, you can use it to make more rock candy, sweeten beverages, or create a simple syrup for cocktails and desserts.
- Is homemade rock candy safe to eat?
- Yes, homemade rock candy made with food-safe ingredients and proper techniques is safe to eat. Be sure to use clean equipment and follow the instructions carefully.
11. How Does Rock Candy Relate to Landscaping?
While seemingly unrelated, the process of making rock candy shares fascinating parallels with geological formations, making it relevant to landscaping enthusiasts. The crystal formation in rock candy mirrors the natural processes of mineral formation, offering insights into the creation of geological landscapes. Here’s how rock candy connects to the world of landscaping:
- Crystal Formation:
- The growth of sugar crystals in rock candy mimics the way minerals form in nature. Just as sugar molecules arrange themselves into organized structures, minerals in the earth’s crust crystallize from supersaturated solutions over time.
- Application: Understanding crystal formation can inspire landscape designs that incorporate natural rock formations and mineral specimens, creating visually stunning and geologically accurate environments.
- Geological Processes:
- The conditions required for rock candy formation—supersaturation, temperature control, and undisturbed environments—mirror the geological conditions that lead to the creation of various rock types.
- Application: By recognizing these processes, landscape architects can design landscapes that reflect natural geological phenomena, such as the layering of sedimentary rocks or the emergence of crystalline structures.
- Aesthetic Inspiration:
- The vibrant colors and unique shapes of rock candy crystals can serve as aesthetic inspiration for landscape designs. The way light interacts with the crystals can be replicated through the use of colored stones, reflective surfaces, and water features.
- Application: Incorporating elements that mimic the appearance of rock candy, such as brightly colored gravel or shimmering glass aggregates, can add a playful and whimsical touch to outdoor spaces.
Looking for inspiration and resources to bring your rock-inspired landscaping dreams to life? Visit rockscapes.net for a wealth of ideas, high-quality materials, and expert advice. Whether you’re interested in creating a serene rock garden, a dramatic desert landscape, or a playful outdoor space inspired by the whimsical beauty of rock candy, Rockscapes has everything you need to transform your vision into reality.
Address: 1151 S Forest Ave, Tempe, AZ 85281, United States.
Phone: +1 (480) 965-9011.
Website: rockscapes.net.
By understanding the connections between rock candy and geological formations, you can create landscapes that are not only visually appealing but also scientifically intriguing.