Making rock sugar is a fun and easy project that brings a touch of geological wonder into your kitchen, and Rockscapes.net is here to guide you through every step. This delightful treat, also known as sugar crystals, is simple to create and offers a fascinating glimpse into crystal formation, perfect for DIY enthusiasts and those interested in homemade candies, and the best part is you can tailor the colors and flavors of your rock candy to match your favorite gemstones. Ready to get started? Let’s explore the sweet science of sugar crystals!
1. What is Rock Sugar and Why Make It?
Rock sugar, also called sugar crystals or rock candy, is crystallized sugar formed through a process of dissolving sugar in water and allowing it to recrystallize. It’s a simple yet fascinating treat to make at home.
Why should you make rock sugar?
Here are several compelling reasons to try your hand at making rock sugar:
- Educational Fun: Making rock sugar is a fantastic science experiment for all ages, illustrating the principles of saturation, solubility, and crystallization.
- Customizable Flavors & Colors: You can easily customize the flavors and colors to create unique and appealing treats.
- Natural Sweetener: Rock sugar can be used as a natural sweetener for teas, coffees, or even cocktails, offering a subtle sweetness and beautiful presentation.
- Unique Decorations: Use it to decorate cakes, cookies, or other desserts for an elegant touch.
- Homemade Gift: Homemade rock sugar makes a thoughtful and personalized gift for friends and family.
- Stress Relief: The process of watching crystals grow can be therapeutic and relaxing.
What is the history of rock sugar?
Rock sugar has a rich history, dating back centuries. It’s believed to have originated in Persia and India, where sugar was first refined. The process of crystallizing sugar was a way to preserve it and create a visually appealing and long-lasting form of sweetener. Rock sugar was often used in traditional medicine and as a symbol of purity and sweetness in various cultures. It eventually made its way to Europe and became a popular confectionery item enjoyed by people of all ages.
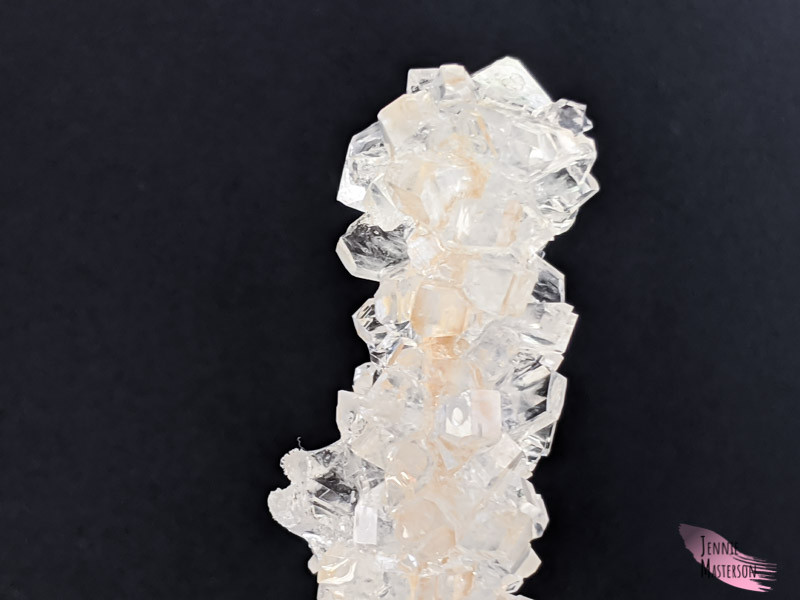 Close up of rock candy on a stick
2. Essential Supplies for Making Rock Sugar
Before you embark on your rock sugar-making adventure, gather these essential supplies to ensure a smooth and successful process:
- Granulated Sugar: The primary ingredient for creating the sugar crystals.
- Water: Used to dissolve the sugar and create the supersaturated solution.
- Mason Jars or Glasses: To hold the sugar solution and allow the crystals to grow.
- Wooden Skewers or Cotton Twine: To provide a surface for the crystals to form on.
- Clothespins: To hold the skewers in place inside the jars.
- Saucepan: To heat and dissolve the sugar in water.
- Spoon: For stirring the mixture.
- Food Coloring (Optional): To add vibrant colors to your rock sugar.
- Flavor Extracts (Optional): Such as vanilla, almond, or fruit extracts, to infuse your rock sugar with delicious flavors.
- Patience: Crystal growth takes time, so patience is essential.
3. Step-by-Step Guide: How to Make Rock Sugar
Follow these detailed steps to create your own dazzling rock sugar crystals:
Step 1: Prepare the Skewers
- Trim the sharp ends off the wooden skewers to prevent any accidents.
- Soak the skewers in water for about an hour. This helps the sugar adhere better.
- Roll the wet skewers in granulated sugar, coating them evenly. These sugar-coated skewers will act as seed crystals, encouraging the rock candy to grow.
- Allow the skewers to dry completely. This step is crucial for the crystal formation process.
 Skewers trimmed next to a pair of scissors
Step 2: Create the Sugar Solution
- In a saucepan, combine 1 ½ cups of water and 4 cups of granulated sugar.
- Heat the mixture over medium heat, stirring constantly until the sugar is completely dissolved.
- Continue adding sugar, a little at a time, until it no longer dissolves. The solution should be supersaturated, meaning it contains more dissolved sugar than it normally would at room temperature.
- Be patient and stir continuously to prevent the sugar from caramelizing or burning.
- Once all the sugar is dissolved, remove the saucepan from the heat.
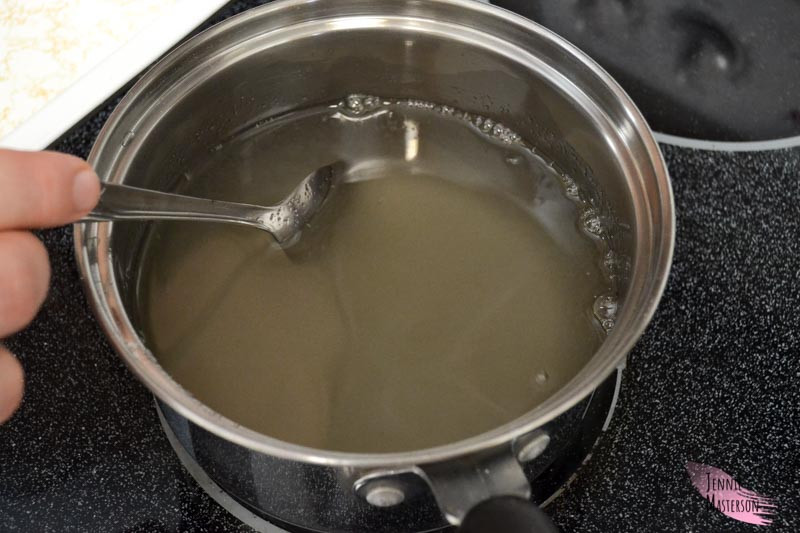 Stirring the sugar and water in a pan
Step 3: Add Color and Flavor (Optional)
- If desired, add a few drops of food coloring to the sugar solution. Remember that the crystals will appear lighter than the solution, so add enough coloring to achieve your desired hue.
- Stir in a few drops of your favorite flavor extract, such as vanilla, almond, or lemon.
- Mix well to evenly distribute the color and flavor throughout the solution.
Step 4: Pour into Jars
- Carefully pour the hot sugar solution into clean mason jars or glasses.
- Be cautious when handling the hot solution to avoid burns.
- Leave some space at the top of the jars.
Step 5: Suspend the Skewers
- Clip clothespins onto the top of the sugar-coated skewers.
- Place the skewers into the jars, using the clothespins to suspend them in the solution. The skewers should hang about 1 inch from the bottom of the jar.
- Make sure the skewers don’t touch the sides or bottom of the jar, as this can interfere with crystal growth.
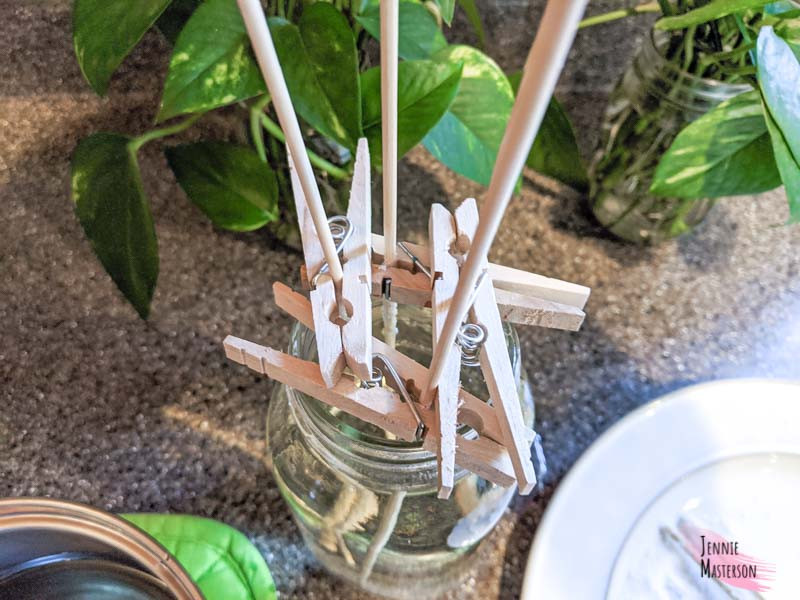 Showing the pattern of the clothes pins at the top of the jar
Step 6: Wait for the Magic to Happen
- Now comes the most exciting part: waiting for the crystals to grow!
- Place the jars in a cool, stable location where they won’t be disturbed.
- Avoid moving or bumping the jars, as this can disrupt the crystal formation process.
- Be patient! It can take anywhere from 3 to 7 days (or even longer) for the crystals to grow to your desired size.
- The longer you wait, the larger the crystals will become.
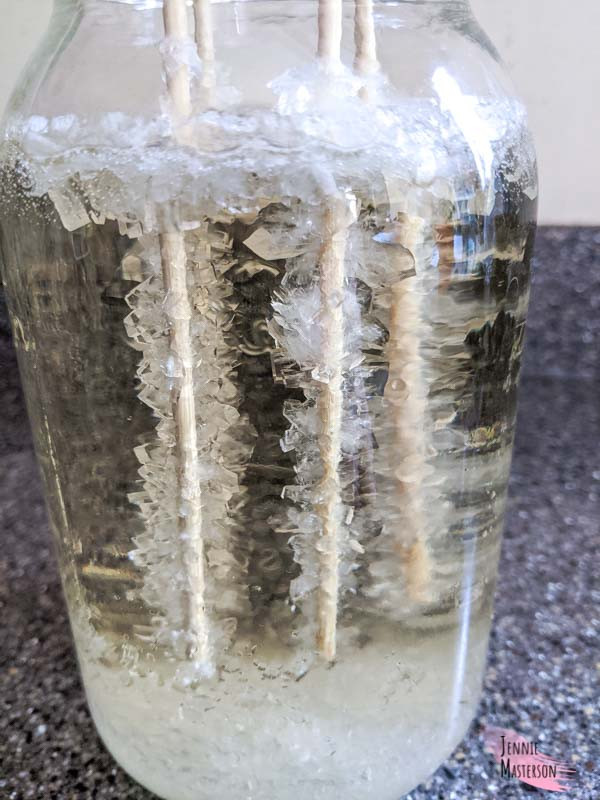 Rock candy growing in the mason jar
Step 7: Remove and Dry
- Once the crystals have grown to your desired size, carefully remove the skewers from the jars.
- Place the rock candy sticks on a plate or wire rack to dry.
- Allow them to dry completely, which may take several hours. This will prevent them from becoming sticky.
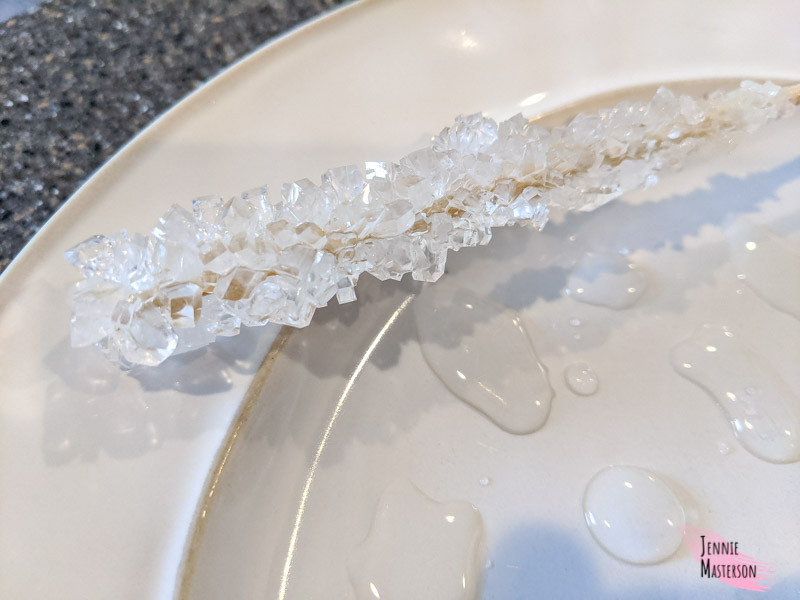 Rocky candy stick drying on a plate
Step 8: Enjoy Your Homemade Rock Sugar
- Once the rock candy is dry, it’s ready to enjoy!
- You can eat it straight off the stick, use it to sweeten your favorite beverages, or incorporate it into desserts.
4. Tips and Tricks for Perfect Rock Sugar
To ensure your rock sugar turns out perfectly every time, consider these helpful tips and tricks:
- Use a Clean Jar: Make sure your mason jars or glasses are thoroughly clean to prevent any impurities from affecting crystal growth.
- Supersaturation is Key: The higher the sugar concentration in your solution, the better the crystal growth.
- Avoid Disturbing the Jars: Keep the jars in a stable location where they won’t be bumped or moved during the crystallization process.
- Control Temperature: Consistent temperature is crucial for even crystal growth. Avoid placing the jars in direct sunlight or near drafts.
- Experiment with Flavors and Colors: Get creative with different food colorings and flavor extracts to create unique and exciting rock sugar variations.
- Seed Crystals Matter: Ensure your skewers are well-coated with sugar crystals to provide a good foundation for crystal growth.
- Patience Pays Off: Don’t rush the process. The longer you wait, the larger and more impressive your rock sugar crystals will be.
- Prevent Sticking: If your rock candy sticks are sticking to the plate while drying, try placing them on a wire rack or parchment paper.
- Proper Storage: Store your rock sugar in an airtight container in a cool, dry place to prevent it from becoming sticky or dissolving.
5. Troubleshooting Common Rock Sugar Problems
Even with careful preparation, you might encounter some challenges while making rock sugar. Here’s how to troubleshoot common issues:
- No Crystal Growth:
- Cause: The sugar solution may not be supersaturated enough, or the seed crystals may not be sufficient.
- Solution: Add more sugar to the solution, ensuring it’s fully dissolved. Re-coat the skewers with sugar and try again.
- Small, Grainy Crystals:
- Cause: The solution may have cooled too quickly, or there may have been impurities in the mixture.
- Solution: Ensure the solution cools slowly and gradually. Use clean jars and utensils.
- Cloudy Solution:
- Cause: Impurities in the sugar or water.
- Solution: Use high-quality granulated sugar and filtered water.
- Crystals Sticking to the Jar:
- Cause: The skewers were touching the sides or bottom of the jar.
- Solution: Make sure the skewers are suspended freely in the solution, without touching the jar.
- Mold Growth:
- Cause: Contamination of the solution.
- Solution: Use clean jars and utensils. Ensure the skewers are properly coated with sugar to prevent mold growth. Discard any batches with mold.
6. Flavor and Color Variations for Rock Sugar
One of the best things about making rock sugar is the ability to customize it with different flavors and colors. Here are some exciting ideas to inspire your creativity:
Flavor Ideas:
- Vanilla: Add a teaspoon of vanilla extract to the sugar solution for a classic, comforting flavor.
- Almond: A few drops of almond extract can add a nutty, sweet aroma to your rock sugar.
- Lemon: Use lemon extract or lemon zest for a refreshing, citrusy twist.
- Peppermint: Peppermint extract can create a cool, invigorating rock sugar perfect for the holidays.
- Cinnamon: Add cinnamon extract or a pinch of ground cinnamon for a warm, spicy flavor.
- Strawberry: Strawberry extract or a few drops of strawberry flavoring can make a sweet and fruity treat.
- Coffee: Add a teaspoon of strong brewed coffee to the sugar solution for a caffeinated kick.
Color Ideas:
- Classic Colors: Use traditional food coloring to create vibrant red, blue, green, and yellow rock sugar.
- Pastel Shades: Mix food coloring to achieve soft, pastel hues for a delicate and elegant look.
- Ombre Effect: Create an ombre effect by gradually adding more food coloring to the solution as you pour it into the jars.
- Layered Colors: Pour different colored solutions into the jars in layers to create a striking visual effect.
- Natural Dyes: Experiment with natural dyes like beet juice for pink, spinach juice for green, or turmeric for yellow.
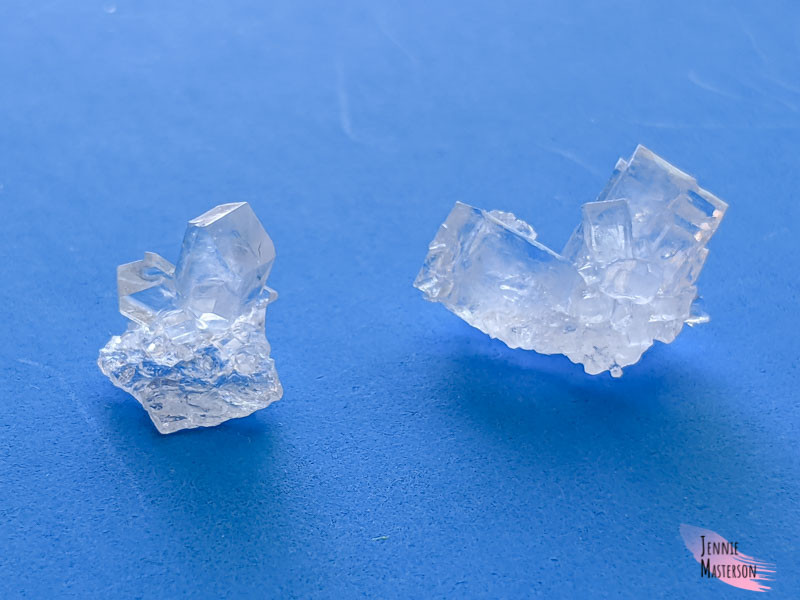 Two sugar crystals side by side
7. The Science Behind Rock Sugar Formation
Understanding the science behind rock sugar can make the process even more fascinating. Here’s a breakdown of the key principles at play:
- Solubility: Solubility refers to the ability of a substance (like sugar) to dissolve in a solvent (like water). Sugar is highly soluble in water, meaning a large amount of sugar can dissolve in a given amount of water.
- Saturation: A solution is saturated when it contains the maximum amount of solute (sugar) that can dissolve at a given temperature.
- Supersaturation: A supersaturated solution contains more dissolved solute than it normally would at a given temperature. This is achieved by heating the solution and dissolving more sugar than it could hold at room temperature. As the solution cools, it becomes unstable, and the excess sugar starts to crystallize.
- Crystallization: Crystallization is the process by which a solid forms, with the molecules or atoms highly organized into a structure known as a crystal. In the case of rock sugar, sugar molecules in the supersaturated solution begin to attach to the seed crystals on the skewers, forming larger and larger crystals over time.
- Nucleation: Nucleation is the initial stage of crystal formation, where small clusters of molecules begin to form. The seed crystals on the skewers provide a surface for this nucleation to occur, speeding up the crystallization process.
According to research from Arizona State University’s School of Earth and Space Exploration, crystal formation is influenced by temperature and the presence of impurities.
8. Creative Uses for Rock Sugar
Beyond being a delicious treat, rock sugar can be used in a variety of creative ways:
- Sweeten Beverages: Add rock sugar to tea, coffee, or cocktails for a subtle sweetness and elegant presentation.
- Cake Decorations: Use rock sugar to decorate cakes, cupcakes, and other desserts for a sparkling touch.
- Edible Gifts: Package homemade rock sugar in decorative jars or bags for thoughtful and personalized gifts.
- Party Favors: Create rock sugar sticks in custom colors to match the theme of your party or event.
- Science Projects: Use rock sugar as part of science experiments to teach kids about crystallization and solubility.
- Wedding Favors: Offer rock sugar as a unique and memorable wedding favor for your guests.
- Holiday Decorations: Incorporate rock sugar into holiday decorations, such as edible ornaments or sparkling centerpieces.
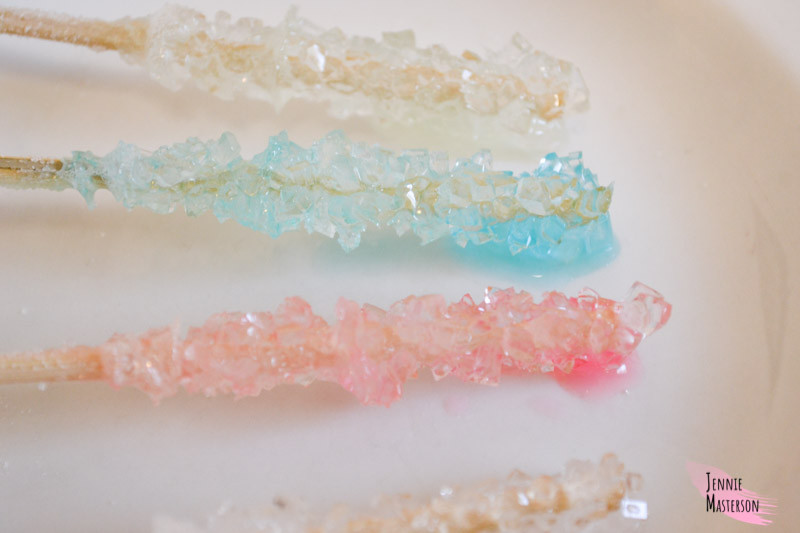 Colored rock candy
9. How Rock Sugar Relates to Gemstones and Rockscapes
The crystalline structure of rock sugar shares similarities with the structure of natural gemstones. Just as minerals in the earth form crystals over time, sugar molecules in a supersaturated solution come together to create beautiful, geometric shapes.
Crystalline Parallels
- Structure: Both rock sugar and gemstones have an organized, repeating atomic structure that gives them their characteristic shapes and properties.
- Formation: Both are formed through a process of crystallization, where molecules or atoms come together to create a solid structure.
- Color: Both can be found in a wide range of colors, depending on the presence of impurities or additives.
Rockscapes.net Connection
At Rockscapes.net, we appreciate the beauty and artistry of natural stone and minerals. Just as rock sugar offers a glimpse into the world of crystal formation, our landscape designs showcase the stunning variety and natural elegance of rocks and stones. We believe that incorporating natural elements into your outdoor spaces can create a sense of wonder and connection to the earth.
Whether you’re interested in creating a tranquil rock garden, a dramatic water feature, or a cozy fire pit area, Rockscapes.net can help you bring your vision to life.
10. Frequently Asked Questions (FAQs) About Making Rock Sugar
Here are some frequently asked questions about making rock sugar:
How long does it take to make rock sugar?
Typically, it takes about 3 to 7 days for the crystals to grow to a decent size, but you can wait longer for larger crystals.
What kind of sugar should I use?
Granulated sugar is the best choice for making rock sugar because it dissolves easily and produces clear crystals.
Can I use honey or other sweeteners?
While you can experiment with other sweeteners, granulated sugar is the most reliable option for achieving consistent results.
Why is my rock sugar cloudy?
A cloudy solution can be caused by impurities in the sugar or water. Use high-quality ingredients for best results.
How do I prevent my rock sugar from sticking to the jar?
Make sure the skewers are suspended freely in the solution, without touching the sides or bottom of the jar.
Can I make rock sugar without skewers?
Yes, you can use cotton twine or even leave the solution undisturbed in a jar for larger crystal formations, but skewers provide a convenient way to create individual rock candy sticks.
How do I store rock sugar?
Store rock sugar in an airtight container in a cool, dry place to prevent it from becoming sticky or dissolving.
Is rock sugar safe to eat?
Yes, rock sugar is made from sugar and is safe to eat in moderation.
Can I add essential oils for flavor?
Yes, but be cautious with the amount. A few drops of food-grade essential oils can add a concentrated burst of flavor.
Why aren’t my crystals growing?
The solution might not be supersaturated enough, or the temperature might be too unstable. Ensure the solution is properly saturated and keep the jars in a stable location.
Making rock sugar is a delightful blend of science and culinary art. With the right ingredients, a little patience, and these tips from Rockscapes.net, you can create your own dazzling sugar crystals and explore the fascinating world of crystallization. Whether you’re looking for a fun science project, a unique homemade treat, or a beautiful addition to your desserts, rock sugar is sure to bring a touch of sweetness and wonder to your life.
Ready to explore more amazing rock creations? Visit Rockscapes.net today for inspiration, tips, and expert advice on incorporating natural stone into your landscape designs. Discover the beauty and versatility of rocks and stones and create outdoor spaces that are both stunning and sustainable. Contact us at 1151 S Forest Ave, Tempe, AZ 85281, United States or call +1 (480) 965-9011. Let rockscapes.net help you bring your dream landscape to life!