Moving rocks in Animal Crossing: New Horizons can be a fun way to customize your island landscape, and rockscapes.net is here to guide you through the process. By strategically breaking and respawning rocks, you can create the perfect rock arrangement for your dream island. Let’s explore how to master rock placement, optimize resource gathering, and design stunning stone features that will elevate your island’s aesthetic, offering tips, tricks, and inspiration for creating your unique island paradise with rock placement strategies and island customization ideas.
1. Why Can’t I Move Rocks Directly in Animal Crossing: New Horizons?
Unfortunately, you can’t directly pick up and move rocks in Animal Crossing: New Horizons the way you might move furniture or smaller items. The game doesn’t allow for that level of manipulation with environment features.
1.1. Understanding Game Limitations
Animal Crossing: New Horizons is designed with certain limitations to maintain balance and prevent exploits. Direct manipulation of rocks would likely disrupt the game’s resource system and island layout mechanics.
1.2. Exploring Indirect Methods
Instead of direct movement, the game provides an alternative method: breaking the rocks and allowing them to respawn in a more desirable location. This involves a bit of planning and patience but ultimately allows you to achieve your desired rock arrangement.
1.3. Considering the Original Game Design
The original design likely intended for rocks to be a more permanent feature, requiring players to work around them. However, the developers recognized the need for some degree of customization, leading to the breaking and respawn mechanic.
2. How Do I Break a Rock in Animal Crossing: New Horizons?
To successfully move a rock, you must first break it. This requires consuming fruit to gain the strength needed to shatter the rock with a shovel or axe.
2.1. Eating Fruit for Strength
Before you can break a rock, you need to eat fruit. Each fruit you consume grants you temporary strength, allowing you to smash objects like rocks and trees. Each fruit allows you to break one rock.
2.2. Choosing the Right Tool
While both shovels and axes can break rocks, shovels are generally preferred for this task. Axes can break rocks, but they are more commonly used for chopping trees.
2.3. Smashing the Rock
Once you’ve eaten a fruit and equipped your shovel, stand directly in front of the rock you wish to break and repeatedly press the “A” button to strike it. After a few hits, the rock will shatter into pieces.
2.4. What Happens After Breaking a Rock?
After you break a rock, it disappears entirely. The next day, a new rock will respawn in a random location on your island.
2.5. The Importance of Strategic Rock Breaking
Breaking rocks strategically is essential to effectively moving them. It’s best to break only one rock per day to manage the respawn process and avoid resource shortages.
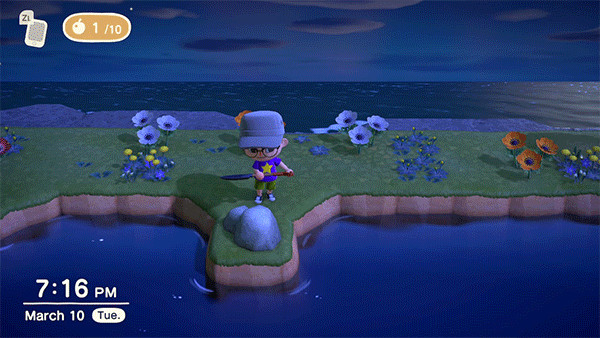 Animal Crossing character breaks a rock on a tiny peninsula
3. Where Will the Rocks Respawn?
Understanding how and where rocks respawn is crucial for successfully moving them. Rocks will reappear on your island the day after you break them, but their location is somewhat random.
3.1. Random Respawn Locations
Rocks will respawn in any available space on your island, but they won’t appear in certain areas, such as:
- On top of custom designs placed on the ground
- Directly next to buildings or other permanent structures
- On beaches
- In areas completely covered by water or cliffs
3.2. Influencing Respawn Locations
While you can’t directly control where rocks respawn, you can influence their placement by covering unwanted areas with custom designs or other obstacles.
3.3. Using Mannequins to Control Rock Spawns
One popular method for controlling rock spawns involves using mannequins. By placing mannequins strategically around your island, you can limit the available spaces for rocks to respawn.
3.4. Creating a Rock Garden
Many players create “rock gardens” by carefully manipulating rock respawns. This involves covering the entire island with custom designs except for a small, designated area where you want the rocks to appear.
3.5. Patience is Key
Moving rocks in Animal Crossing: New Horizons requires patience. It may take several days or even weeks to get all the rocks exactly where you want them.
4. How to Create a Rock Garden in Animal Crossing: New Horizons?
Creating a rock garden is a popular way to organize your rocks in Animal Crossing: New Horizons. It involves carefully controlling the respawn locations to create a designated area for all your rocks.
4.1. Planning Your Rock Garden Location
Start by choosing a location for your rock garden. Consider factors such as:
- Accessibility: Make sure the location is easy to reach.
- Aesthetics: Choose a spot that complements your island’s overall design.
- Size: Ensure the area is large enough to accommodate all six rocks.
4.2. Covering Your Island with Mannequins or Custom Designs
To control where rocks respawn, you need to cover the rest of your island with obstacles. Mannequins are a popular choice because they can be easily removed once the rocks are in place. Custom designs placed on the ground also work well.
4.3. Breaking All the Rocks
Once your island is covered, break all the rocks. Remember, only one rock will respawn per day, so this process will take several days.
4.4. Waiting for Rocks to Respawn in the Desired Location
Each day, check to see where the new rock has spawned. If it’s in your designated rock garden area, great! If not, break it again and wait for the next day.
4.5. Removing the Mannequins or Custom Designs
Once all the rocks are in your rock garden, you can remove the mannequins or custom designs from the rest of your island.
4.6. Maintaining Your Rock Garden
To maintain your rock garden, avoid placing any items or structures within the designated area. This will ensure that the rocks remain in their desired locations.
5. What are the Benefits of Moving Rocks in Animal Crossing: New Horizons?
Moving rocks in Animal Crossing: New Horizons offers several benefits, from aesthetic improvements to resource management.
5.1. Aesthetic Customization
One of the primary reasons players move rocks is for aesthetic purposes. Arranging rocks in a specific pattern or creating a rock garden can enhance your island’s visual appeal.
5.2. Efficient Resource Gathering
By grouping rocks together, you can create a convenient resource gathering spot. This makes it easier to collect stone, clay, iron nuggets, and other materials.
5.3. Island Organization
Moving rocks can help you organize your island and create more functional spaces. This is especially useful if you’re planning a specific layout or theme for your island.
5.4. Creative Landscaping
Rocks can be used as part of creative landscaping projects. They can serve as decorative elements, create natural barriers, or add texture to your island’s environment.
5.5. Achieving a Specific Island Vision
Ultimately, moving rocks allows you to achieve your specific island vision. Whether you’re aiming for a naturalistic look or a highly structured design, rock placement can play a significant role.
6. What Resources Can I Get From Rocks in Animal Crossing: New Horizons?
Rocks are a valuable source of resources in Animal Crossing: New Horizons. Each day, you can strike each rock up to eight times to obtain various materials.
6.1. Stone
Stone is one of the most common resources obtained from rocks. It’s used in a variety of crafting recipes, including tools, furniture, and outdoor decorations.
6.2. Clay
Clay is another frequently obtained resource. It’s essential for crafting items like pottery, bricks, and certain types of furniture.
6.3. Iron Nuggets
Iron nuggets are crucial for crafting tools, upgrading your island infrastructure, and building certain types of furniture. They are particularly important in the early stages of the game.
6.4. Gold Nuggets
Gold nuggets are rare and valuable resources. They are used in high-end crafting recipes and can be sold for a significant amount of Bells.
6.5. Money
Sometimes, instead of resources, rocks will dispense Bells. Hitting the rock multiple times in quick succession can yield a substantial amount of money.
6.6. Maximizing Resource Output
To maximize the resources you obtain from rocks, dig two holes behind you before you start hitting the rock. This will prevent you from being knocked backward, allowing you to hit the rock the maximum number of times.
7. How to Maximize Rock Resources in Animal Crossing: New Horizons?
Maximizing the resources you get from rocks is essential for progressing in Animal Crossing: New Horizons. Here are some tips to help you get the most out of your rocks.
7.1. The Digging Trick
As mentioned earlier, digging two holes behind you before hitting a rock prevents you from being knocked back. This allows you to hit the rock the maximum of eight times, yielding more resources.
7.2. Hitting Rocks Consistently
Make it a daily habit to hit all the rocks on your island. Resources replenish each day, so consistent harvesting is key to building up your inventory.
7.3. Understanding the Resource Cycle
Each rock has a set cycle of resources it will dispense each day. Understanding this cycle can help you anticipate what resources you’ll receive and plan your crafting accordingly.
7.4. Using the Right Tools
While shovels are generally preferred for breaking rocks, any type of shovel will work for harvesting resources. Choose a sturdy shovel to avoid breakage.
7.5. Consider Island Layout
Design your island layout to make it easy to access your rocks. Grouping them together in a rock garden or placing them near your crafting area can save you time and effort.
8. What are Some Creative Rock Design Ideas for Animal Crossing: New Horizons?
Rocks can be used in a variety of creative ways to enhance your island’s design. Here are some ideas to inspire you.
8.1. Rock Gardens
Rock gardens are a classic design element in Animal Crossing: New Horizons. They create a serene and naturalistic atmosphere.
8.2. Stone Pathways
Use rocks to create winding pathways through your island. This adds texture and visual interest to your landscape.
8.3. Rock Walls
Stack rocks to create natural-looking walls or barriers. This can be used to define different areas of your island or add privacy to certain spaces.
8.4. Zen Gardens
Combine rocks with sand and other elements to create a traditional Zen garden. This is a great way to add a touch of tranquility to your island.
8.5. Natural Seating Areas
Arrange rocks to create natural seating areas. This is a unique and inviting way to encourage villagers and visitors to relax and enjoy your island.
8.6. Incorporating Rocks into Water Features
Place rocks around ponds, streams, and waterfalls to create a more naturalistic look. This adds depth and texture to your water features.
9. Common Mistakes to Avoid When Moving Rocks in Animal Crossing: New Horizons?
Moving rocks in Animal Crossing: New Horizons can be a tricky process. Here are some common mistakes to avoid.
9.1. Breaking All Rocks at Once
Breaking all your rocks at once can lead to resource shortages. It’s best to break only one rock per day to manage the respawn process.
9.2. Not Covering Your Island Properly
If you don’t cover your island adequately with mannequins or custom designs, rocks may respawn in unwanted locations.
9.3. Placing Items Too Close to the Desired Rock Locations
Rocks need a certain amount of clear space to respawn. Avoid placing items or structures too close to your desired rock locations.
9.4. Giving Up Too Easily
Moving rocks can be a time-consuming process. Don’t give up if you don’t see results immediately. Patience is key.
9.5. Ignoring Island Aesthetics
While it’s important to move rocks for practical purposes, don’t forget to consider the overall aesthetics of your island. Make sure your rock placement complements your island’s design.
10. How Does This Relate to Rockscapes.net?
Rockscapes.net is a great resource for anyone interested in using rocks in their landscaping and design projects. While Animal Crossing: New Horizons is a virtual world, the principles of rock placement and design are similar to those in the real world.
10.1. Inspiration for Real-World Landscaping
The rock gardens and other designs you create in Animal Crossing: New Horizons can serve as inspiration for real-world landscaping projects.
10.2. Understanding Rock Types and Placement
Learning about different types of rocks and how they can be used in design can enhance your appreciation for rockscapes in both the virtual and real worlds.
10.3. Finding Resources and Ideas
Rockscapes.net offers a wealth of information, resources, and ideas for anyone interested in incorporating rocks into their landscaping or design projects.
10.4. Connecting with Experts
Whether you’re a seasoned landscaper or just starting out, Rockscapes.net connects you with experts who can provide guidance and support.
So, are you ready to transform your island with perfectly placed rocks? Visit rockscapes.net to discover a world of inspiration, information, and expert advice. Whether you’re dreaming of a serene rock garden, a dramatic stone pathway, or a cozy natural seating area, rockscapes.net can help you bring your vision to life. Explore our extensive gallery of landscape designs, learn about different types of rocks, and connect with professionals who can guide you through every step of the process. Let rockscapes.net be your partner in creating stunning rock features that will elevate your island paradise.
FAQ: Moving Rocks in Animal Crossing: New Horizons
1. Can I move rocks after I’ve already placed them?
No, you can’t directly move rocks once they’ve spawned. You need to break them and allow them to respawn in a new location.
2. How many rocks are there on my island?
There are typically six rocks on each island in Animal Crossing: New Horizons.
3. Can I customize the appearance of rocks?
No, you can’t change the appearance of rocks. They have a fixed design.
4. Do rocks respawn in the same location every day?
No, rocks respawn in random locations each day after being broken.
5. What happens if I don’t break the rocks?
If you don’t break the rocks, they will remain in their current locations.
6. Can I move rocks to the beach?
No, rocks cannot respawn on the beach.
7. How long does it take for a rock to respawn?
A rock will respawn the day after it is broken.
8. Can I use an axe instead of a shovel to break rocks?
Yes, you can use an axe to break rocks, but shovels are generally preferred.
9. What happens if I accidentally break all my rocks?
If you accidentally break all your rocks, you’ll need to wait several days for them to respawn, one per day.
10. Can I move rocks to a Mystery Island?
No, you cannot move rocks to a Mystery Island.
Remember, for more inspiration and expert advice on incorporating rocks into your landscaping projects, visit rockscapes.net today! Our address is 1151 S Forest Ave, Tempe, AZ 85281, United States. You can also reach us by phone at +1 (480) 965-9011. Let us help you create the rockscape of your dreams!