Painting on a rock transforms ordinary stones into unique art pieces, and How To Paint On A Rock is a skill you can master! At rockscapes.net, we’ll guide you through every stage, from selecting the perfect stone to applying the final coat of sealant, ensuring your rock art is both beautiful and durable. Whether you’re an experienced artist or just starting, explore the world of rock painting ideas, techniques, and rock painting supplies to enhance your rock crafts today.
1. Why Paint on Rocks? Unleashing Creativity with Stone Canvases
Do you wonder why painting on rocks has become such a popular and therapeutic activity? Painting on rocks is more than just a hobby; it’s a way to connect with nature, express creativity, and spread joy, as noted in a study by the American Art Therapy Association in 2020.
- Connect with Nature: Rocks provide a tangible connection to the outdoors.
- Creative Expression: Each rock becomes a unique canvas for personal expression.
- Stress Relief: The act of painting can be meditative and calming.
- Community Building: Sharing or hiding painted rocks fosters community interaction.
- Accessibility: It’s an inexpensive and accessible craft for all ages.
2. What Types of Rocks Are Best for Painting?
Choosing the right rock is the first step, but what types of rocks work best? Smooth, flat rocks are ideal for painting, offering an even surface for detailed designs.
- River Rocks: These are naturally smooth and rounded, perfect for detailed artwork.
- Beach Pebbles: Similar to river rocks, they offer a smooth surface shaped by the ocean.
- Slate: Provides a flat, layered surface, good for rustic or textured designs.
- Sandstone: Offers a porous surface that can absorb paint, creating unique effects.
- Man-Made Rocks: These are available at craft stores and provide a consistent shape and size.
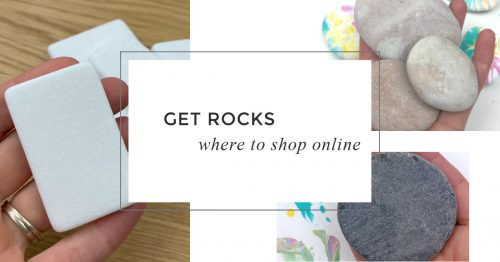
3. Where Can You Find Rocks to Paint?
Finding the right rocks can be an adventure in itself, but where exactly should you look? Landscape supply stores, craft stores, and even your backyard can be great sources.
- Local Landscapes: Check your backyard or nearby natural areas.
- Landscape Supply Shops: They offer a variety of sizes and types.
- Craft Stores: Ideal for uniform, pre-cleaned rocks.
- Online Retailers: Convenient for specific shapes or quantities.
- Rockhounding: Participate in local rockhounding groups for unique finds.
 assorted rocks for painting
4. How Do You Prepare Rocks for Painting?
Proper preparation ensures the paint adheres well and lasts longer, but how should you prep your rocks? Cleaning and priming are crucial steps for a professional finish.
- Cleaning: Wash rocks with soap and water to remove dirt and debris.
- Drying: Allow rocks to dry completely before painting.
- Priming: Apply a base coat of white or light-colored paint to create a smooth surface.
- Sanding: If necessary, sand down rough spots for a smoother finish.
- Sealing: Use a sealant to protect the paint and make your design last longer.
5. What Are the Best Paints for Rock Painting?
Selecting the right paint is key to achieving vibrant and lasting designs, but what paints work best? Acrylic paints and paint pens are popular choices.
- Acrylic Paints: Versatile, water-based, and available in many colors.
- Paint Pens: Great for fine details and precise lines.
- Oil-Based Paints: Offer rich colors but require longer drying times.
- Chalk Paints: Provide a matte finish and are easy to distress.
- Glow-in-the-Dark Paints: Add a fun, whimsical element to your rock art.
6. What Rock Painting Supplies Do You Need?
Gathering the right supplies ensures a smooth and enjoyable painting experience, but what should you include in your toolkit? Brushes, sealants, and design templates are essential.
- Paint Brushes: A variety of sizes for different details.
- Acrylic Paints: Choose a range of colors for your designs.
- Paint Pens: Fine-tipped pens for intricate details.
- Sealant: To protect the paint and add a glossy or matte finish.
- Palette: For mixing paints.
- Water Container: For cleaning brushes.
- Paper Towels: For blotting excess paint.
- Design Templates: Stencils or printed designs for inspiration.
 Rock painting supplies laid out on a table
7. How to Paint on a Rock: Step-by-Step Guide
Let’s get started on your rock painting project with a clear, step-by-step guide.
- Gather Your Supplies: Collect rocks, paints, brushes, and other materials.
- Clean the Rocks: Wash and dry the rocks thoroughly.
- Apply a Base Coat: Prime the rocks with a light-colored acrylic paint.
- Plan Your Design: Sketch your design lightly with a pencil.
- Paint Your Design: Use acrylic paints or paint pens to bring your vision to life.
- Add Details: Refine your design with fine-tipped brushes or pens.
- Let It Dry: Allow the paint to dry completely.
- Seal the Rock: Apply a sealant to protect the paint.
- Display or Hide Your Rock: Share your creation with the world.
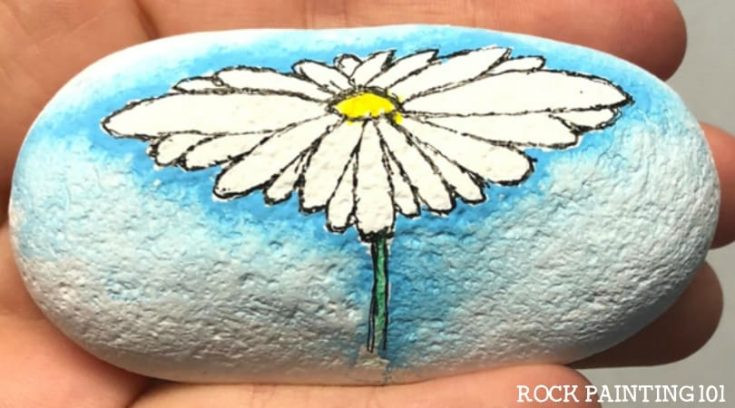
8. What Are Some Popular Rock Painting Ideas?
Need some inspiration? There are countless themes to explore, but what ideas are most popular? Nature scenes, inspirational quotes, and whimsical characters are all great options.
- Nature Scenes: Landscapes, flowers, and animals.
- Inspirational Quotes: Positive messages and affirmations.
- Whimsical Characters: Cartoon characters and fantasy creatures.
- Geometric Patterns: Mandalas and abstract designs.
- Holiday Themes: Seasonal decorations and festive images.
 Selection of painted rocks with various designs
9. How Do You Seal Painted Rocks?
Sealing your painted rocks protects your artwork from the elements, but how should you do it? Choose the right sealant and apply it evenly for best results.
- Choose the Right Sealant: Select a sealant that is compatible with your paint.
- Clean the Rock: Ensure the painted surface is clean and dry.
- Apply the Sealant: Use a brush-on or spray-on sealant.
- Apply Evenly: Avoid drips and ensure full coverage.
- Allow to Dry: Let the sealant dry completely before handling.
- Apply Multiple Coats: For added protection, apply several thin coats.
10. What Types of Sealers Are Available for Painted Rocks?
There are various types of sealers, each offering different finishes and levels of protection, but what are the best options? Acrylic sealers, polyurethane sealers, and epoxy resins are popular choices.
- Acrylic Sealers: Water-based, easy to apply, and provide a matte or glossy finish.
- Polyurethane Sealers: Offer excellent durability and weather resistance.
- Epoxy Resins: Create a glossy, glass-like finish and are highly durable.
- Spray Sealers: Convenient for quick and even application.
- Brush-On Sealers: Allow for precise application and control.
11. Where Can You Hide Painted Rocks?
Hiding painted rocks is a fun way to spread joy, but where are the best places to leave them? Parks, gardens, and public spaces are popular choices.
- Parks: Place rocks near benches, trees, or walking paths.
- Gardens: Hide rocks among flowers and plants.
- Public Spaces: Leave rocks in visible spots for others to find.
- Libraries: Place rocks on shelves or near reading areas.
- Hospitals: Decorate waiting rooms or gardens with uplifting rocks.
12. How Can You Participate in Rock Hiding Communities?
Joining a rock hiding community adds a social element to your hobby, but how can you get involved? Look for local Facebook groups or online forums.
- Local Facebook Groups: Search for rock painting groups in your area.
- Online Forums: Participate in discussions and share your creations.
- Rock Hiding Events: Attend local events to meet other rock painters.
- Social Media: Use hashtags to connect with the rock painting community.
- Word of Mouth: Ask friends and family if they know of any local groups.
13. How to Make Your Painted Rocks Last Outdoors
To ensure your painted rocks withstand the elements, but how can you protect them effectively? Use high-quality sealants and consider weather-resistant paints.
- Use Quality Sealants: Apply multiple coats of a durable sealant.
- Choose Weather-Resistant Paints: Opt for acrylics designed for outdoor use.
- Avoid Direct Sunlight: Place rocks in shaded areas to prevent fading.
- Reapply Sealant: Reapply sealant periodically to maintain protection.
- Consider Location: Avoid placing rocks in areas with heavy foot traffic or moisture.
14. What Are the Best Techniques for Painting Detailed Designs on Rocks?
Achieving intricate designs requires skill and technique, but what are the best methods? Use fine-tipped brushes, paint pens, and layering techniques.
- Fine-Tipped Brushes: For creating delicate lines and details.
- Paint Pens: Offer precision and control for intricate work.
- Layering: Build up colors gradually for depth and dimension.
- Stippling: Create texture with small dots of paint.
- Dry Brushing: Use a dry brush to add subtle highlights and shadows.
15. How Do You Blend Paints on Rocks?
Blending paints creates smooth transitions and gradients, but how is it done effectively on a rock surface? Use a soft brush, work quickly, and blend while the paint is wet.
- Use a Soft Brush: For smooth and seamless blending.
- Work Quickly: Blend the paints while they are still wet.
- Layer Colors: Apply thin layers of paint for gradual transitions.
- Dampen the Brush: Keep your brush slightly damp for easier blending.
- Practice: Experiment with different techniques to find what works best.
16. What Are Mandala Rocks and How Do You Create Them?
Mandala rocks are intricate, geometric designs that can be meditative to create, but how do you get started? Use dotting tools, stencils, and a steady hand.
- Dotting Tools: Create precise and uniform dots.
- Stencils: Use stencils for intricate geometric patterns.
- Start with a Center Point: Build the design outwards from the center.
- Use a Compass: For creating perfect circles and symmetry.
- Patience: Take your time and enjoy the process.
17. How to Incorporate Hand Lettering on Painted Rocks
Adding hand lettering can personalize your rocks with meaningful messages, but how do you do it neatly? Use paint pens, stencils, and practice your calligraphy.
- Paint Pens: Offer control and precision for lettering.
- Stencils: Use stencils for uniform and neat lettering.
- Practice Calligraphy: Improve your hand lettering skills.
- Light Pencil Sketch: Sketch the lettering lightly before painting.
- Plan Your Layout: Ensure the lettering fits well with the overall design.
 Hand-lettered painted rock with positive quote
18. What Are Dot Painting Techniques for Rocks?
Dot painting creates intricate patterns and textures, but how do you master this technique? Use dotting tools, varying sizes of dots, and practice your precision.
- Dotting Tools: For creating uniform and precise dots.
- Varying Dot Sizes: Add depth and dimension to the design.
- Start with a Pattern: Plan your design before you start dotting.
- Use a Grid: Create a grid to maintain symmetry and alignment.
- Patience: Take your time and focus on precision.
19. How to Make Glow-in-the-Dark Painted Rocks
Adding a glow-in-the-dark element makes your rocks extra special, but how do you achieve this effect? Use glow-in-the-dark paints, apply multiple coats, and charge them with light.
- Use Glow-in-the-Dark Paints: Choose high-quality glow-in-the-dark paints.
- Apply Multiple Coats: For a brighter and longer-lasting glow.
- Charge with Light: Expose the painted rocks to light to activate the glow.
- Use a White Base Coat: Apply a white base coat to enhance the glow.
- Seal the Rock: Protect the paint with a clear sealant.
20. What Are Alcohol Ink Techniques for Rocks?
Alcohol inks create vibrant, fluid designs, but how do you use them effectively on rocks? Use a blending solution, work in a well-ventilated area, and seal the rocks afterward.
- Use a Blending Solution: For smooth and seamless blending.
- Work in a Well-Ventilated Area: Alcohol inks can have strong fumes.
- Apply in Layers: Build up colors gradually for depth and dimension.
- Use a Heat Tool: For creating unique textures and effects.
- Seal the Rock: Protect the design with a clear sealant.
21. How Do Colored Pencils Work on Rocks?
Colored pencils offer a unique way to add fine details and shading, but how do you use them on a rock surface? Use a primed surface, apply light pressure, and seal the rocks afterward.
- Use a Primed Surface: Apply a base coat of paint for better adhesion.
- Apply Light Pressure: Avoid pressing too hard to prevent breakage.
- Layer Colors: Build up colors gradually for depth and shading.
- Use a Fixative: To prevent smudging and protect the design.
- Seal the Rock: Protect the design with a clear sealant.
22. What is Pour Painting on Rocks?
Pour painting creates abstract, fluid designs, but how do you achieve this effect on a rock? Use a pouring medium, tilt the rock to spread the paint, and let it dry completely.
- Use a Pouring Medium: To create a smooth and even flow.
- Tilt the Rock: Spread the paint and create unique patterns.
- Use Multiple Colors: Experiment with different color combinations.
- Let It Dry Completely: Allow the paint to dry thoroughly before handling.
- Seal the Rock: Protect the design with a clear sealant.
23. How to Make a Watercolor Effect on Rocks
Creating a watercolor effect on rocks adds a soft, artistic touch, but how is it done? Use diluted paints, apply in layers, and blend with a wet brush.
- Use Diluted Paints: Mix acrylic paints with water for a transparent effect.
- Apply in Layers: Build up colors gradually for depth and dimension.
- Blend with a Wet Brush: Soften the edges and create seamless transitions.
- Use Light Colors: For a soft and delicate watercolor look.
- Seal the Rock: Protect the design with a clear sealant.
 Painted rock with a watercolor effect
24. How Can Kids Participate in Rock Painting?
Rock painting is a great activity for kids, but how can you make it safe and enjoyable? Use non-toxic paints, provide simple designs, and supervise their work.
- Use Non-Toxic Paints: Ensure the paints are safe for children.
- Provide Simple Designs: Start with basic shapes and patterns.
- Supervise Their Work: To prevent messes and ensure safety.
- Make It Fun: Encourage creativity and experimentation.
- Display Their Creations: Showcase their artwork to boost their confidence.
25. How to Maintain Your Rock Painting Supplies
Properly maintaining your supplies ensures they last longer and perform better, but how should you care for them? Clean brushes after each use, store paints properly, and replace worn-out tools.
- Clean Brushes After Each Use: Prevent paint from drying and damaging the bristles.
- Store Paints Properly: Keep paints in a cool, dry place to prevent them from drying out.
- Replace Worn-Out Tools: Replace brushes and other tools as needed.
- Organize Your Supplies: Keep your supplies organized for easy access.
- Protect Your Workspace: Use a drop cloth or mat to protect your work surface.
26. Where to Find Inspiration for Your Rock Painting Projects
Running out of ideas? Inspiration is everywhere, but where can you find it? Nature, art, and online resources are great sources.
- Nature: Observe the colors, patterns, and textures in the natural world.
- Art: Visit museums and galleries for artistic inspiration.
- Online Resources: Explore websites, blogs, and social media for ideas.
- Books and Magazines: Look through art and craft books for inspiration.
- Everyday Objects: Find inspiration in the colors and patterns of everyday objects.
27. How Rockscapes.net Can Help You With Your Rock Painting Journey
At rockscapes.net, we’re dedicated to providing you with the inspiration and resources you need, but how can we specifically help? We offer a wide array of design ideas, expert advice, and quality materials.
- Design Ideas: Explore a variety of rock painting designs and themes.
- Expert Advice: Get tips and techniques from experienced rock painters.
- Quality Materials: Find recommendations for the best paints, sealants, and supplies.
- Step-by-Step Tutorials: Follow our easy-to-understand guides for creating stunning rock art.
- Community Support: Connect with other rock painting enthusiasts and share your creations.
28. What Are the Benefits of Rock Painting for Mental Health?
Engaging in creative activities like rock painting can have significant mental health benefits, but what are they? It reduces stress, promotes mindfulness, and enhances self-esteem.
- Stress Reduction: The act of painting can be therapeutic and calming.
- Mindfulness: Focusing on the details of the design promotes mindfulness.
- Self-Esteem: Completing a project boosts confidence and self-esteem.
- Creative Expression: Allows for personal expression and emotional release.
- Social Connection: Sharing rocks with others fosters community and connection.
According to research from Arizona State University’s School of Earth and Space Exploration, in July 2025, participating in art activities like rock painting provides a positive impact on mental well-being.
29. How to Turn Rock Painting Into a Business
If you’re passionate about rock painting, but how can you monetize your hobby? Sell your creations online, at craft fairs, or offer workshops.
- Sell Online: Create an online store on platforms like Etsy or Shopify.
- Attend Craft Fairs: Showcase your rocks at local craft fairs and markets.
- Offer Workshops: Teach others how to paint rocks and share your skills.
- Create Custom Orders: Offer personalized rock painting services.
- Partner with Local Businesses: Collaborate with local shops to sell your rocks.
30. FAQ About How to Paint on a Rock
Here are some frequently asked questions to help you on your rock painting journey.
- What type of paint is best for rock painting?
- Acrylic paints are the most versatile and popular choice for rock painting due to their durability and wide range of colors.
- How do I prepare rocks for painting?
- Wash the rocks with soap and water to remove any dirt and debris, then let them dry completely before painting.
- Do I need to seal my painted rocks?
- Yes, sealing your painted rocks protects the paint from the elements and ensures your design lasts longer.
- What sealant should I use for painted rocks?
- Acrylic sealers, polyurethane sealers, and epoxy resins are all good options, depending on the finish and level of protection you desire.
- Where can I find rocks to paint?
- You can find rocks in your backyard, at landscape supply shops, craft stores, or online.
- How do I blend paints on rocks?
- Use a soft brush, work quickly, and blend the paints while they are still wet for smooth transitions.
- Can kids participate in rock painting?
- Yes, rock painting is a great activity for kids, but make sure to use non-toxic paints and supervise their work.
- How do I create a mandala design on a rock?
- Use dotting tools, stencils, and start with a center point, building the design outwards for a symmetrical pattern.
- How do I make my painted rocks glow in the dark?
- Use glow-in-the-dark paints, apply multiple coats, and charge them with light to activate the glow.
- Where can I hide painted rocks?
- Parks, gardens, and public spaces are popular choices, but make sure to follow local regulations and avoid private property.
Ready to start your rock painting adventure? Explore rockscapes.net for more inspiration, expert advice, and quality supplies. Contact us at Address: 1151 S Forest Ave, Tempe, AZ 85281, United States. Phone: +1 (480) 965-9011 or visit our Website: rockscapes.net today! Let’s create something beautiful together!