Want to know How To Polish River Rocks and transform them into stunning decorative pieces? At rockscapes.net, we’ll guide you through the entire process, from selecting the right rocks to achieving a professional-looking shine. Discover the art of rock polishing and unlock the hidden beauty within these natural treasures with practical tips and expert advice.
1. What Is River Rock Polishing and Why Should You Do It?
River rock polishing is the art of transforming ordinary, dull river rocks into gleaming, attractive stones. These polished rocks can then be used for a variety of decorative purposes, adding a natural and elegant touch to your home and garden.
According to research from Arizona State University’s School of Earth and Space Exploration, polished stones have been used for ornamental purposes since ancient times. Evidence suggests that humans have been fascinated by the beauty of polished stones for thousands of years, using them in jewelry, art, and architecture.
1.1. What are the benefits of polishing river rocks?
Polishing river rocks offers numerous benefits:
- Aesthetic Appeal: Polished rocks enhance the natural beauty of the stones, bringing out their colors and patterns.
- Versatility: They can be used in landscaping, interior design, crafts, and even jewelry making.
- Therapeutic: The process of hand-polishing can be relaxing and meditative, offering a sense of accomplishment.
- Cost-Effective: River rocks are readily available and inexpensive, making this a budget-friendly DIY project.
- Personalization: You have complete control over the final look, allowing you to create unique and personalized pieces.
1.2. What types of river rocks are best for polishing?
The best river rocks for polishing are those that are relatively hard and free of cracks or fractures. Some popular choices include:
- Quartz: Known for its hardness and ability to take a high polish.
- Jasper: Offers a variety of colors and patterns, making it a visually appealing choice.
- Agate: Features intricate banding and a smooth texture.
- Basalt: A dark, fine-grained rock that can be polished to a sleek, modern finish.
- Granite: Provides a speckled appearance and is very durable.
1.3. Are there any river rocks that are not suitable for polishing?
Yes, some river rocks are not ideal for polishing:
- Soft Rocks: Rocks like shale or sandstone are too soft and may crumble during the polishing process.
- Porous Rocks: Rocks with high porosity absorb too much polishing compound and may not achieve a high shine.
- Fractured Rocks: Rocks with cracks or fractures are likely to break apart during polishing.
2. What Tools and Materials Do You Need To Polish River Rocks?
Before you begin, gather the necessary tools and materials to ensure a smooth and efficient polishing process. Having everything on hand will make the project more enjoyable and less stressful.
2.1. What are the essential tools for hand polishing river rocks?
- Bucket: For cleaning and rinsing the rocks.
- Old Toothbrush: For scrubbing dirt and debris from the rocks.
- Sandpaper: In various grits (220, 500, 1200) for shaping and smoothing.
- Cutting Board or Flat Surface: To provide a stable base for sanding.
- Thick Cloth: Such as denim or canvas, for final polishing.
- Toothpaste: A mild abrasive for achieving a final shine.
- Mineral Oil or Rock Polish: To enhance the luster of the polished rocks.
- Water: For keeping the rocks and sandpaper wet during the sanding process.
- Gloves: To protect your hands from abrasion.
- Safety Glasses: To protect your eyes from flying debris.
2.2. Can I use a Dremel for polishing river rocks?
Yes, a Dremel rotary tool can be a valuable addition to your rock polishing toolkit, especially for shaping and polishing harder stones or intricate details.
According to a study published in the “Journal of Gemmology,” rotary tools like Dremels can significantly reduce the time and effort required to polish gemstones and rocks, providing a more controlled and precise polishing action.
2.3. What Dremel attachments are best for polishing rocks?
- Grinding Stones: For shaping and removing rough edges.
- Sanding Drums: In various grits for smoothing the surface.
- Felt Polishing Wheels: For applying polishing compounds and achieving a final shine.
- Diamond Polishing Bits: For working with harder stones.
2.4. What safety precautions should I take when using a Dremel?
- Wear Safety Glasses: Always protect your eyes from flying debris.
- Use Gloves: Protect your hands from abrasion and the rotating tool.
- Wear a Dust Mask: Prevent inhaling fine particles.
- Work in a Well-Ventilated Area: To minimize dust exposure.
- Secure the Rock: Use a vise or clamp to hold the rock firmly in place.
3. How to Polish River Rocks by Hand: A Step-by-Step Guide
Follow these detailed steps to transform your river rocks into beautiful, polished gems. This process requires patience and attention to detail, but the results are well worth the effort.
3.1. Step 1: Cleaning the Rocks
Thoroughly clean the rocks to remove any dirt, debris, or residue.
- Fill a bucket with hot, soapy water.
- Use an old toothbrush to scrub the rocks, paying attention to crevices and stubborn spots.
- Rinse the rocks thoroughly with clean water.
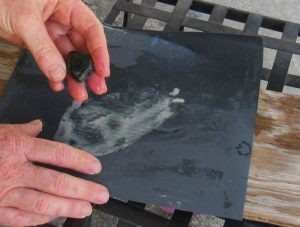 Cleaning river rocks with soapy water and a toothbrush
3.2. Step 2: Shaping with 220-Grit Sandpaper
Begin shaping the rocks and removing rough edges using 220-grit sandpaper.
- Moisten the sandpaper and place it grit-side up on a cutting board or flat surface.
- Wet the rock and hold it firmly in your dominant hand.
- Rub the rock along the sandpaper in a consistent motion to remove sharp edges and achieve the desired shape.
- Continuously wet the rock to remove fine particles and prevent the sandpaper from clogging.
3.3. Step 3: Refining with 500-Grit Sandpaper
Refine the shape and remove heavy scratches using 500-grit sandpaper.
- Replace the 220-grit sandpaper with 500-grit sandpaper.
- Repeat the sanding process, keeping the rock wet and rinsing it frequently.
- Focus on removing any remaining scratches and smoothing the surface further.
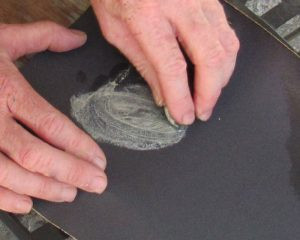 Smoothing amber with 220-grit sandpaper
3.4. Step 4: Polishing with 1200-Grit Sandpaper
Remove lighter scratches and begin the final polishing stage with 1200-grit sandpaper.
- Replace the 500-grit sandpaper with 1200-grit sandpaper.
- Continue sanding, keeping the rock wet and rinsing it often.
- You will start to see a shine forming on the surface of the rock during this step.
3.5. Step 5: Final Polish with Toothpaste
Achieve a beautiful luster with toothpaste and a thick cloth.
- Dampen a square of thick cloth, such as denim or canvas.
- Add a generous dab of toothpaste to the cloth.
- Work the stone through the toothpaste and over the fabric, applying firm pressure.
- Continue polishing until the desired shine is achieved, adding more toothpaste as needed.
3.6. Step 6: Enhancing the Shine
Enhance the luster of the polished rock with mineral oil or commercial rock polish.
- Rinse off the toothpaste thoroughly with clean water.
- Apply a thin coat of mineral oil or rock polish to the surface of the rock.
- Allow the rock to dry completely.
- Admire your beautifully polished river rock!
4. How to Use a Dremel to Polish River Rocks: A Detailed Guide
Using a Dremel can speed up the polishing process, especially for harder stones or intricate shapes.
4.1. Step 1: Preparing the Rock
Clean the rock thoroughly and secure it in a vise or clamp.
- Follow the cleaning instructions in Step 1 of the hand polishing guide.
- Secure the rock in a vise or clamp to prevent it from moving during the polishing process.
4.2. Step 2: Shaping with a Grinding Stone
Shape the rock and remove rough edges using a Dremel with a grinding stone attachment.
- Attach a grinding stone to the Dremel.
- Set the Dremel to a low speed.
- Gently grind away any sharp edges or unwanted features.
- Keep the rock and grinding stone wet to reduce dust and prevent overheating.
4.3. Step 3: Smoothing with Sanding Drums
Smooth the surface of the rock using a Dremel with sanding drum attachments.
- Attach a coarse-grit sanding drum to the Dremel.
- Set the Dremel to a medium speed.
- Smooth the surface of the rock, working your way through progressively finer grits.
- Keep the rock and sanding drum wet to reduce dust and prevent clogging.
4.4. Step 4: Polishing with Felt Wheels
Polish the rock to a high shine using a Dremel with felt polishing wheels and polishing compounds.
- Attach a felt polishing wheel to the Dremel.
- Apply a small amount of polishing compound to the wheel.
- Set the Dremel to a low speed.
- Polish the surface of the rock, applying gentle pressure.
- Continue polishing until the desired shine is achieved.
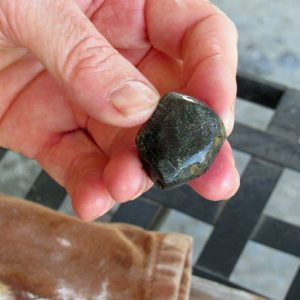 Shiny stone after polishing
4.5. Step 5: Final Touches
Clean the polished rock and apply a protective coating.
- Clean the rock with a soft cloth to remove any polishing compound residue.
- Apply a thin coat of mineral oil or rock polish to protect the surface and enhance the shine.
5. River Rock Polishing: Tumbling vs. Hand Polishing
Choosing between tumbling and hand polishing depends on your goals, the type of rocks you have, and the amount of time and effort you’re willing to invest. Both methods have their advantages and disadvantages.
5.1. What are the advantages of rock tumbling?
- Less Labor-Intensive: The machine does most of the work.
- Good for Large Quantities: You can polish many rocks at once.
- Consistent Results: Tumblers provide uniform polishing.
5.2. What are the disadvantages of rock tumbling?
- Time-Consuming: The process can take several weeks.
- No Control Over Shape: The rocks are tumbled randomly, so you have less control over the final shape.
- Not Suitable for Soft Stones: Soft stones may break or crumble in a tumbler.
5.3. What are the advantages of hand polishing?
- More Control: You have complete control over the shape and finish of the rock.
- Faster Turnaround: Hand polishing is quicker for softer stones.
- Suitable for Delicate Stones: You can carefully polish delicate or fragile stones without damaging them.
- Therapeutic: The process can be relaxing and rewarding.
5.4. What are the disadvantages of hand polishing?
- More Labor-Intensive: Hand polishing requires more effort and attention to detail.
- Slower for Hard Stones: Polishing hard stones by hand can be time-consuming.
- Requires Skill and Patience: Achieving a professional-looking finish requires practice and patience.
6. River Rock Polishing: Tips and Tricks for a Perfect Shine
Achieving a perfect shine on your river rocks requires attention to detail and a few helpful tricks. These tips will help you get the best possible results from your polishing efforts.
6.1. How do I choose the right polishing compounds?
- Aluminum Oxide: A versatile compound suitable for most types of rocks.
- Cerium Oxide: Ideal for polishing glass and delicate stones.
- Diamond Paste: For achieving a high shine on very hard stones.
- Tin Oxide: Good for polishing softer stones.
6.2. How can I prevent scratches during polishing?
- Start with Clean Rocks: Remove all dirt and debris before polishing.
- Use Plenty of Water: Keep the rocks and sandpaper or polishing wheels wet.
- Change Sandpaper Regularly: Use fresh sandpaper as soon as it becomes clogged or worn.
- Avoid Cross-Contamination: Use separate polishing wheels and compounds for different types of rocks.
6.3. How do I get a mirror-like finish on river rocks?
- Use Progressively Finer Grits: Gradually move from coarser to finer grits of sandpaper or polishing compounds.
- Spend Enough Time on Each Grit: Don’t rush the process; each grit plays a crucial role in removing scratches and refining the surface.
- Use a High-Quality Polishing Compound: Invest in a good polishing compound that is specifically designed for the type of stone you are polishing.
- Apply Even Pressure: When using a Dremel or polishing wheel, apply even pressure to avoid creating uneven surfaces.
- Finish with a Protective Coating: Apply a thin coat of mineral oil or rock polish to protect the surface and enhance the shine.
6.4. How do I polish river rocks with unique shapes and crevices?
- Use Hand Tools: For intricate shapes, hand polishing with sandpaper and polishing cloths may be more effective than using a machine.
- Use Flexible Polishing Wheels: Dremel attachments with flexible polishing wheels can reach into tight spaces and crevices.
- Use a Soft Brush: A soft brush can help remove polishing compound from crevices and reveal the polished surface.
- Be Patient: Polishing rocks with unique shapes and crevices takes time and patience.
7. River Rock Polishing: Creative Uses for Your Polished Rocks
Once you’ve polished your river rocks, the possibilities are endless! Here are some creative ways to use your polished rocks in your home, garden, and beyond.
7.1. What are some landscaping ideas using polished river rocks?
- Garden Borders: Use polished rocks to create decorative borders around flower beds or pathways.
- Water Features: Add polished rocks to ponds, fountains, or waterfalls for a natural and elegant touch.
- Rock Gardens: Create a rock garden featuring a variety of polished rocks, succulents, and other drought-tolerant plants.
- Pathways: Use polished rocks to create a unique and eye-catching pathway through your garden.
- Mulch: Use polished rocks as a decorative mulch around trees and shrubs.
7.2. How can I use polished river rocks in interior design?
- Table Centerpieces: Create a stunning table centerpiece by arranging polished rocks in a bowl or tray.
- Vase Fillers: Use polished rocks to fill vases and add a natural touch to floral arrangements.
- Candle Holders: Create unique candle holders by placing polished rocks around the base of candles.
- Paperweights: Use larger polished rocks as decorative paperweights.
- Decorative Accents: Scatter polished rocks around your home to add a touch of natural beauty.
7.3. Are there any craft projects using polished river rocks?
- Jewelry Making: Drill holes in polished rocks and use them to create pendants, earrings, or bracelets.
- Mosaics: Use polished rocks to create mosaics on walls, floors, or tabletops.
- Painted Rocks: Paint designs or patterns on polished rocks and use them as decorative accents or gifts.
- Rock Animals: Glue polished rocks together to create animal figurines.
- Rock Coasters: Glue polished rocks to cork or felt to create unique coasters.
7.4. What are some unique and unusual ways to use polished rocks?
- Massage Stones: Warm polished rocks and use them for massage therapy.
- Meditation Stones: Hold polished rocks during meditation to enhance focus and relaxation.
- Pet Memorials: Use polished rocks to create a memorial for a beloved pet.
- Gifts: Give polished rocks as unique and personalized gifts.
- Educational Tools: Use polished rocks to teach children about geology and nature.
8. River Rock Polishing: Addressing Common Problems
Even with careful preparation and technique, you may encounter some common problems during the rock polishing process. Here’s how to troubleshoot and overcome these challenges.
8.1. What causes uneven polishing?
- Uneven Pressure: Applying uneven pressure during sanding or polishing can result in uneven surfaces.
- Worn Sandpaper or Polishing Wheels: Worn sandpaper or polishing wheels may not remove material evenly.
- Inconsistent Grit Sequence: Skipping grits or using an inconsistent grit sequence can lead to uneven polishing.
- Rock Hardness Variations: Variations in the hardness of the rock can cause uneven polishing.
Solution: Apply even pressure during sanding and polishing, replace worn sandpaper and polishing wheels regularly, follow a consistent grit sequence, and be patient when polishing rocks with hardness variations.
8.2. How do I deal with scratches that won’t go away?
- Insufficient Sanding: Scratches may persist if the rock has not been sanded sufficiently with each grit.
- Contaminated Sandpaper: Contaminated sandpaper can re-introduce scratches to the surface.
- Hard Spots: Hard spots in the rock may resist polishing.
Solution: Spend more time sanding with each grit, use fresh sandpaper, and be patient when polishing hard spots.
8.3. Why is my rock not shining, even after polishing?
- Insufficient Polishing: The rock may not have been polished sufficiently with the final polishing compound.
- Incorrect Polishing Compound: The polishing compound may not be appropriate for the type of rock being polished.
- Contaminated Polishing Wheel: A contaminated polishing wheel can prevent the rock from shining.
Solution: Spend more time polishing with the final polishing compound, use the correct polishing compound for the type of rock, and use a clean polishing wheel.
8.4. How do I prevent my Dremel from overheating?
- Excessive Speed: Running the Dremel at too high a speed can cause it to overheat.
- Excessive Pressure: Applying too much pressure can strain the motor and cause it to overheat.
- Insufficient Cooling: The Dremel may overheat if it is not allowed to cool down periodically.
Solution: Use a lower speed, apply gentle pressure, and allow the Dremel to cool down periodically.
9. River Rock Polishing: Safety First!
Polishing river rocks can be a fun and rewarding hobby, but it’s important to prioritize safety to avoid injuries. Here are some essential safety precautions to follow.
9.1. What safety gear should I wear when polishing rocks?
- Safety Glasses: Protect your eyes from flying debris.
- Gloves: Protect your hands from abrasion and the rotating tools.
- Dust Mask: Prevent inhaling fine particles.
- Apron: Protect your clothing from splashes and stains.
9.2. How can I prevent dust inhalation?
- Work in a Well-Ventilated Area: Ensure adequate ventilation to minimize dust exposure.
- Use a Dust Collector: A dust collector can help remove dust from the air.
- Wet Sanding: Keep the rocks and sandpaper or polishing wheels wet to reduce dust.
9.3. What are the potential hazards of using a Dremel?
- Flying Debris: The rotating tool can send small pieces of rock or polishing compound flying through the air.
- Abrasion: The rotating tool can cause abrasion or cuts to the skin.
- Dust Inhalation: Polishing rocks can create fine dust that can be harmful if inhaled.
- Overheating: The Dremel can overheat if used improperly.
9.4. How should I store polishing compounds and chemicals safely?
- Keep Out of Reach of Children: Store polishing compounds and chemicals in a secure location out of reach of children.
- Store in Original Containers: Keep polishing compounds and chemicals in their original containers to avoid confusion.
- Label Containers Clearly: Label all containers clearly with the name of the substance and any hazard warnings.
- Store in a Cool, Dry Place: Store polishing compounds and chemicals in a cool, dry place away from direct sunlight and heat.
10. River Rock Polishing: Expert Insights and Further Resources
To deepen your knowledge and skills in river rock polishing, here are some expert insights and valuable resources to explore.
10.1. What do experts say about the best techniques for polishing river rocks?
According to Allen McGhee, a long-time rockhound and hand polisher, “Toothpaste works just as well as expensive polishing compounds, and it’s cheaper. Pretty much any toothpaste works, so don’t buy the high-priced ones.”
The Gemological Institute of America (GIA) recommends using a consistent grit sequence and high-quality polishing compounds to achieve the best results.
10.2. Are there any books or websites that offer advanced techniques for rock polishing?
- “Modern Rock Tumbling” by Steve Hart: A comprehensive guide to rock tumbling, including advanced techniques for polishing different types of rocks.
- “Lapidary Carving: Design & Techniques” by James Miller: A guide to shaping and polishing gemstones and rocks using lapidary equipment.
- The Gemological Institute of America (GIA) website: Offers a wealth of information on gemology, including techniques for polishing gemstones and rocks.
- Rock & Gem Magazine: A monthly magazine featuring articles on rock collecting, lapidary arts, and jewelry making.
10.3. Where can I find high-quality polishing supplies and equipment?
- Rockscapes.net: Offers a wide selection of polishing supplies and equipment for all your rock polishing needs. Visit our website at rockscapes.net or our address at 1151 S Forest Ave, Tempe, AZ 85281, United States. You can also call us at +1 (480) 965-9011.
- Amazon: A vast online marketplace with a wide selection of polishing supplies and equipment.
- eBay: An online auction site where you can find deals on polishing supplies and equipment.
- Local Lapidary Supply Stores: Support your local community by purchasing polishing supplies and equipment from local lapidary supply stores.
10.4. How can I connect with other rock polishing enthusiasts?
- Join a Rock and Gem Club: Connect with other rock polishing enthusiasts in your local area.
- Attend Rock and Gem Shows: Attend rock and gem shows to see demonstrations, learn new techniques, and purchase supplies.
- Participate in Online Forums and Communities: Share your experiences and learn from other rock polishing enthusiasts in online forums and communities.
- Follow Rock Polishing Experts on Social Media: Follow rock polishing experts on social media to stay up-to-date on the latest techniques and trends.
Ready to transform ordinary river rocks into stunning works of art? Visit rockscapes.net today for inspiration, expert advice, and high-quality supplies. Discover the beauty of polished stones and elevate your landscaping and design projects to new heights. Let rockscapes.net be your guide to the world of rock polishing!
FAQ
1. What is the best way to clean river rocks before polishing?
The best way to clean river rocks before polishing is to scrub them with hot, soapy water and a toothbrush. This removes dirt, debris, and any stubborn residue.
2. What sandpaper grit should I start with for polishing river rocks?
You should start with 220-grit sandpaper to shape the rocks and remove rough edges.
3. Can I use regular toothpaste to polish river rocks?
Yes, regular toothpaste can be used as a final polishing compound to achieve a beautiful luster on river rocks.
4. How long does it take to polish river rocks by hand?
The time it takes to polish river rocks by hand depends on the hardness of the rocks and the desired level of shine. It can take several hours or even days for harder stones.
5. Is it better to use a rock tumbler or polish river rocks by hand?
It depends on your goals. Rock tumblers are less labor-intensive and good for large quantities, while hand polishing offers more control and is quicker for softer stones.
6. What is the best polishing compound for river rocks?
Aluminum oxide is a versatile compound suitable for most types of rocks, while cerium oxide is ideal for polishing glass and delicate stones.
7. How can I prevent scratches when polishing river rocks?
To prevent scratches, start with clean rocks, use plenty of water, change sandpaper regularly, and avoid cross-contamination.
8. How do I get a mirror-like finish on river rocks?
Use progressively finer grits, spend enough time on each grit, use a high-quality polishing compound, and apply even pressure.
9. What safety precautions should I take when polishing river rocks?
Wear safety glasses, gloves, and a dust mask, and work in a well-ventilated area.
10. Where can I find high-quality polishing supplies and equipment?
High-quality polishing supplies and equipment can be found at rockscapes.net, Amazon, eBay, and local lapidary supply stores.