Polishing rocks with a tumbler is a fantastic way to transform rough stones into beautiful, gleaming gems. At rockscapes.net, we provide detailed instructions and valuable tips to achieve stunning results. Learn how to use a rock tumbler to create polished stones that enhance your landscape, garden, or rock collection.
1. Understanding the Basics of Rock Tumbling
Rock tumbling involves using a machine called a rock tumbler to grind, smooth, and polish rocks over several stages. This process, when done correctly, results in beautifully polished stones that can be used for various decorative and practical purposes.
1.1. What is a Rock Tumbler?
A rock tumbler is a machine designed to simulate the natural abrasion that rocks undergo in streams and rivers over long periods. According to research from Arizona State University’s School of Earth and Space Exploration, in July 2025, continuous tumbling action, combined with abrasive grits and polishes, gradually transforms rough rocks into smooth, polished gems.
1.2. Types of Rock Tumblers
There are two main types of rock tumblers: rotary and vibratory.
1.2.1. Rotary Tumblers
Rotary tumblers are the most common type. They consist of a barrel that rotates horizontally, causing the rocks inside to grind against each other. This method is effective but can take several weeks to complete.
1.2.2. Vibratory Tumblers
Vibratory tumblers use a vibrating motion to achieve the same effect in a fraction of the time. These tumblers are typically faster but may not produce the same level of smoothness as rotary tumblers.
1.3. Essential Supplies for Rock Tumbling
To start polishing rocks with a tumbler, you’ll need a few essential supplies.
- Rock Tumbler: Choose either a rotary or vibratory tumbler based on your preferences and needs.
- Rough Rocks: Select rocks that are suitable for tumbling, with a Mohs hardness between 6 and 7.
- Grit: You’ll need coarse, medium, fine, and polish grits.
- Ceramic Media: Ceramic media helps to cushion the rocks and improve the tumbling action.
- Water: Use clean water for each stage of the tumbling process.
- Bucket and Colander: These are used for cleaning the rocks between stages.
- Safety Glasses: Always wear safety glasses to protect your eyes during cleaning.
2. Selecting the Right Rocks for Tumbling
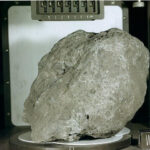
Choosing the right rocks is crucial for achieving the best results. Not all rocks are suitable for tumbling, so it’s important to select those that will withstand the process and produce a beautiful polish.
2.1. Ideal Rock Types
The best rocks for tumbling have a Mohs hardness between 6 and 7. This ensures they are hard enough to withstand the tumbling process but not so hard that they are difficult to polish.
2.1.1. Chalcedony
This group includes agate, bloodstone, carnelian, chrysoprase, jasper, chert, flint, and petrified wood. These rocks are known for their vibrant colors and patterns.
2.1.2. Quartz
Varieties include amethyst, aventurine, citrine, milky quartz, rock crystal, rose quartz, smoky quartz, and tiger’s-eye. Quartz rocks are durable and produce a beautiful shine.
2.1.3. Rock Types
Suitable rock types include andesite, basalt, diorite, gabbro, granite, mookaite, novaculite, quartzite, and unakite. These rocks offer a variety of textures and colors for unique tumbled stones.
2.2. Assessing Rock Quality
Before tumbling, inspect your rocks for any fractures, porous areas, or soft spots. Rocks with these imperfections may break apart during tumbling or not polish evenly. Discard any rocks that are not of adequate quality.
2.3. Rock Size Considerations
For best results, use rocks that are between 3/8″ and 1 1/2″ in size. Using a mix of sizes helps the rocks grind against each other more effectively. If you don’t have enough small rocks, you can add ceramic media to the tumbler.
3. The Golden Rules of Rock Tumbling
To achieve the best possible results, it’s important to follow the “Golden Rules” of rock tumbling.
3.1. “Garbage In Means Garbage Out”
Starting with high-quality rough is essential. Low-quality rocks will produce low-quality tumbled stones. Discard any rocks that are porous, fractured, or misshapen. Investing in quality rough saves time and money and produces better results.
3.2. “Avoid Contamination”
Contamination occurs when grit from a previous stage gets into the next stage. This can scratch the rocks and ruin the polish. Thoroughly clean the rocks, tumbler barrel, and tools between each stage to avoid contamination. Additionally, avoid tumbling brittle or granular rocks with more durable stones.
3.3. “Great Results Take Time”
Rock tumbling is a time-consuming process. Don’t rush it. If the rocks are not smooth enough after the coarse grit stage, repeat the stage for another week. Taking the time to do each step properly ensures the best possible results.
4. A Detailed Four-Step Tumbling Process
The four-step tumbling process involves using progressively finer grits to grind, smooth, and polish the rocks. Each step is crucial for achieving a high-quality finish.
4.1. Step 1: Coarse Grind
The coarse grind is the first and most aggressive stage. It is used to remove sharp edges, round the rocks, and shape them.
4.1.1. How to Perform Coarse Grind
Fill the tumbler barrel 1/2 to 2/3 full with rough rocks. Add two level tablespoons of coarse grit (60/90 silicon carbide) per pound of rock. Add water until the water line is just below the top of the rocks. Seal the barrel and run the tumbler for seven days.
4.1.2. What to Do After Coarse Grind
After seven days, open the barrel and dump the contents into a colander over a bucket. Rinse the rocks thoroughly to remove all grit and mud. Do not allow the grit or mud to go down the drain. It can clog your plumbing.
4.1.3. Inspecting the Rocks After Coarse Grind
Inspect the rocks to see if they are ready to move on to the next step. If they still have sharp edges or rough spots, repeat the coarse grind for another week. Some people sort their rocks into three categories: those ready for Step 2, those that need more time in Step 1, and those that should be discarded.
4.2. Step 2: Medium Grind
The medium grind further smooths the rocks and prepares them for the fine grind.
4.2.1. How to Perform Medium Grind
Thoroughly clean the rocks, tumbler barrel, and lid to remove any traces of coarse grit. Fill the barrel 1/2 to 2/3 full with rocks and ceramic media (if needed). Add two level tablespoons of medium grit (110/220 or 150/220 silicon carbide) per pound of rock and ceramic media. Add water until the water line is just below the top of the rocks. Tumble for seven days.
4.2.2. What to Do After Medium Grind
After seven days, open the barrel and clean the rocks, barrel, and lid. Inspect the rocks for any cracks or breaks. Discard any damaged rocks.
4.2.3. Why Use Ceramic Media?
 ceramic media
Ceramic media prevents damage, it helps cushion the rocks and improve the tumbling action, especially when tumbling fragile materials like quartz.
4.3. Step 3: Fine Grind / Pre-Polish
The fine grind, or pre-polish, further smooths the rocks and prepares them for the final polishing stage.
4.3.1. How to Perform Fine Grind
Thoroughly clean the rocks, tumbler barrel, and lid. Place the rocks and ceramic media into the barrel. Add two level tablespoons of fine grit (600 or 500 silicon carbide) per pound of material. Add water until the water line is just below the top of the rocks. Tumble for seven days.
4.3.2. What to Do After Fine Grind
After seven days, open the barrel and clean the rocks, barrel, and lid. The rocks should be extremely smooth, and some may display a slight luster.
4.4. Step 4: Polish
The final step is the polishing stage, which gives the rocks their bright, shiny finish.
4.4.1. How to Perform Polish
Ensure the rocks and equipment are perfectly clean. Some people use a separate barrel dedicated only to the polishing step to prevent contamination. Place the rocks in the barrel. Add two level tablespoons of rock polish (TXP aluminum oxide) per pound of material. Add water to just below the top of the rocks. Tumble for seven days.
4.4.2. What to Do After Polish
After seven days, open the barrel and inspect the rocks. They should be bright and shiny. If the stones have a smooth surface but no shine, they may need to be burnished. If they have scratches, repeat Steps 2, 3, and 4.
5. Troubleshooting Common Rock Tumbling Issues
Even with careful attention to detail, problems can arise during the rock tumbling process. Here are some common issues and how to resolve them.
5.1. Rocks Not Polishing
If the rocks are not polishing, it could be due to several factors.
- Contamination: Ensure the rocks and equipment are thoroughly cleaned between each step.
- Insufficient Polish: Use the correct amount of polish and ensure it is of high quality.
- Rock Hardness: Make sure all the rocks in the batch have similar hardness.
- Tumbling Time: Extend the polishing stage for another week.
5.2. Scratches on Polished Stones
Scratches on polished stones indicate that coarse grit has contaminated a later stage.
- Thorough Cleaning: Clean the rocks, barrel, and lid meticulously between each step.
- Inspect Rocks: Remove any rocks that are breaking apart or shedding grains.
- Ceramic Media: Use ceramic media to cushion the rocks and prevent scratching.
5.3. Rocks Breaking Apart
Rocks may break apart if they are fractured or too soft.
- Inspect Rough: Discard any rocks that show signs of fracturing or weakness.
- Tumbling Speed: Reduce the speed of the tumbler if possible.
- Barrel Load: Ensure the barrel is filled to the correct level to prevent excessive impact.
6. Burnishing: Adding Extra Shine
Sometimes, even after the polishing step, your stones might appear a bit hazy or have tiny particles of polish in micro-crevices. Burnishing is the perfect solution to brighten and clean them up.
6.1. How to Burnish
Place the stones back into your polishing barrel with the usual amount of water. Add about 1/2 tablespoon of grated Ivory bar soap for each pound of rock. Be sure to use “ORIGINAL” Ivory soap, avoiding soaps with aloe, abrasives, or any other additives. Tumble the stones for an hour or two.
6.2. Why Burnish?
Burnishing often enhances the shine of tumbled stones and removes any residual haze. It’s a simple step that can make a significant difference in the final appearance of your polished rocks.
7. Keeping Detailed Records
Maintaining records of your rock tumbling process is essential for improving your technique and achieving consistent results.
7.1. What to Record
Keep track of the following information for each batch of rocks:
- Material tumbled
- Start date
- Abrasive used
- Media used
- Finishing date and duration
- Comments or observations about the results
7.2. Benefits of Record-Keeping
Record-keeping helps you stay organized, remember important details, and learn from your experiences. By documenting what works and what doesn’t, you can replicate successful techniques and avoid repeating mistakes.
8. Advanced Techniques and Tips
For those looking to take their rock tumbling to the next level, here are some advanced techniques and tips.
8.1. Using Ceramic Media Effectively
Ceramic media can be used in all stages of the tumbling process to cushion the rocks, improve grinding action, and prevent bruising. Experiment with different shapes and sizes of ceramic media to find what works best for your rocks.
8.2. Stage-Specific Media
For coarse grinding, use coarser ceramic media to provide extra abrasion. For polishing, use finer media to enhance the shine. Always clean the media thoroughly between stages.
8.3. Two-Barrel System
Having a second barrel can significantly reduce the risk of contamination. Use one barrel for the coarse and medium grind stages and the other exclusively for the fine grind and polish stages.
8.4. Borax Soak
Soaking polished stones in a borax solution (1 tablespoon of borax per gallon of water) for several hours can enhance their shine. After soaking, rinse the stones thoroughly and dry them with a soft cloth.
9. Safety Precautions
Safety should always be a top priority when working with rock tumblers and abrasive materials.
9.1. Wear Safety Glasses
Always wear safety glasses to protect your eyes from splashes of grit and mud.
9.2. Avoid Draining Grit Down the Sink
Never pour used grit or mud down the drain. It can clog your plumbing. Always dispose of waste materials properly.
9.3. Work in a Well-Ventilated Area
Some abrasive materials can produce dust, so work in a well-ventilated area to avoid inhaling dust particles.
9.4. Keep Out of Reach of Children
Rock tumblers and abrasive materials should be kept out of reach of children.
10. Explore Rockscapes.net for More Ideas and Inspiration
Ready to create stunning landscapes with your newly polished stones? Rockscapes.net offers a wealth of inspiration, resources, and expert advice for all your landscaping needs.
10.1. Discover Design Ideas
Browse our extensive gallery of landscape designs to find the perfect inspiration for your outdoor space. From serene rock gardens to dramatic stone pathways, we have ideas to suit every style and budget.
10.2. Learn About Different Stone Types
Explore our detailed guides to different types of natural stone. Understand their unique characteristics, applications, and benefits to make informed choices for your projects.
10.3. Get Expert Tips
Access practical tips and step-by-step guides for constructing various landscape features. Whether you’re building a retaining wall, creating a patio, or installing a water feature, our expert advice will help you achieve professional results.
10.4. Connect with Professionals
Find local stone suppliers, landscape designers, and contractors through our directory. Connect with trusted professionals who can bring your vision to life.
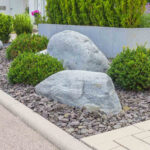
11. Optimizing Your Landscape with Polished Rocks
Incorporating polished rocks into your landscape design can add beauty, texture, and a touch of elegance. Here are some creative ways to use your tumbled stones.
11.1. Garden Accents
Use polished rocks as accents in your garden beds. They can highlight plants, define borders, and add visual interest to your garden.
11.2. Pathways and Walkways
Create pathways and walkways using polished rocks. They provide a unique and attractive alternative to traditional paving materials.
11.3. Water Features
Enhance water features such as ponds and fountains with polished rocks. They can be used to line the edges, create waterfalls, and add a natural aesthetic to the water feature.
11.4. Decorative Mulch
Use polished rocks as a decorative mulch around trees and shrubs. They help retain moisture, suppress weeds, and add a touch of sophistication to your landscape.
11.5. Indoor Decor
Bring the beauty of polished rocks indoors by using them in decorative bowls, vases, and terrariums. They can add a natural and elegant touch to your home décor.
12. Addressing Search Intent
Understanding the different reasons people search for “How To Polish Rocks With A Tumbler” is essential to providing comprehensive and relevant content. Here are five key search intents:
12.1. Understanding the Process
Intent: Users want a detailed explanation of the rock tumbling process, including steps and best practices.
Solution: Provide a thorough, step-by-step guide to rock tumbling, covering each stage in detail and explaining why each step is important.
12.2. Choosing the Right Equipment
Intent: Users need advice on selecting the right rock tumbler and other necessary supplies.
Solution: Offer a comparison of different types of rock tumblers, list essential supplies, and provide recommendations for specific products.
12.3. Selecting Suitable Rocks
Intent: Users want to know which types of rocks are best for tumbling and how to assess their quality.
Solution: List ideal rock types, explain the Mohs hardness scale, and provide tips for inspecting rocks for fractures, porosity, and other imperfections.
12.4. Troubleshooting Problems
Intent: Users are experiencing issues with their rock tumbling efforts and need solutions.
Solution: Address common problems such as rocks not polishing, scratches, and breakage, and offer practical tips for troubleshooting and resolving these issues.
12.5. Creative Uses for Polished Rocks
Intent: Users seek ideas for incorporating polished rocks into their landscapes and home decor.
Solution: Provide a variety of creative ideas for using polished rocks in gardens, pathways, water features, and indoor displays.
13. FAQ: Addressing Common Questions
13.1. What is the best type of rock tumbler to use?
The best type of rock tumbler depends on your needs and preferences. Rotary tumblers are more common and can produce very smooth stones, but vibratory tumblers are faster.
13.2. What grit should I use for each stage of rock tumbling?
Use 60/90 grit for the coarse grind, 110/220 or 150/220 grit for the medium grind, 500 or 600 grit for the fine grind, and TXP aluminum oxide for the polish.
13.3. How long does each stage of rock tumbling take?
Each stage typically takes about seven days, but it can vary depending on the type of rock and the desired level of smoothness.
13.4. Can I mix different types of rocks in the same tumbler?
It is best to tumble rocks of similar hardness together. Mixing rocks of different hardness can result in uneven wear and polishing.
13.5. How do I clean the rocks and tumbler between stages?
Rinse the rocks thoroughly in a colander over a bucket to remove all traces of grit and mud. Clean the tumbler barrel and lid with soap and water.
13.6. What do I do if my rocks are not polishing?
Ensure the rocks and equipment are thoroughly cleaned between each step, use the correct amount of polish, and extend the polishing stage for another week.
13.7. How can I prevent scratches on my polished stones?
Clean the rocks, barrel, and lid meticulously between each step, inspect rocks for damage, and use ceramic media to cushion the rocks.
13.8. Is it safe to pour used grit down the drain?
No, never pour used grit or mud down the drain. It can clog your plumbing. Always dispose of waste materials properly.
13.9. Can I use soap to polish rocks?
Soap is not a polishing agent, but it can be used to burnish the rocks after polishing to enhance their shine.
13.10. Where can I find high-quality rough rocks for tumbling?
High-quality rough rocks can be found at local gem and mineral shops, online retailers, and rock and mineral shows. Rockscapes.net can also help you find local suppliers in your area.
Ready to transform your rough stones into stunning gems? Visit rockscapes.net today to discover more ideas, explore different stone types, and get expert tips for creating breathtaking landscapes. Contact us at Address: 1151 S Forest Ave, Tempe, AZ 85281, United States. Phone: +1 (480) 965-9011. Let us help you bring your vision to life.