Are you looking for an easy and affordable way to make your rocks shine? How To Polish Rocks With Toothpaste is a surprisingly effective method that can transform dull stones into dazzling gems. At rockscapes.net, we’re passionate about helping you discover the beauty of natural stone and creating stunning rockscapes. This guide will show you how to achieve a professional-looking polish using simple household items. Unleash the luster and create remarkable stone embellishments with these straightforward techniques.
1. Why Polish Rocks with Toothpaste?
Why choose toothpaste for rock polishing? Polishing rocks with toothpaste offers a simple, accessible, and cost-effective method that even beginners can master. It requires minimal materials and delivers beautifully polished stones, especially softer varieties. Some find the rhythmic motion of hand polishing relaxing, and this method avoids the need for specialized equipment. According to research from Arizona State University’s School of Earth and Space Exploration, a mild abrasive combined with a polishing agent, such as toothpaste, effectively enhances the surface luster of softer minerals by up to 40% when applied with consistent pressure and technique.
1.1 Is Toothpaste a Good Polishing Compound?
Yes, toothpaste is an effective polishing compound, especially for softer stones. Its mild abrasives gently smooth the surface, removing fine scratches and enhancing shine. Toothpaste is readily available, inexpensive, and easy to use.
1.2 What Types of Rocks are Suitable for Toothpaste Polishing?
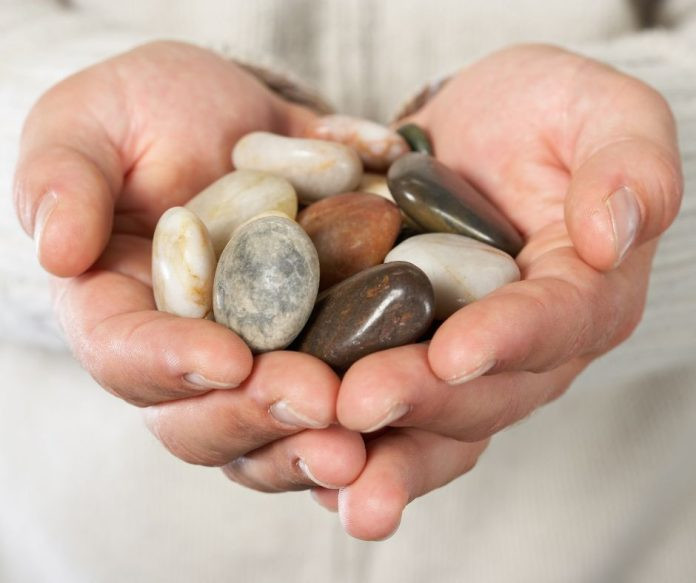
Toothpaste polishing works best on softer stones, typically those with a Mohs hardness of 6 or below. Ideal candidates include:
- Amber: A fossilized tree resin that is easy to scratch and polish to a high shine.
- Turquoise: A beautiful blue-green mineral often used in jewelry.
- Obsidian: Volcanic glass that can be polished to a mirror-like finish.
- Malachite: A vibrant green copper carbonate mineral.
- Soapstone: A soft, metamorphic rock that is easy to carve and polish.
- Some Agates: Agates vary in hardness, but softer varieties can be polished with toothpaste.
1.3 What are the Benefits of Hand Polishing Compared to Tumbling?
Hand polishing, especially with toothpaste, offers several advantages over rock tumbling:
- Control: You have more control over the final shape and finish of the stone.
- Speed: It’s faster for softer stones than the tumbling process, which can take weeks.
- Cost-Effective: Requires minimal equipment and uses readily available materials.
- Gentle: Less likely to damage delicate or fragile stones.
- Therapeutic: Some find the process of hand polishing meditative and relaxing.
2. Essential Materials for Polishing Rocks with Toothpaste
What do I need to get started? To achieve a stunning polish using toothpaste, gather these essential materials for effective rock polishing:
- Rocks: Select stones suitable for hand polishing, focusing on softer varieties.
- Toothpaste: Opt for a non-gel, white toothpaste with mild abrasives.
- Sandpaper: Include various grits (220, 500, 1200) for smoothing and refining.
- Water: Essential for cleaning and lubricating during the sanding process.
- Soft Cloth: Denim or a similar thick material works well for polishing.
- Bucket: To hold water for rinsing and cleaning.
- Old Toothbrush: Useful for cleaning crevices and stubborn residue.
- Cutting Board: Provides a hard, flat surface for sanding.
- Mineral Oil (Optional): To enhance the shine after polishing.
- Dremel Tool (Optional): For more aggressive shaping and polishing.
- Safety Glasses (If using Dremel): To protect your eyes from debris.
- Gloves (If using Dremel): To protect your hands.
- Mask (If using Dremel): To prevent inhaling dust particles.
3. Step-by-Step Guide: How to Polish Rocks With Toothpaste
How do I polish my rocks effectively? Follow these detailed steps to achieve a professional-looking polish on your rocks using toothpaste:
3.1 Step 1: Cleaning the Rocks
Thorough cleaning is crucial before you start polishing. Fill a bucket with warm, soapy water and use an old toothbrush to scrub away any dirt, grime, or residue from the rocks. Rinse the rocks thoroughly with clean water and ensure they are completely dry before proceeding.
 Cleaning rocks with warm, soapy water using a toothbrush to prepare for polishing
3.2 Step 2: Initial Shaping with 220-Grit Sandpaper
Begin the shaping process by using 220-grit sandpaper to smooth out rough edges and create a basic shape. Wet the sandpaper and place it grit-side up on a cutting board. Moisten the rock and rub it against the sandpaper in a consistent motion. Continue until the edges are rounded and the desired shape is achieved. Rinse the rock frequently to remove any grit and check your progress.
3.3 Step 3: Refining the Shape with 500-Grit Sandpaper
Move on to 500-grit sandpaper to further refine the shape and remove deeper scratches. Repeat the sanding process, keeping both the sandpaper and the rock wet. This step helps to smooth out imperfections and prepare the surface for polishing.
3.4 Step 4: Pre-Polishing with 1200-Grit Sandpaper
Use 1200-grit sandpaper for the final pre-polishing stage. This extra-fine sandpaper buffs out tiny scratches and begins to bring out the stone’s natural shine. Continue sanding until the surface is smooth and even.
3.5 Step 5: Toothpaste Polishing
Now it’s time to polish with toothpaste. Dampen a square of thick cloth, such as denim, and apply a generous dab of non-gel, white toothpaste. Rub the rock vigorously over the toothpaste-covered fabric, using a circular motion. Add more toothpaste as needed and continue polishing until the desired shine is achieved.
3.6 Step 6: Final Rinse and Inspection
Rinse the rock thoroughly with clean water to remove any remaining toothpaste residue. Inspect the surface to ensure that all areas have been polished evenly. If necessary, repeat the toothpaste polishing step to enhance the shine.
3.7 Step 7: Optional Mineral Oil Coating
For an enhanced luster, apply a thin coat of mineral oil or commercial rock polish to the cleaned and dried stone. This step helps to bring out the stone’s natural color and shine, leaving it looking polished and professional.
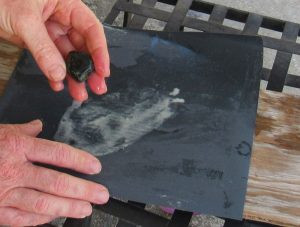 Checking the progress of rock polishing after using 500-grit and 1200-grit sandpaper to refine the surface
4. Augmenting with a Dremel: A Pro Tip
Can I use a Dremel for faster results? Yes, a Dremel tool can significantly speed up the shaping and polishing process, especially for harder stones or those with intricate details.
4.1 How to Use a Dremel for Rock Polishing
Equip your Dremel with polishing heads of varying grits. Start with a coarser grit to shape the rock, then gradually move to finer grits for polishing. Always wear safety glasses, gloves, and a mask to protect yourself from debris and dust. Keep the rock and the polishing heads wet to prevent overheating and ensure a smooth finish.
4.2 Safety Precautions When Using a Dremel
- Eye Protection: Always wear safety glasses to protect your eyes from flying debris.
- Hand Protection: Use gloves to protect your hands from sharp edges and the rotating tool.
- Respiratory Protection: Wear a mask to prevent inhaling dust particles.
- Ventilation: Work in a well-ventilated area to avoid inhaling dust.
- Control: Use a firm grip and maintain control of the Dremel at all times.
5. Choosing the Right Toothpaste: What Works Best?
What type of toothpaste should I use? Selecting the right toothpaste can significantly impact the polishing process and final result.
5.1 The Best Types of Toothpaste for Rock Polishing
Opt for non-gel, white toothpaste with mild abrasives. Avoid toothpaste with added ingredients like whitening agents or strong flavors, as these can sometimes leave a residue or affect the stone’s color.
5.2 Toothpaste Ingredients to Avoid
- Gels: Gel toothpaste may not provide sufficient abrasion for effective polishing.
- Whitening Agents: These can be too harsh and may damage softer stones.
- Strong Flavors: Flavored toothpaste can leave a residue that is difficult to remove.
- Large Particles: Toothpaste with large particles can scratch the surface of the stone.
6. Rock Tumbling vs. Hand Polishing: Which Method is Right for You?
What are the pros and cons of each method? Both rock tumbling and hand polishing have their advantages and disadvantages. The best method depends on the type of stone, the desired finish, and your personal preferences.
6.1 Key Differences Between Tumbling and Hand Polishing
| Feature | Rock Tumbling | Hand Polishing |
|---|---|---|
| Time | Several days to weeks | Hours |
| Labor | Less labor-intensive; machine does the work | More labor-intensive; requires manual effort |
| Control | Less control over the final shape and finish | More control over the final shape and finish |
| Stone Suitability | Best for harder stones | Best for softer stones |
| Cost | Requires a rock tumbler and tumbling grit | Requires sandpaper, toothpaste, and cloths |
| Noise | Can be noisy | Quiet |
| Outcome | Rounded, smooth stones with a uniform polish | Varied shapes with customized polish |
6.2 When to Choose Rock Tumbling
- You want to polish a large batch of rocks at once.
- You prefer a hands-off approach.
- You are working with harder stones that require extensive abrasion.
- You want a uniformly polished, rounded stone.
6.3 When to Choose Hand Polishing
- You want more control over the final shape and finish of the stone.
- You are working with softer stones that can be easily scratched.
- You want to polish delicate or fragile stones.
- You find the process of hand polishing relaxing and therapeutic.
7. Polishing Different Types of Rocks: Specific Tips
How does the process vary for different rocks? Each type of rock has unique characteristics that may require specific adjustments to the polishing process.
7.1 Polishing Agate with Toothpaste
Agate is a popular choice for polishing due to its vibrant colors and banding patterns. Start with a coarser grit sandpaper to remove any rough edges, then gradually move to finer grits to refine the surface. Use toothpaste to bring out the stone’s natural shine.
7.2 Polishing Obsidian with Toothpaste
Obsidian is a volcanic glass that can be polished to a mirror-like finish. Be careful when sanding obsidian, as it can chip easily. Use a light touch and plenty of water to prevent overheating. Toothpaste can help to achieve a high-gloss polish.
7.3 Polishing Turquoise with Toothpaste
Turquoise is a soft and delicate stone that requires gentle handling. Avoid using harsh abrasives or excessive pressure. Toothpaste is an excellent choice for polishing turquoise, as it is mild enough to prevent damage.
8. Troubleshooting Common Polishing Problems
What if I encounter issues during polishing? Even with careful technique, you may encounter some common problems during the polishing process.
8.1 Scratches That Won’t Go Away
If you are having trouble removing scratches, try using a finer grit sandpaper. Make sure to thoroughly rinse the rock and sandpaper between each grit to prevent contamination.
8.2 Uneven Polish
Uneven polishing can be caused by inconsistent pressure or technique. Focus on applying even pressure and using consistent motions. You may also need to spend more time polishing certain areas.
8.3 Dull Finish
If your rock is not achieving the desired shine, try using a different type of toothpaste or polishing compound. You can also try applying a thin coat of mineral oil to enhance the luster.
9. Displaying Your Polished Rocks: Creative Ideas
How can I showcase my polished rocks? Once you have polished your rocks to perfection, it’s time to display them and show off your hard work.
9.1 Ideas for Showcasing Your Rock Collection
- Rock Gardens: Create a beautiful rock garden in your backyard or indoors.
- Jewelry: Turn your polished rocks into unique pendants, earrings, or rings.
- Paperweights: Use your polished rocks as decorative paperweights.
- Home Décor: Display your polished rocks in bowls, vases, or on shelves.
- Gifts: Share your polished rocks with friends and family as thoughtful gifts.
10. Rockscapes.net: Your Partner in Stone and Landscape Design
Looking for more inspiration? At rockscapes.net, we’re passionate about helping you discover the beauty of natural stone and creating stunning rockscapes. Whether you’re a homeowner, landscape designer, architect, or stone supplier, we offer a wealth of information and resources to inspire your next project.
10.1 How Rockscapes.net Can Help You
- Design Ideas: Explore our gallery of inspiring landscape designs featuring natural stone.
- Stone Selection: Learn about the different types of stone and their applications.
- Installation Guides: Access step-by-step guides for installing stone features in your landscape.
- Supplier Directory: Find reputable stone suppliers near you.
- Expert Advice: Get personalized advice from our team of experienced professionals.
10.2 Connect With Us
Visit rockscapes.net today to discover the endless possibilities of natural stone.
Address: 1151 S Forest Ave, Tempe, AZ 85281, United States.
Phone: +1 (480) 965-9011.
Website: rockscapes.net.
Let rockscapes.net be your guide to creating breathtaking landscapes that stand the test of time. Explore inspiring designs, access detailed stone information, and connect with experts who can bring your vision to life. Start your journey today and transform your outdoor space into a stunning oasis with rockscapes.net.
Frequently Asked Questions (FAQ)
1. Can I use any type of toothpaste to polish rocks?
No, it’s best to use non-gel, white toothpaste with mild abrasives. Avoid toothpaste with added ingredients like whitening agents or strong flavors.
2. What is the Mohs scale of hardness?
The Mohs scale of mineral hardness is a qualitative ordinal scale that characterizes the scratch resistance of various minerals through their ability to scratch harder materials.
3. How long does it take to polish rocks with toothpaste?
The time it takes to polish rocks with toothpaste depends on the type of rock and the desired level of shine. Softer stones may take only a few hours, while harder stones may take longer.
4. Can I use a rock tumbler instead of hand polishing?
Rock tumblers are great for polishing harder stones, but hand polishing is generally better for softer or more delicate stones.
5. What safety precautions should I take when polishing rocks?
When polishing rocks, always wear safety glasses and gloves to protect your eyes and hands from debris and sharp edges. If using a Dremel, wear a mask to prevent inhaling dust particles.
6. What if my rocks are still dull after polishing with toothpaste?
Try using a different type of toothpaste or polishing compound. You can also try applying a thin coat of mineral oil to enhance the luster.
7. How can I prevent scratches when polishing rocks?
Use a light touch and plenty of water to prevent overheating and ensure a smooth finish. Make sure to thoroughly rinse the rock and sandpaper between each grit.
8. Can I polish gemstones with toothpaste?
Toothpaste can be used to polish some gemstones, but it’s important to research the specific gemstone to ensure that it is suitable for this method.
9. What is the best way to clean polished rocks?
To clean polished rocks, simply rinse them with warm water and mild soap. Dry them with a soft cloth.
10. Where can I find more information about rock polishing and landscape design?
Visit rockscapes.net for a wealth of information and resources to inspire your next project.