Do you want to discover the simple steps to create your own rock candy? At rockscapes.net, we offer a fun and easy guide to making this sugary treat, perfect for desserts, science experiments, or unique landscape decorations. Learn how to make rock candy, explore different colors, flavors, and crystal sizes, and bring a touch of sweetness to your life with this simple yet fascinating DIY project. Explore sugar crystals, candy-making, and confectionery creations now!
1. What Exactly is Rock Candy?
Rock candy is essentially crystallized sugar, often called “sugar candy” for obvious reasons. This delightful confection is made entirely of large, beautiful sugar crystals. Rock candy is known for its vibrant colors and is a popular item in candy stores everywhere.
Making rock candy is similar to making simple syrup but with a twist. According to research from Arizona State University’s School of Earth and Space Exploration, supersaturation is key to crystal formation. This means adding more sugar than the water can dissolve at room temperature. As the solution cools, the excess sugar precipitates out and attaches to a skewer, forming the candy crystals.
2. Why Should You Make Rock Candy at Home?
While buying rock candy online or in stores is easy, making it yourself is a rewarding experience. Not only is it fun, but it also allows for personalization and creativity. Whether you intend to enjoy it personally or present it as a gift, DIY rock candy is a simple yet impressive project.
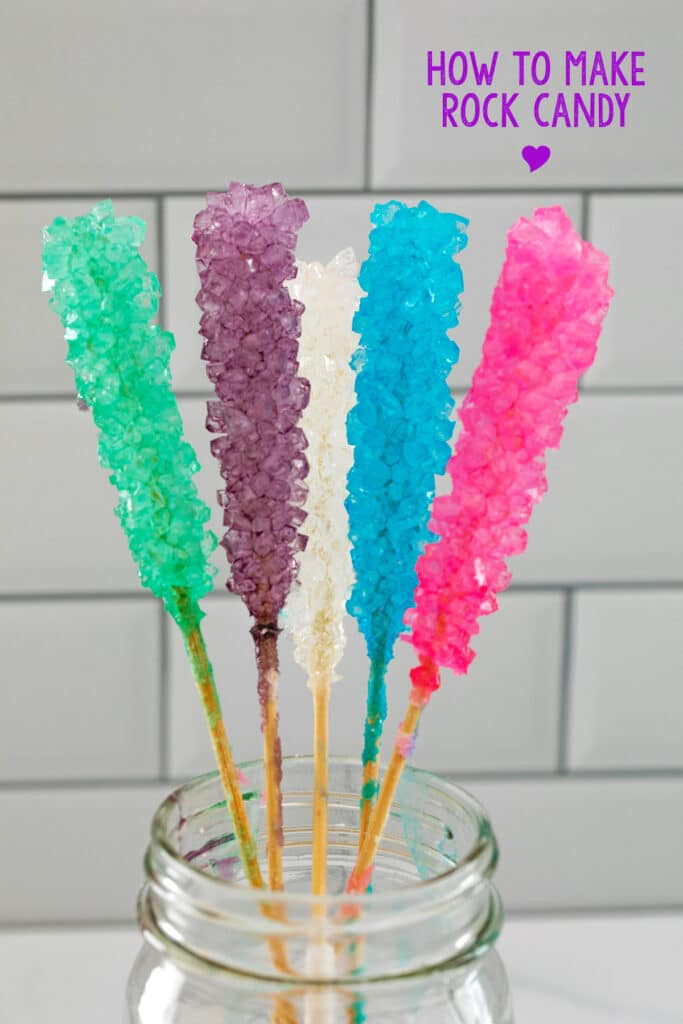 Close-up of 5 different colors rock candy in mason jar with
2.1. The Educational Aspect
Rock candy is a great educational tool. You and your kids can learn about crystallization, saturation, and solutions, turning your kitchen into a science lab.
2.2. Creative Culinary Uses
Homemade rock candy isn’t just for snacking. It can also be used to enhance cocktails (and mocktails) or as a decorative element in desserts. If you’re interested in other candy-making adventures, consider exploring homemade fudge or gummy candy recipes. ChemicalSafetyFacts.org offers a comprehensive guide to sugar chemistry, which can be very insightful for such projects.
3. What is the Time Commitment Required to Make Rock Candy?
Creating the sugar solution for rock candy is quick and straightforward. However, the crystallization process requires patience, typically taking 6-7 days.
This waiting period can be enjoyable as you observe the crystals growing daily. It’s a slow but satisfying process.
4. What Equipment is Needed to Start?
You likely have many of the necessary items in your kitchen already. Here’s a simple list:
| Item | Description |
|---|---|
| Granulated Sugar | Essential for forming the crystals. |
| Water | Acts as the solvent for the sugar. |
| Food Coloring | Optional, for adding color to your candy. |
| Mason Jars | To hold the sugar solution during crystallization. |
| Skewers/Sticks | Provide a base for the crystals to grow on. |
| Clothespins/Chip Clips | To suspend the skewers in the jars without touching the bottom. |
5. How to Make Rock Candy: Step-by-Step
This method will create five sticks of rock candy, each growing in a separate jar. This allows you to experiment with different colors simultaneously.
5.1. Prepare the Skewers
“Seeding” the skewers with sugar provides a surface for the crystals to latch onto.
Trim the skewers to a suitable length to fit inside your jars comfortably.
Submerge the skewers in water, then roll them in granulated sugar. Allow them to dry completely, ideally overnight, but at least an hour.
5.2. Set Up the Jars
Clean your mason jars thoroughly with hot water to ensure they are not cold. Attach a clothespin or chip clip to each skewer to suspend it in the jar.
Ensure the skewer hangs about an inch from the bottom to prevent the crystals from adhering to the bottom of the jar.
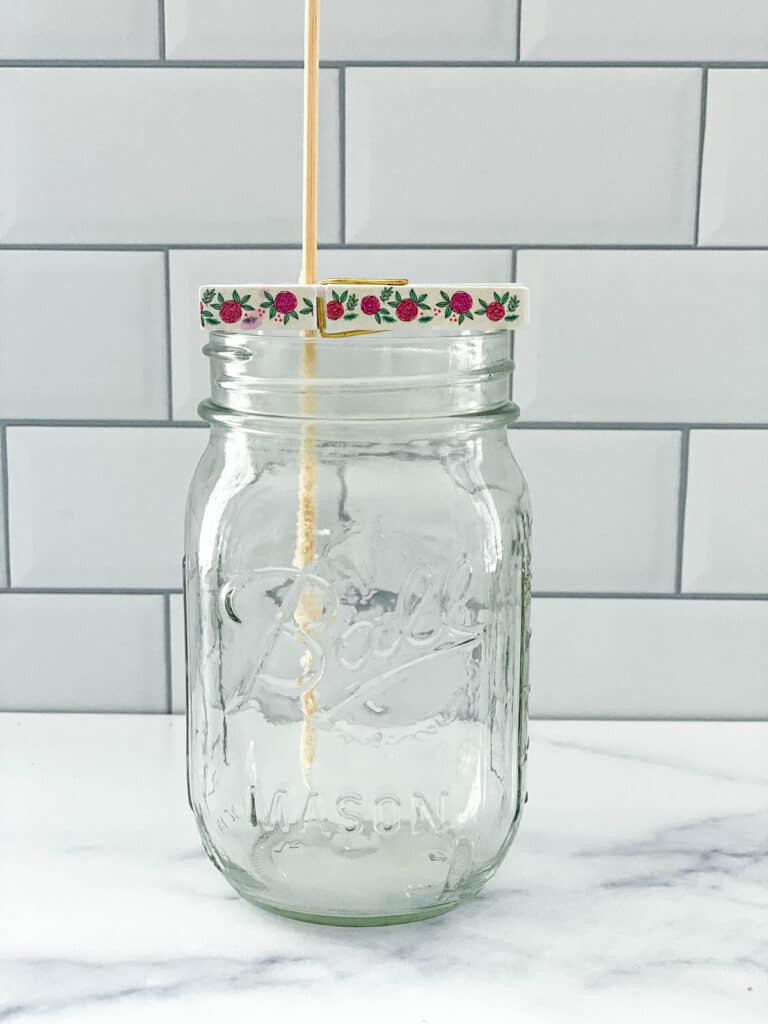 Skewer sitting in mason jar ready for rock candy sugar solution
5.3. Create the Sugar Solution
In a large saucepan, bring four cups of water to a boil. Gradually add ten cups of sugar, one cup at a time, stirring continuously until each cup is fully dissolved before adding the next.
The solution will become increasingly difficult to dissolve as you add more sugar, indicating that it is becoming supersaturated.
Once all the sugar is dissolved, simmer the mixture for about five minutes before removing it from the heat.
Let the solution rest for about 15 minutes.
5.4. Add Color and Crystallize
Divide the mixture evenly among the prepared jars. Stir in food coloring to achieve your desired colors.
Carefully move the jars to their resting place before inserting the prepared skewers. Try to minimize movement once the skewers are in place.
5.5. Be Patient
Crystals should start forming on the sticks within a day. After 24 hours, you’ll notice small crystals beginning to appear.
Allow the crystals to grow for at least six days for full formation.
5.6. Harvest Your Candy
To remove the rock candy, gently break any hardened sugar on top of the jar and carefully wiggle the stick to release it.
Allow any excess syrup to drip off, and then enjoy your homemade rock candy.
6. Can You Re-Use the Sugar Solution?
Yes, you can reuse the sugar solution.
Pour the solution back into a saucepan, bring it to a boil, and add an additional ¼ cup of sugar. Simmer for a few minutes before pouring it back into the jar. This revitalizes the solution, ensuring continued crystal growth.
7. Why Isn’t Your Rock Candy Growing? Troubleshooting Tips
Rock candy making can be tricky. Here are some reasons why your crystals might not be forming and how to fix it:
| Issue | Possible Cause | Solution |
|---|---|---|
| No Crystal Growth | Insufficient saturation | Reheat the mixture, add more sugar, and use new sugar-coated skewers. |
| Jars are too cold or not clean | Temperature affects crystal formation. | Use clean jars, rinsed with hot water, to ensure a warm environment. |
| Disturbance during crystallization | Moving the jars can disrupt the crystal formation process. | Avoid moving the jars once the skewers are in the solution. |
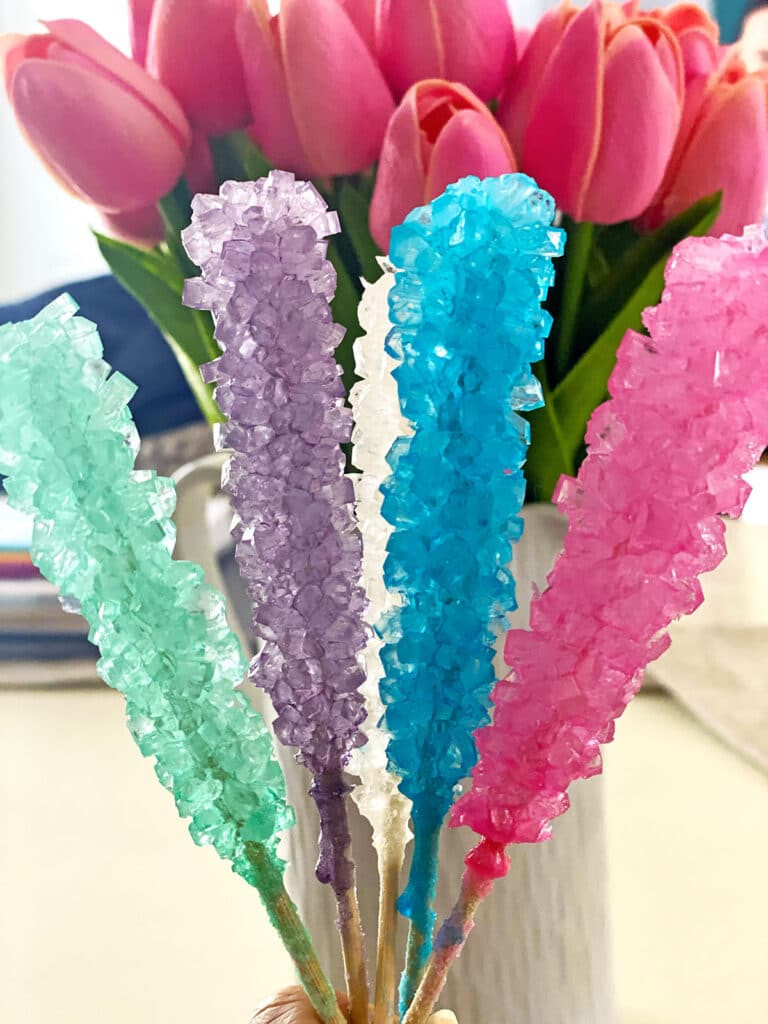 Homemade rock candy on sticks with pink tulips in the background
8. Is it Possible to Make Rock Candy Faster?
There’s no foolproof method to speed up rock candy growth significantly. Some suggest refrigerating the jars, but results can vary.
Removing the candy after only a couple of days might result in sparse crystal formation.
9. How Should You Store Rock Candy?
Store rock candy in a cool, dry place. Wrapping them individually in cellophane wrappers is recommended for longer storage or gifting.
When stored properly, rock candy can last up to a year.
10. Helpful Tips and Tricks
Here are some extra tips to help you make perfect rock candy:
| Tip | Description |
|---|---|
| Ensure Cleanliness | Always use clean, warm mason jars. |
| Don’t Skip Seeding | Coating the sticks in sugar is crucial for crystal adhesion. |
| Intensify Colors | Make the color of the sugar solution a bit darker than you desire, as the crystals will lighten the color. |
| Use Concentrated Flavorings | If adding flavor, use concentrated flavorings to avoid diluting the solution too much. |
| Minimize Movement During Crystallization | Once the sticks are in the jars, avoid moving them to ensure undisturbed crystal growth. |
11. Rock Candy: A Sweet Conclusion
DIY rock candy is simple once you grasp the basics and science behind it. It requires patience and plenty of sugar, but the result is a rewarding and delightful treat.
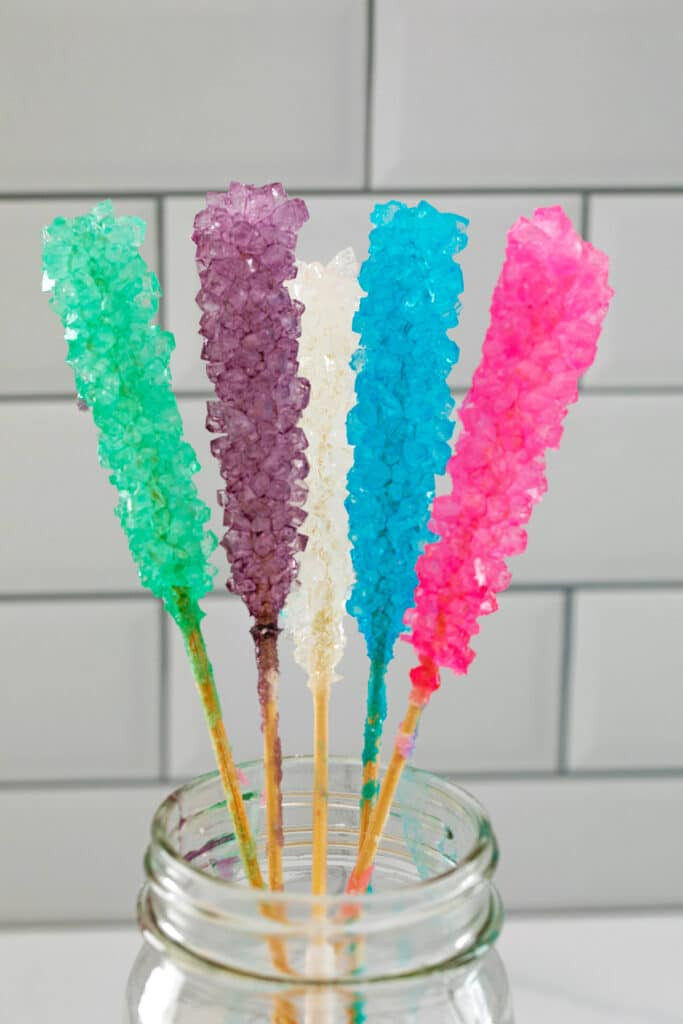 Mason jar filled with 5 different colors of rock candy on sticks
12. Frequently Asked Questions (FAQs)
12.1. Can I use tap water for making rock candy?
Yes, tap water is generally fine, but filtered water can provide even clearer crystals.
12.2. What type of sugar works best for rock candy?
Granulated sugar is the best choice for achieving clear and well-formed crystals.
12.3. How do I prevent the crystals from sticking to the bottom of the jar?
Ensure the skewer is suspended about an inch from the bottom and avoid disturbing the jars during crystallization.
12.4. Can I add essential oils for flavoring?
Yes, but use them sparingly. A few drops of food-grade essential oil can add a unique flavor.
12.5. What is the ideal room temperature for crystal growth?
A stable room temperature between 68-72°F (20-22°C) is ideal.
12.6. How long can I store homemade rock candy?
Properly stored in a cool, dry place, homemade rock candy can last up to a year.
12.7. Can I make rock candy without skewers?
Yes, you can grow crystals on a string suspended in the sugar solution.
12.8. Why is my rock candy cloudy instead of clear?
This can happen due to impurities in the sugar or water. Using high-quality ingredients can help.
12.9. What can I do with leftover sugar solution?
Besides reusing it for more rock candy, you can use it as a sweetener for beverages or in baking.
12.10. Is it safe to consume food coloring in rock candy?
Yes, as long as you use food-grade coloring in the recommended amounts.
13. Crafting Landscapes with Rock Candy Inspiration
While learning how to make rock candy might seem unrelated to rockscapes, consider the potential for creativity and design inspiration. The vibrant colors, unique crystal formations, and the overall aesthetic appeal can spark innovative ideas for your landscape projects. Imagine using the color schemes and textures of rock candy to influence your choice of stones, plants, and design elements in your outdoor spaces. This whimsical approach can transform ordinary landscapes into extraordinary works of art, blending natural elements with a touch of playful sweetness.
14. Transform Your Landscape with Rockscapes.net
Ready to elevate your landscape with innovative ideas and quality materials? Visit rockscapes.net today! Explore a wide range of design inspirations, detailed information about various stones, and expert tips to bring your vision to life. Whether you’re looking to create a serene garden retreat or a vibrant outdoor entertainment area, rockscapes.net has everything you need to transform your space. Don’t wait—start your landscape journey with us and create the outdoor oasis you’ve always dreamed of.
Discover the beauty and versatility of natural stones and let us help you turn your landscape dreams into reality. Visit our showroom at 1151 S Forest Ave, Tempe, AZ 85281, United States, or call us at +1 (480) 965-9011 to speak with our experts. Your perfect landscape is just a click or a call away!