Rocking chairs bring a timeless charm and soothing motion to any space, especially a nursery. If you’re looking to enhance the comfort and aesthetics of your rocking chair, creating a custom cushion is a rewarding DIY project. Like many DIYers, we’ve learned a few lessons through trial and error while updating our inherited rocking chair. This guide will walk you through the best way to craft your own upholstered Rocking Chair Cushion, sharing tips from our experiences to help you avoid common pitfalls and achieve professional-looking results.
Our journey began with a hand-me-down rocking chair that, while sturdy, needed a style refresh to better match our home.
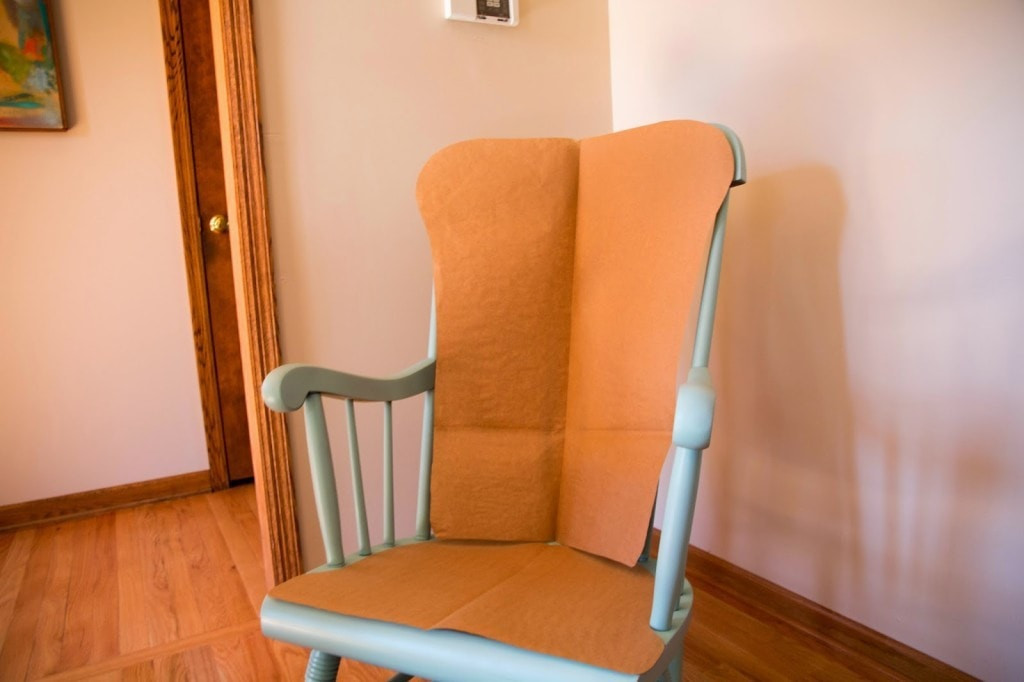
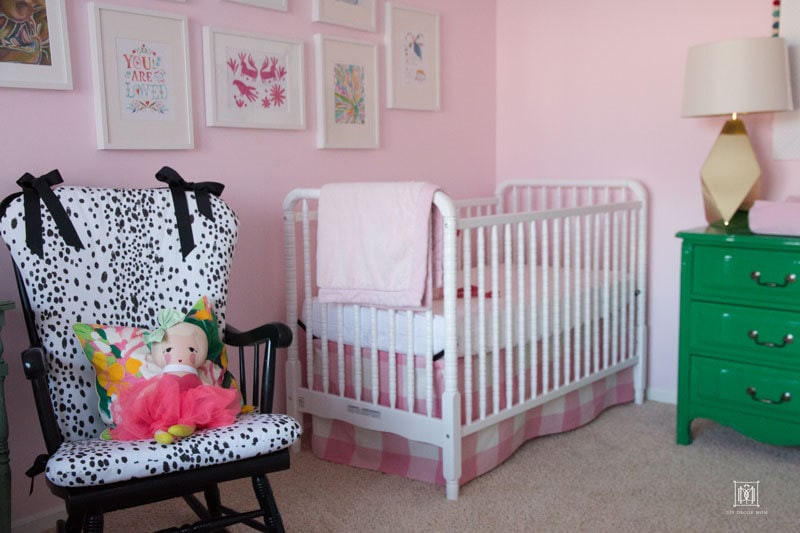 Rocking chair before makeover in a nursery setting, showing its outdated appearance
With a bit of spray paint, a newly crafted cushion, and stylish fabric, we completely transformed its look and feel!
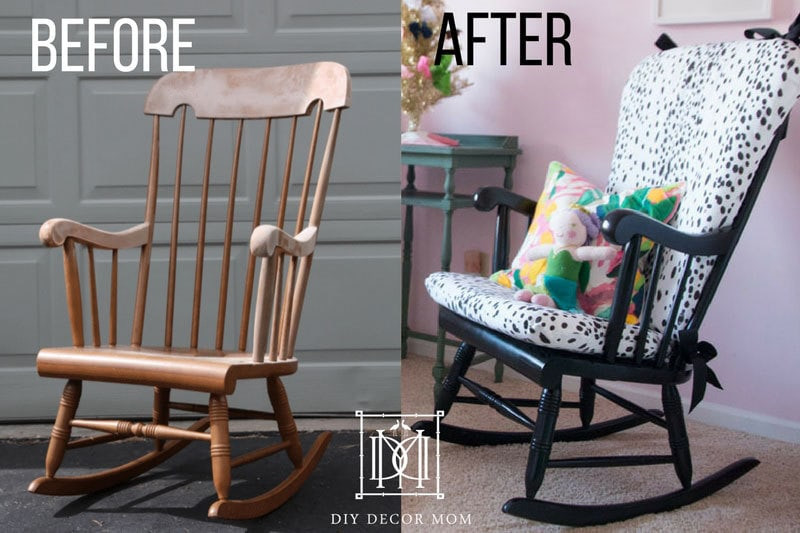 Before and after comparison of a rocking chair cushion makeover, highlighting the transformation from old to new
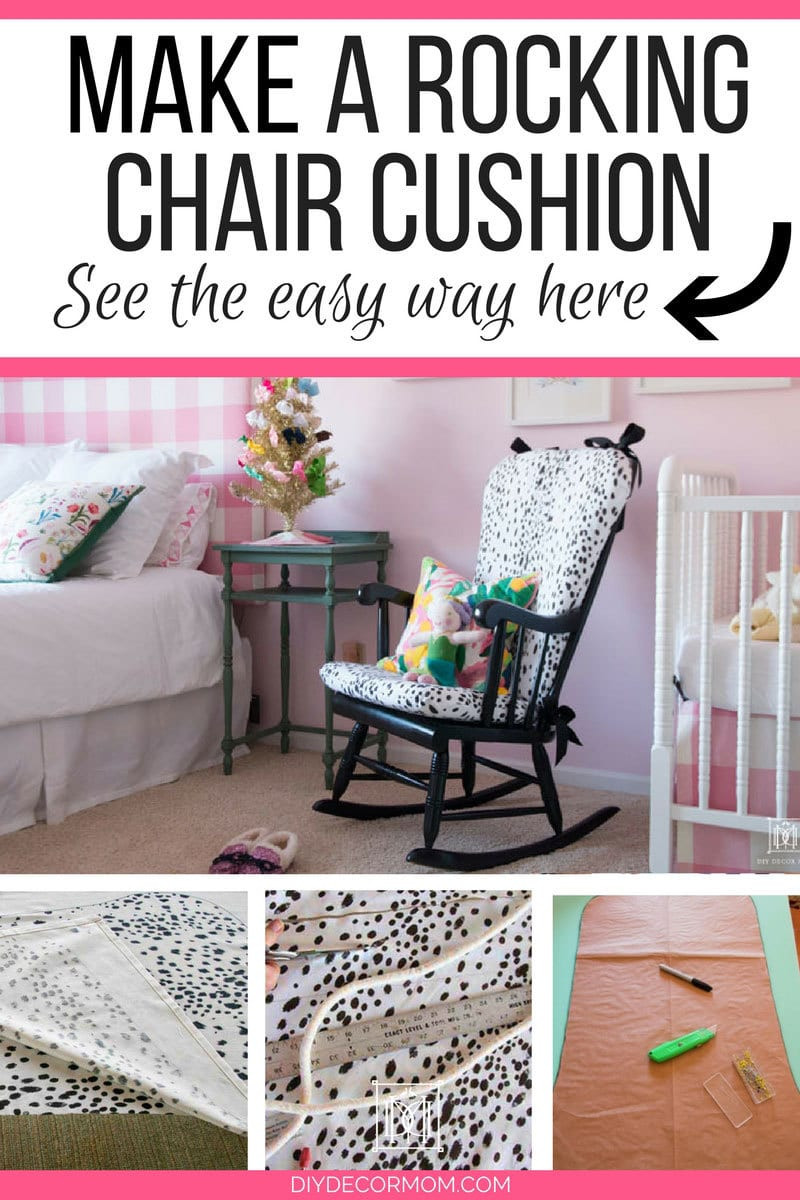
Upholstered Rocking Chair Cushion: Elevate Your Comfort and Décor
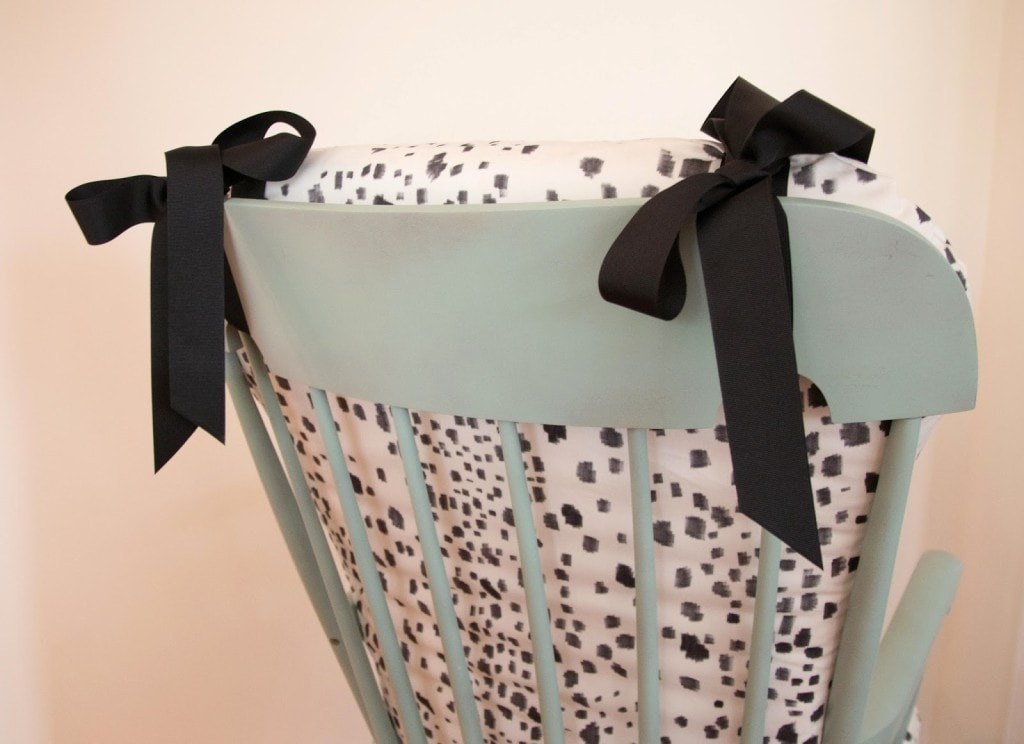
 Close-up of a newly upholstered rocking chair cushion in a nursery, showcasing its fabric and design
This post contains affiliate links at no additional cost to you. For full disclosure, please see our Disclosure Policy.
Ready to get started? Let’s gather our materials and begin the transformation!
Materials for Your DIY Rocking Chair Cushion:
To create your own comfortable and stylish rocking chair cushion, you’ll need the following supplies:
- Fabric: 3 yards of upholstery-weight fabric. Choosing the right fabric is crucial for durability and appearance.
- Grosgrain Ribbon: 1.5″ and Black Grosgrain Ribbon for adding ties to secure your cushion to the chair.
- Foam: 2″ thick foam for comfortable cushioning.
- Batting: To wrap the foam and create a softer surface under the fabric.
- Spray Paint: For refreshing the rocking chair frame (optional, but impactful for a full makeover).
- Iron: For prepping your fabric and ensuring a smooth finish.
- Chef’s Knife or Electric Knife: For cutting the foam cleanly and precisely.
- Sewing Machine: Essential for assembling your fabric cover.
- Upholstery Shears: For accurate fabric cutting.
- Yard Stick: For measuring and marking straight lines.
- Extra-large Paper: For creating a template that perfectly fits your rocking chair.
- Permanent Marker: For tracing your template onto the foam and fabric.
Step-by-Step Directions for Making Your Rocking Chair Cushion:
Follow these detailed instructions to craft your own professional-looking rocking chair cushion:
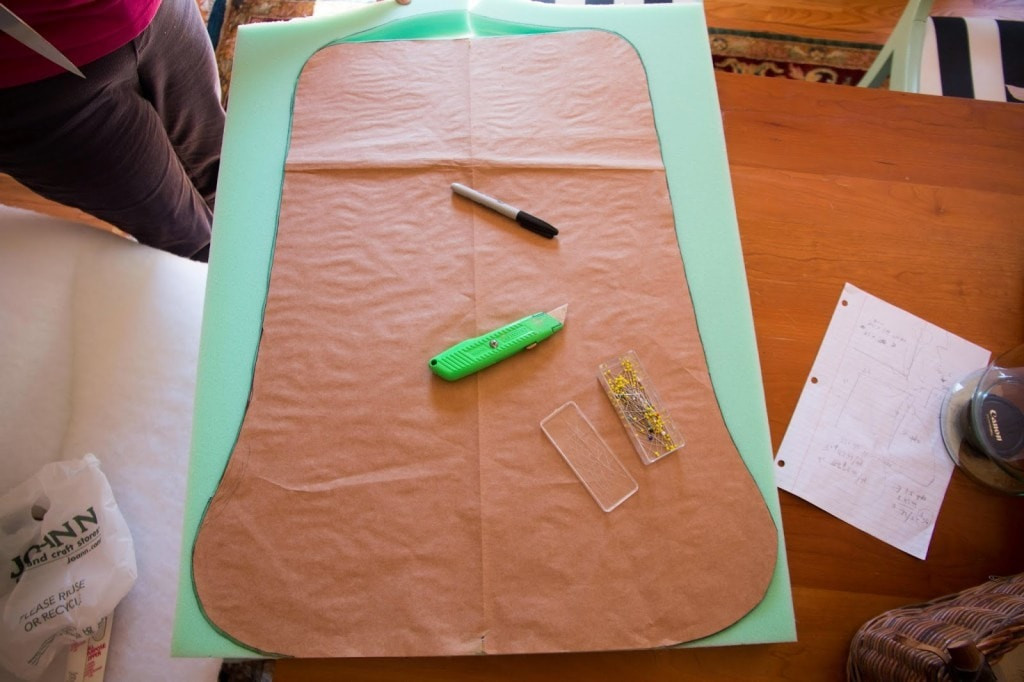
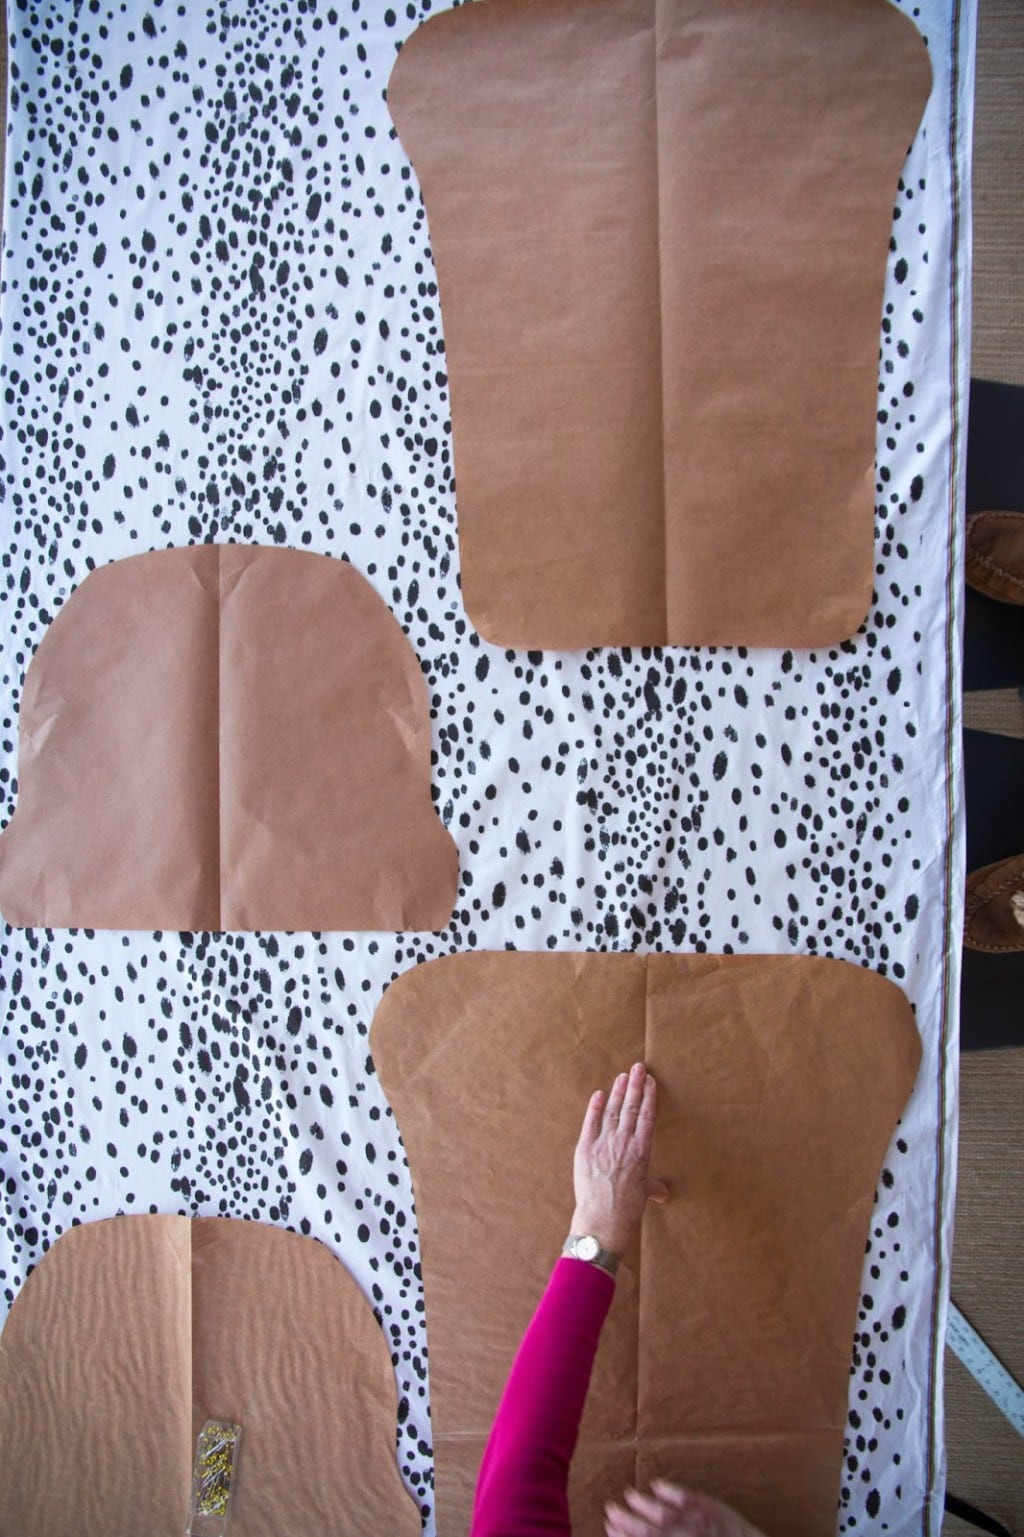
1. Creating Your Cushion Template:
Begin by laying out your extra-large paper. This is where you’ll design the shape and dimensions of your cushion. It’s helpful to prototype with paper first to ensure the cushion fits your rocking chair perfectly.
 DIY process of creating a paper template for a rocking chair cushion, showing the outline being shaped
Carefully trace the outline of the seat and back of your rocking chair onto the paper to create your custom template.
 Close-up of a paper template being refined and adjusted for accurate rocking chair cushion dimensions
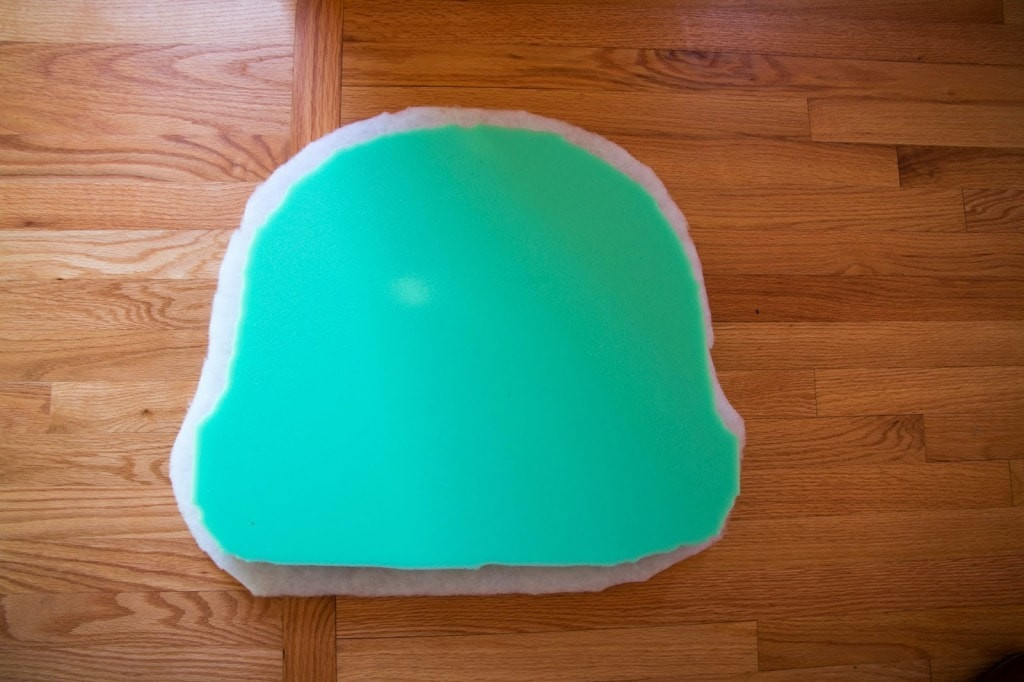
2. Cutting the Foam:
Place your paper template on top of the 2″ foam. Use a permanent marker to trace the template outlines onto the foam. For cutting the foam, an electric knife provides the smoothest cuts, but a large chef’s knife can also work effectively with careful, even strokes.
 Tracing a paper template onto foam for a DIY rocking chair cushion, preparing for cutting
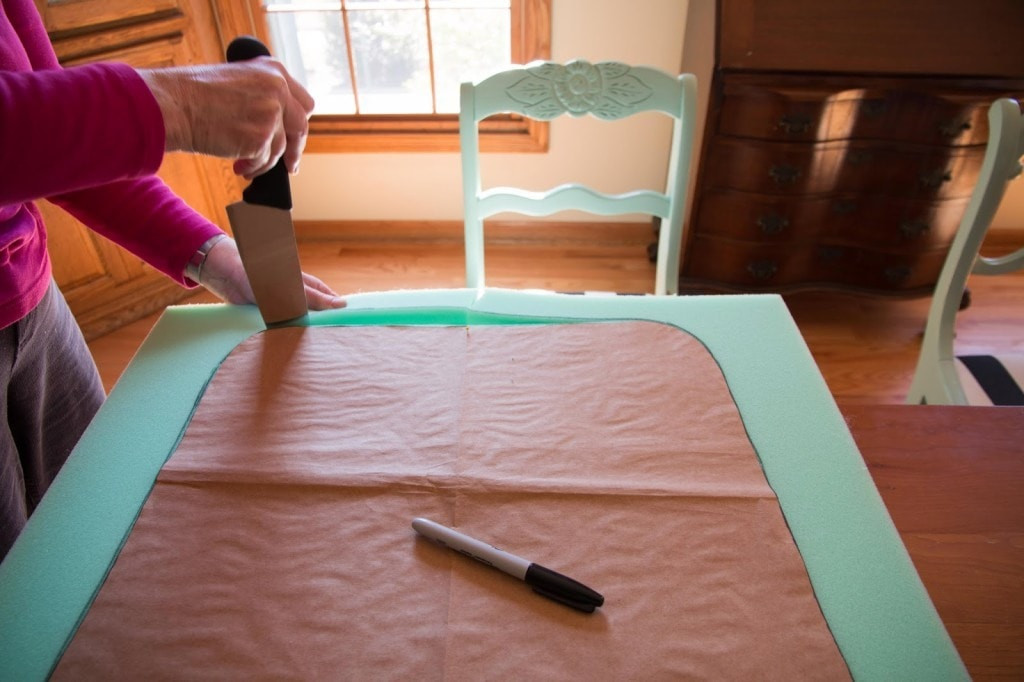 Cutting foam using a knife for a DIY rocking chair cushion, showing the process of shaping the cushion
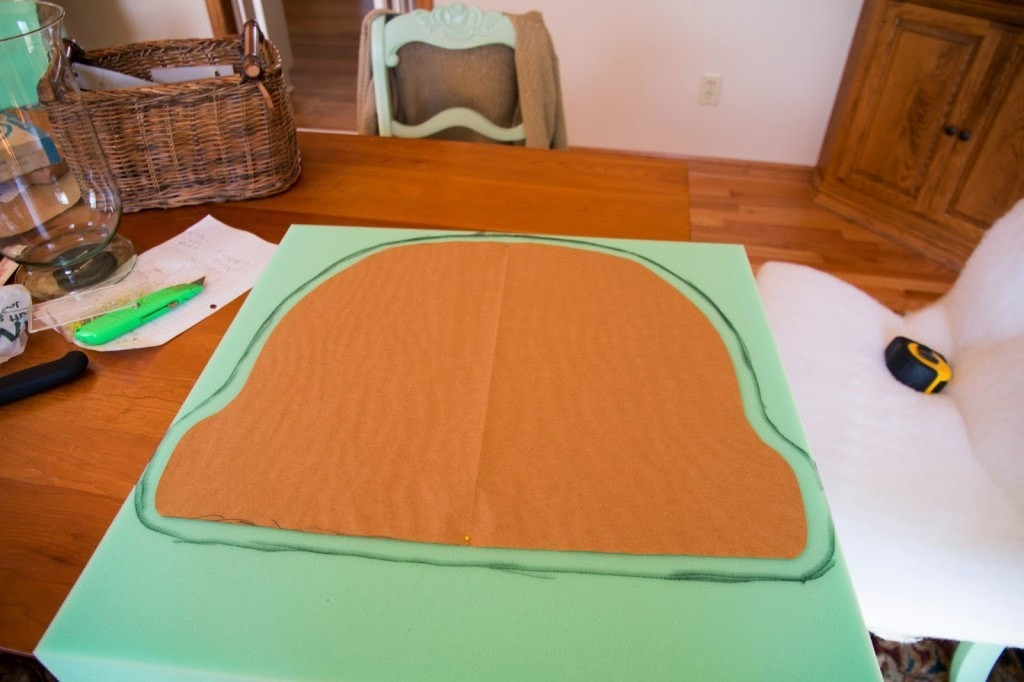 Close-up of cut foam pieces for a DIY rocking chair cushion, showing the shaped foam ready for covering
3. Preparing the Batting Cover:
To soften the foam edges and add extra comfort, wrap each foam piece in batting. Cut the batting about an inch or two larger than the foam on all sides to ensure full coverage. Sew the batting around the foam, encasing it completely. This layer makes the cushion softer and smoother under the fabric cover.
 Wrapping foam pieces with batting for a DIY rocking chair cushion, preparing for fabric cover
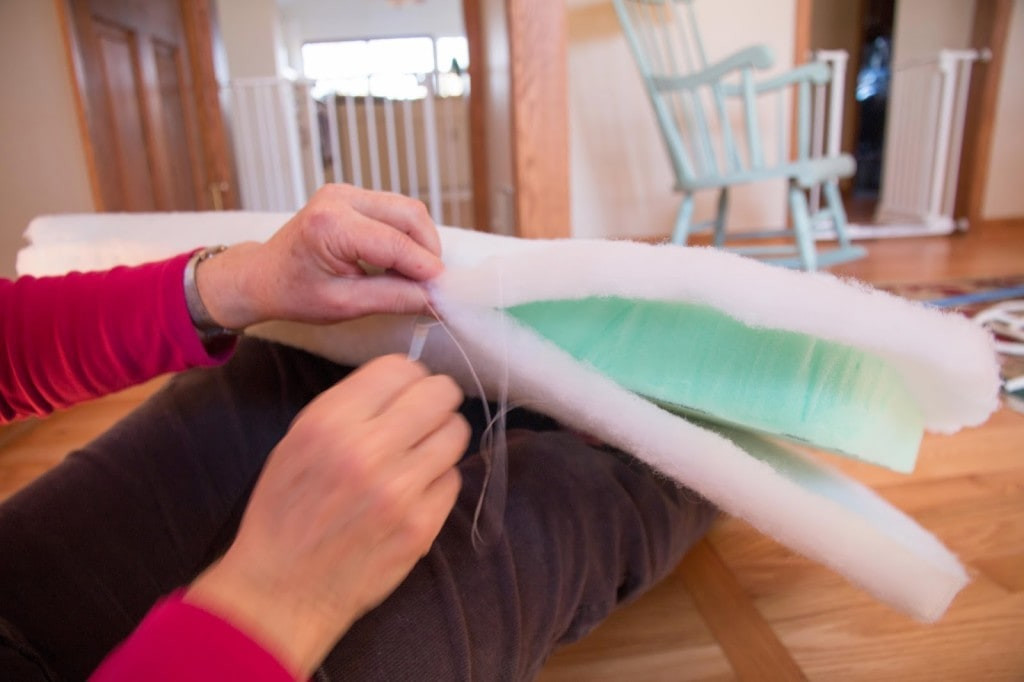 Sewing batting around foam for a DIY rocking chair cushion, securing the batting layer
4. Sewing the Fabric Cover:
Lay your fabric out and position your paper templates on top. If your fabric has a pattern, consider how you want it centered on the cushion. Folding your template in half can help you align the pattern symmetrically. Add approximately 1.5″ around the template outline for seam allowance. Cut out your fabric pieces using upholstery shears.
Sew the fabric pieces together, inside out, to create the cushion cover. Adding a zipper is highly recommended if you want to be able to remove and wash the cover.
 Cutting fabric using a template for a DIY rocking chair cushion cover, ensuring precise fabric shapes
 Sewing fabric pieces together for a DIY rocking chair cushion cover, assembling the cover inside-out
 Close-up of sewing details for a DIY rocking chair cushion cover, showing seam work
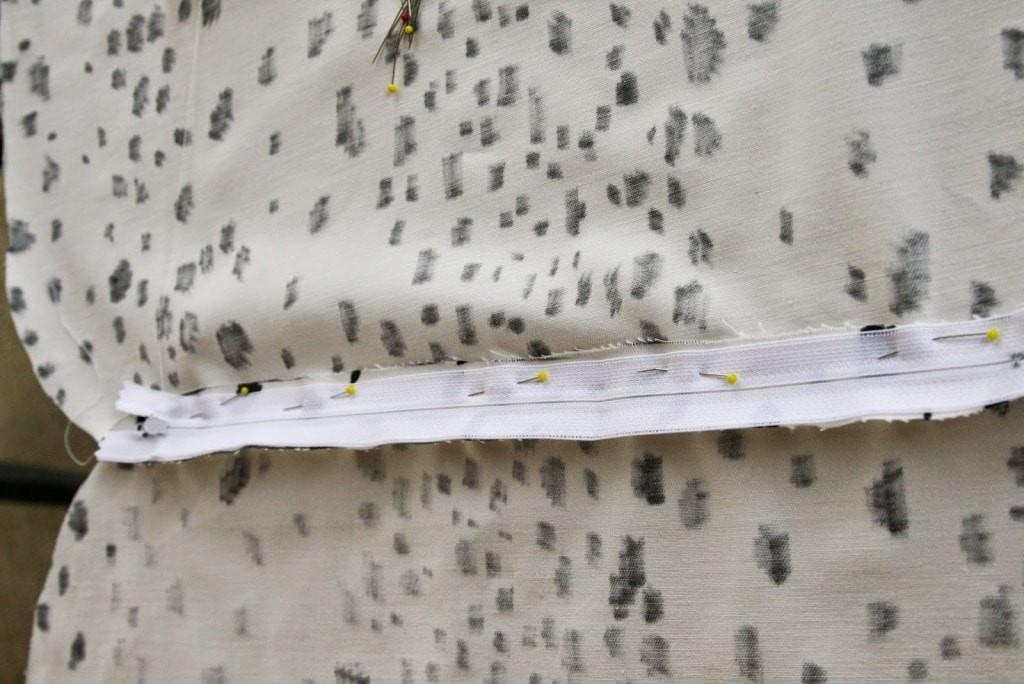 Adding a zipper to a DIY rocking chair cushion cover, for easy removal and washing
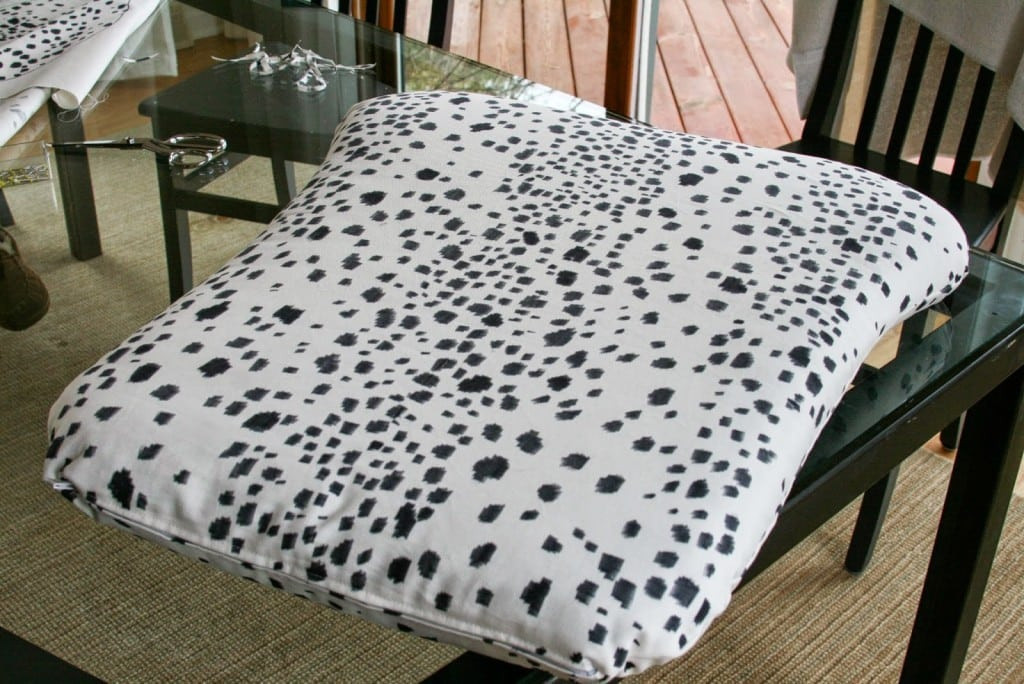
5. Final Assembly and Adding Ribbons:
Turn your fabric cover right side out and insert the batting-covered foam cushions. If desired, cut grosgrain ribbon to create ties to secure the cushion to your rocking chair. Use Fabric Check or a similar product on the ribbon ends to prevent fraying, ensuring a clean and durable finish.
 Adding ribbon ties to a DIY rocking chair cushion, showing the final steps of assembly
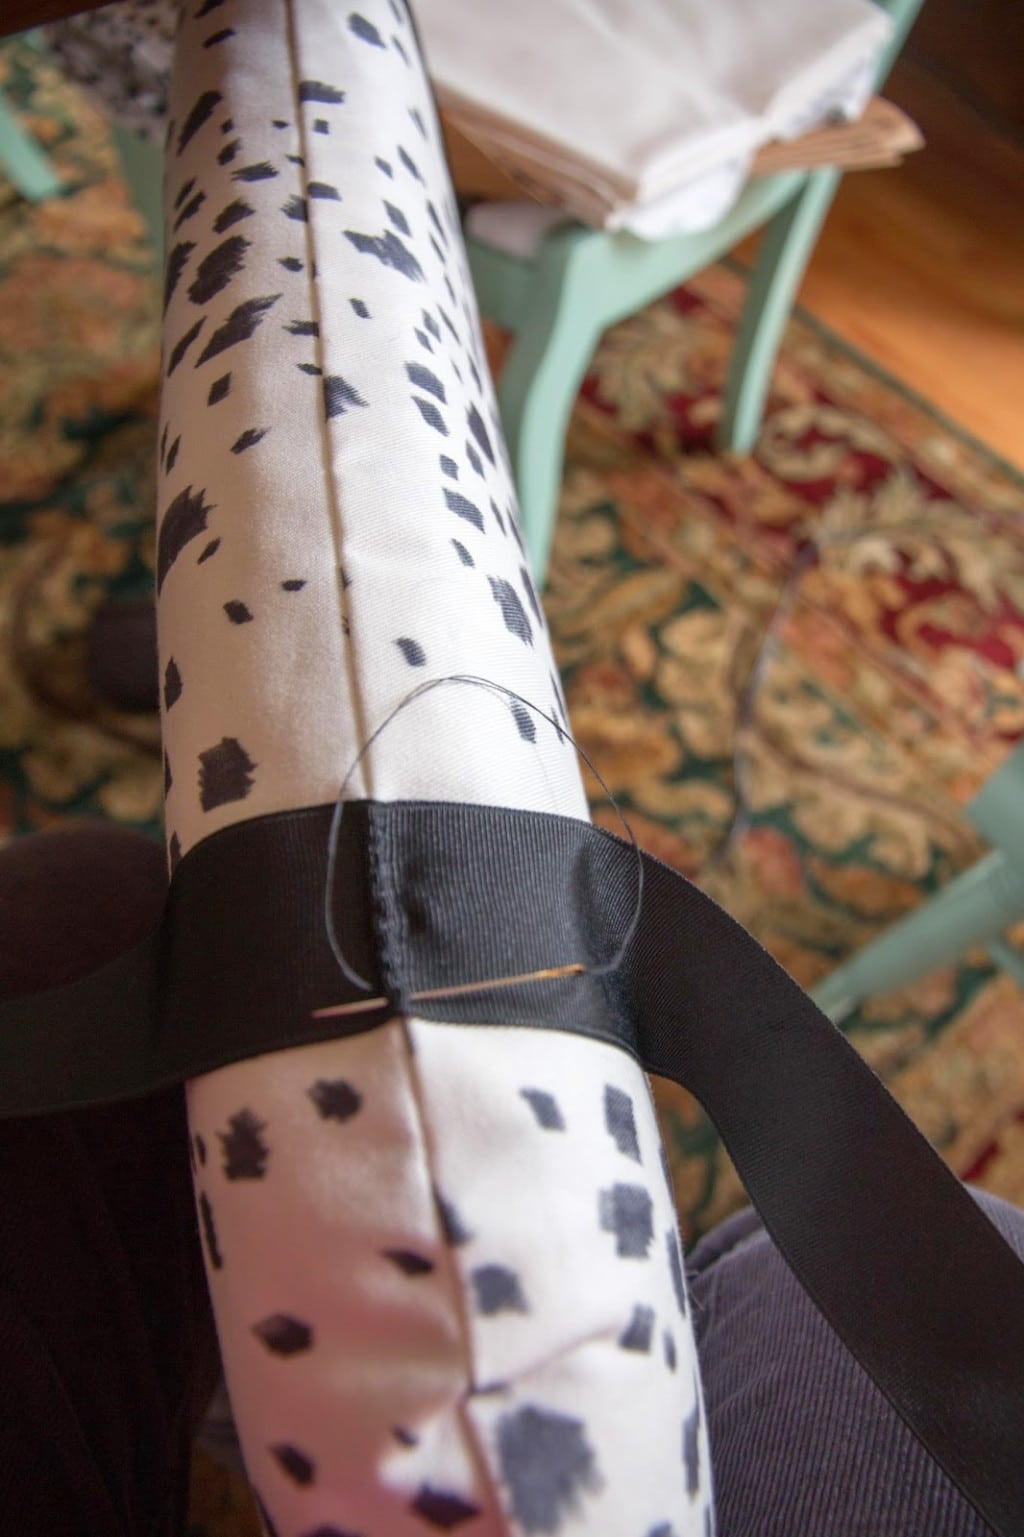 Attaching ribbon ties to a DIY rocking chair cushion, ensuring secure fastening
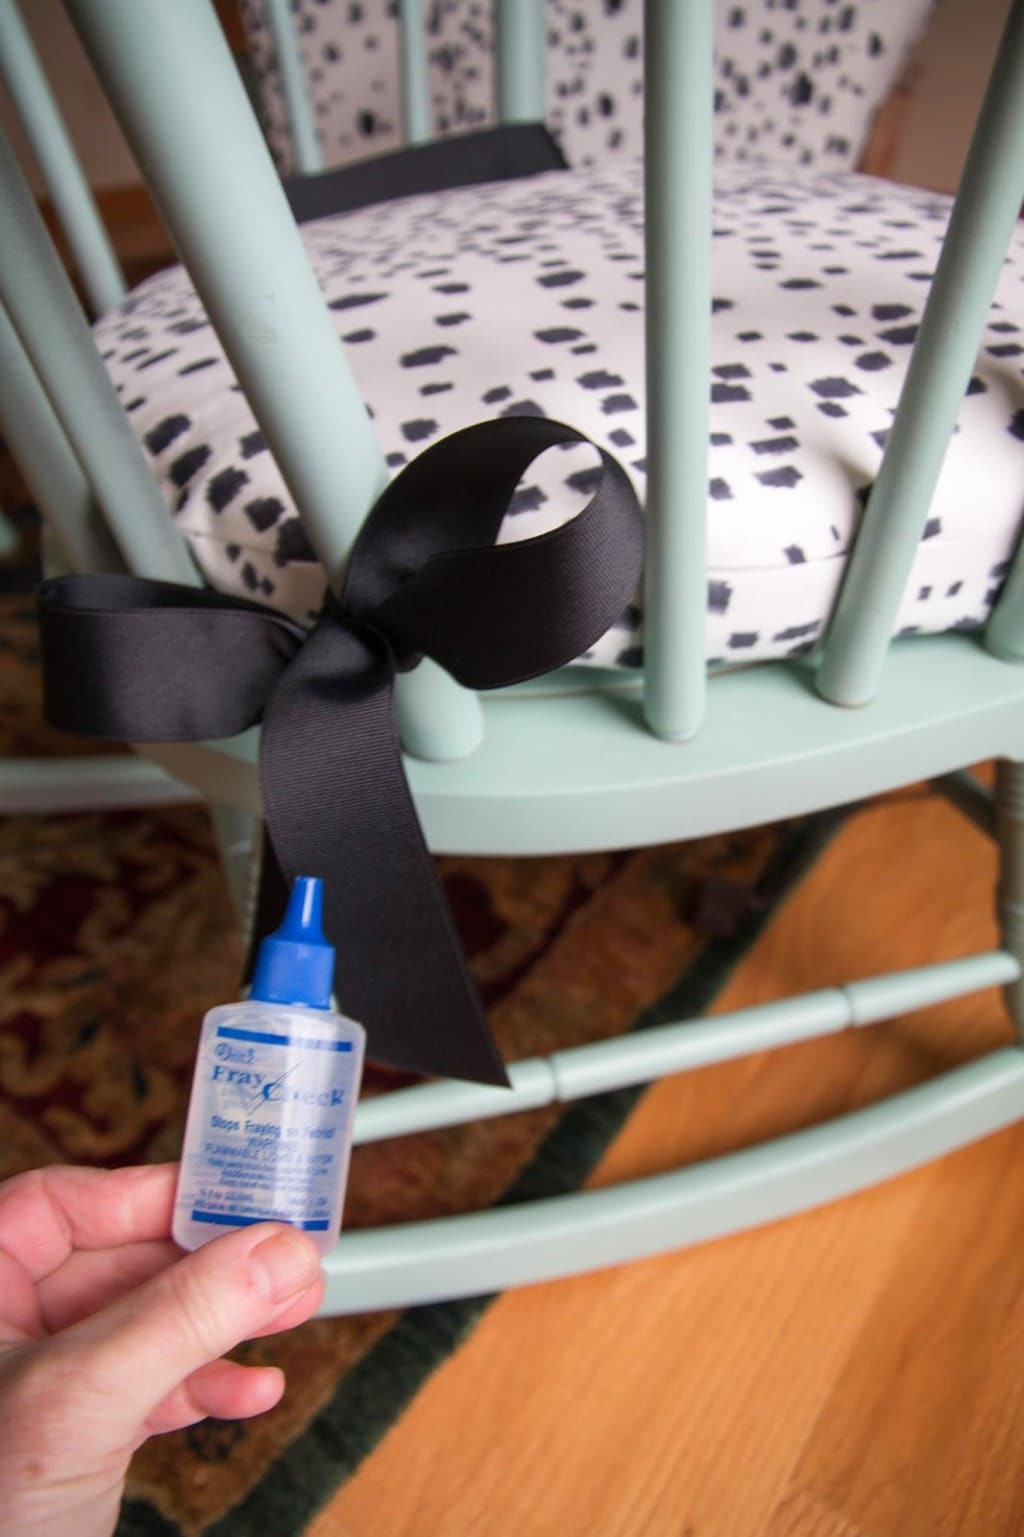 Finished DIY rocking chair cushion with ribbon ties, ready to be placed on the chair
Your newly upholstered rocking chair cushion is now complete! Place it on your rocking chair and enjoy the enhanced comfort and style.
 Completed rocking chair with a new DIY upholstered cushion, showcasing the final look
Frequently Asked Questions: Upholstered Rocking Chair Cushions
What kind of fabric is best for a rocking chair cushion?
For a durable and long-lasting rocking chair cushion, upholstery-weight fabric is essential. Our first attempt taught us a valuable lesson: using lightweight fabric is a mistake. It lacks the strength needed to withstand tautness and can split under pressure. Invest in upholstery-weight or drapery-weight material for much better results and longevity.
Where can I buy fabric for recovering my rocking chair cushion?
High-quality upholstery fabric can be found at various retailers. Online fabric stores like Fabric.com and Spoonflower offer a wide selection (Spoonflower is where we sourced our patterned fabric). For budget-friendly options, consider heavy-weight Ikea curtains like the Merete curtains, which can be repurposed into durable and stylish cushion covers.
Is making a DIY cushion truly cost-effective?
Absolutely! Our DIY rocking chair cushion project totaled around $150. While this isn’t free, it’s considerably less expensive than purchasing a new glider or a pre-upholstered rocking chair. Custom rocking chair cushion covers made professionally can easily cost between $200-$300, making DIY a significant saving.
Are rocking chairs or gliders more comfortable?
In terms of pure comfort, gliders generally offer superior comfort due to their smoother, more consistent motion. However, rocking chairs have their own charm and can be made significantly more comfortable with a well-padded cushion. To further enhance comfort, we even created a matching rocking chair stool, which we’ll be sharing soon after a fresh coat of spray paint!
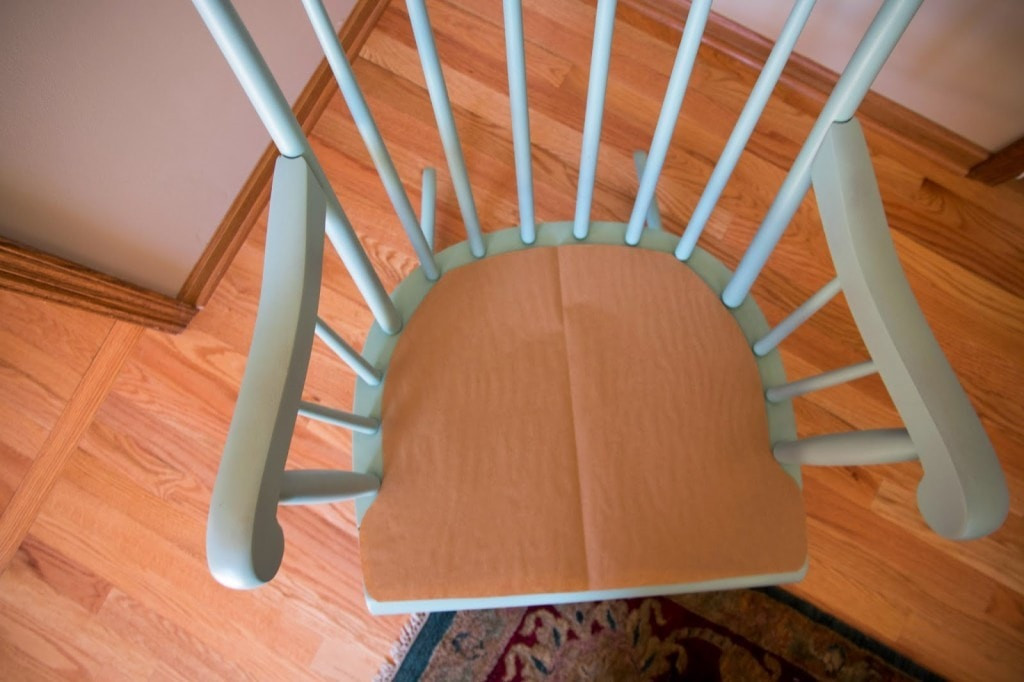
Why did the rocking chair colors change in the photos?
Our rocking chair has undergone a few transformations! It started as brown wood, then we spray-painted it mint green. After a couple of years, we opted for a more modern look with black spray paint. This illustrates how easily you can update your rocking chair’s style along with the cushion.
Is spray paint or regular paint better for a rocking chair?
Spray paint is often preferred for rocking chairs because it provides a smooth, even finish quickly and is excellent for intricate details and curves. However, regular paint can also be used, especially if you desire a specific color that’s not available in spray paint, or prefer a brush-applied finish. Proper preparation, like sanding and priming, is key for both types of paint.
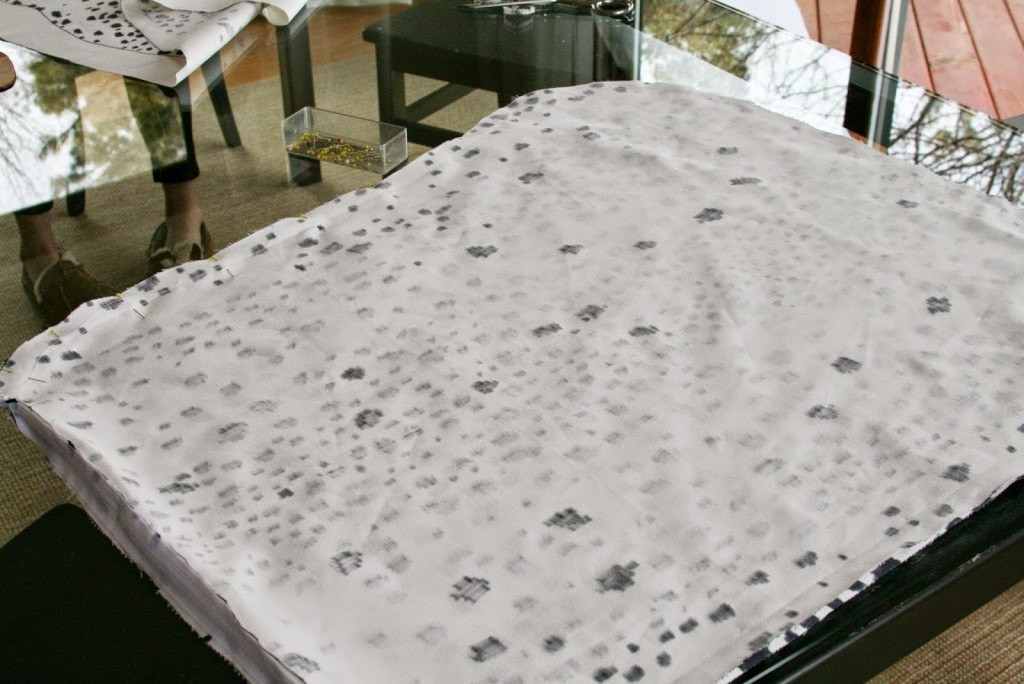
What about the permanent marker spots mentioned earlier?
Ah, yes! In our early DIY days, after using the wrong lightweight fabric, we attempted to mimic the expensive Brunschwig & Fils “Les Touches” fabric (which retails for around $150 per yard!) by drawing spots on Ikea curtains with a permanent marker. Big mistake! Permanent markers are not waterproof, and the ink bled when exposed to moisture. Learn from our experience: if you want washable cushion covers, stick to pre-printed fabrics like those from Spoonflower, and always wash and iron your fabric according to the manufacturer’s directions before sewing.
 Decorator Cheat Sheet Image Link