What Do You Need To Make Rock Candy? Rock candy is a delightful treat, and making it at home is easier than you might think, offering a fun and educational activity for all ages; at rockscapes.net, we believe in bringing the wonder of the earth into your everyday life, even if that means starting with a sugary crystal formation! You can create stunning edible gems that will dazzle your taste buds and your eyes with a few simple ingredients and the right equipment. Consider rock candy a sweet start to exploring the fascinating world of crystal formation and the art of creating beautiful landscapes, both edible and natural.
1. What Exactly Is Rock Candy and Why Make It Yourself?
Rock candy is essentially crystallized sugar formed into large, appealing crystals. While readily available for purchase, making it yourself offers unique benefits.
1.1. The Science Behind the Sweetness
Rock candy, also known as sugar candy, is pure crystallized sugar; the process is similar to making simple syrup, but you intentionally oversaturate the solution with sugar. According to research from the University of California, Berkeley’s College of Chemistry, sugar crystallization is a fascinating process where sugar molecules in a supersaturated solution attach to a seed crystal, growing larger over time. This scientific principle is not only the basis for making delicious treats but also for understanding geological formations.
1.2. Why DIY Rock Candy?
- Fun and Engaging: Making rock candy is a fantastic activity for kids and adults alike, turning the kitchen into a science lab.
- Customizable: You control the colors and flavors, allowing for personalized creations.
- Cost-Effective: Making your own can be more economical than buying pre-made rock candy, especially if you need a large quantity.
- Great for Gifting: Homemade rock candy makes a thoughtful and unique gift.
- Cocktail Enhancement: As a decorative and flavorful addition to cocktails and mocktails.
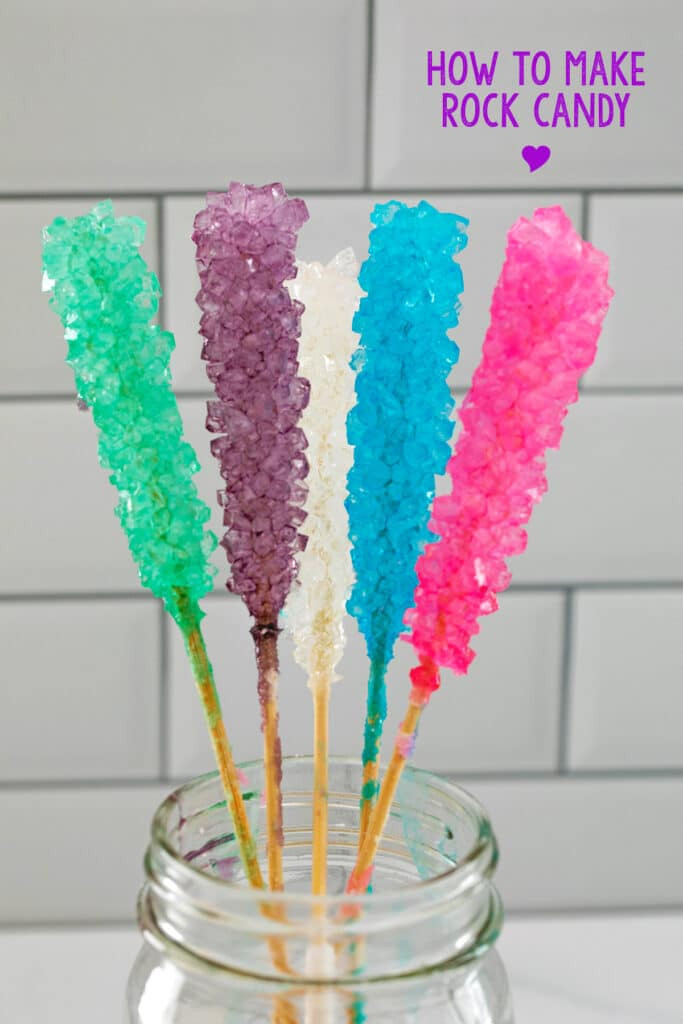 Close-up of 5 different colors rock candy in mason jar with
2. What Essential Ingredients Are Needed to Make Rock Candy?
The list of ingredients is surprisingly short, but the quality and ratios are crucial.
2.1. The Core Components
- Granulated Sugar: This is the primary ingredient. For about 5 sticks of rock candy, you’ll need around 10 cups.
- Water: Distilled water is recommended for the purest crystals.
- Food Coloring (Optional): Gel food coloring is ideal for vibrant, concentrated colors.
2.2. Choosing the Right Sugar
Granulated sugar, also known as table sugar, is the standard choice for making rock candy due to its consistent crystal size and purity; according to a study by the Sugar Association, granulated sugar provides the best results for candy making due to its consistent crystallization properties. Avoid using powdered sugar or brown sugar, as they contain additives that can interfere with the crystallization process.
2.3. Exploring Natural Coloring Options
If you prefer natural alternatives to artificial food coloring, consider using:
- Beet Juice: For a pink or red hue.
- Turmeric: For a yellow or golden color.
- Spinach Juice: For a green shade.
- Red Cabbage Juice: For a purple color (the pH level can affect the final color, so experiment with small batches).
3. What Equipment Do You Need to Make Rock Candy Successfully?
Having the right tools on hand will make the process smoother and more enjoyable.
3.1. Must-Have Tools
- Mason Jars or Glasses: To hold the sugar solution while the crystals form. Standard 16 oz. mason jars work well.
- Skewers or Candy Sticks: To provide a surface for the crystals to grow on. Wooden skewers or specialized rock candy sticks are suitable.
- Clothespins or Clips: To suspend the skewers in the jars without touching the bottom.
- Saucepan: A large, heavy-bottomed saucepan for making the sugar solution.
- Wooden Spoon: For stirring the sugar solution.
- Measuring Cups and Spoons: For accurate ingredient measurements.
- Candy Thermometer (Optional): To ensure the sugar solution reaches the correct temperature.
- Parchment Paper or Silicone Mat: To dry the finished rock candy.
3.2. Selecting the Right Jars
Mason jars are the go-to choice for making rock candy due to their wide mouth, which makes it easy to insert and remove the skewers. Glass cups or mugs can also be used, but ensure they are heat-resistant. Avoid using plastic containers, as they may not withstand the high temperatures of the sugar solution.
3.3. Preparing Skewers for Crystal Growth
To encourage crystal formation on the skewers, “seed” them by coating them with sugar before submerging them in the sugar solution. This provides a base for the sugar crystals to attach to and grow. Submerge the skewers in water, then roll them in granulated sugar, and let them dry completely before using them.
4. What’s the Step-by-Step Process for Making Rock Candy?
Follow these steps carefully for the best results.
4.1. Step 1: Prepare the Skewers
“Seeding” the skewers is essential. Wet them with water, roll them in sugar, and let them dry completely. This provides a base for the crystals to grow.
4.2. Step 2: Prepare the Jars
Ensure the jars are clean and warm. Attach clothespins or clips to the skewers and balance them over the jars, ensuring the skewer hangs about an inch from the bottom.
4.3. Step 3: Make the Sugar Solution
- In a large saucepan, bring 4 cups of water to a boil.
- Add sugar one cup at a time, stirring constantly until each cup is fully dissolved before adding the next.
- Continue adding sugar until you reach 10 cups. The solution will become increasingly saturated, and it will be harder to dissolve the sugar.
4.4. Step 4: Simmer and Rest
Once all the sugar is dissolved, let the mixture simmer for about 5 minutes. Remove from heat and let it rest for 15 minutes.
4.5. Step 5: Add Color and Pour
Divide the mixture among the prepared jars and stir in food coloring, if desired.
4.6. Step 6: Add Skewers and Wait
Carefully place the prepared skewers into the solution, ensuring they don’t touch the bottom of the jar. Now, comes the hard part: waiting.
4.7. Step 7: Crystallization
Crystals should start forming within a day; let the jars rest undisturbed for 6-7 days for the crystals to fully form.
4.8. Step 8: Remove and Dry
Gently crack the hardened sugar on top of the jar and wiggle the stick to release it. Let the syrup drip off and dry on parchment paper or a silicone mat.
5. How Long Does it Take to Make Rock Candy?
While the hands-on time is minimal, patience is key.
5.1. The Time Commitment
The solution itself takes about 30 minutes to prepare. However, the crystallization process takes 6-7 days.
5.2. Factors Affecting Crystallization Time
- Temperature: A stable, slightly cool room temperature is ideal.
- Humidity: High humidity can slow down the crystallization process.
- Purity of Ingredients: Using distilled water and high-quality sugar can speed up crystal growth.
- Saturation Level: The more saturated the solution, the faster the crystals will grow.
6. What Are Some Tips and Tricks for Perfect Rock Candy?
Mastering the art of rock candy involves understanding the nuances of the process.
6.1. Achieving Supersaturation
The key to successful rock candy is creating a supersaturated sugar solution. This means dissolving as much sugar as possible in the water so that the solution can’t hold any more sugar at a cooler temperature. As the solution cools, the excess sugar will precipitate out of the solution and form crystals on the skewers.
6.2. Preventing Common Problems
- Crystals Not Forming: Ensure the solution is supersaturated. If not, boil the mixture again and add more sugar. Also, make sure the jars are clean and warm.
- Small Crystals: Avoid disturbing the jars during crystallization.
- Crystals Sticking to the Bottom: Ensure the skewers don’t touch the bottom of the jar.
- Cloudy Crystals: Use distilled water and high-quality sugar.
6.3. Adding Flavor
To add flavor to your rock candy, use concentrated flavor extracts or oils. Add the flavoring after removing the sugar solution from the heat and before pouring it into the jars. Be careful not to add too much liquid, as this can dilute the solution and affect crystal formation.
Popular flavorings include:
- Vanilla Extract: For a classic, sweet flavor.
- Lemon Extract: For a citrusy, refreshing taste.
- Peppermint Extract: For a cool, minty flavor.
- Cinnamon Oil: For a warm, spicy flavor.
7. Can You Re-Use the Sugar Solution?
Yes, you can, but with a few adjustments.
7.1. Reheating and Adding Sugar
After removing the rock candy, pour the solution back into the saucepan, bring it to a boil, and add another ¼ cup of sugar. Simmer for a few minutes before pouring back into the jar.
7.2. Why It’s Necessary
Reheating and adding sugar ensures the solution remains supersaturated, allowing for further crystal growth.
7.3. Troubleshooting Reused Solution
If your reused solution isn’t producing crystals, it may not be saturated enough. Add more sugar and reheat the solution again. Also, ensure the skewers are properly seeded and the jars are clean.
8. How Should You Store Rock Candy?
Proper storage is essential to maintain the quality and appearance of your homemade rock candy.
8.1. Ideal Storage Conditions
Store rock candy in a cool, dry place.
8.2. Wrapping for Longevity
For longer storage or gifting, wrap the rock candy in cellophane wrappers to prevent moisture absorption.
8.3. Shelf Life
When stored properly, rock candy can last for up to a year.
8.4. Preventing Stickiness
To prevent your rock candy from becoming sticky, avoid storing it in humid environments. If you live in a humid climate, consider adding a desiccant packet to the storage container to absorb excess moisture.
9. What Are Some Creative Variations of Rock Candy?
Once you’ve mastered the basic recipe, experiment with different flavors and colors to create unique variations.
9.1. Flavor Combinations
- Citrus: Lemon, lime, or orange.
- Spice: Cinnamon, clove, or ginger.
- Floral: Rosewater or lavender.
- Herbal: Mint or basil.
9.2. Color Swirls
Create a tie-dye effect by swirling different colored solutions together in the jar.
9.3. Edible Additions
Add edible glitter or sprinkles to the sugar solution for extra sparkle.
9.4. Rock Candy Lollipops
Pour the sugar solution into lollipop molds instead of jars to create rock candy lollipops. Insert lollipop sticks into the molds before the solution cools.
10. What Are Some Frequently Asked Questions (FAQs) About Making Rock Candy?
Here are some common questions and answers to help you troubleshoot any issues.
10.1. Why Isn’t My Rock Candy Growing?
- Answer: Ensure the sugar solution is supersaturated. If not, boil the mixture again and add more sugar. Also, make sure the jars are clean and warm, and avoid moving the jars once the skewers are in place.
10.2. How Can I Make Rock Candy Faster?
- Answer: Unfortunately, there isn’t a way to speed up the crystallization process significantly. While some suggest refrigerating the jars, this method is not guaranteed and may result in smaller crystals.
10.3. Can I Use Honey Instead of Sugar?
- Answer: While you can experiment with honey, it may affect the crystallization process and the final texture of the rock candy. Sugar provides the most consistent results.
10.4. How Do I Prevent the Crystals from Sticking to the Bottom of the Jar?
- Answer: Ensure the skewers don’t touch the bottom of the jar. Use clothespins or clips to suspend them properly.
10.5. Can I Add Essential Oils for Flavor?
- Answer: Yes, but use them sparingly as they are highly concentrated. Add a few drops after removing the sugar solution from the heat.
10.6. What Is the Best Type of Food Coloring to Use?
- Answer: Gel food coloring is ideal as it provides vibrant, concentrated color without adding too much liquid to the solution.
10.7. How Do I Clean the Jars After Making Rock Candy?
- Answer: Soak the jars in hot water to dissolve the hardened sugar. You may need to scrub them with a sponge or brush to remove any stubborn residue.
10.8. Can I Use Different Types of Sugar, Like Brown Sugar or Powdered Sugar?
- Answer: No, granulated sugar is the best choice for making rock candy due to its consistent crystal size and purity. Brown sugar and powdered sugar contain additives that can interfere with the crystallization process.
10.9. How Long Will Homemade Rock Candy Last?
- Answer: When stored properly in a cool, dry place, homemade rock candy can last for up to a year.
10.10. Is It Safe to Eat the Rock Candy After It Has Been Stored for a Long Time?
- Answer: Yes, as long as the rock candy is stored properly and shows no signs of spoilage (such as mold or a strange odor), it is safe to eat even after it has been stored for a long time.
Making rock candy is a delightful blend of science and culinary art, offering a sweet reward for your patience and creativity. Now that you know what you need to make rock candy, why not explore the natural beauty of rockscapes at rockscapes.net? Just as sugar crystals transform from a simple solution into something beautiful, we can help you transform your outdoor spaces into stunning landscapes.
Ready to explore the beauty of natural rockscapes? Visit rockscapes.net for inspiration, information, and expert advice. Let us help you create the landscape of your dreams! You can find us at 1151 S Forest Ave, Tempe, AZ 85281, United States or give us a call at +1 (480) 965-9011.