Rock painting is a fantastic way to express your creativity and spread joy, and choosing the right paint is crucial for ensuring your artwork withstands the elements; at rockscapes.net, we guide you through the best types of paint for creating durable and vibrant rock art that lasts. Discover the ideal paints and sealing techniques to transform ordinary stones into stunning, weather-resistant masterpieces, ensuring your artistic creations bring lasting beauty to any outdoor space. Learn about our landscaping rocks, decorative stone and garden rocks.
1. Why Does the Kind of Paint Matter for Rock Painting?
Selecting the right type of paint is essential for rock painting because it directly affects the artwork’s longevity and visual appeal. Using suitable paints ensures that your designs remain vibrant and withstand various weather conditions, making your creations durable and eye-catching; let’s explore why this choice is crucial.
1.1. Durability and Weather Resistance
The primary reason to choose the right paint is durability. Rocks, when placed outdoors, are exposed to sun, rain, and temperature fluctuations. According to research from Arizona State University’s School of Earth and Space Exploration, the desert climate of Arizona can cause rapid weathering of improperly protected materials. Therefore, the paint must be able to withstand these conditions without fading, cracking, or peeling.
- Acrylic Paints: Known for their excellent weather resistance.
- Enamel Paints: Provide a hard, durable finish that resists scratches and chipping.
- Oil-Based Paints: Offer superior adhesion and protection against the elements.
1.2. Adhesion to Rock Surfaces
Rocks have a non-porous surface, which can make it challenging for some paints to adhere properly. Proper adhesion prevents the paint from flaking off over time.
- Textured Surfaces: Require paints that can grip onto uneven surfaces.
- Smooth Surfaces: Benefit from paints that create a strong bond.
1.3. Color Retention and Vibrancy
The right paint ensures that the colors remain vibrant and do not fade quickly under sunlight.
- UV-Resistant Paints: Specifically formulated to resist fading from sun exposure.
- High-Pigment Paints: Offer rich, vibrant colors that last longer.
1.4. Safety Considerations
When painting rocks, especially with children, it’s important to use non-toxic paints.
- Non-Toxic Acrylics: Safe for use by all ages, ensuring a worry-free painting experience.
- Water-Based Paints: Easy to clean and generally safer than solvent-based options.
1.5. Aesthetic Appeal
Different paints offer different finishes, such as matte, glossy, or metallic, which can enhance the aesthetic appeal of your rock art.
- Glossy Finishes: Provide a shiny, reflective look.
- Matte Finishes: Offer a more subdued, natural appearance.
- Metallic Finishes: Add a touch of sparkle and sophistication.
By choosing the right type of paint, you can ensure that your rock art remains beautiful, durable, and safe for everyone to enjoy.
2. What are the Best Types of Paint for Rock Painting?
Selecting the ideal paint for rock painting depends on the desired effect, durability needs, and environmental factors. Here’s a breakdown of the best types of paint to use, along with their pros and cons.
2.1. Acrylic Paints: Versatile and Widely Used
Acrylic paints are a popular choice for rock painting due to their versatility, ease of use, and availability. They are water-based, non-toxic, and come in a wide range of colors.
Pros:
- Versatility: Suitable for various techniques, from base coats to detailed designs.
- Quick Drying: Dries relatively quickly, allowing for multiple layers in a short time.
- Water-Based: Easy to clean with water and generally non-toxic.
- Wide Availability: Readily available in craft stores and online.
- Cost-Effective: Generally more affordable than other types of paint.
Cons:
- Less Durable: May require a sealant for outdoor use to protect against the elements.
- Can Fade: Some colors may fade over time with prolonged sun exposure.
- Not as Permanent: Can be scratched or chipped if not properly sealed.
Best Uses:
- Base Coats: Provides a solid foundation for more detailed designs.
- Detailed Designs: Suitable for intricate patterns and artwork.
- Beginner Projects: Easy to work with, making them ideal for beginners.
2.2. Acrylic Paint Pens: Precision and Detail
Acrylic paint pens are perfect for adding fine details, lettering, and intricate designs to your rock art. They offer more control than brushes, making them ideal for detailed work.
Pros:
- Precision: Allows for fine lines and intricate details.
- Control: Easier to control than brushes, especially for lettering.
- Convenience: No need for water or palettes, making them easy to use.
- Variety: Available in various tip sizes and colors.
Cons:
- Limited Coverage: Not suitable for large areas or base coats.
- Can Dry Out: Tips can dry out if not properly stored.
- More Expensive: Generally more expensive than regular acrylic paints.
Best Uses:
- Outlining: Creating outlines for designs and patterns.
- Lettering: Writing quotes, names, or messages on rocks.
- Fine Details: Adding intricate details to existing artwork.
2.3. Enamel Paints: Durable and Glossy
Enamel paints are known for their hard, glossy finish and excellent durability. They are oil-based, providing a tough, weather-resistant coating that is ideal for outdoor use.
Pros:
- Durability: Highly resistant to scratches, chips, and fading.
- Glossy Finish: Provides a shiny, attractive look.
- Weather Resistance: Excellent for outdoor use, withstanding various weather conditions.
- Adhesion: Adheres well to non-porous surfaces like rocks.
Cons:
- Slower Drying: Takes longer to dry than acrylic paints.
- Solvent-Based: Requires solvents for cleaning, which can be harsh.
- Strong Odor: Can have a strong, unpleasant odor.
- Less Environmentally Friendly: Contains more VOCs (volatile organic compounds) than water-based paints.
Best Uses:
- Outdoor Art: Ideal for projects that need to withstand the elements.
- Protective Coatings: Provides a durable, protective layer for rock art.
- High-Gloss Finish: Suitable for achieving a shiny, polished look.
2.4. Oil-Based Paints: Rich Colors and Long-Lasting
Oil-based paints offer rich, vibrant colors and excellent adhesion, making them a good choice for rock painting. They are known for their durability and resistance to fading.
Pros:
- Rich Colors: Provides deep, vibrant colors that stand out.
- Durability: Offers excellent resistance to fading and weathering.
- Adhesion: Adheres well to various surfaces, including rocks.
- Blending: Allows for smooth blending and layering of colors.
Cons:
- Slow Drying: Takes a long time to dry, often several days.
- Solvent-Based: Requires solvents for cleaning, which can be harsh.
- Strong Odor: Can have a strong, unpleasant odor.
- Less Environmentally Friendly: Contains more VOCs than water-based paints.
Best Uses:
- Detailed Artwork: Suitable for creating detailed, nuanced designs.
- Long-Lasting Projects: Ideal for projects that require long-term durability.
- Blending and Layering: Excellent for achieving smooth color transitions.
2.5. Specialty Paints: Unique Effects
Specialty paints, such as glow-in-the-dark, glitter, and metallic paints, can add unique effects to your rock art, making it stand out.
Pros:
- Unique Effects: Creates eye-catching, distinctive designs.
- Variety: Available in various colors and finishes.
- Fun to Use: Adds an element of fun and creativity to rock painting.
Cons:
- Durability Varies: Durability depends on the specific type of paint.
- May Require Sealing: Some specialty paints may require a sealant for outdoor use.
- Cost: Can be more expensive than regular paints.
Best Uses:
- Glow-in-the-Dark: For creating nighttime displays or unique effects.
- Glitter Paints: For adding sparkle and shimmer to rock art.
- Metallic Paints: For creating a sophisticated, elegant look.
Choosing the right type of paint for your rock painting projects depends on your specific needs and preferences. Consider the desired finish, durability requirements, and environmental factors to make the best choice for your artwork.
 Acrylic paint is a good choice for painting rocks.
3. How to Prepare Rocks for Painting
Proper preparation is crucial for ensuring that paint adheres well to the rock surface and that your artwork looks its best. Follow these steps to prepare your rocks for painting.
3.1. Gather Your Rocks
Start by gathering smooth, clean rocks. You can find rocks in your backyard, at a local park, or purchase them from a craft store.
Tips for Selecting Rocks:
- Smooth Surface: Choose rocks with a smooth, flat surface for easier painting.
- Size and Shape: Select a variety of sizes and shapes to add interest to your collection.
- Cleanliness: Avoid rocks with a waxy film, as they can be harder to decorate.
3.2. Cleaning the Rocks
Cleaning the rocks removes dirt, debris, and any loose particles that could interfere with paint adhesion.
Steps for Cleaning:
- Rinse: Rinse the rocks under running water to remove loose dirt.
- Scrub: Use a brush or sponge to scrub the rocks with soap and water.
- Soak (Optional): For heavily soiled rocks, soak them in a bucket of soapy water for a few hours.
- Rinse Again: Rinse the rocks thoroughly to remove all traces of soap.
3.3. Drying the Rocks
Allow the rocks to dry completely before painting. This ensures that the paint adheres properly and prevents moisture from affecting the finish.
Drying Methods:
- Air Dry: Place the rocks on a clean towel or rack and allow them to air dry completely.
- Sun Dry: Place the rocks in direct sunlight to speed up the drying process.
- Oven Dry (Optional): If you need the rocks to dry quickly, you can bake them in the oven at a low temperature (around 200°F or 93°C) for about 30 minutes. Make sure to let them cool completely before painting.
3.4. Priming the Rocks (Optional)
Priming the rocks can create a smooth, even surface for painting and improve paint adhesion.
Priming Steps:
- Choose a Primer: Select a primer that is suitable for use on rocks and compatible with your chosen paint.
- Apply Primer: Apply a thin, even coat of primer to the rock surface using a brush or spray.
- Dry Primer: Allow the primer to dry completely according to the manufacturer’s instructions.
- Sand (Optional): If the primer creates a rough surface, lightly sand it with fine-grit sandpaper to create a smooth finish.
3.5. Applying a Base Coat (Optional)
Applying a base coat of paint can create a uniform background for your design and make the colors stand out.
Base Coat Steps:
- Choose a Color: Select a base coat color that complements your design.
- Apply Paint: Apply a thin, even coat of paint to the rock surface using a brush or sponge.
- Dry Paint: Allow the paint to dry completely before adding your design.
- Apply Additional Coats (Optional): If necessary, apply additional coats of paint to achieve full coverage.
By following these steps, you can ensure that your rocks are properly prepared for painting, resulting in beautiful, long-lasting artwork.
4. Painting Techniques for Rocks
Mastering various painting techniques can enhance the beauty and durability of your rock art. Here are some popular techniques to try.
4.1. Base Coating Techniques
A solid base coat is essential for creating a smooth canvas for your designs. Here are some techniques for applying a base coat effectively.
Brush Application:
- Choose the Right Brush: Use a wide, flat brush for even coverage.
- Apply Thin Coats: Apply thin, even coats of paint to avoid streaks and drips.
- Dry Between Coats: Allow each coat to dry completely before applying the next.
Sponge Application:
- Use a Sponge Brush: Sponge brushes provide a smooth, textured finish.
- Dab the Paint: Dab the paint onto the rock surface to avoid streaks.
- Apply Even Pressure: Apply even pressure to ensure uniform coverage.
Spray Painting:
- Use Spray Paint: Spray paint provides a smooth, even base coat.
- Apply in Light Layers: Apply light, even layers to avoid drips and runs.
- Work in a Well-Ventilated Area: Ensure proper ventilation when using spray paint.
4.2. Detailing Techniques
Adding fine details can bring your rock art to life. Here are some techniques for creating intricate designs.
Fine Brushwork:
- Use Fine-Tipped Brushes: Fine-tipped brushes allow for precise detailing.
- Steady Hand: Maintain a steady hand for clean, crisp lines.
- Practice: Practice your brushwork on paper before painting on the rock.
Acrylic Paint Pens:
- Choose the Right Tip Size: Select a tip size that is appropriate for your design.
- Apply Light Pressure: Apply light pressure to avoid bleeding.
- Outline First: Outline your design before filling in the details.
Stippling:
- Use a Round Brush: Use a small, round brush for stippling.
- Dab the Paint: Dab the paint onto the rock surface to create a textured effect.
- Vary the Density: Vary the density of the dots to create shading and highlights.
4.3. Blending Techniques
Blending colors can create smooth transitions and add depth to your rock art. Here are some techniques for blending effectively.
Wet-on-Wet Blending:
- Apply Colors Side by Side: Apply the colors you want to blend side by side while they are still wet.
- Use a Soft Brush: Use a soft brush to blend the colors together.
- Work Quickly: Work quickly to prevent the paint from drying.
Dry Brushing:
- Use a Dry Brush: Use a dry brush to blend the colors together.
- Apply Light Pressure: Apply light pressure to create a subtle transition.
- Clean the Brush: Clean the brush frequently to prevent color contamination.
Layering:
- Apply Thin Layers: Apply thin layers of paint to build up the colors gradually.
- Allow Each Layer to Dry: Allow each layer to dry completely before applying the next.
- Blend with a Soft Brush: Blend the layers together with a soft brush to create a smooth transition.
4.4. Special Effects Techniques
Adding special effects can make your rock art stand out. Here are some techniques for creating unique effects.
Glow-in-the-Dark Paint:
- Apply Multiple Coats: Apply multiple coats of glow-in-the-dark paint for maximum brightness.
- Charge the Paint: Charge the paint by exposing it to light before displaying it in the dark.
Glitter Paint:
- Apply a Base Coat: Apply a base coat of paint before applying glitter paint.
- Use a Brush or Sponge: Use a brush or sponge to apply the glitter paint evenly.
- Seal the Glitter: Seal the glitter with a clear sealant to prevent it from flaking off.
Metallic Paint:
- Apply Evenly: Apply metallic paint evenly to avoid streaks.
- Use a Soft Brush: Use a soft brush to prevent scratching the metallic finish.
- Seal for Protection: Seal the metallic paint with a clear sealant to protect it from tarnishing.
By mastering these painting techniques, you can create stunning rock art that is both beautiful and durable.
5. Sealing Painted Rocks for Protection
Sealing painted rocks is crucial for protecting your artwork from the elements and ensuring its longevity. Here’s how to properly seal your painted rocks.
5.1. Why Sealing is Important
Sealing painted rocks protects the paint from fading, chipping, and damage caused by weather conditions. It also enhances the colors and adds a professional finish.
Benefits of Sealing:
- Protects Paint: Prevents the paint from fading, cracking, and peeling.
- Enhances Colors: Brings out the vibrancy of the colors.
- Waterproofs: Protects the artwork from rain and moisture.
- UV Protection: Shields the paint from sun damage and fading.
- Durable Finish: Adds a hard, durable finish that resists scratches and chips.
5.2. Types of Sealants
There are several types of sealants available for painted rocks, each with its own pros and cons.
Acrylic Sealants:
- Pros: Water-based, non-toxic, easy to apply, and provides good protection.
- Cons: May require multiple coats for full protection.
Polyurethane Sealants:
- Pros: Durable, water-resistant, and provides excellent protection against the elements.
- Cons: Solvent-based, requires proper ventilation, and can yellow over time.
Epoxy Resins:
- Pros: Extremely durable, provides a glossy, glass-like finish, and excellent water resistance.
- Cons: More difficult to apply, requires precise mixing, and can be expensive.
Mod Podge:
- Pros: Easy to use, water-based, and provides a good balance of protection and finish.
- Cons: Not as durable as other sealants and may require multiple coats.
5.3. How to Apply Sealant
Follow these steps to apply sealant to your painted rocks properly.
- Clean the Rocks: Ensure the rocks are clean and free from dust and debris.
- Choose a Well-Ventilated Area: Work in a well-ventilated area or outdoors to avoid inhaling fumes.
- Apply the Sealant: Apply a thin, even coat of sealant to the rock surface using a brush or spray.
- Dry the Sealant: Allow the sealant to dry completely according to the manufacturer’s instructions.
- Apply Additional Coats (Optional): Apply additional coats of sealant for added protection and durability.
5.4. Tips for Sealing
Here are some tips for achieving the best results when sealing your painted rocks.
- Read the Instructions: Always read and follow the manufacturer’s instructions for the sealant you are using.
- Test the Sealant: Test the sealant on a small, inconspicuous area of the rock before applying it to the entire surface.
- Avoid Thick Coats: Avoid applying thick coats of sealant, as this can lead to drips and runs.
- Allow Sufficient Drying Time: Allow sufficient drying time between coats to ensure proper adhesion and protection.
- Use a Soft Brush: Use a soft brush to apply the sealant evenly and avoid brush strokes.
- Spray Evenly: When using a spray sealant, hold the can about 10-12 inches from the rock and spray in a sweeping motion.
By properly sealing your painted rocks, you can protect your artwork and ensure that it remains beautiful for years to come.
6. Creative Ideas for Rock Painting
Rock painting offers endless possibilities for creativity. Here are some ideas to inspire your next project.
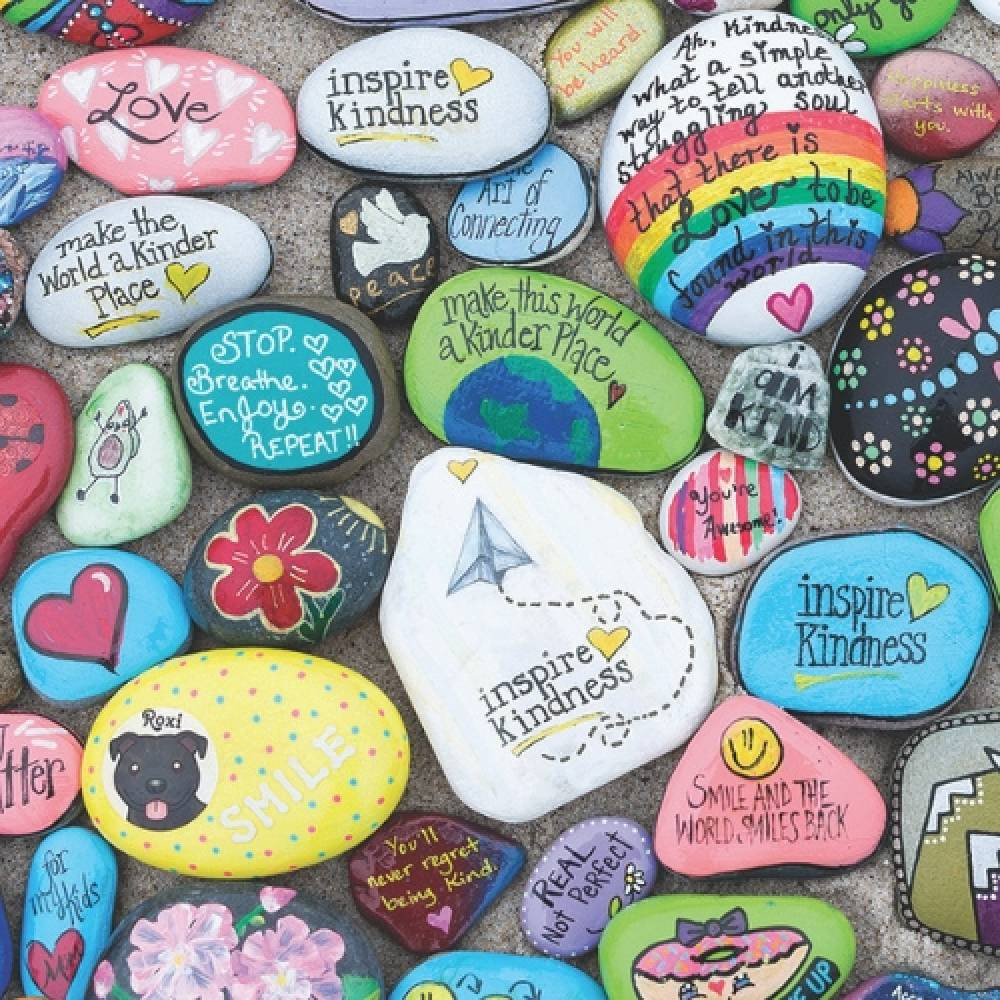
6.1. Inspirational Messages
Paint rocks with inspirational messages to spread positivity and encouragement.
Examples:
- Be Kind
- You Are Loved
- Never Give Up
- Dream Big
- Believe in Yourself
6.2. Nature Themes
Create rock art inspired by nature, such as flowers, animals, and landscapes.
Ideas:
- Flowers: Paint colorful flowers like daisies, roses, and sunflowers.
- Animals: Create animal-themed rocks with ladybugs, butterflies, and birds.
- Landscapes: Paint scenic landscapes with mountains, trees, and rivers.
6.3. Abstract Designs
Experiment with abstract designs to create unique and eye-catching rock art.
Techniques:
- Geometric Patterns: Paint geometric patterns with shapes like triangles, squares, and circles.
- Color Blocking: Use bold blocks of color to create a modern, abstract look.
- Fluid Art: Create fluid art designs with swirling colors and patterns.
6.4. Holiday Themes
Create rock art inspired by holidays and special occasions.
Examples:
- Halloween: Paint spooky Halloween-themed rocks with pumpkins, ghosts, and bats.
- Christmas: Create festive Christmas-themed rocks with snowflakes, snowmen, and Santa Claus.
- Easter: Paint colorful Easter-themed rocks with bunnies, eggs, and chicks.
6.5. Themed Rock Gardens
Create themed rock gardens by grouping painted rocks together to form a cohesive display.
Ideas:
- Fairy Garden: Create a fairy garden with painted rocks featuring fairies, gnomes, and whimsical creatures.
- Ocean Theme: Create an ocean-themed rock garden with painted rocks featuring sea creatures, seashells, and waves.
- Alphabet Garden: Create an alphabet garden with painted rocks featuring letters of the alphabet.
By exploring these creative ideas, you can transform ordinary rocks into stunning works of art that bring joy and inspiration to others.
Acrylic paint is a good choice for painting rocks.
7. Where to Find Inspiration and Resources
Finding inspiration and resources can help you enhance your rock painting skills and create unique designs. Here are some places to look for inspiration and resources.
7.1. Online Communities
Join online communities and social media groups dedicated to rock painting. These communities provide a platform for sharing ideas, asking questions, and getting feedback.
Popular Platforms:
- Facebook Groups: Search for rock painting groups on Facebook to connect with other artists.
- Instagram: Follow rock painting hashtags like #rockpainting, #kindnessrocks, and #paintedrocks for inspiration.
- Pinterest: Explore rock painting boards on Pinterest for design ideas and tutorials.
7.2. Books and Magazines
Explore books and magazines dedicated to rock painting for design ideas, techniques, and tips.
Recommended Resources:
- “Rock Art Handbook: Techniques and Projects for Painting, Coloring, and Transforming Stones” by Samantha Sarles
- “Kindness Rocks: Painting with Purpose, Inspiration & Creativity” by Megan Murphy
- “The Art of Stone Painting: 30 Designs to Spark Your Creativity” by F. Sehnaz Bac
7.3. Workshops and Classes
Attend workshops and classes to learn new techniques and get hands-on guidance from experienced artists.
Where to Find Workshops:
- Local Craft Stores: Check with local craft stores for upcoming workshops and classes.
- Community Centers: Community centers often offer art classes and workshops for all ages.
- Online Platforms: Explore online platforms like Udemy and Skillshare for rock painting courses.
7.4. Rockscapes.net
Visit rockscapes.net for a wealth of information on landscaping rocks, decorative stones, and garden rocks. Explore design ideas, tips, and resources to enhance your rock painting projects and create stunning outdoor displays.
What You Can Find on Rockscapes.net:
- Design Inspiration: Discover a variety of rock painting design ideas and themes.
- Material Information: Learn about different types of rocks and their suitability for painting.
- Techniques and Tips: Find helpful tips and techniques for preparing, painting, and sealing rocks.
- Community Forum: Connect with other rock painting enthusiasts and share your creations.
- Product Recommendations: Get recommendations for the best paints, sealants, and tools for rock painting.
7.5. Local Parks and Gardens
Visit local parks and gardens for inspiration from nature. Observe the colors, shapes, and textures of rocks, plants, and animals to spark your creativity.
What to Look For:
- Natural Colors: Pay attention to the natural colors of rocks, plants, and flowers.
- Unique Shapes: Observe the unique shapes and patterns of rocks and stones.
- Textural Elements: Notice the textures of bark, leaves, and stones to incorporate into your designs.
By exploring these resources, you can find endless inspiration and enhance your rock painting skills to create beautiful and meaningful artwork.
8. Safety Tips for Rock Painting
Safety is paramount when engaging in any art project, including rock painting. Adhering to safety guidelines ensures a secure and enjoyable experience for everyone.
8.1. Use Non-Toxic Materials
When selecting paints, sealants, and other materials, opt for non-toxic options, especially if children are involved. Look for products labeled as non-toxic and water-based to minimize exposure to harmful chemicals.
Tips for Choosing Non-Toxic Materials:
- Read Labels: Carefully read product labels to ensure they are non-toxic and safe for use.
- Water-Based Paints: Opt for water-based acrylic paints and sealants, which are generally safer than solvent-based options.
- AP Seal: Look for the AP (Approved Product) seal from the Art & Creative Materials Institute (ACMI), which indicates that the product has been evaluated for toxicity.
8.2. Work in a Well-Ventilated Area
Work in a well-ventilated area to avoid inhaling fumes from paints, sealants, and other art supplies. Open windows and doors or use a fan to circulate air and reduce exposure to harmful vapors.
Tips for Ensuring Proper Ventilation:
- Outdoor Workspace: If possible, work outdoors to ensure ample ventilation.
- Open Windows: Open windows and doors to allow fresh air to circulate.
- Use a Fan: Use a fan to direct air away from your face and towards an open window or door.
8.3. Wear Protective Gear
Wear protective gear, such as gloves and a mask, to protect your skin and respiratory system from exposure to paints, sealants, and other art supplies.
Recommended Protective Gear:
- Gloves: Wear disposable gloves to protect your hands from paint and chemicals.
- Mask: Wear a dust mask or respirator to avoid inhaling harmful vapors and particles.
- Apron: Wear an apron to protect your clothing from paint splatters and stains.
8.4. Supervise Children
Supervise children closely when they are engaged in rock painting activities to ensure they are using materials safely and responsibly. Keep paints, sealants, and other art supplies out of reach when not in use.
Tips for Supervising Children:
- Provide Guidance: Provide clear instructions and guidance on how to use materials safely.
- Monitor Activities: Monitor children’s activities closely to ensure they are following safety guidelines.
- Keep Materials Out of Reach: Store paints, sealants, and other art supplies in a secure location out of reach of children when not in use.
8.5. Dispose of Materials Properly
Dispose of used paints, sealants, and other art supplies properly to prevent environmental contamination. Follow local regulations for disposing of hazardous waste.
Tips for Proper Disposal:
- Recycle: Recycle empty paint cans and containers whenever possible.
- Hazardous Waste Disposal: Dispose of used paints, sealants, and solvents at a designated hazardous waste collection site.
- Clean Up Spills: Clean up spills and drips immediately to prevent stains and contamination.
By following these safety tips, you can ensure a safe and enjoyable rock painting experience for yourself and others.
9. Sharing and Hiding Painted Rocks
Sharing and hiding painted rocks is a fun way to spread kindness and brighten someone’s day. Here are some guidelines for sharing and hiding your painted rocks responsibly.
9.1. Share on Social Media
Share photos of your painted rocks on social media platforms like Facebook and Instagram to inspire others and spread positivity. Use relevant hashtags like #rockpainting, #kindnessrocks, and #paintedrocks to reach a wider audience.
Tips for Sharing on Social Media:
- Take High-Quality Photos: Take clear, well-lit photos of your painted rocks to showcase your artwork.
- Use Relevant Hashtags: Use relevant hashtags to increase the visibility of your posts.
- Tag Local Groups: Tag local rock painting groups or communities in your posts to connect with other artists.
- Spread Positivity: Share positive messages and stories about your rock painting experiences.
9.2. Hide in Public Places
Hide your painted rocks in public places for others to find and enjoy. Choose locations that are safe, accessible, and frequented by people of all ages.
Guidelines for Hiding Rocks:
- Choose Safe Locations: Hide rocks in safe locations away from traffic, hazards, and private property.
- Consider Accessibility: Choose locations that are accessible to people of all ages and abilities.
- Avoid Sensitive Areas: Avoid hiding rocks in sensitive areas such as national parks, historical sites, and private residences.
- Respect the Environment: Avoid disturbing plants, animals, and natural features when hiding rocks.
9.3. Leave a Note
Leave a note with your painted rocks to explain the purpose of the project and encourage finders to share their experiences on social media.
What to Include in Your Note:
- Explanation: Explain that the painted rock is meant to bring joy and kindness to others.
- Instructions: Encourage finders to share photos of the rock on social media using relevant hashtags.
- Contact Information: Include contact information for local rock painting groups or communities.
9.4. Join Local Rock Painting Groups
Join local rock painting groups or communities to connect with other artists and participate in organized rock hiding events.
Benefits of Joining a Group:
- Connect with Others: Connect with other rock painting enthusiasts and share ideas and experiences.
- Participate in Events: Participate in organized rock hiding events and community projects.
- Spread Kindness: Work together to spread kindness and positivity throughout your community.
9.5. Respect the Environment
Respect the environment when sharing and hiding your painted rocks. Avoid disturbing plants, animals, and natural features, and always follow Leave No Trace principles.
Leave No Trace Principles:
- Plan Ahead and Prepare: Plan your rock hiding activities carefully and prepare for potential challenges.
- Travel and Camp on Durable Surfaces: Stick to established trails and pathways when hiding rocks.
- Dispose of Waste Properly: Pack out all trash and waste and dispose of it properly.
- Leave What You Find: Leave natural objects and features undisturbed.
- Minimize Campfire Impacts: Avoid building campfires and use portable stoves instead.
- Respect Wildlife: Observe wildlife from a distance and avoid disturbing their habitats.
- Be Considerate of Other Visitors: Be considerate of other visitors and respect their experiences.
By following these guidelines, you can share and hide your painted rocks responsibly and contribute to a culture of kindness and positivity in your community.
10. FAQ About Paint for Rocks
Here are some frequently asked questions about choosing and using paint for rocks.
10.1. Can I use regular craft paint on rocks?
Yes, you can use regular craft paint, particularly acrylics, on rocks. However, keep in mind that craft paint may not be as durable or weather-resistant as paints specifically designed for outdoor use. For long-lasting results, seal your painted rocks with a waterproof sealant.
10.2. What is the best paint for rock painting?
The best paint for rock painting is acrylic paint due to its versatility, quick-drying nature, and wide availability. Acrylic paint pens are also excellent for adding fine details. For outdoor durability, consider enamel or oil-based paints.
10.3. Do I need to seal my painted rocks?
Yes, sealing your painted rocks is highly recommended, especially if they will be placed outdoors. Sealing protects the paint from fading, chipping, and damage caused by weather conditions, ensuring your artwork lasts longer.
10.4. What kind of sealant should I use for painted rocks?
The best sealants for painted rocks are acrylic sealants, polyurethane sealants, and Mod Podge. Choose a sealant that is waterproof, UV-resistant, and suitable for outdoor use.
10.5. How many coats of sealant do I need to apply?
Apply at least two coats of sealant for adequate protection. Allow each coat to dry completely before applying the next. For added durability, consider applying additional coats.
10.6. Can I use spray paint on rocks?
Yes, you can use spray paint on rocks, especially for creating a base coat. Apply spray paint in light, even layers to avoid drips and runs. Ensure you are working in a well-ventilated area and wearing a mask to avoid inhaling fumes.
10.7. How do I clean painted rocks?
To clean painted rocks, gently wipe them with a soft, damp cloth. Avoid using harsh chemicals or abrasive cleaners, as these can damage the paint and sealant.
10.8. Can I paint rocks with kids?
Yes, rock painting is a fun and creative activity for kids. Use non-toxic, water-based paints and supervise children closely to ensure they are using materials safely.
10.9. Where can I find rocks for painting?
You can find rocks for painting in your backyard, at local parks, or by purchasing them from craft stores, garden centers, and landscaping suppliers.
10.10. What are some easy rock painting ideas for beginners?
Easy rock painting ideas for beginners include painting simple shapes, patterns, and designs, such as polka dots, stripes, hearts, and flowers. You can also paint inspirational messages or create animal-themed rocks.
Rockscapes.net is your ultimate resource for all things related to rocks and landscaping. Whether you’re seeking inspiration for your next project or need expert advice on selecting the right materials, we’re here to help.
Ready to transform ordinary stones into stunning works of art? Visit rockscapes.net today to discover a wealth of design ideas, tips, and resources to enhance your rock painting projects and create breathtaking outdoor displays. Contact us at Address: 1151 S Forest Ave, Tempe, AZ 85281, United States or Phone: +1 (480) 965-9011. Let rockscapes.net be your guide to a world of creativity and inspiration.