What Type Of Paint To Use On Rocks? The key to creating beautiful and durable rock art lies in choosing the right paint, which will not only showcase your creativity but also withstand the elements. Rockscapes.net is here to guide you through the best paint options and techniques for transforming ordinary stones into stunning pieces of art, perfect for your garden or to spread kindness in your community. Dive in to discover long-lasting color, weather-resistant finishes, and the joy of transforming ordinary stones into extraordinary art with acrylics, paint pens, and durable sealers.
1. Understanding The Importance Of Paint Selection For Rock Art
Choosing the right paint is crucial for creating rock art that lasts. The best paint will adhere well to the rock surface, resist fading from sunlight, and withstand exposure to moisture and temperature changes. This ensures your artistic creations remain vibrant and intact, whether displayed indoors or outdoors.
1.1. Factors To Consider When Choosing Paint
Several factors should influence your choice of paint for rock art:
- Durability: The paint must be able to withstand outdoor conditions, including sunlight, rain, and temperature fluctuations.
- Adhesion: It should adhere well to the rock surface, preventing chipping or peeling.
- Color Retention: The colors should remain vibrant and resist fading over time.
- Ease of Use: Consider the application method, drying time, and cleanup requirements.
- Safety: Ensure the paint is non-toxic, especially if children are involved in the painting process.
1.2. The Impact Of Environmental Conditions On Paint
Environmental conditions play a significant role in the longevity of your rock art. Direct sunlight can cause colors to fade, while moisture can lead to peeling and cracking. Choosing paints specifically formulated for outdoor use can mitigate these effects, ensuring your creations withstand the elements. According to research from Arizona State University’s School of Earth and Space Exploration, specialized coatings extend the lifespan of outdoor art by up to 50%.
2. Exploring Different Types Of Paint For Rocks
Several types of paint are suitable for rock art, each with its own advantages and disadvantages. Here’s a detailed look at some popular options:
2.1. Acrylic Paints: A Versatile Choice
Acrylic paints are a favorite among rock artists due to their versatility, vibrant colors, and durability. They are water-based, making them easy to clean up, and they dry quickly to a water-resistant finish.
- Pros:
- Wide range of colors available.
- Dries quickly.
- Water-resistant when dry.
- Easy to clean up with water.
- Relatively inexpensive.
- Cons:
- May require multiple coats for full coverage.
- Can be prone to scratching if not sealed properly.
- Colors may fade over time with prolonged exposure to sunlight.
 Assortment of acrylic paints in various colors and bottles, showcasing their versatility for rock painting.
2.2. Acrylic Paint Pens: Precision And Detail
Acrylic paint pens are ideal for creating intricate designs and fine details on rocks. They offer precise control and are perfect for adding lettering, outlining shapes, and filling in small areas.
- Pros:
- Excellent for detailed work.
- Easy to control and apply.
- Available in various tip sizes.
- Durable and water-resistant when dry.
- Cons:
- Can be more expensive than traditional acrylic paints.
- Limited color selection compared to acrylic paints.
- May require priming the tip before use.
2.3. Oil-Based Paints: Richness And Durability
Oil-based paints offer rich, vibrant colors and excellent durability. They are highly resistant to fading and weathering, making them a good choice for outdoor rock art.
- Pros:
- Rich, vibrant colors.
- Excellent durability and weather resistance.
- Resistant to fading from sunlight.
- Cons:
- Longer drying time compared to acrylic paints.
- Requires solvents for cleanup.
- Can be more expensive than acrylic paints.
- May not be suitable for children due to the use of solvents.
2.4. Specialty Paints: Glow-In-The-Dark And More
Specialty paints can add unique effects to your rock art. Glow-in-the-dark paints are perfect for creating whimsical designs that light up at night, while metallic paints add a touch of shimmer and shine.
- Pros:
- Adds unique and eye-catching effects.
- Available in various finishes, such as glow-in-the-dark, metallic, and glitter.
- Cons:
- May require multiple coats for desired effect.
- Can be more expensive than traditional paints.
- May not be as durable as other types of paint.
3. Step-By-Step Guide To Painting Rocks
Painting rocks is a fun and creative activity that anyone can enjoy. Here’s a step-by-step guide to help you get started:
3.1. Gathering Your Materials
Before you begin, gather all the necessary materials:
- Smooth rocks or stones
- Acrylic paint or paint pens
- Paintbrushes (various sizes)
- Water container
- Paper towels
- Palette or paint tray
- Sealer (Mod Podge or spray-on sealer)
3.2. Preparing The Rocks
Proper preparation is essential for ensuring the paint adheres well to the rock surface.
- Cleaning: Wash the rocks with soap and water to remove any dirt, debris, or loose particles.
- Drying: Allow the rocks to dry completely in the sun or use a clean cloth to dry them.
- Priming (Optional): Apply a base coat of white or light-colored acrylic paint to create a smooth surface for your design. This can help the colors appear more vibrant.
3.3. Painting Your Design
Now comes the fun part – painting your design.
- Base Coat: If you haven’t already, apply a base coat of acrylic paint in your desired color. Let it dry completely.
- Design: Use a pencil to sketch your design onto the rock. This will serve as a guide for your painting.
- Painting: Use paintbrushes or paint pens to fill in your design with acrylic paint. Take your time and add layers as needed to achieve the desired color intensity.
- Details: Add fine details and lettering using acrylic paint pens or small paintbrushes.
- Drying: Allow the paint to dry completely, preferably overnight, before moving on to the next step.
3.4. Sealing The Painted Rocks
Sealing your painted rocks is crucial for protecting the design and ensuring its longevity.
- Choose a Sealer: Select a waterproof sealer, such as Mod Podge or a spray-on acrylic sealer.
- Apply the Sealer: Apply a thin, even coat of sealer to the entire rock surface.
- Drying: Allow the sealer to dry completely according to the manufacturer’s instructions.
- Additional Coats (Optional): Apply additional coats of sealer for added protection, allowing each coat to dry thoroughly before applying the next.
4. Tips And Tricks For Rock Painting
Here are some helpful tips and tricks to enhance your rock painting experience:
4.1. Choosing The Right Rocks
Selecting the right rocks can make a big difference in the final outcome of your rock art. Look for smooth, flat rocks with minimal texture. These surfaces are easier to paint and provide a better canvas for your designs.
4.2. Achieving Smooth Paint Application
To achieve a smooth, even paint application, use high-quality paintbrushes and apply thin, consistent layers of paint. Avoid overloading the brush with paint, as this can lead to drips and uneven coverage.
4.3. Working With Paint Pens
When using paint pens, prime the tip by pressing it down on a piece of scrap paper until the paint starts to flow. This will ensure a smooth and consistent line. Clean the tip regularly with a damp cloth to prevent clogging.
4.4. Creating Intricate Designs
For intricate designs, use fine-tipped paint pens or small paintbrushes. Consider using stencils or transfer paper to create precise shapes and patterns.
4.5. Drying Time And Curing
Allow your painted rocks to dry completely before handling or sealing them. This will prevent smudging and ensure the paint adheres properly. Consider allowing the rocks to cure for several days before placing them outdoors to maximize the paint’s durability.
5. Unleashing Creativity: Rock Painting Ideas
Need some inspiration? Here are a few rock painting ideas to spark your creativity:
5.1. Nature-Inspired Designs
Paint flowers, leaves, trees, or animals on your rocks to bring a touch of nature to your garden or home.
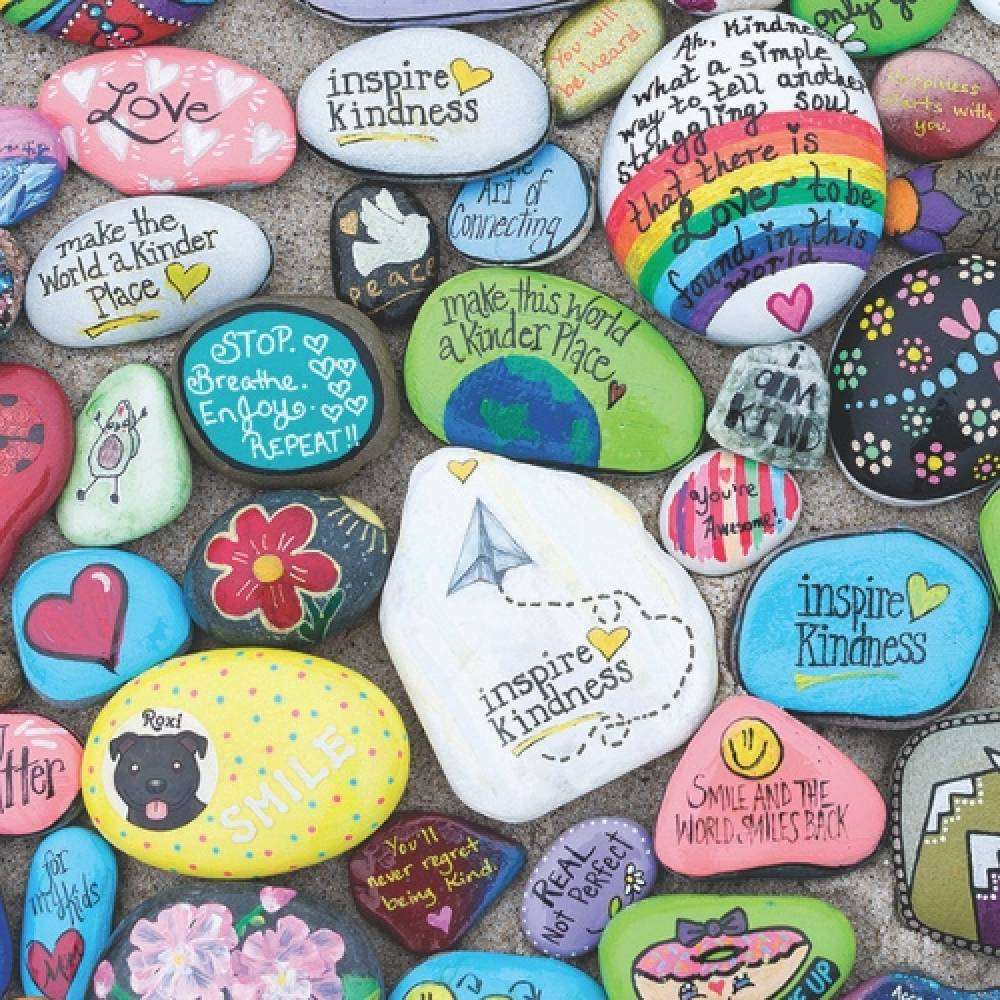
5.2. Inspirational Messages
Write positive affirmations, motivational quotes, or words of encouragement on your rocks to spread kindness and uplift others.
5.3. Geometric Patterns
Create eye-catching designs using geometric shapes, such as circles, squares, triangles, and stripes.
5.4. Cartoon Characters
Paint your favorite cartoon characters on rocks for a fun and whimsical touch.
5.5. Abstract Art
Experiment with abstract designs using bold colors and fluid lines.
6. Where To Find Rocks For Painting
Finding the perfect rocks for painting is easier than you might think. Here are some places to look:
6.1. Local Craft Stores
Craft stores often sell bags of smooth, pre-washed rocks specifically for painting.
6.2. Hardware Stores
Hardware stores may carry decorative stones or pebbles that are suitable for rock art.
6.3. Landscaping Businesses
Landscaping businesses can be a great source for larger rocks and stones.
6.4. Nature
Of course, you can always collect rocks from nature, such as beaches, parks, or your own backyard. Just be sure to check local regulations and avoid taking rocks from protected areas.
7. Sealing Painted Rocks For Outdoor Display
Protecting your painted rocks from the elements is essential for maintaining their beauty and longevity. Here’s how to properly seal your rocks for outdoor display:
7.1. Choosing The Right Sealer
Select a waterproof sealer specifically designed for outdoor use. Mod Podge Outdoor and Krylon Clear Coat are popular choices.
7.2. Application Techniques
Apply the sealer in thin, even coats, following the manufacturer’s instructions. Use a paintbrush for Mod Podge or a spray can for Krylon Clear Coat.
7.3. Drying And Curing Times
Allow the sealer to dry completely between coats and follow the recommended curing time before placing the rocks outdoors.
7.4. Maintenance Tips
Periodically inspect your sealed rocks for any signs of wear or damage. Reapply sealer as needed to maintain their protection.
8. Sharing Your Rock Art With The Community
One of the joys of rock painting is sharing your creations with others. Here are some ways to spread kindness and connect with your community through rock art:
8.1. Hiding Rocks In Public Places
Hide your painted rocks in parks, gardens, or other public places for others to find. This can bring a smile to someone’s face and brighten their day.
8.2. Joining Local Rock Painting Groups
Join a local rock painting group to connect with other artists, share ideas, and participate in community events.
8.3. Social Media
Share photos of your rock art on social media using hashtags like #rockpainting, #kindnessrocks, and #paintedrocks. This can inspire others to get involved and spread positivity.
8.4. Creating A Rock Garden
Create a rock garden in your yard or community space where people can leave and take painted rocks.
9. Addressing Common Rock Painting Challenges
Even experienced rock painters can encounter challenges. Here are some solutions to common problems:
9.1. Paint Not Adhering
If paint is not adhering properly to the rock surface, try cleaning the rocks more thoroughly and applying a primer before painting.
9.2. Colors Fading
To prevent colors from fading, use high-quality paints and seal the rocks with a UV-resistant sealer.
9.3. Paint Cracking
Paint cracking can be caused by applying thick layers of paint or exposing the rocks to extreme temperature changes. Apply thin, even coats of paint and avoid placing the rocks in direct sunlight or freezing temperatures.
9.4. Smudging
To prevent smudging, allow the paint to dry completely before handling or sealing the rocks.
10. Frequently Asked Questions (FAQs) About Rock Painting
10.1. Is rock painting suitable for kids?
Yes, rock painting is a fun and engaging activity for kids. Just be sure to use non-toxic paints and provide adult supervision.
10.2. Can I use Sharpie markers on rocks?
Sharpie markers can be used for adding details to rock art, but they are not as durable as acrylic paint and may fade over time.
10.3. How do I clean painted rocks?
To clean painted rocks, gently wipe them with a damp cloth. Avoid using harsh chemicals or abrasive cleaners.
10.4. Can I sell my painted rocks?
Yes, many people sell their painted rocks at craft fairs, markets, or online.
10.5. What is the best way to display painted rocks?
Painted rocks can be displayed in gardens, flower pots, shelves, or any other creative way you can imagine.
10.6. How do I remove paint from rocks if I make a mistake?
You can remove wet paint with soap and water. For dry paint, try using a paint remover or sanding the rock surface.
10.7. What are some good resources for rock painting inspiration?
Websites like Pinterest, Instagram, and rockpainting101.com offer a wealth of rock painting ideas and inspiration.
10.8. Can I use glitter on my painted rocks?
Yes, glitter can add a fun and sparkly touch to your rock art. Just be sure to seal the glitter in place with a clear coat of sealer.
10.9. How can I make my painted rocks glow in the dark?
Use glow-in-the-dark paint or add glow-in-the-dark accents to your designs.
10.10. Are there any ethical considerations when collecting rocks for painting?
Yes, always be respectful of the environment and avoid taking rocks from protected areas.
Conclusion: Inspiring Kindness Through Rock Art
Choosing the right type of paint for your rock art is essential for creating lasting beauty and spreading kindness in your community. Whether you opt for versatile acrylic paints, precise paint pens, or durable oil-based paints, the key is to select materials that will withstand the elements and showcase your artistic vision. With the right techniques and a little creativity, you can transform ordinary rocks into extraordinary works of art that bring joy and inspiration to others.
Ready to embark on your rock painting journey? Visit Rockscapes.net for even more inspiration, detailed guides, and expert advice on selecting the perfect stones and paints for your next project. Discover a wide array of design ideas, from nature-inspired motifs to uplifting messages, and learn how to seal your creations for lasting beauty. Let rockscapes.net be your partner in transforming ordinary stones into extraordinary expressions of art and kindness. For personalized assistance and to explore our curated selection of rock art supplies, contact us at +1 (480) 965-9011 or visit our location at 1151 S Forest Ave, Tempe, AZ 85281, United States. Let’s create something beautiful together.