Cleaning large rocks can seem challenging, but it’s essential for maintaining the beauty of your landscape; rockscapes.net offers expert tips to simplify this task, ensuring your outdoor space remains stunning. With the right techniques and tools, you can restore and preserve the natural appeal of your rock features, as well as discover various landscaping stones and decorative rocks.
Table of Contents
- Why is Cleaning Large Rocks Important?
- Understanding Different Types of Rocks
- Essential Tools and Materials for Cleaning Large Rocks
- Step-by-Step Guide: How to Clean Large Rocks
- Dealing with Stubborn Stains and Growth on Rocks
- Eco-Friendly Cleaning Solutions for Large Rocks
- Maintaining the Cleanliness of Large Rocks Over Time
- Common Mistakes to Avoid When Cleaning Large Rocks
- Professional Cleaning Services vs. DIY: What’s Best for You?
- FAQ: Cleaning Large Rocks
1. Why is Cleaning Large Rocks Important?
Cleaning large rocks in your landscape is crucial for several reasons, extending beyond mere aesthetics. Regular cleaning maintains their appearance, prevents damage, and supports a healthy outdoor environment.
- Enhancing Aesthetic Appeal: Over time, rocks accumulate dirt, algae, moss, and stains, which dull their natural beauty. Cleaning removes these unsightly elements, revealing the rock’s original color and texture, thereby enhancing the overall look of your landscape. A clean rock feature can significantly uplift the visual appeal of your garden or yard.
- Preventing Damage and Decay: Accumulation of organic matter like leaves and soil can trap moisture against the rock surface. This constant moisture can lead to the growth of mold and mildew, which can slowly erode the rock, especially softer varieties like sandstone. Regular cleaning prevents this moisture buildup and subsequent decay.
- Maintaining Structural Integrity: In rock walls or retaining structures, dirt and vegetation can infiltrate the joints between rocks. This not only weakens the structure but can also cause the rocks to shift or crumble over time. Cleaning these joints and ensuring they are free from debris helps maintain the structural integrity of your rock features.
- Promoting Plant Health: Rocks are often integrated into garden beds and around plants. Dirty rocks can harbor pests and diseases that can spread to nearby plants. Cleaning the rocks reduces the risk of infestation and disease, promoting a healthier environment for your plants to thrive.
- Improving Drainage: Rocks play a vital role in landscape drainage, directing water away from structures and preventing soil erosion. When rocks are covered in dirt and debris, their ability to facilitate drainage is compromised, leading to waterlogged areas and potential damage to your landscape.
- Increasing Property Value: A well-maintained landscape significantly contributes to the curb appeal and overall value of your property. Clean and attractive rock features demonstrate attention to detail and care, making your home more appealing to potential buyers. According to the National Association of Realtors, a well-maintained landscape can increase a home’s value by as much as 5-11%.
- Creating a Safer Environment: Algae and moss growth on rocks can create slippery surfaces, posing a safety hazard, especially on pathways and steps. Cleaning these surfaces regularly reduces the risk of slips and falls, ensuring a safer environment for you, your family, and visitors.
- Discouraging Pest Infestation: Debris around rocks can create a favorable environment for pests such as insects and rodents. Regular cleaning eliminates these hiding places, discouraging pest infestations and protecting your home and garden from potential damage.
- Supporting Biodiversity: Clean rocks can provide a better habitat for beneficial insects and microorganisms that contribute to a healthy ecosystem in your garden. These organisms play a crucial role in nutrient cycling and pest control, supporting the overall biodiversity of your landscape.
- Extending the Lifespan of Your Rocks: Regular cleaning and maintenance can significantly extend the lifespan of your rock features. By preventing damage and decay, you can enjoy the beauty and functionality of your rocks for many years to come, making it a worthwhile investment of your time and effort.
By prioritizing the cleanliness of your large rocks, you not only enhance the aesthetic appeal of your landscape but also protect its structural integrity, promote plant health, and ensure a safer, more enjoyable outdoor environment.
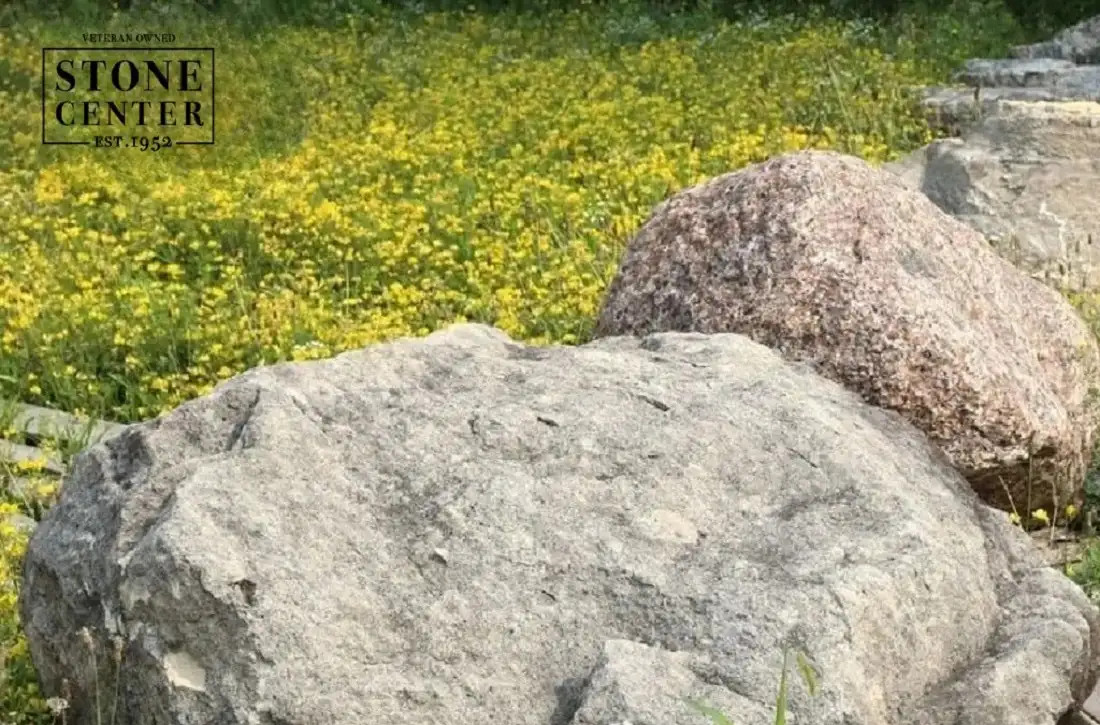
2. Understanding Different Types of Rocks
Knowing the type of rock you’re cleaning is crucial because different rocks react differently to cleaning methods and solutions. Here’s a guide to some common types of rocks used in landscaping and how their properties affect cleaning:
| Rock Type | Description | Porosity | Cleaning Considerations |
|---|---|---|---|
| Granite | A hard, durable igneous rock with visible grains of quartz, feldspar, and mica. | Low | Resistant to most cleaning solutions; can handle pressure washing. |
| Limestone | A sedimentary rock composed mainly of calcium carbonate. Often contains fossils. | High | Porous and can be damaged by acidic cleaners like vinegar. Use gentle, pH-neutral cleaners. |
| Sandstone | A sedimentary rock composed of sand grains cemented together. | High | Very porous and absorbent. Avoid harsh chemicals and high-pressure washing, which can erode the surface. Seal after cleaning to prevent future staining. |
| Slate | A fine-grained metamorphic rock derived from shale. Known for its layered appearance. | Low | Durable and resistant to most cleaning methods. Be cautious with sharp tools that could scratch the surface. |
| River Rock | Smooth, rounded rocks shaped by water currents. Can be various rock types, but often include granite and basalt. | Variable | Generally durable, but check for porous varieties. Mild soap and water or a gentle vinegar solution work well. |
| Fieldstone | Naturally occurring, often irregularly shaped rocks found on the surface of the ground. | Variable | Can be any rock type. Assess each stone individually and adjust cleaning methods accordingly. |
| Quartzite | A metamorphic rock formed from sandstone. Very hard and durable. | Low | Highly resistant to weathering and chemicals. Can withstand vigorous cleaning methods. |
| Basalt | A dark-colored, fine-grained igneous rock. | Low | Durable and resistant to most cleaning solutions. |
| Marble | A metamorphic rock formed from limestone or dolomite. Known for its veined appearance. | Medium | Susceptible to staining and etching from acids. Use pH-neutral cleaners specifically designed for marble. |
| Flagstone | A type of sedimentary rock that is easily split into flat pieces, often used for paving. | Medium | Varies in porosity depending on the type of flagstone. Generally, avoid harsh chemicals and high-pressure washing. |
| Manufactured Stone Veneer | A lightweight concrete product designed to mimic natural stone. | Variable | Follow manufacturer’s instructions. Generally, use mild soap and water and avoid abrasive cleaners or pressure washing, which can damage the surface coating. |
- Porosity: This refers to how much liquid a rock can absorb. Porous rocks like limestone and sandstone are more susceptible to staining and damage from harsh chemicals.
- Hardness: Hardness determines how well a rock resists scratching and abrasion. Softer rocks like sandstone require gentler cleaning methods.
- Chemical Sensitivity: Some rocks, like limestone and marble, are sensitive to acidic cleaners such as vinegar and lemon juice, which can etch or dissolve their surface.
Consider these factors when selecting your cleaning methods and products. Always test a small, inconspicuous area first to ensure the cleaning solution doesn’t damage or discolor the rock. This knowledge will help you choose the safest and most effective cleaning approach for your large rocks, preserving their beauty and longevity.
 Granite rock formation, showcasing its coarse-grained texture and durability, ideal for landscaping.
3. Essential Tools and Materials for Cleaning Large Rocks
Having the right tools and materials on hand makes the task of cleaning large rocks more efficient and effective. Here’s a comprehensive list of essential items to gather before you begin:
Basic Cleaning Tools:
- Garden Hose with Adjustable Nozzle: This is essential for rinsing off loose dirt and debris, as well as for washing away cleaning solutions. An adjustable nozzle allows you to control the water pressure, which is particularly useful for delicate stones.
- Stiff-Bristle Brush or Broom: A stiff brush is ideal for scrubbing away dirt, moss, algae, and other buildup from the surface of the rocks. Choose a brush with durable bristles that can withstand repeated use.
- Soft-Bristle Brush: For more delicate rock surfaces, a soft-bristle brush prevents scratching or damage. This is particularly useful for softer stone types like sandstone or limestone.
- Bucket: A sturdy bucket is necessary for mixing cleaning solutions and carrying water.
- Small Brush or Old Toothbrush: These are perfect for cleaning crevices, cracks, and hard-to-reach areas of the rocks. An old toothbrush is especially useful for detail work.
- Protective Gloves: Protect your hands from harsh cleaning solutions and rough rock surfaces by wearing gloves. Rubber or nitrile gloves are ideal.
- Safety Goggles: Protect your eyes from splashes and debris while cleaning. Safety goggles are especially important when using pressure washers or chemical cleaners.
- Rake or Leaf Blower: Use these tools to remove loose leaves, twigs, and other debris from around the rocks before you begin cleaning.
- Pressure Washer (Optional): A pressure washer can be a powerful tool for cleaning large rocks, but use it with caution. It’s best suited for durable rocks like granite and should be used on a low-pressure setting to avoid damage.
Cleaning Solutions:
- Mild Dish Soap: A general-purpose cleaner that is safe for most rock types. Mix a small amount of dish soap with water to create a gentle cleaning solution.
- White Vinegar: A natural and effective cleaner for removing stains and algae. Mix equal parts white vinegar and water for a versatile cleaning solution.
- Baking Soda: Ideal for tackling stubborn stains. Make a paste by mixing baking soda with water and apply it to the stained area.
- Hydrogen Peroxide: A mild bleaching agent that can help lighten stains on white or light-colored rocks. Use a 3% solution.
- Bleach: Use cautiously as a last resort for stubborn stains and algae. Mix one part bleach with ten parts water and apply sparingly. Always wear protective gear when using bleach.
- Commercial Stone Cleaners: Consider purchasing a commercial stone cleaner specifically formulated for your rock type. These cleaners are designed to be effective yet gentle on stone surfaces.
Additional Materials:
- Drop Cloths or Plastic Sheeting: Protect surrounding plants and surfaces from cleaning solutions by covering them with drop cloths or plastic sheeting.
- Stone Sealer: After cleaning, apply a stone sealer to protect the rocks from future staining and damage. Choose a sealer specifically designed for your rock type.
- Spray Bottle: For applying cleaning solutions to specific areas, a spray bottle is a handy tool.
- Measuring Cups and Spoons: Ensure accurate measurements when mixing cleaning solutions.
- Old Towels or Rags: Use these for wiping down the rocks and drying them after cleaning.
By gathering these essential tools and materials, you’ll be well-prepared to tackle the task of cleaning large rocks and keep your landscape looking its best. Remember to always prioritize safety by wearing protective gear and testing cleaning solutions in an inconspicuous area first.
4. Step-by-Step Guide: How to Clean Large Rocks
Cleaning large rocks effectively involves a systematic approach to ensure thoroughness and prevent damage. Here’s a detailed, step-by-step guide on How To Clean Large Rocks in your landscape:
Step 1: Preparation
- Gather Your Supplies: Assemble all the necessary tools and materials mentioned in the previous section. Having everything within reach will streamline the cleaning process.
- Protect Surrounding Areas: Cover any nearby plants, grass, or other surfaces with drop cloths or plastic sheeting to protect them from cleaning solutions and debris.
- Clear Loose Debris: Use a rake, leaf blower, or broom to remove loose leaves, twigs, dirt, and other debris from around the rocks. This will make the cleaning process more efficient.
Step 2: Initial Rinse
- Rinse the Rocks: Use a garden hose with an adjustable nozzle to rinse the rocks thoroughly. Start at the top and work your way down, allowing the water to flow away from the clean areas. This initial rinse will remove loose dirt and debris, making it easier to identify areas that need more attention.
Step 3: Apply Cleaning Solution
- Mix Your Cleaning Solution: Depending on the type of rock and the extent of the dirt and stains, choose an appropriate cleaning solution. For general cleaning, mix a small amount of mild dish soap with water in a bucket. For tougher stains or algae, use a solution of equal parts white vinegar and water.
- Apply the Solution: Dip a stiff-bristle brush into the cleaning solution and scrub the surface of the rocks. Apply the solution generously, ensuring that all areas are covered. For hard-to-reach areas, use a small brush or old toothbrush.
- Let the Solution Sit (Optional): For stubborn stains, allow the cleaning solution to sit on the rocks for 10-15 minutes before scrubbing. This will give the solution time to penetrate and loosen the dirt and stains.
Step 4: Scrubbing
- Scrub the Rocks: Use a stiff-bristle brush to scrub the surface of the rocks vigorously. Pay special attention to areas with visible dirt, stains, moss, or algae. For delicate surfaces, use a soft-bristle brush to avoid scratching.
- Clean Crevices and Hard-to-Reach Areas: Use a small brush or old toothbrush to clean crevices, cracks, and other hard-to-reach areas. These areas often accumulate dirt and debris, so thorough cleaning is essential.
Step 5: Rinsing
- Rinse Thoroughly: After scrubbing, rinse the rocks thoroughly with a garden hose to remove all traces of the cleaning solution and loosened dirt. Again, start at the top and work your way down to ensure that everything is washed away.
- Check for Residue: Inspect the rocks carefully to ensure that no cleaning solution or dirt residue remains. If necessary, rinse again.
Step 6: Drying
- Allow to Air Dry: The best way to dry the rocks is to allow them to air dry completely. This may take several hours, depending on the weather and the porosity of the rocks.
- Speed Up Drying (Optional): If you need to speed up the drying process, use a leaf blower or old towels to remove excess moisture.
Step 7: Sealing (Optional)
- Apply Stone Sealer: Once the rocks are completely dry, consider applying a stone sealer to protect them from future staining and damage. Choose a sealer specifically designed for your rock type and follow the manufacturer’s instructions.
- Allow to Cure: Allow the sealer to cure completely before exposing the rocks to water or other elements. This may take 24-48 hours, depending on the product.
Additional Tips:
- Work in Sections: If you have a large area of rocks to clean, work in sections to make the task more manageable.
- Wear Protective Gear: Always wear protective gloves and safety goggles to protect your hands and eyes from cleaning solutions and debris.
- Choose the Right Time: Avoid cleaning rocks in direct sunlight, as the cleaning solution may dry too quickly and leave residue.
- Dispose of Cleaning Solutions Properly: Dispose of any leftover cleaning solutions according to local regulations.
- Consider Professional Help: If you have a large or complex rock feature, or if you are uncomfortable cleaning the rocks yourself, consider hiring a professional cleaning service.
By following these steps, you can effectively clean large rocks in your landscape, restoring their natural beauty and protecting them from future damage. Regular cleaning and maintenance will keep your rock features looking their best for years to come.
5. Dealing with Stubborn Stains and Growth on Rocks
Even with regular cleaning, large rocks can develop stubborn stains and unwanted growth like algae, moss, and lichens. Here are some effective methods for tackling these challenges:
1. Identifying the Stain or Growth:
- Algae: Typically appears as green or black slimy patches, often in damp or shaded areas.
- Moss: Forms a soft, green carpet-like growth on the rock surface.
- Lichens: Crusty or leafy growths that come in various colors, including gray, green, and yellow. They are tightly adhered to the rock surface.
- Rust Stains: Orange or brown discoloration caused by iron oxidation.
- Hard Water Stains: White, chalky deposits left by mineral-rich water.
- Organic Stains: Dark stains caused by decaying leaves, bird droppings, or other organic matter.
2. Solutions for Specific Problems:
-
Algae Removal:
- Vinegar Solution: Mix equal parts white vinegar and water in a spray bottle. Spray the affected areas thoroughly and let it sit for 15-20 minutes. Scrub with a stiff-bristle brush and rinse well.
- Bleach Solution (Use with Caution): Mix one part bleach with ten parts water. Apply to the algae-covered areas, let it sit for 10-15 minutes, and scrub with a brush. Rinse thoroughly. Protect surrounding plants and wear protective gear.
- Commercial Algaecides: Follow the manufacturer’s instructions. Ensure the product is safe for use around plants and animals.
-
Moss Removal:
- Scrubbing: Use a stiff-bristle brush and a solution of mild dish soap and water to scrub away the moss. Rinse thoroughly.
- Boiling Water: Pour boiling water over the moss to kill it. Be careful not to splash the hot water on yourself or nearby plants.
- Moss Killer Products: Apply a commercial moss killer according to the manufacturer’s instructions.
-
Lichen Removal:
- Scrubbing: Lichens are tightly adhered, so vigorous scrubbing is necessary. Use a stiff-bristle brush and a solution of mild dish soap and water.
- Ammonia Solution: Mix one part ammonia with three parts water. Apply to the lichen-covered areas, let it sit for a few hours, and then scrub with a brush. Rinse thoroughly.
- Patience: Lichens can be very difficult to remove completely, so be prepared to repeat the process several times.
-
Rust Stain Removal:
- Lemon Juice and Salt: Sprinkle salt over the rust stain and then squeeze lemon juice onto it. Let it sit for a few hours, then scrub with a brush and rinse.
- Commercial Rust Removers: Follow the manufacturer’s instructions carefully. Test the product on a small, inconspicuous area first to ensure it doesn’t damage the rock.
-
Hard Water Stain Removal:
- Vinegar Solution: Apply a solution of equal parts white vinegar and water to the hard water stains. Let it sit for 15-20 minutes, then scrub with a brush and rinse.
- Commercial Hard Water Stain Removers: Follow the manufacturer’s instructions.
-
Organic Stain Removal:
- Baking Soda Paste: Mix baking soda with water to create a thick paste. Apply the paste to the organic stain, let it dry completely, and then scrub with a brush and rinse.
- Hydrogen Peroxide: Apply a 3% hydrogen peroxide solution to the stain, let it sit for 10-15 minutes, and then scrub with a brush and rinse.
3. Additional Tips:
- Pressure Washing: A pressure washer can be effective for removing stubborn stains and growth, but use it with caution. Start with a low-pressure setting and gradually increase as needed. Avoid using a pressure washer on delicate or porous rocks.
- Steam Cleaning: A steam cleaner can be a gentle and effective way to remove stains and growth without using chemicals.
- Repeat Treatments: Stubborn stains and growth may require multiple treatments. Be patient and persistent.
- Prevention: After cleaning, apply a stone sealer to help prevent future staining and growth. Regularly inspect your rocks and address any issues promptly.
By identifying the specific type of stain or growth and using the appropriate cleaning methods, you can effectively restore the beauty of your large rocks and keep them looking their best.
6. Eco-Friendly Cleaning Solutions for Large Rocks
For homeowners keen on maintaining an environmentally conscious approach, eco-friendly cleaning solutions offer a safe and effective way to clean large rocks without harming plants, wildlife, or the environment. Here are some excellent eco-friendly options:
-
White Vinegar:
- Effectiveness: White vinegar is a versatile and effective cleaner for removing algae, moss, hard water stains, and general dirt and grime. Its acidity helps to break down mineral deposits and kill unwanted growth.
- How to Use: Mix equal parts white vinegar and water in a spray bottle or bucket. Apply to the rocks, let it sit for 15-20 minutes, then scrub with a stiff-bristle brush and rinse thoroughly.
- Benefits: Non-toxic, biodegradable, and safe for plants and animals when used in diluted form. It’s also an affordable option.
-
Baking Soda:
- Effectiveness: Baking soda is a mild abrasive and deodorizer that can help remove stubborn stains and grime. It’s particularly effective for organic stains and general cleaning.
- How to Use: Make a paste by mixing baking soda with water. Apply the paste to the stained area, let it dry completely, then scrub with a brush and rinse.
- Benefits: Non-toxic, biodegradable, and gentle on surfaces. It’s also effective at neutralizing odors.
-
Lemon Juice:
- Effectiveness: Lemon juice is a natural acid that can help remove rust stains and lighten other types of discoloration.
- How to Use: Squeeze lemon juice directly onto the stain, sprinkle with salt, and let it sit for a few hours. Scrub with a brush and rinse thoroughly.
- Benefits: Non-toxic, biodegradable, and has a pleasant scent.
-
Castile Soap:
- Effectiveness: Castile soap is a gentle, plant-based soap that can be used for general cleaning. It’s effective for removing dirt and grime without harsh chemicals.
- How to Use: Mix a small amount of castile soap with water in a bucket. Apply to the rocks, scrub with a brush, and rinse thoroughly.
- Benefits: Biodegradable, non-toxic, and gentle on surfaces. It’s also available in various scents.
-
Hydrogen Peroxide:
- Effectiveness: Hydrogen peroxide is a mild bleaching agent that can help lighten stains and kill mold and mildew.
- How to Use: Use a 3% hydrogen peroxide solution. Apply to the stained area, let it sit for 10-15 minutes, then scrub with a brush and rinse.
- Benefits: Breaks down into water and oxygen, making it an environmentally friendly option.
-
Enzyme Cleaners:
- Effectiveness: Enzyme cleaners use natural enzymes to break down organic matter, such as algae, moss, and mildew.
- How to Use: Follow the manufacturer’s instructions. Typically, you spray the cleaner onto the affected area, let it sit for a specified time, and then rinse.
- Benefits: Biodegradable, non-toxic, and effective at removing organic stains and growth.
Tips for Using Eco-Friendly Cleaners:
- Test First: Always test the cleaning solution on a small, inconspicuous area of the rock to ensure it doesn’t cause any damage or discoloration.
- Dilute Properly: Follow the recommended dilution ratios to avoid using too much cleaner, which can harm plants and wildlife.
- Rinse Thoroughly: Ensure you rinse the rocks thoroughly after cleaning to remove any residue.
- Avoid Direct Sunlight: Clean the rocks on a cloudy day or in the early morning or late afternoon to prevent the cleaning solution from drying too quickly.
- Protect Plants: Cover nearby plants with drop cloths or plastic sheeting to protect them from the cleaning solution.
- Dispose of Properly: Dispose of any leftover cleaning solution according to local regulations.
By using these eco-friendly cleaning solutions, you can keep your large rocks looking their best while minimizing your impact on the environment.
7. Maintaining the Cleanliness of Large Rocks Over Time
Maintaining the cleanliness of large rocks in your landscape requires consistent effort and proactive measures. Here are some effective strategies to keep your rocks looking their best over time:
-
Regular Inspections:
- Frequency: Conduct regular inspections of your rocks, ideally every month or after significant weather events.
- What to Look For: Check for any signs of dirt buildup, algae growth, moss, lichens, stains, or debris accumulation. Early detection allows for easier and more effective cleaning.
-
Remove Debris Regularly:
- Method: Use a rake, leaf blower, or broom to remove loose leaves, twigs, dirt, and other debris from around the rocks.
- Frequency: Do this weekly or as needed, especially during the fall when leaves are falling.
-
Routine Rinsing:
- Method: Use a garden hose with an adjustable nozzle to rinse the rocks periodically. This helps to remove loose dirt and prevent buildup.
- Frequency: Rinse the rocks every few weeks or as needed, depending on the weather and environmental conditions.
-
Prevent Water Accumulation:
- Ensure Proper Drainage: Make sure that the area around the rocks has proper drainage to prevent water from pooling. Standing water can promote algae and moss growth.
- Direct Water Away: If necessary, adjust the landscape to direct water away from the rocks.
-
Trim Overhanging Vegetation:
- Why: Overhanging trees and shrubs can drop leaves, twigs, and sap onto the rocks, contributing to dirt buildup and stains.
- Action: Trim back any overhanging vegetation to reduce the amount of debris that falls onto the rocks.
-
Apply a Stone Sealer:
- Benefits: A stone sealer can help protect the rocks from staining, dirt, and algae growth. It also makes cleaning easier.
- How to Choose: Choose a sealer specifically designed for your rock type.
- Frequency: Reapply the sealer every 1-3 years, or as recommended by the manufacturer.
-
Use Weed Barriers:
- Why: Weeds can grow up around the rocks, making them look unkempt and contributing to dirt buildup.
- Action: Install a weed barrier fabric underneath the rocks to prevent weed growth.
-
Address Stains and Growth Promptly:
- Action: As soon as you notice any stains or growth, address them promptly using the appropriate cleaning methods.
- Benefits: Early intervention prevents the problem from becoming more severe and difficult to remove.
-
Consider Professional Cleaning:
- When: If you have a large or complex rock feature, or if you are unable to maintain the rocks yourself, consider hiring a professional cleaning service.
- Benefits: Professionals have the tools and expertise to clean your rocks effectively and safely.
-
Be Mindful of Surrounding Activities:
- Avoid Pollutants: Be mindful of activities that could contribute to dirt or stains on the rocks, such as parking cars nearby, using fertilizers or pesticides, or allowing pets to roam freely.
- Take Precautions: Take precautions to minimize the impact of these activities on the rocks.
By implementing these strategies, you can maintain the cleanliness of your large rocks over time and enjoy their beauty for years to come. Regular maintenance not only keeps your rocks looking their best but also helps to prevent damage and prolong their lifespan.
8. Common Mistakes to Avoid When Cleaning Large Rocks
Cleaning large rocks may seem straightforward, but several common mistakes can lead to damage, ineffective cleaning, or even safety hazards. Here are some key errors to avoid:
-
Using Harsh Chemicals:
- Why it’s a Mistake: Harsh chemicals like bleach, muriatic acid, or strong solvents can damage or discolor certain types of rocks, especially porous ones like limestone or sandstone.
- What to Do Instead: Opt for gentler cleaning solutions like mild dish soap, white vinegar, or baking soda. Always test the cleaner on a small, inconspicuous area first.
-
Applying High-Pressure Washing to Delicate Rocks:
- Why it’s a Mistake: High-pressure washing can erode the surface of delicate rocks like sandstone or manufactured stone veneer. It can also damage mortar joints in rock walls or pavers.
- What to Do Instead: Use a garden hose with an adjustable nozzle on a low-pressure setting. For stubborn stains, use a stiff-bristle brush and gentle cleaning solution.
-
Ignoring the Rock Type:
- Why it’s a Mistake: Different types of rocks have different properties and react differently to cleaning methods and solutions.
- What to Do Instead: Identify the type of rock you’re cleaning and choose appropriate cleaning methods and products. Research the specific needs of your rock type before you begin.
-
Neglecting Safety Precautions:
- Why it’s a Mistake: Cleaning solutions can be harmful if they come into contact with your skin or eyes. Slippery surfaces can also pose a safety hazard.
- What to Do Instead: Wear protective gloves and safety goggles to protect your skin and eyes. Ensure the area is well-ventilated. Use caution on wet surfaces to prevent slips and falls.
-
Cleaning in Direct Sunlight:
- Why it’s a Mistake: Cleaning solutions can dry too quickly in direct sunlight, leaving residue or causing discoloration.
- What to Do Instead: Clean the rocks on a cloudy day or in the early morning or late afternoon when the sun is less intense.
-
Using Abrasive Scrubbing Tools:
- Why it’s a Mistake: Abrasive scrubbing tools like steel wool or scouring pads can scratch or damage the surface of the rocks.
- What to Do Instead: Use a stiff-bristle brush made of nylon or other non-abrasive materials. For delicate surfaces, use a soft-bristle brush.
-
Failing to Rinse Thoroughly:
- Why it’s a Mistake: Leaving cleaning solution residue on the rocks can attract dirt, promote algae growth, or damage the rock surface.
- What to Do Instead: Rinse the rocks thoroughly with a garden hose after cleaning to remove all traces of the cleaning solution.
-
Overlooking the Surrounding Environment:
- Why it’s a Mistake: Cleaning solutions can harm nearby plants, grass, or other surfaces if they are not protected.
- What to Do Instead: Cover nearby plants and surfaces with drop cloths or plastic sheeting to protect them from cleaning solutions.
-
Ignoring the Weather:
- Why it’s a Mistake: Cleaning rocks before a heavy rainstorm can wash away the cleaning solution and render your efforts ineffective. Cleaning during freezing temperatures can damage the rocks.
- What to Do Instead: Check the weather forecast before cleaning the rocks and choose a day with mild temperatures and no rain in the forecast.
-
Skipping Preventative Measures:
- Why it’s a Mistake: Failing to take preventative measures can lead to frequent and difficult cleaning tasks.
- What to Do Instead: Apply a stone sealer to protect the rocks from staining and growth. Regularly remove debris and trim overhanging vegetation to minimize dirt buildup.
By avoiding these common mistakes, you can clean your large rocks safely and effectively, preserving their beauty and longevity.
9. Professional Cleaning Services vs. DIY: What’s Best for You?
Deciding whether to hire a professional cleaning service or tackle the job of cleaning large rocks yourself depends on various factors, including the size and complexity of the rock feature, your budget, your physical capabilities, and your comfort level with DIY projects. Here’s a breakdown to help you make the best decision:
DIY Cleaning:
Pros:
- Cost-Effective: DIY cleaning is typically more affordable than hiring a professional service, as you only need to pay for cleaning supplies and tools.
- Control: You have complete control over the cleaning methods and products used, allowing you to choose eco-friendly options or those specifically suited for your rock type.
- Flexibility: You can clean the rocks at your own pace and schedule, without having to coordinate with a service provider.
- Personal Satisfaction: Completing the job yourself can provide a sense of accomplishment and satisfaction.
Cons:
- Time-Consuming: Cleaning large rocks can be a time-consuming and labor-intensive task, especially if the rocks are heavily soiled or stained.
- Physical Effort: The job can require significant physical effort, including scrubbing, lifting, and bending, which may not be suitable for individuals with mobility issues or health concerns.
- Risk of Damage: If you’re not familiar with the proper cleaning methods or products, you could potentially damage the rocks.
- Limited Equipment: You may not have access to specialized equipment like pressure washers or steam cleaners, which can make the job more difficult.
Professional Cleaning Services:
Pros:
- Expertise: Professional cleaners have the knowledge and experience to clean rocks effectively and safely, using the right methods and products for your rock type.
- Efficiency: Professionals can complete the job much faster than you could yourself, thanks to their experience and specialized equipment.
- Equipment: Professional services have access to specialized equipment like pressure washers, steam cleaners, and industrial-strength cleaning solutions.
- Reduced Effort: Hiring a professional service eliminates the need for you to spend time and effort on the job, freeing you up for other tasks.
- Safety: Professionals are trained to handle cleaning solutions and equipment safely, reducing the risk of accidents or injuries.
- Guaranteed Results: Many professional services offer guarantees on their work, ensuring that you’re satisfied with the results.
Cons:
- Cost: Professional cleaning services can be more expensive than DIY cleaning, especially for large or complex rock features.
- Scheduling: You’ll need to coordinate with the service provider’s schedule, which may not always be convenient.
- Less Control: You may have less control over the cleaning methods and products used, although you can discuss your preferences with the service provider.
- Finding a Reputable Service: It can be challenging to find a reputable and reliable cleaning service, so it’s important to do your research and read reviews.
When to Choose DIY:
- You have a small or moderately sized rock feature.
- The rocks are not heavily soiled or stained.
- You have the time and physical ability to do the job yourself.
- You’re comfortable with DIY projects and have some experience with cleaning.
- You want to save money and have control over the cleaning methods and products used.
When to Choose Professional Cleaning:
- You have a large or complex rock feature.
- The rocks are heavily soiled or stained.
- You don’t have the time or physical ability to do the job yourself.
- You’re not comfortable with DIY projects or don’t have experience with cleaning.
- You want guaranteed results and are willing