Engraving river rocks unlocks a world of artistic possibilities, transforming ordinary stones into personalized keepsakes and unique décor. At rockscapes.net, we provide the expertise and inspiration you need to master this craft. This guide explores various engraving techniques, empowering you to create stunning designs on river rocks and other stones. Discover how to elevate your DIY projects and landscaping with the timeless beauty of engraved stones.
1. Understanding the Art of River Rock Engraving
River rock engraving involves etching designs, text, or patterns onto the surface of smooth, rounded stones found in rivers and streams. This process combines artistic skill with technical know-how, resulting in personalized and visually appealing creations. Let’s explore the nuances of this craft.
1.1 Why Engrave River Rocks?
River rocks offer a unique canvas for artistic expression. Their smooth surfaces and natural variations make them ideal for engraving. The appeal of engraved river rocks lies in:
- Personalization: Engrave names, dates, or meaningful quotes to create personalized gifts or mementos.
- Decoration: Add unique touches to your home and garden décor with custom-engraved stones.
- Craft Projects: Incorporate engraved rocks into various craft projects, such as mosaics, garden markers, and decorative displays.
- Remembrance: Use engraved rocks as memorial stones or keepsakes to honor loved ones or special occasions.
1.2 Essential Considerations Before You Start
Before embarking on your river rock engraving journey, keep the following points in mind:
- Stone Selection: Choose river rocks with smooth, even surfaces for optimal engraving results.
- Design Planning: Plan your design in advance, considering the size and shape of the rock.
- Tool Selection: Select the appropriate engraving tools based on your skill level and desired outcome.
- Safety Precautions: Always wear safety goggles and a dust mask to protect yourself from flying debris.
1.3 Safety First: Protecting Yourself During Engraving
Engraving river rocks can create dust and small particles that can be harmful if inhaled or get into your eyes. Prioritize safety by:
- Wearing Safety Goggles: Protect your eyes from flying debris.
- Using a Dust Mask: Prevent inhalation of stone dust.
- Working in a Well-Ventilated Area: Ensure proper air circulation to minimize dust exposure.
- Wearing Gloves: Protect your hands from sharp edges and potential abrasions.
2. Methods for Engraving River Rocks: A Detailed Comparison
There are several methods for engraving river rocks, each with its own advantages and disadvantages. Here’s a detailed comparison:
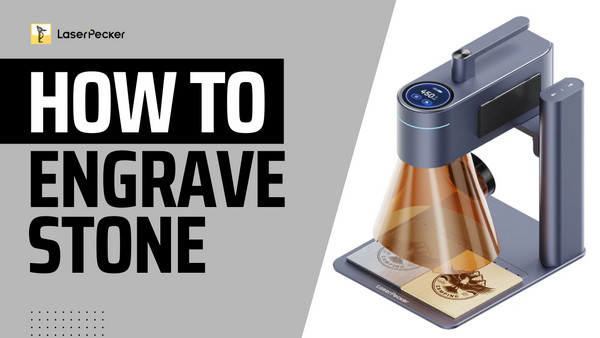
2.1 Laser Engraving: Precision and Detail
Laser engraving uses a concentrated beam of light to etch designs onto the surface of the stone. This method offers precision, durability, and the ability to create intricate and detailed designs.
2.1.1 Tools Needed for Laser Engraving
- Laser Engraving Machine: Choose a laser engraving machine suitable for stone engraving.
- Laser Engraving Software: Use design software compatible with the laser engraving machine.
- River Rocks: Select smooth, flat river rocks for engraving.
- Protective Gear: Wear safety goggles and gloves.
- Cleaning Materials: Use isopropyl alcohol, water, and a soft cloth.
2.1.2 The Laser Engraving Process: Step-by-Step
- Design Preparation: Create or import your design into the laser engraving software. Adjust the dimensions and settings.
- Stone Preparation: Clean the stone surface thoroughly and place it securely in the machine.
- Machine Setup: Configure laser settings such as power, speed, and resolution.
- Testing and Calibration: Perform a test engraving to verify settings.
- Engraving: Start the engraving process and monitor for any issues.
- Post-Engraving Care: Remove the stone and clean the engraved area.
- Inspection and Finishing: Inspect the design and apply sealant or polish if desired.
2.1.3 Advantages of Laser Engraving
- High Precision: Creates intricate and detailed designs with accuracy.
- Durability: Engravings are long-lasting and resistant to wear.
- Versatility: Suitable for various types of stones and designs.
- Automation: Allows for automated and repeatable engraving processes.
2.1.4 Disadvantages of Laser Engraving
- High Initial Cost: Laser engraving machines can be expensive.
- Technical Expertise: Requires knowledge of laser engraving software and machine operation.
- Safety Concerns: Lasers can be hazardous if not used properly.
- Material Limitations: Some stones may not be suitable for laser engraving.
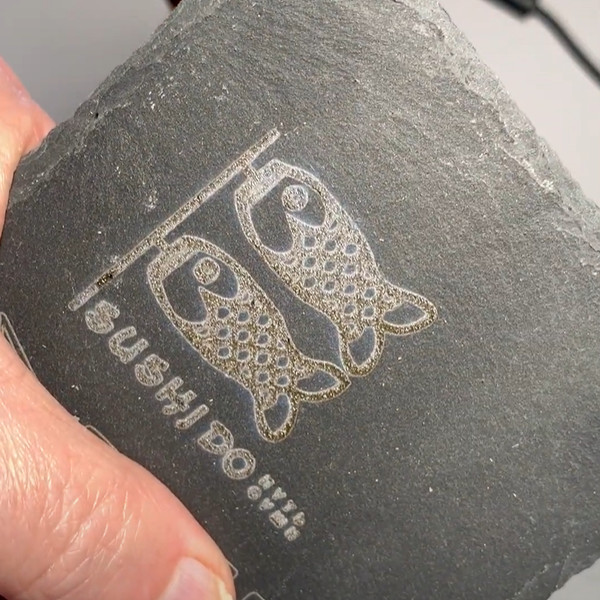
 Laser engraved river rock
2.2 Dremel Engraving: Versatility and Accessibility
Engraving stone using a Dremel tool offers a versatile and accessible method to create designs on various types of stones. This technique provides a hands-on approach, allowing for artistic expression and customization.
2.2.1 Tools Needed for Dremel Engraving
- Dremel Rotary Tool: Select a Dremel tool with variable speed settings.
- Engraving Bits: Use carbide or diamond-tipped engraving bits.
- Safety Gear: Wear safety goggles and a dust mask.
- River Rocks: Choose smooth river rocks for engraving.
- Stabilization: Use clamps to hold the stone in place.
- Cleaning Materials: Have water, a soft cloth, and a brush available.
2.2.2 Step-by-Step Guide to Dremel Engraving
- Design Preparation: Sketch or transfer your design onto the stone surface.
- Bit Selection: Choose an appropriate engraving bit.
- Stone Preparation: Clean the stone and securely fasten it.
- Dremel Setup: Insert the bit and adjust the speed settings.
- Engraving: Trace the design outlines lightly, maintaining a steady hand.
- Detailing: Work on intricate details by changing the bit if necessary.
- Post-Engraving Care: Wipe the stone surface with a damp cloth.
- Finishing: Apply sealant or polish if desired.
2.2.3 Advantages of Dremel Engraving
- Affordability: Dremel tools are relatively inexpensive.
- Versatility: Suitable for various materials and designs.
- Portability: Dremel tools are compact and easy to transport.
- Ease of Use: Relatively simple to learn and operate.
2.2.4 Disadvantages of Dremel Engraving
- Lower Precision: Less precise compared to laser engraving.
- Manual Operation: Requires a steady hand and manual control.
- Time-Consuming: Can be slower than laser engraving.
- Bit Wear: Engraving bits can wear out quickly, requiring frequent replacement.
 River rock engraving with Dremel
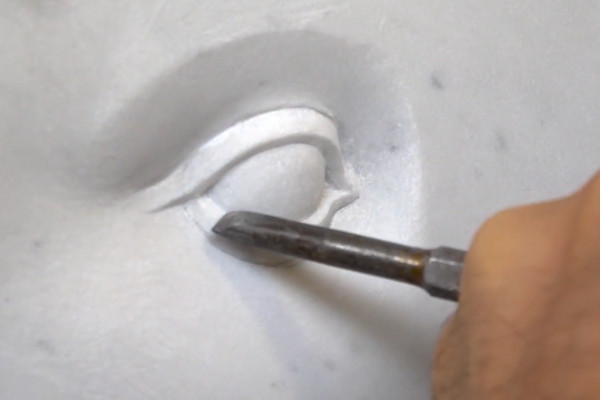
2.3 Hand Engraving: Traditional Craftsmanship
Hand engraving on stone is a traditional technique that allows artisans to create designs using manual tools. This method offers a hands-on approach, providing a unique level of craftsmanship.
2.3.1 Essential Tools for Hand Engraving
- Chisels: Use various sizes and shapes of chisels with carbide or steel tips.
- Hammers or Mallets: Used to strike the chisels.
- Safety Gear: Wear safety goggles, gloves, and a dust mask.
- River Rocks: Choose stones suitable for hand engraving.
- Cleaning Materials: Have water, a soft cloth, and a brush available.
2.3.2 The Art of Hand Engraving: A Step-by-Step Approach
- Design Preparation: Sketch or transfer the design onto the stone surface.
- Chisel Selection: Choose appropriate chisels based on the design complexity.
- Stone Preparation: Ensure the stone surface is clean and position it securely.
- Engraving: Hold the chisel at a slight angle and use controlled strikes with the hammer.
- Detailing: Work on intricate details using smaller chisels.
- Cleaning: Clean the stone surface periodically.
- Post-Engraving Care: Clean the stone thoroughly and apply sealant or polish if desired.
2.3.3 Advantages of Hand Engraving
- Traditional Craftsmanship: Offers a unique, handcrafted aesthetic.
- No Electricity Required: Can be done anywhere without power.
- Fine Control: Allows for precise control over each stroke.
- Low Equipment Cost: Basic tools are relatively inexpensive.
2.3.4 Disadvantages of Hand Engraving
- High Skill Level: Requires significant skill and practice.
- Time-Consuming: Can be very slow and labor-intensive.
- Physical Effort: Demands physical strength and endurance.
- Limited Detail: Difficult to achieve highly intricate designs.
 Hand engraved river rock
3. Choosing the Right River Rocks for Engraving
Selecting the right river rocks is crucial for successful engraving. Consider the following factors:
3.1 Size and Shape: Finding the Perfect Canvas
- Size: Choose rocks that are large enough to accommodate your design.
- Shape: Opt for rocks with smooth, flat surfaces for easier engraving.
- Consistency: Look for rocks with a consistent shape to ensure uniformity in your project.
3.2 Smoothness and Texture: Ensuring Optimal Results
- Smoothness: Smooth surfaces are easier to engrave and produce cleaner lines.
- Texture: Avoid rocks with excessive texture, as they can be difficult to work with.
- Evenness: Ensure the surface is even to prevent inconsistencies in the engraving depth.
3.3 Color and Composition: Enhancing Your Design
- Color: Choose rocks with colors that complement your design.
- Composition: Opt for rocks with a consistent composition to ensure uniform engraving results.
- Natural Variations: Embrace natural variations in color and texture to add character to your engravings.
3.4 Sourcing Your River Rocks: Where to Find the Best Stones
- Local Rivers and Streams: Collect your own river rocks from local sources (check local regulations).
- Landscaping Suppliers: Purchase river rocks from landscaping suppliers or garden centers.
- Craft Stores: Find smaller river rocks at craft stores.
- Online Retailers: Buy river rocks from online retailers for convenience.
4. Design Ideas for River Rock Engraving: Inspiration and Creativity
Unleash your creativity with these design ideas for river rock engraving:
4.1 Inspirational Quotes: Words to Live By
Engrave inspirational quotes on river rocks to create uplifting and motivational pieces:
- “Believe in yourself”
- “Never give up”
- “Dream big”
- “Stay positive”
- “Be the change”
4.2 Nature-Inspired Motifs: Bringing the Outdoors In
Capture the beauty of nature with these nature-inspired designs:
- Leaves
- Flowers
- Trees
- Animals
- Landscapes
4.3 Personalized Names and Dates: Cherished Memories
Create personalized keepsakes by engraving names and dates on river rocks:
- Birthdays
- Anniversaries
- Weddings
- Graduations
- Memorials
4.4 Geometric Patterns: Modern and Stylish
Add a modern touch with geometric patterns:
- Triangles
- Squares
- Circles
- Abstract Designs
- Mandalas
4.5 Custom Illustrations: Unique and Artistic
Showcase your artistic talent with custom illustrations:
- Portraits
- Cartoons
- Logos
- Symbols
- Abstract Art
5. Engraving River Rocks: Detailed Techniques
Mastering engraving techniques ensures the best results. Here are some detailed techniques for engraving river rocks:
5.1 Laser Engraving Techniques
Laser engraving uses a precise laser beam to etch designs onto river rocks.
5.1.1 Setting Up the Laser Engraver
Proper setup is crucial for achieving optimal engraving results.
- Calibrating the Laser: Adjust the laser settings based on the type of river rock.
- Focusing the Laser: Ensure the laser is accurately focused on the rock surface for precision.
- Software Settings: Use the appropriate software settings to control power and speed.
5.1.2 Engraving Process
Engrave your designs smoothly and effectively.
- Test Engraving: Perform a test engraving on a spare rock to confirm settings.
- Monitoring the Engraving: Closely observe the engraving process for any issues.
- Adjusting Settings: Make real-time adjustments to the laser settings as needed.
5.2 Dremel Engraving Techniques
Dremel engraving uses a rotary tool to carve designs into river rocks.
5.2.1 Selecting the Right Bits
Choosing the correct bits is essential for detail and precision.
- Diamond-Tipped Bits: Ideal for hard stones like granite.
- Carbide Bits: Best for softer stones like limestone.
- Shaped Bits: Use different shapes for unique design effects.
5.2.2 Hand Control and Pressure
Maintain steady hand control for accurate engraving.
- Consistent Pressure: Apply even pressure to avoid mistakes.
- Steady Hand: Keep your hand steady for clean lines.
- Overlapping Strokes: Use overlapping strokes to create depth and texture.
 Dremel engraving in action
5.3 Hand Engraving Techniques
Hand engraving involves using chisels and hammers to manually carve designs.
5.3.1 Choosing Chisels
Select various sizes and shapes for different effects.
- Pointed Chisels: For fine details and intricate lines.
- Flat Chisels: For removing larger areas of stone.
- Rounded Chisels: For creating curved lines and shapes.
5.3.2 Hammering Techniques
Control the force and angle for precise results.
- Controlled Strikes: Use gentle, controlled strikes to avoid damaging the stone.
- Angle of Chisel: Adjust the angle to achieve different depths and effects.
- Consistent Rhythm: Maintain a steady rhythm for even engraving.
6. Enhancing Your Engraved River Rocks: Finishing Touches
Adding finishing touches can enhance the appearance and durability of your engraved river rocks:
6.1 Cleaning and Polishing: Bringing Out the Shine
- Cleaning: Remove dust and debris with a soft brush and water.
- Polishing: Use a stone polishing compound to enhance the shine.
- Sealing: Apply a sealant to protect the engraving and enhance its appearance.
6.2 Sealing and Protecting: Ensuring Longevity
- Type of Sealant: Choose a sealant specifically designed for stone.
- Application: Apply the sealant evenly, following the manufacturer’s instructions.
- Drying Time: Allow the sealant to dry completely before handling the rocks.
6.3 Painting and Coloring: Adding Visual Appeal
- Type of Paint: Use acrylic paints or stone-specific paints.
- Application: Apply the paint carefully with a fine brush.
- Sealing: Seal the painted areas to protect the color and prevent fading.
6.4 Displaying Your Engraved Rocks: Showcasing Your Art
- Garden Décor: Place engraved rocks in your garden as decorative accents.
- Home Décor: Use engraved rocks as paperweights, shelf decorations, or table centerpieces.
- Gifts: Give engraved rocks as personalized gifts for friends and family.
- Craft Projects: Incorporate engraved rocks into mosaics, jewelry, or other craft projects.
7. Troubleshooting Common Engraving Problems: Solutions and Tips
Even with careful preparation, you may encounter some common engraving problems. Here are some solutions and tips:
7.1 Chipping and Cracking: Prevention and Repair
- Prevention: Use gentle pressure and avoid excessive force.
- Repair: Use stone adhesive to repair small chips or cracks.
- Reinforcement: Apply a sealant to reinforce the stone and prevent further damage.
7.2 Uneven Engraving Depth: Achieving Consistency
- Consistent Pressure: Apply consistent pressure while engraving.
- Level Surface: Ensure the stone is placed on a level surface.
- Machine Calibration: Calibrate your engraving machine for consistent results.
7.3 Blurred or Fuzzy Lines: Enhancing Clarity
- Sharp Bits: Use sharp engraving bits for clean lines.
- Proper Focus: Ensure the laser or Dremel is properly focused.
- Cleaning: Clean the stone surface regularly to remove debris.
7.4 Uneven Surfaces: Addressing Irregularities
- Stone Selection: Choose stones with smooth, even surfaces.
- Sanding: Sand down uneven areas before engraving.
- Stabilization: Use shims to stabilize the stone during engraving.
8. River Rock Engraving Ideas for Different Occasions
River rock engravings make excellent personalized gifts and decorations for various occasions. Here are some ideas:
8.1 Weddings: Celebrating Love
- Engrave the couple’s names and wedding date.
- Incorporate romantic quotes or symbols.
- Create wedding favors or table decorations.
8.2 Birthdays: Personalized Greetings
- Engrave the recipient’s name and birthdate.
- Add birthday wishes or a special message.
- Create personalized gifts or party favors.
8.3 Anniversaries: Remembering Milestones
- Engrave the couple’s names and anniversary date.
- Include a meaningful quote or symbol of love.
- Create a special keepsake to commemorate the occasion.
8.4 Memorials: Honoring Loved Ones
- Engrave the deceased’s name and dates of life.
- Add a heartfelt message or a symbol of remembrance.
- Create a memorial stone for a garden or special place.
8.5 Holidays: Festive Decorations
- Engrave holiday-themed designs, such as Christmas trees, Easter eggs, or Halloween pumpkins.
- Add festive greetings or holiday wishes.
- Create holiday decorations for your home or garden.
9. Advanced Techniques and Tips for River Rock Engraving
Elevate your river rock engraving skills with these advanced techniques and tips:
9.1 Layered Engraving: Creating Depth and Dimension
- Multiple Passes: Use multiple passes with varying depths to create a layered effect.
- Shading: Add shading to create dimension and realism.
- Contrasting Colors: Use contrasting colors to enhance the layered effect.
9.2 Incorporating Inlays: Adding Visual Interest
- Material Selection: Choose inlay materials that complement the stone.
- Precision Cutting: Cut the inlay material precisely to fit the engraved areas.
- Adhesive Application: Apply adhesive carefully to secure the inlays.
9.3 Using Stencils: Achieving Intricate Designs
- Stencil Creation: Create stencils using vinyl or other materials.
- Stencil Application: Apply the stencil to the stone surface.
- Engraving: Engrave through the stencil to create intricate designs.
9.4 Combining Techniques: Mastering Versatility
- Laser and Dremel: Use laser engraving for precise details and Dremel engraving for texture.
- Hand and Machine: Combine hand engraving with machine engraving for unique effects.
- Experimentation: Don’t be afraid to experiment with different techniques to discover new possibilities.
10. Maintaining and Caring for Your Engraved River Rocks
Proper maintenance ensures your engraved river rocks retain their beauty for years:
10.1 Regular Cleaning: Keeping Them Pristine
- Soft Brush: Use a soft brush to remove dust and debris.
- Mild Soap: Clean with mild soap and water if necessary.
- Rinsing: Rinse thoroughly with clean water.
10.2 Protecting from the Elements: Ensuring Durability
- Indoor Display: Display engraved rocks indoors to protect them from the elements.
- Sealing: Apply a sealant to protect the stone from moisture and UV damage.
- Shade: Place engraved rocks in shaded areas to prevent fading.
10.3 Addressing Wear and Tear: Restoration Tips
- Re-Sealing: Re-apply sealant periodically to maintain protection.
- Touch-Up Paint: Use touch-up paint to restore color to faded areas.
- Professional Restoration: Consult a professional stone restorer for significant damage.
By following these tips and techniques, you can create stunning engraved river rocks that will be treasured for years to come. Remember to explore rockscapes.net for more inspiration, detailed guides, and expert advice on all things landscaping and stone design. We’re here to help you transform your creative visions into reality.
FAQ: Frequently Asked Questions About Engraving River Rocks
1. What types of river rocks are best for engraving?
Smooth, flat river rocks with minimal texture are best. Granite, marble, slate, sandstone, and limestone are commonly used.
2. Can I engrave river rocks at home?
Yes, with tools like Dremel tools, chisels, or laser engravers. Safety gear and practice are essential.
3. What safety precautions should I take when engraving river rocks?
Always wear safety goggles, a dust mask, and gloves. Work in a well-ventilated area to avoid dust inhalation.
4. How do I transfer my design onto the river rock?
Sketch your design directly onto the rock with a pencil, or use transfer paper to apply a printed design.
5. What are the best tools for engraving river rocks by hand?
Small chisels and a mallet are ideal for hand engraving. Choose chisels with varying tips for different effects.
6. How do I clean engraved river rocks?
Use a soft brush and mild soap to gently clean the engraved areas. Rinse thoroughly and allow to dry completely.
7. Can I paint engraved river rocks?
Yes, use acrylic or stone-specific paints. Seal the painted areas to protect the color and prevent fading.
8. How do I seal engraved river rocks to protect them from the elements?
Apply a sealant specifically designed for stone. Follow the manufacturer’s instructions for best results.
9. What are some design ideas for engraved river rocks?
Inspirational quotes, nature-inspired motifs, personalized names and dates, geometric patterns, and custom illustrations are all great options.
10. How can I display my engraved river rocks?
Use them as garden decorations, paperweights, shelf decorations, or personalized gifts.
Ready to start your own river rock engraving project? At rockscapes.net, we offer a wealth of inspiration, detailed guides, and expert advice. Whether you’re looking for design ideas, tool recommendations, or step-by-step instructions, we have everything you need to unleash your creativity and transform ordinary stones into extraordinary works of art. Visit rockscapes.net today to explore the endless possibilities of river rock engraving and discover how to elevate your landscaping and DIY projects with the timeless beauty of engraved stones. Contact us at 1151 S Forest Ave, Tempe, AZ 85281, United States or call +1 (480) 965-9011. Let rockscapes.net be your guide to creating stunning, personalized masterpieces that will be treasured for generations.