The cheapest way to fix rusted rocker panels involves DIY methods like cutting out rust, fabricating replacement panels from galvanized flashing, and sealing/painting. At rockscapes.net, we understand the importance of maintaining your vehicle’s integrity and appearance. This guide explores cost-effective techniques, materials, and step-by-step instructions to tackle rocker panel rust, prevent further damage, and restore your vehicle’s aesthetic appeal. Learn about rust conversion, seam sealers, and protective coatings for effective auto body repair.
1. Understanding Rocker Panel Rust and Why It Matters
Rocker panels are particularly vulnerable to rust due to their proximity to the road, constantly exposed to moisture, salt, and debris. Addressing rust promptly is crucial for structural integrity and preventing costly repairs.
1.1. What Are Rocker Panels and Their Function?
Rocker panels are structural components of a vehicle located below the doors, between the front and rear wheel wells. They contribute to the vehicle’s frame strength and protect the body from road debris and impacts.
1.2. Why Are Rocker Panels Prone to Rust?
Rocker panels are exposed to harsh conditions, including:
- Road Salt: Used in winter to melt ice and snow, salt accelerates rust.
- Moisture: Rain, snow, and humidity contribute to corrosion.
- Debris: Rocks, gravel, and other road debris can chip away protective coatings, exposing bare metal.
- Poor Drainage: Water and debris can accumulate in rocker panels, leading to rust from the inside out.
According to research from Arizona State University’s School of Earth and Space Exploration, environmental factors like road salt and humidity significantly accelerate the corrosion process in automotive components.
1.3. The Importance of Addressing Rust Early
Addressing rust early is crucial for several reasons:
- Structural Integrity: Rust weakens the rocker panels, compromising the vehicle’s structural integrity.
- Safety: Weakened rocker panels can affect the vehicle’s performance in a collision.
- Aesthetics: Rust detracts from the vehicle’s appearance and reduces its value.
- Cost Savings: Addressing rust early prevents it from spreading, saving you money on extensive repairs.
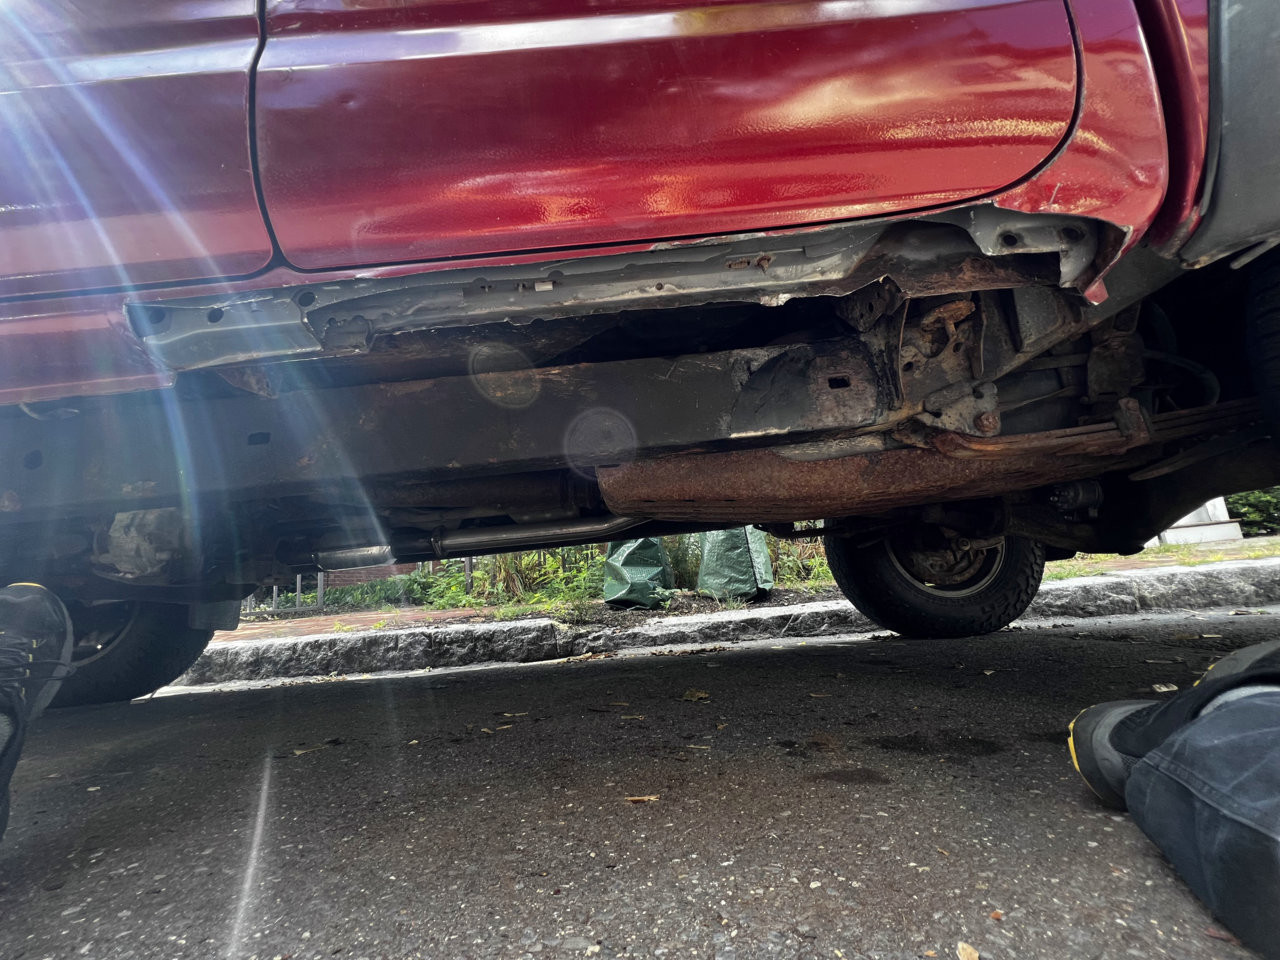
2. Identifying the Extent of Rocker Panel Rust
Before attempting any repairs, it’s essential to assess the extent of the rust damage. This evaluation will help you determine the appropriate repair method and materials needed.
2.1. Visual Inspection: What to Look For
Start with a visual inspection to identify:
- Surface Rust: Light discoloration or flaking on the panel’s surface.
- Bubbling Paint: Indicates rust forming underneath the paint layer.
- Holes or Perforation: Severe rust damage where metal has corroded through.
2.2. Using a Screwdriver or Awl to Test for Weak Spots
Use a screwdriver or awl to gently probe suspected rust spots. If the metal is soft or crumbles easily, it indicates significant corrosion that needs to be addressed.
2.3. Assessing Rust from the Inside of the Rocker Panel
Inspect the inside of the rocker panel for rust. Use a flashlight to look for corrosion, especially in areas where moisture and debris may accumulate. Accessing the interior may require removing interior trim or panels.
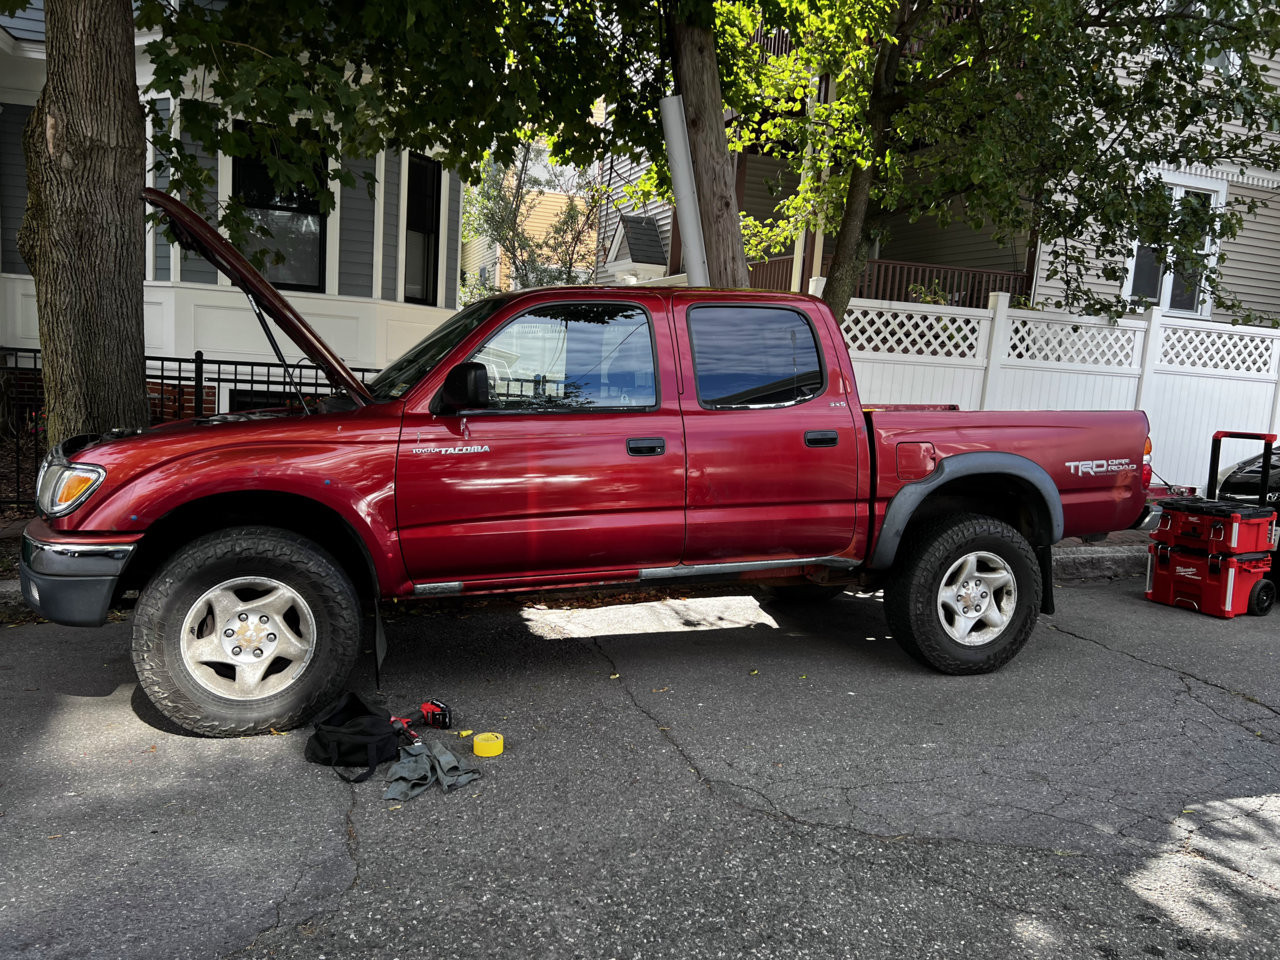
3. Cheapest DIY Methods for Fixing Rusted Rocker Panels
Several DIY methods can address rusted rocker panels without incurring the high costs of professional body shop repairs. These methods involve cutting, patching, and sealing the damaged areas.
3.1. Cut Out the Rust: Preparing the Area
The initial step involves removing the rusted metal to create a clean surface for repair.
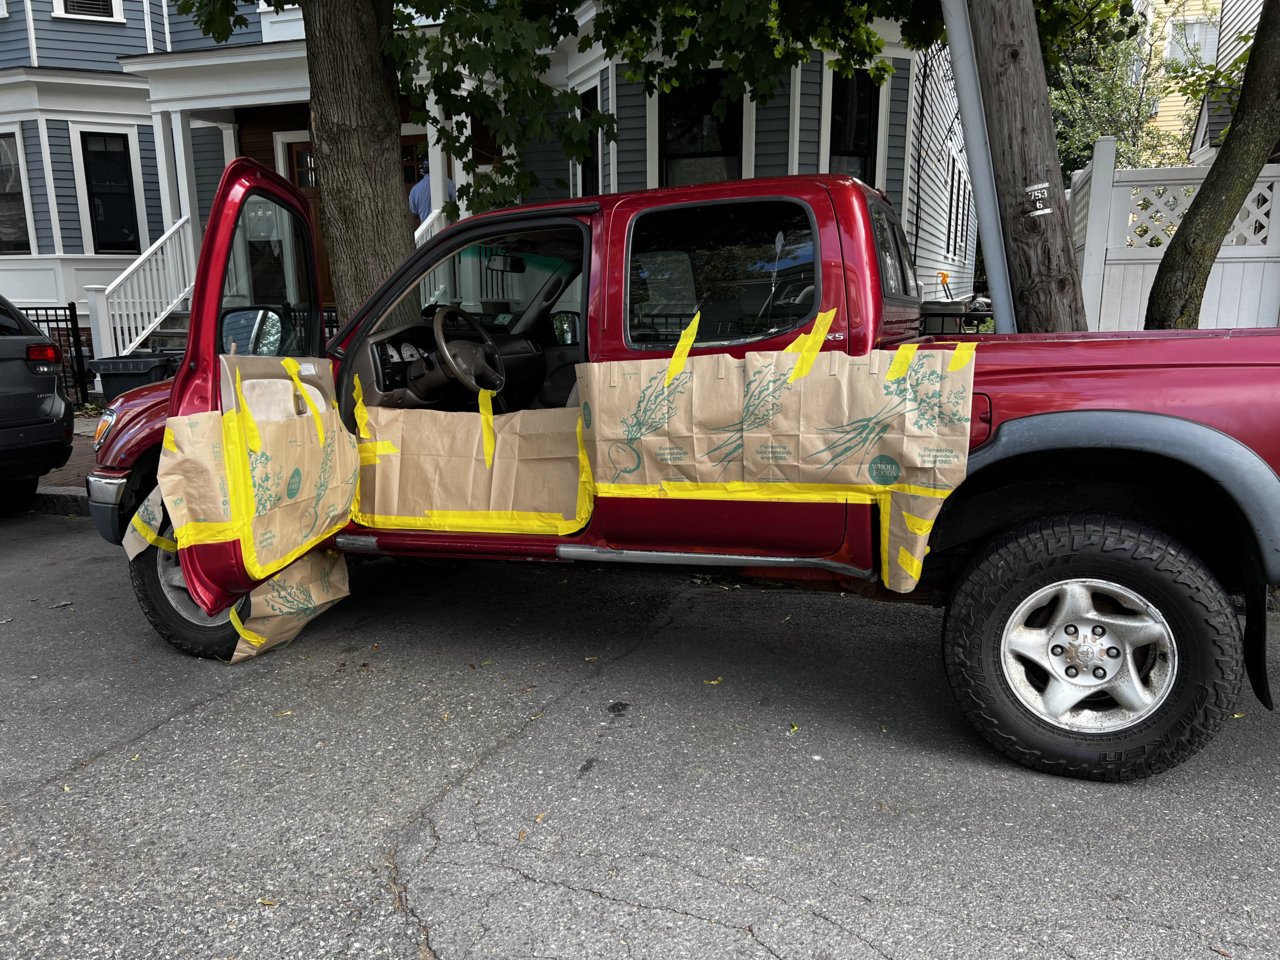
3.1.1. Safety Precautions: Gear and Ventilation
- Eye Protection: Wear safety glasses or goggles to protect your eyes from flying debris.
- Gloves: Use work gloves to protect your hands from sharp edges and chemicals.
- Respirator: Wear a respirator to avoid inhaling dust and fumes.
- Ventilation: Work in a well-ventilated area or use a fan to circulate air.
3.1.2. Tools Needed for Cutting and Grinding
- Angle Grinder: For cutting and grinding away rust and old paint.
- Cutting Discs: For making precise cuts in the rocker panel.
- Grinding Discs: For removing rust and smoothing rough edges.
- Wire Brush: For cleaning rust and debris from the metal surface.
- Hammer and Dolly: For shaping and forming metal patches.
- Tin Snips: For cutting sheet metal to create patches.
 Guts exposed.HEIC.jpg
3.1.3. Step-by-Step Instructions for Removing Rusted Metal
- Mark the Area: Use a marker to outline the rusted area you need to remove. Extend the cut a few inches beyond the visible rust to ensure you remove all affected metal.
- Cut Out the Rust: Use an angle grinder with a cutting disc to carefully cut along the marked lines. Be cautious not to cut into adjacent body panels.
- Grind Away Remaining Rust: Use a grinding disc to remove any remaining rust and smooth the edges of the cut area.
- Clean the Area: Use a wire brush to remove loose rust, dirt, and debris from the surrounding metal.
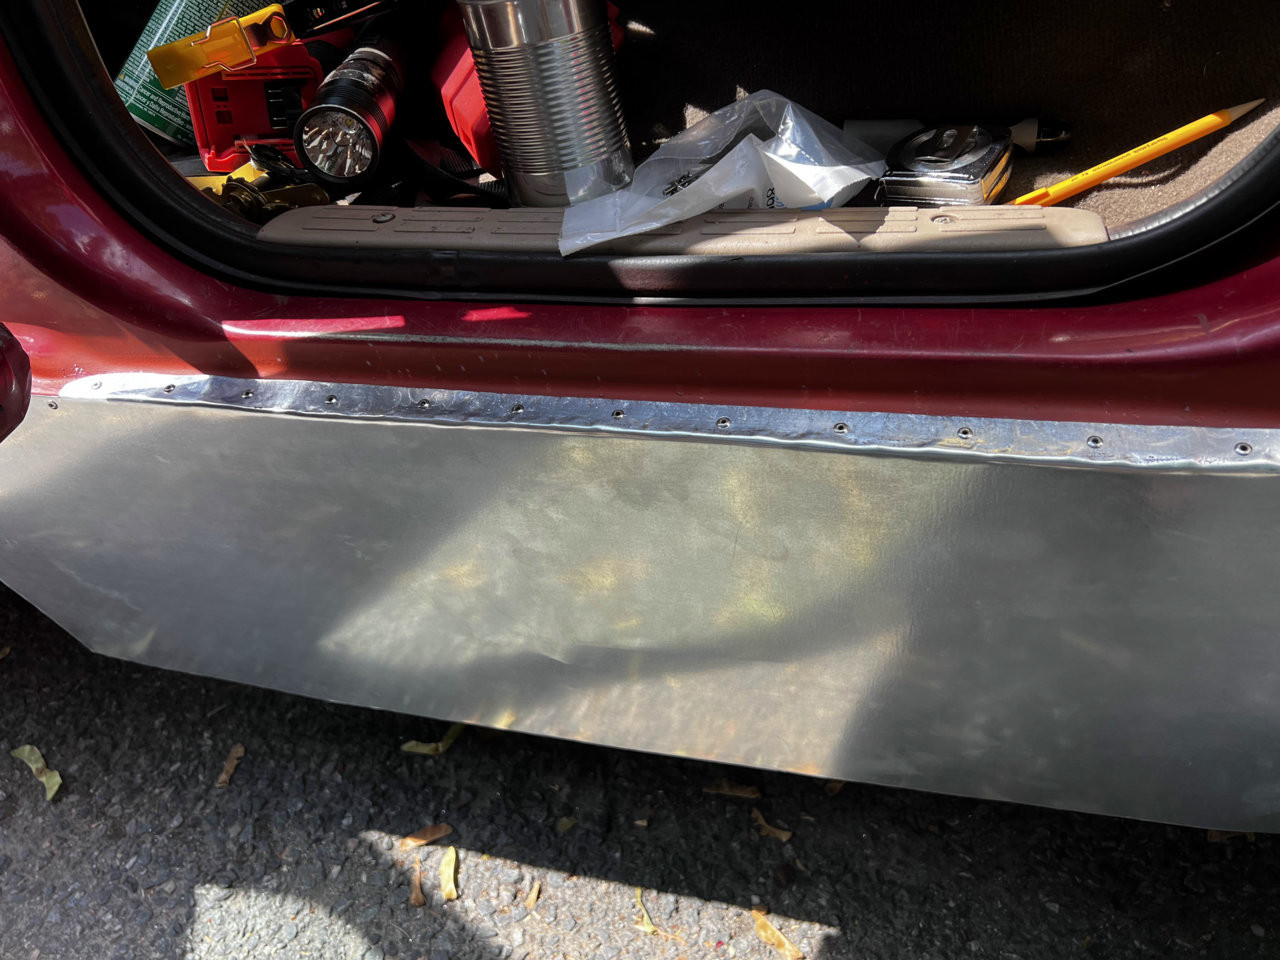
3.2. Creating Replacement Panels from Galvanized Flashing
After removing the rusted metal, you need to fabricate replacement panels to fill the gaps. Galvanized flashing is a cost-effective material for this purpose.
3.2.1. Why Galvanized Flashing Is a Cost-Effective Option
Galvanized flashing offers several advantages:
- Cost: Galvanized flashing is relatively inexpensive compared to other types of sheet metal.
- Rust Resistance: The zinc coating provides excellent rust protection.
- Workability: It’s easy to cut, shape, and form using basic tools.
- Availability: Available at most hardware stores.
3.2.2. Tools Needed for Shaping and Cutting Flashing
- Tin Snips: For cutting the flashing to the desired shape and size.
- Hammer and Dolly: For shaping the flashing to match the contour of the rocker panel.
- Clamps: For holding the flashing in place while shaping and attaching it.
- Measuring Tape: For accurate measurements of the area to be patched.
- Marker: For marking cutting lines on the flashing.
3.2.3. Step-by-Step Instructions for Fabricating Panels
- Measure the Area: Measure the dimensions of the area you need to patch. Add an extra inch or two to each side for overlap.
- Cut the Flashing: Use tin snips to cut the galvanized flashing to the measured size.
- Shape the Flashing: Use a hammer and dolly to shape the flashing to match the contour of the rocker panel. Take your time and make small adjustments to achieve a good fit.
- Test Fit: Place the shaped flashing panel into the opening and check the fit. Adjust as needed until the panel sits flush with the surrounding metal.
3.3. Attaching the New Panels: Rivets, Screws, or Adhesives
Several methods can be used to attach the new panels to the rocker panel. Each method has its pros and cons.
3.3.1. Using Rivets: Pros and Cons
Pros:
- Strong Hold: Rivets provide a secure and permanent attachment.
- Easy to Install: Rivets are relatively easy to install with a rivet gun.
- Clean Look: Rivets sit flush with the surface, providing a clean appearance.
Cons:
- Requires a Rivet Gun: A rivet gun is needed for proper installation.
- Difficult to Remove: Rivets are difficult to remove without damaging the surrounding metal.
 First row of rivets.HEIC.jpg
3.3.2. Using Screws: Pros and Cons
Pros:
- Easy to Install: Screws are easy to install with a screwdriver or drill.
- Removable: Screws can be easily removed if needed.
- Cost-Effective: Screws are relatively inexpensive.
Cons:
- Potential for Leaks: Screw holes can be a potential entry point for water, leading to rust.
- Not as Strong as Rivets: Screws may not provide as strong a hold as rivets.
- Protruding Heads: Screw heads may protrude from the surface, affecting the appearance.
3.3.3. Using Automotive Adhesives: Pros and Cons
Pros:
- Smooth Finish: Adhesives provide a smooth, seamless finish.
- No Holes: No drilling required, reducing the risk of rust.
- Good for Large Areas: Ideal for bonding large panels.
Cons:
- Surface Preparation Is Critical: Requires thorough surface preparation for proper adhesion.
- Cure Time: Adhesives require time to cure properly.
- Can Be Messy: Applying adhesives can be messy and require special tools.
3.3.4. Step-by-Step Instructions for Attaching Panels
- Drill Holes (if using rivets or screws): Drill holes through the replacement panel and the rocker panel. Space the holes evenly, about 1-2 inches apart.
- Apply Adhesive (if using adhesive): Apply automotive adhesive to the back of the replacement panel and the surface of the rocker panel.
- Attach the Panel: Align the replacement panel with the opening and attach it using rivets, screws, or clamps (if using adhesive).
- Secure the Panel: If using rivets, use a rivet gun to secure the rivets. If using screws, tighten the screws until they are snug. If using adhesive, clamp the panel in place and allow the adhesive to cure according to the manufacturer’s instructions.
3.4. Sealing the Seams: Preventing Future Rust
Sealing the seams is crucial to prevent moisture from entering and causing future rust.
3.4.1. Types of Seam Sealers: Brushable vs. Caulkable
- Brushable Seam Sealer: Applied with a brush, providing a textured finish. Ideal for replicating factory seams.
- Caulkable Seam Sealer: Applied with a caulking gun, providing a smooth finish. Easier to apply in tight spaces.
3.4.2. Applying Seam Sealer for a Watertight Seal
- Clean the Seams: Clean the seams with a wire brush and degreaser to remove dirt, rust, and debris.
- Apply Seam Sealer: Apply a generous bead of seam sealer along all the seams and edges of the replacement panel.
- Smooth the Seam Sealer: Use a brush or your finger to smooth the seam sealer and ensure it fills all gaps and crevices.
- Allow to Dry: Allow the seam sealer to dry completely according to the manufacturer’s instructions.
3.5. Painting and Finishing: Protecting Your Work
Painting and finishing the repaired area not only improves the appearance but also protects the metal from rust.
3.5.1. Priming: Preparing the Surface for Paint
- Sand the Area: Sand the repaired area with fine-grit sandpaper to create a smooth surface for priming.
- Clean the Area: Clean the area with a wax and grease remover to remove any contaminants.
- Apply Primer: Apply 2-3 coats of automotive primer to the repaired area, allowing each coat to dry before applying the next.
3.5.2. Painting: Choosing the Right Paint and Application Techniques
- Match the Paint: Use automotive paint that matches the color of your vehicle. You can find the paint code on a sticker inside the driver’s side door or in the glove compartment.
- Apply Paint: Apply 2-3 coats of automotive paint to the primed area, allowing each coat to dry before applying the next. Use smooth, even strokes to avoid runs and drips.
3.5.3. Applying a Protective Coating: Bedliner or Undercoating
- Bedliner: Provides a durable, textured finish that protects against rust, scratches, and impacts. Ideal for rocker panels that are frequently exposed to road debris.
- Undercoating: Provides a flexible, rubberized coating that protects against rust and corrosion. Ideal for areas that are exposed to moisture and salt.
 Before Paint.HEIC.jpg
4. Alternative Methods: Rust Converters and Encapsulators
Rust converters and encapsulators are chemical treatments that neutralize rust and prevent it from spreading. These products can be used as an alternative or in addition to the DIY repair methods described above.
4.1. How Rust Converters Work
Rust converters contain chemicals that react with rust, converting it into a stable, inert compound. This compound forms a protective layer that prevents further corrosion.
4.2. How Rust Encapsulators Work
Rust encapsulators coat the rusted surface with a protective barrier that seals out moisture and air, preventing further rust.
4.3. When to Use Converters vs. Encapsulators
- Rust Converters: Best for treating surface rust and areas where it is difficult to remove all the rust.
- Rust Encapsulators: Best for sealing off heavily rusted areas after removing loose rust and debris.
4.4. Application Techniques for Best Results
- Clean the Area: Clean the area with a wire brush to remove loose rust, dirt, and debris.
- Apply the Product: Apply the rust converter or encapsulator according to the manufacturer’s instructions. Use a brush, spray can, or applicator pad.
- Allow to Dry: Allow the product to dry completely before applying primer and paint.
5. Cost Breakdown: Materials and Tools
To estimate the cost of fixing rusted rocker panels, consider the following breakdown of materials and tools:
5.1. Essential Tools and Their Costs
| Tool | Estimated Cost |
|---|---|
| Angle Grinder | $50 – $150 |
| Cutting Discs | $10 – $20 |
| Grinding Discs | $10 – $20 |
| Wire Brush | $5 – $15 |
| Hammer and Dolly | $30 – $80 |
| Tin Snips | $15 – $30 |
| Rivet Gun | $20 – $50 |
| Safety Glasses | $10 – $20 |
| Gloves | $5 – $10 |
| Respirator | $20 – $40 |
5.2. Materials Needed and Their Costs
| Material | Estimated Cost |
|---|---|
| Galvanized Flashing | $30 – $60 |
| Rivets/Screws | $10 – $20 |
| Automotive Adhesive | $20 – $40 |
| Seam Sealer | $15 – $30 |
| Rust Converter/Encapsulator | $20 – $40 |
| Automotive Primer | $15 – $30 |
| Automotive Paint | $20 – $50 |
| Bedliner/Undercoating | $30 – $60 |
| Sandpaper | $5 – $10 |
| Wax and Grease Remover | $10 – $20 |
5.3. Total Estimated Cost Range
The total estimated cost for DIY rocker panel repair ranges from $250 to $700, depending on the extent of the damage and the quality of materials used.
6. Preventing Future Rust: Long-Term Protection
Preventing future rust is essential to protect your investment and extend the life of your vehicle.
6.1. Regular Washing and Cleaning, Especially in Winter
Wash your vehicle regularly, especially during the winter months, to remove salt and debris that can cause rust. Pay attention to the rocker panels and other areas prone to rust.
6.2. Applying Rust-Proofing Sprays and Coatings
Apply rust-proofing sprays and coatings to the rocker panels and other vulnerable areas. These products create a protective barrier that prevents moisture and salt from reaching the metal.
6.3. Maintaining Drainage Holes: Preventing Water Buildup
Ensure that the drainage holes in the rocker panels are clear and free of debris. This will prevent water from building up inside the panels and causing rust from the inside out.
6.4. Addressing Paint Chips and Scratches Promptly
Repair any paint chips and scratches promptly to prevent rust from forming underneath the paint layer. Use touch-up paint or have the areas professionally repaired.
 Paint prep.HEIC.jpg
7. Knowing When to Seek Professional Help
While DIY repairs can be cost-effective, there are situations where professional help is necessary.
7.1. Severe Structural Damage
If the rocker panels have severe structural damage, such as large holes or extensive corrosion, it is best to seek professional help. A body shop can properly repair or replace the damaged panels to ensure the vehicle’s structural integrity.
7.2. Extensive Rust Beyond DIY Capabilities
If the rust is too extensive or complex to repair with DIY methods, it is best to consult a professional. They have the tools, skills, and experience to handle challenging rust repairs.
7.3. Ensuring Proper Welding and Panel Replacement
Welding and panel replacement require specialized skills and equipment. If these tasks are necessary, it is best to entrust them to a professional body shop.
8. Real-World Examples and Case Studies
Examining real-world examples and case studies can provide valuable insights into effective rust repair techniques.
8.1. DIY Success Stories
Many DIY enthusiasts have successfully repaired rusted rocker panels using the methods described in this guide. These success stories demonstrate that with the right tools, materials, and skills, you can achieve professional-quality results.
8.2. Common Mistakes to Avoid
Common mistakes to avoid include:
- Not Removing Enough Rust: Ensure that all rust is removed before applying patches or treatments.
- Poor Surface Preparation: Proper surface preparation is essential for proper adhesion of patches, sealers, and coatings.
- Using Incompatible Materials: Use materials that are compatible with each other to avoid corrosion and other problems.
- Neglecting Seam Sealing: Sealing the seams is crucial to prevent moisture from entering and causing future rust.
8.3. Learning from Others’ Experiences
Learn from the experiences of others by reading online forums, watching tutorial videos, and consulting with experienced DIYers. This will help you avoid common pitfalls and achieve better results.
9. Sourcing Materials: Where to Find the Best Deals
Finding the best deals on materials can help you save money on your rocker panel repair project.
9.1. Local Hardware Stores
Local hardware stores offer a wide variety of tools and materials for DIY projects. Check for sales and discounts to save money.
9.2. Automotive Supply Stores
Automotive supply stores specialize in automotive tools and materials. They often offer higher-quality products and expert advice.
9.3. Online Retailers
Online retailers offer a convenient way to shop for tools and materials from the comfort of your home. Compare prices from different retailers to find the best deals.
10. FAQ: Addressing Common Concerns About Rocker Panel Rust
Here are some frequently asked questions about rocker panel rust and how to address it:
10.1. What Causes Rocker Panels to Rust?
Rocker panels rust due to exposure to moisture, salt, and debris from the road. Poor drainage and inadequate rust protection can also contribute to rust.
10.2. Can I Prevent Rocker Panel Rust?
Yes, you can prevent rocker panel rust by washing your vehicle regularly, applying rust-proofing sprays and coatings, maintaining drainage holes, and addressing paint chips and scratches promptly.
10.3. How Much Does It Cost to Fix Rusted Rocker Panels?
The cost to fix rusted rocker panels varies depending on the extent of the damage and the repair method. DIY repairs can range from $250 to $700, while professional repairs can cost $1000 or more.
10.4. Is It Safe to Drive with Rusted Rocker Panels?
Driving with severely rusted rocker panels can be unsafe, as it can compromise the vehicle’s structural integrity and affect its performance in a collision.
10.5. Can I Use Bondo to Fix Rusted Rocker Panels?
Bondo can be used to fill small holes and imperfections, but it is not a substitute for proper metal repair. Bondo is not structural and will not prevent rust from spreading.
10.6. How Do I Know If My Rocker Panels Are Structurally Damaged?
If your rocker panels have large holes, extensive corrosion, or are soft and crumbling, they may be structurally damaged. Consult a professional body shop for an inspection.
10.7. What Is the Best Way to Protect Rocker Panels from Rust?
The best way to protect rocker panels from rust is to combine several preventative measures, including regular washing, rust-proofing sprays, maintaining drainage holes, and addressing paint damage promptly.
10.8. Can I Replace Rocker Panels Myself?
Replacing rocker panels yourself is possible, but it requires specialized skills and equipment, such as welding. If you are not experienced in these tasks, it is best to seek professional help.
10.9. What Are the Benefits of Fixing Rusted Rocker Panels?
The benefits of fixing rusted rocker panels include improving the vehicle’s structural integrity, enhancing its appearance, preventing further damage, and maintaining its value.
10.10. How Often Should I Inspect My Rocker Panels for Rust?
You should inspect your rocker panels for rust at least twice a year, especially before and after winter. Early detection can prevent rust from spreading and causing more extensive damage.
At rockscapes.net, we believe in empowering you with the knowledge and resources to tackle your DIY projects effectively. While this guide provides a comprehensive overview of fixing rusted rocker panels, remember to explore our website for more innovative ideas and solutions to enhance your outdoor spaces.
Are you ready to transform your landscape with stunning rock features? Visit rockscapes.net today and discover a world of inspiration, expert advice, and premium materials to bring your vision to life! Contact us at Address: 1151 S Forest Ave, Tempe, AZ 85281, United States. Phone: +1 (480) 965-9011. Let’s create something extraordinary together!